Test Impact with Team Foundation Build 2010
So in my last blog entry, I touched upon how you could use the Test Impact View in Visual Studio 2010. Today’s topic is how to use the test impact feature with Team Foundation Build 2010. Team Foundation Build 2010 is part of Team Foundation Server 2010 and has many new features, including the very cool "Gated Check-in” feature that allows you to configure a build to validate a shelveset before it ever gets checked into the product. Among those many new features is support for test impact analysis. Let’s walk through creating a simple class library, creating unit tests, creating a build definition, and modifying source code to view test impact in Team Foundation Build 2010.
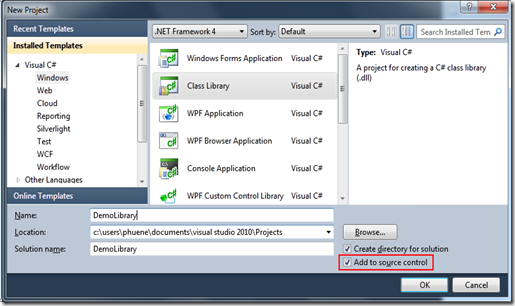
To get started, let’s create a new C# class library project called “DemoLibrary” (a more ingenious name there never was):
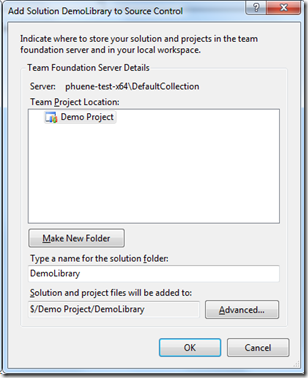
Note that I’ve checked the “Add to source control” checkbox. This will prompt us to add the solution to Team Foundation Server after the project is created, like so:
Here, I am adding the solution to the “Demo Project” team project I already created on my Team Foundation Server. Next, I renamed the generic “Class1.cs” to “DemoClass.cs”, which refactored Class1 to DemoClass. Here’s what my brilliant demo library source looks like:
    1: using System;
    2:
    3: namespace DemoLibrary
    4: {
    5:     public class DemoClass
    6:     {
    7:         public static void TestMe()
    8:         {
    9:             Console.WriteLine("TestMe() was called.");
   10:         }
   11:     }
   12: }
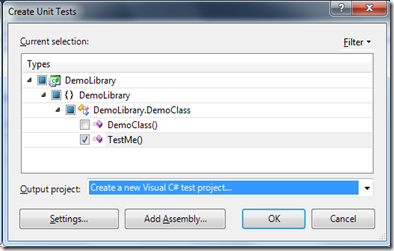
So now that we have a rather useless library to test, let’s create a unit test for the TestMe method. Right click inside of TestMe in the editor and select “Create Unit Tests…”. Doing so will bring up this dialog:
After clicking the OK button, it will prompt you for a name of the new test project. Let’s call our test project “DemoLibraryTests”. Having “Tests” in the name will come in handy later on. Let’s change the code for the unit test to simply:
    1: using DemoLibrary;
    2: using Microsoft.VisualStudio.TestTools.UnitTesting;
    3: using System;
    4:
    5: namespace DemoLibraryTests
    6: {
    7:     [TestClass()]
    8:     public class DemoClassTest
    9:     {
   10:         [TestMethod()]
   11:         public void TestMeTest()
   12:         {
   13:             DemoClass.TestMe();
   14:         }
   15:     }
   16: }
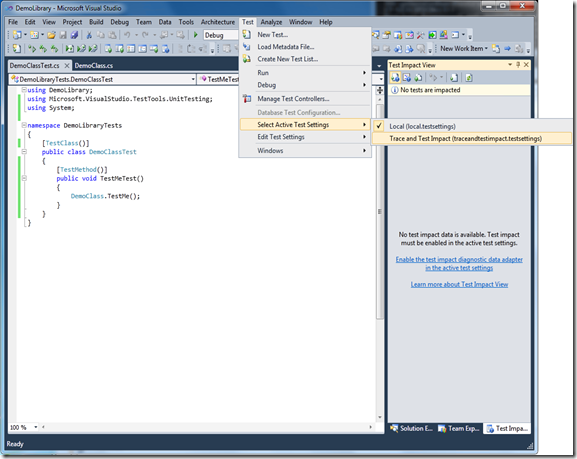
As you can see, all the unit test does is call the TestMe method in the DemoClass class. As TestMe never throws and the test never asserts, this test should always pass. Obviously it’s not a useful test, but this walkthrough is more about how to use the test impact feature than how to properly test your source code. Now let’s turn on test impact locally by changing the active test settings to the “Trace and Test Impact” settings (the “trace” part of the name is for IntelliTrace; if the test fails, you’ll get an .iTrace file you can examine for diagnostic events and exceptions):
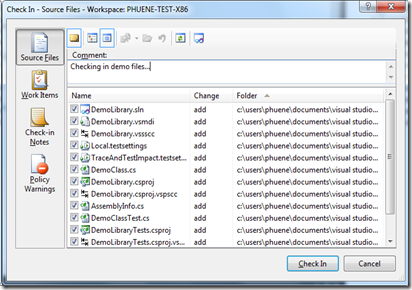
Now that we’ve switched the active test settings to collect test impact data, let’s run the test locally before checking in. Once we’ve verified the test passes, check the files in. Right click on the solution in Solution Explorer and select “Check In…” to bring up this dialog:
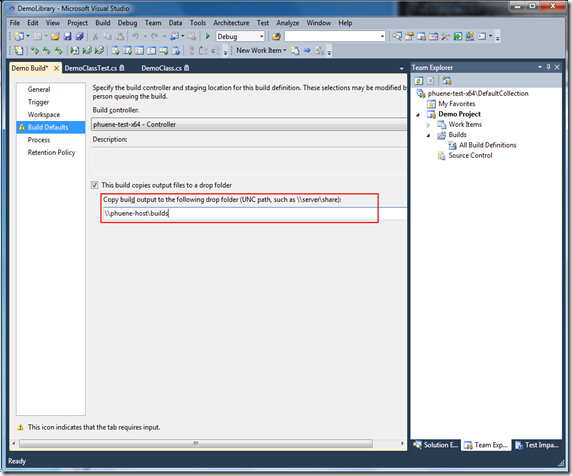
After checking in the files, it’s time to setup a Team Foundation Build to build our projects and run tests. To do so, bring up Team Explorer, right click on “Builds” and select “New Build Definition…”, to bring up the build definition editor:
The first thing you’ll need to do is give the build definition a name on the “General” tab. I gave my build definition the creative name of “Demo Build”. The next thing to do is to set the build drop location on the “Build Defaults” tab, shown above. The build drop location is a share you would like the builds published to. The share needs to grant read/write privileges to the identity of the build agent service so that it can publish the build outputs.
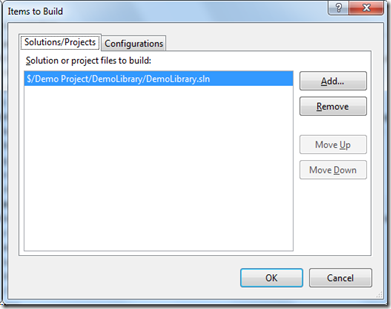
Next, we need to change properties in the “Process” tab in the build definition editor. This section controls what gets built and tested. There are three important properties for us in this scenario: Items to Build (i.e. what solutions/projects to build), Automated Tests (i.e. what tests to run), and Analyze Test Impact (i.e. should test impact analysis be performed? The default is yes.). Clicking on the “…” button in the “Items to Build” property brings up this dialog:
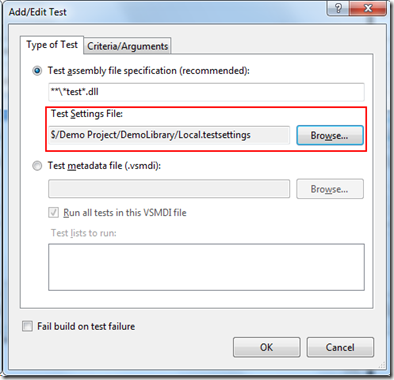
With the build of Visual Studio 2010 I’m using to walkthrough this scenario, Team Foundation Build was smart enough to pre-populate this with the solution we’re working on already. I’m not sure if this functionality is in Beta 2 or not, so I’m displaying this screenshot to show where you would select the solution to build. Next, let’s configure what tests to run by clicking on the “…” button in the “Automated Tests” property:
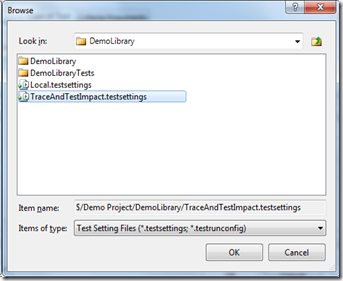
Again, the build of Team Foundation Build I’m using was smart enough to default to running all tests in files that match *test*.dll. Because we named our unit test project “DemoLibraryTests”, Team Foundation Build will automatically run our tests without us changing anything. By default, Team Foundation Build will run tests using the Local.testsettings file. This file will not have the test impact diagnostic data adapter enabled. To enable test impact data collection, you need to either enable the test impact diagnostic data adapter in Local.testsettings, or switch the test settings to one that already has it enabled. The test project already created a test settings file that supports test impact data collection, so let’s click the Browse button above to change it to TraceAndTestImpact.testsettings:
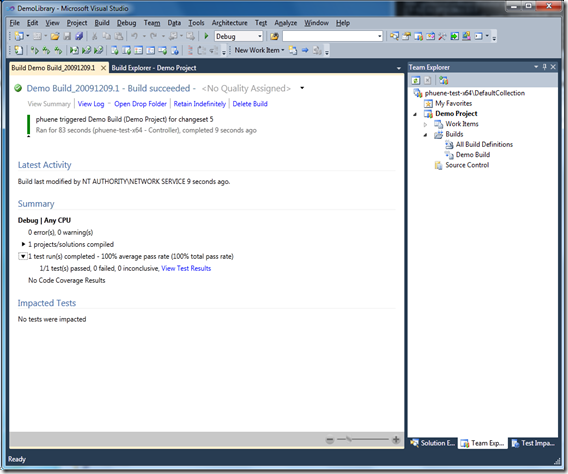
Once this is done, save the new build definition. A “Demo Build” node should appear under the “Builds” node in Team Explorer. Let’s queue up a new build by right clicking on the “Demo Build” node and selecting “Queue New Build…”. This brings up a dialog to override build definition defaults if so desired. Just click the “Queue” button to queue the build using the defaults provided in the build definition. Double click on the build in progress in Build Explorer. This will show you what the build is currently doing. The build should succeed and the build summary page should look like this:
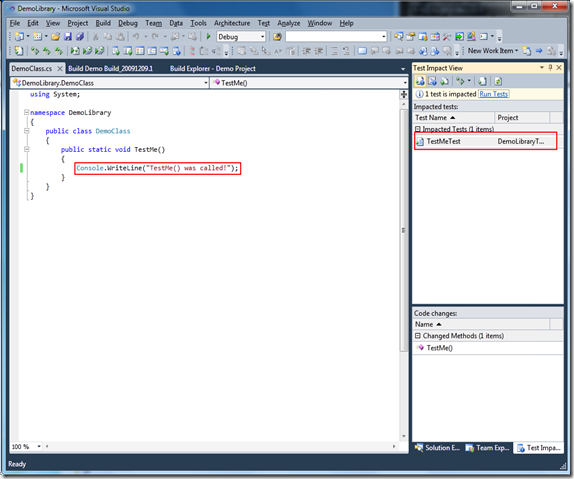
We see here that our unit test ran successfully and no tests were impacted. As this is the very first build of this build definition, there won’t be any impacted tests because tests have never been run with test impact data collected. Now comes the fun part: changing the code. Open up DemoClass.cs and simply change the “TestMe() was called.” string to something different; this will automatically check out the file for edit. I chose to change the period to an exclamation point. An innocuous change, but even a seemingly innocuous change can cause tests to fail. Build the solution and view the test impact view by going to Test –> Windows –> Test Impact View. Test Impact View should have detected the code change and recommended that the unit test be run, like this:
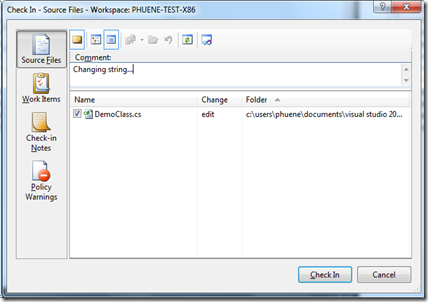
As you can see, it does recommend TestMeTest be run to verify the change I made to TestMe. Let’s click the “Run Tests” link in the Test Impact view to run the impacted tests. The test should pass. Now we’re ready to check in the change. Right click on the solution in Solution Explorer and select “Check In…” again to bring up this dialog:
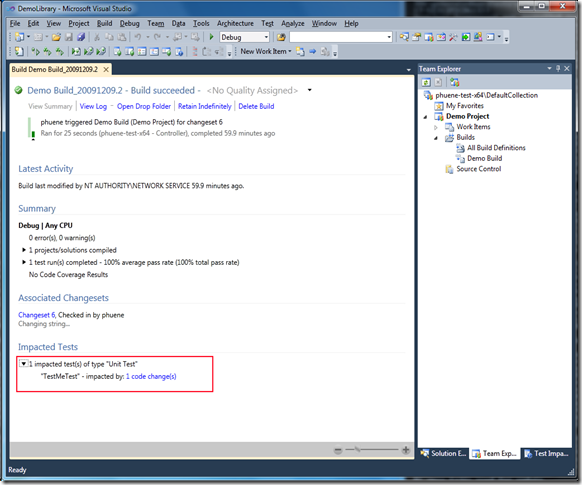
Check in the change. Queue up a new “Demo Build” build. During the build, a special activity will notice the change to TestMe and record that the unit test was impacted for that build. You will find this in the Test Impact section of the build summary page:
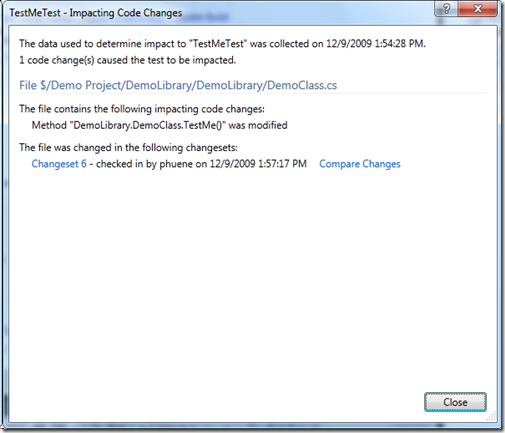
This shows that the unit test was impacted by 1 code change. What if the change had actually caused the test to fail? Wouldn’t it be nice if we could easily figure out what changes might have caused the test to fail? That’s where the “1 code change(s)” link shown above comes in. Clicking this will give you more detail in what code changes likely caused the test to be impacted. Let’s click the link to bring up the code changes dialog:
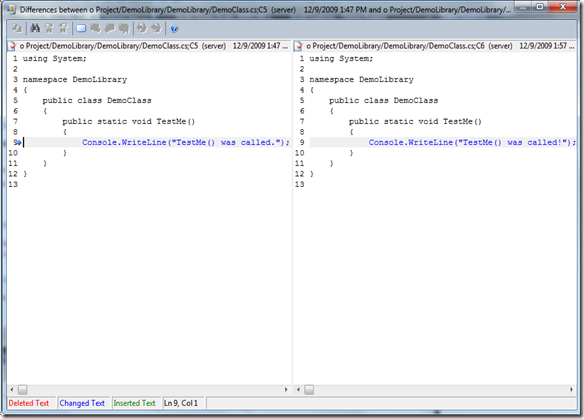
As we can see here, the method DemoLibrary.DemoClass.TestMe() was modified and this caused the test to be impacted. We then get a list of all changesets that went into the build that modified the file. We can then go through each changeset to identify which may have broken the test. Clicking the “Compare Changes” link will compare only the file containing an impacting code change with the previous version:
Here we see I changed the ‘.’ to a ‘!’ which changed TestMe and ultimately impacted the test in question.
Let’s end this long walkthrough here. Hopefully you find this information useful in setting up test impact analysis in Team Foundation Build 2010. My next related blog entry will be using the test impact analysis feature from the new Microsoft Test and Lab Management product for manual tests.
