
How to use C++ AMP from C# using WinRT
[Updated 5/17/2012 for Visual Studio 11 Beta]
In a previous article, How to use C++ AMP to C#, we described how you can use P/Invoke to call into C++ AMP and accelerate your C# apps on GPUs and other heterogeneous hardware. In this post, we’ll take a look at how the same task becomes easier in Windows 8 using WinRT.
Before attempting to call C++ AMP from C#, make sure that you have C++ AMP working on your machine. For example, please verify that you can run the C++ AMP “Hello, World” example.
The short story
Once you have C++ AMP working on your machine, the easiest way to start using it from C# via WinRT is to open this sample project in Visual Studio 11 and begin experimenting with the code.
The long story
If you have an existing Metro style app that you’d like to modify to use C++ AMP – or you’d like to understand how the sample is set up – you can follow the steps below. In summary, you need to take the following steps:
- Step 1: Open or create a C# Metro style project in Visual Studio 11
- Choose the platform target as X86 (if you plan to write 32-bit C++ AMP code).
- Step 2: Create a C++ WinRT Component DLL project
- DO NOT build the project before completing step 3
- Step 3: Add the C++ project as a reference to the C# project.
- Step 4: Write the C++ AMP and the C# code
Step 1: Open or create a C# Metro style project
First, you need to open or create a C# Metro style application project. The rest of the article assumes that the project is named HelloWorldCSharpWinRT:
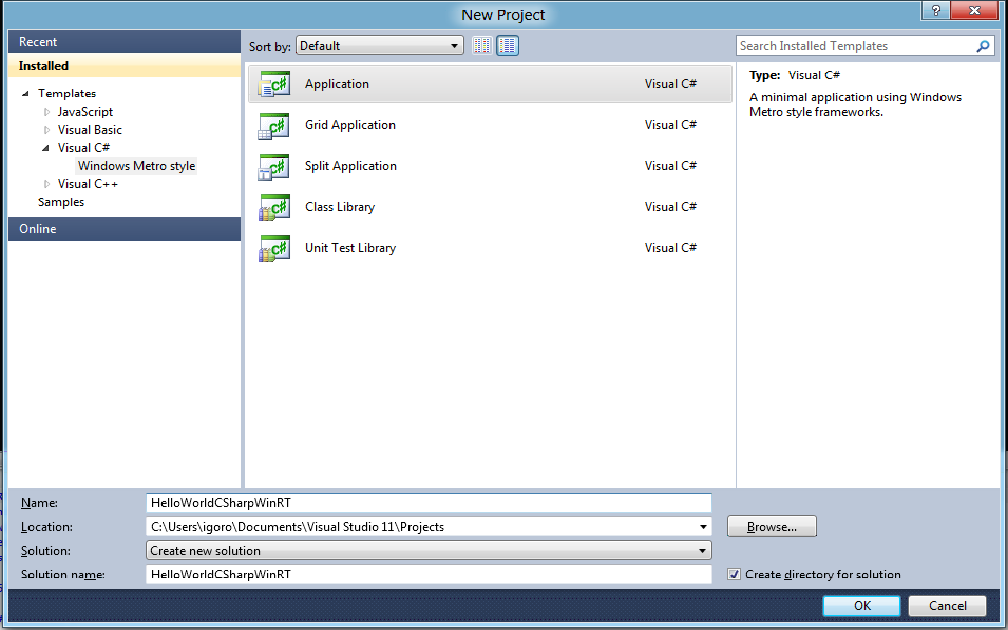
Also, set the “Platform target” of the project to “X86”.
Step 2: Create a C++ WinRT Component DLL project
Now, you can add a Visual C++ WinRT component that will contain the C++ AMP code. Simply create a project named “HelloWorldLib” from the “WinRT Component DLL” template:
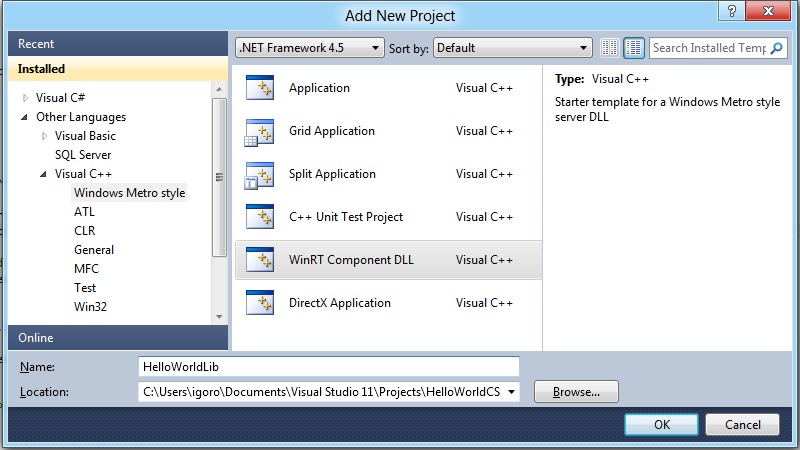
WARNING: Do not build the project yet! Due to a bug in the Visual Studio 11 Developer Preview, building the project before completing step 3 will cause problems, and you may be stuck having to delete and recreate the C++ WinRT project.
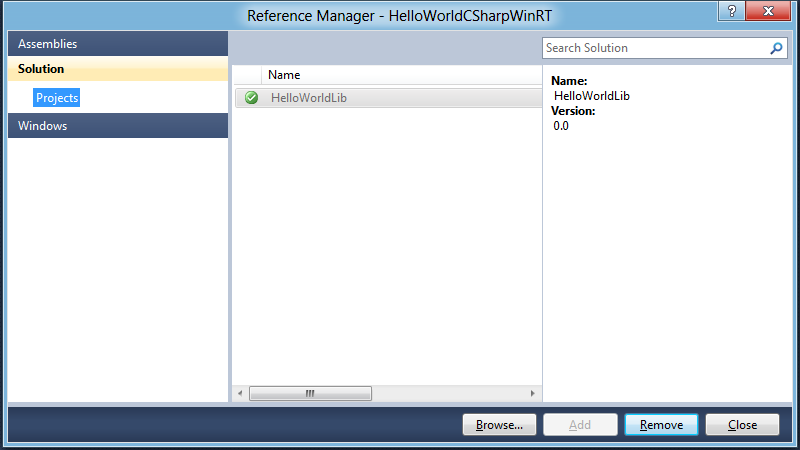
Step 3: Add reference from HelloWorldCSharpWinRT to HelloWorldLib
With WinRT, you can simply add HelloWorldLib as a reference to HelloWorldCSharpWinRT. No more manual editing of the csproj file is necessary, as it was with P/Invoke! Just right-click HelloWorldCSharpWinRT, choose “Add Reference…” and select the HelloWorldLib project:
Step 4. Write the C++ AMP and the C# code
Now, we just need to write the C++ AMP code and call it from C#.
Since a C++ AMP kernel may take a long time to execute, the WinRT guidelines state that the kernel should be exposed as an asynchronous operation. A convenient way to expose asynchronous operations in C++ is via create_async, currently available in the PPL Sample Pack (for details on how this works, see Try It Now: Use PPL to Produce Windows 8 Asynchronous Operations).
Delete WinRTComponent.h.
Modify WinRTComponent.cpp as follows:
#include <pch.h>
#include <amp.h>
#include <ppltasks.h>
#include <collection.h>
#include <vector>
using namespace concurrency;
using namespace Windows::Foundation;
using namespace Windows::Foundation::Collections;
namespace HelloWorldLib
{
public ref class WinRTComponent sealed
{
public:
IAsyncOperation<IVectorView<float>^>^ square_array_async(
IVectorView<float>^ input)
{
// Synchronously copy input data from host to device
int size = input->Size;
array<float, 1> *dataPt = new array<float, 1>(
size, begin(input), end(input));
// Asynchronously perform the computation on the GPU
return create_async( [=]() -> IVectorView<float>^
{
// Array objects can only be captured by Reference
array<float,1> &arr = *dataPt;
// Run the kernel on the GPU
parallel_for_each(arr.extent, [&arr] (index<1> idx) mutable restrict(amp)
{
arr[idx] = arr[idx] * arr[idx];
});
// Copy outputs from device to host
std::vector<float> vec = std::vector<float>(size);
copy((*dataPt), vec.begin());
delete dataPt;
// Return the outputs as a VectorView<float>
return ref new Platform::Collections::VectorView<float>(vec);
});
}
};
}
Notice that the square-array operation is exposed via an asynchronous API. In WinRT, operations that may be long-running should be exposed via asynchronous APIs, and GPU operations may take a relatively long time to execute.
That is all that we need on the C++ side. Now, we’ll add a button to the C# project. Modify MainPage.xaml as follows:
<UserControl x:Class=”HelloWorldCSharpWinRT.MainPage”
xmlns=”http://schemas.microsoft.com/winfx/2006/xaml/presentation”
xmlns:x=”http://schemas.microsoft.com/winfx/2006/xaml”
xmlns:d=”http://schemas.microsoft.com/expression/blend/2008″
xmlns:mc=”http://schemas.openxmlformats.org/markup-compatibility/2006″
mc:Ignorable=”d”
d:DesignHeight=”768″ d:DesignWidth=”1366″>
<Grid x:Name=”LayoutRoot” Background=”#FF0C0C0C”>
<Button x:Name=”Button_Example” Content=”Click” Click=”Button_Example_Click” HorizontalAlignment=”Center”/>
</Grid>
</UserControl>
When the user clicks the button, we’ll call into C++ AMP. Modify MainPage.xaml.cs as follows:
using System;
using System.Collections.Generic;
using Windows.UI.Popups;
using Windows.UI.Xaml;
using HelloWorldLib;
namespace HelloWorldCSharpWinRT
{
partial class MainPage
{
public MainPage()
{
InitializeComponent();
}
private async void Button_Example_Click(
object sender, RoutedEventArgs e)
{
Button_Example.IsEnabled = false;
var arr = new [] { 1.0f, 2.0f, 3.0f, 4.0f };
List<float> inputs = new List<float>(arr);
IReadOnlyList<float> outputs =
await new WinRTComponent()
.square_array_async(inputs);
await new MessageDialog(string.Join(“,”, outputs)).ShowAsync();
Button_Example.IsEnabled = true;
}
}
}
… and that’s it!
Note that this is a very simple example that demonstrates how to call a C++ AMP function from C#. The example is too naïve to demonstrate speedup – it contains too little work per data element and in total to benefit from GPU acceleration. An example of a workload that does demonstrate speedup is matrix multiplication, and here is a link to C++ AMP code for Matrix Multiplication.
 Light
Light Dark
Dark
0 comments