Authorization As a Service,the coolest thing for LOB
World is getting better - definitely
If You are a lazy programmer like me this will blow Your mind .... I promise.
When developing software I'd like to write only the stuff that absolutely definitely needs to be written, nothing more.
So I have a long standing hate-hate relationship with those verbose xml-configs and convoluted frameworks since all they represent extra work that I need to do. In the worst case such work that has no value to the actual customer (remember customer anyone ? ) , but work that just needs to be done to make the wheels go round.
I hate writing boilerplate code/config/definition with a passion.
So Imagine my smile when I found out that I can consume the services of a modern Authorization stack (including multi factor authentication) with a simple click of a button.
Doesn't sound like much does it ? Wait, let me show You ...
Setting the scene
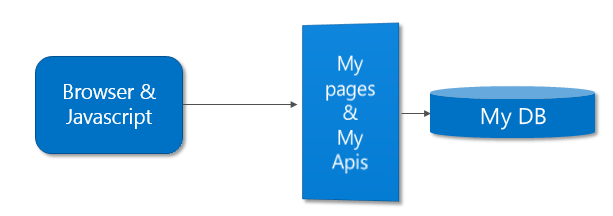
I’m writing this from the viewpoint of an LOB – developer. More specifically I want to write responsive HTML5 single page applications so I’m using Bootstrap on the front end side and some jquery (optionally some knockout,angular,…) and some sort of backend to service my front ed app some REST JSON APIs.
Simple enough.
In this scenario my backend needs to spit out some html but mostly serve my API calls. And when doing that the backend needs to know who the user is !
The users can’t be stored on the LOB-applications own database anymore (we all know that) so how about using some modern structure like oAuth and Azure Ad and so on … That’s when everything starts
getting convoluted !
The minute You start dabbling with authorization things slow down like in Matrix bullet-time and You lose all productivity and Your hair starts getting gray very rapidly.
But luckily there’s a really nice rabbit hole to bypass oll this grief when operating with Azure websites:
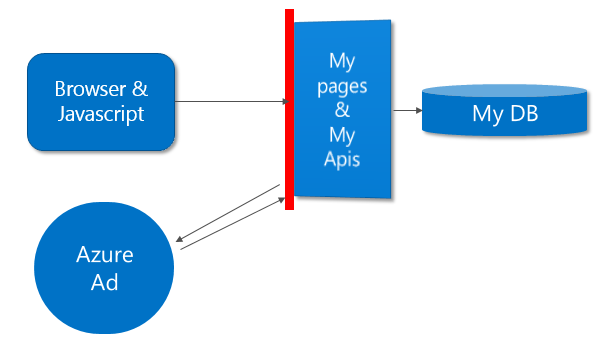
The red bar is the real superhero of this story. It intercepts all calls to my application, regardless if it is a page request or a REST call to one of my APIs It makes sure that only those people who have successfully logged in with my AD can pass. And when they do pass my application is being given a nice context describing the user …
And all this without writing any code. … well almost no code , since I need to write code to acces and use the userinfo I’ve been so graciously given.
Enough talk, show me the money !
For the sake of simplicity I’ll only present the skeleton portion of an LOB, next time well continue from that.
Visual Studio 2013 / New Project / Cloud / ASP.NET Web application / Web API / No Authentication :

So now we have a nice skeleton. Lets tweak it just a little.
And hit run (F5) . Once it runs go to https://Your_app/api/values. Mine is: https://localhost:44752/api/values
You should get some JSON back. Opening mine : ["value1","value2",""] – Exactly as it should be
So now we are done developing !!!
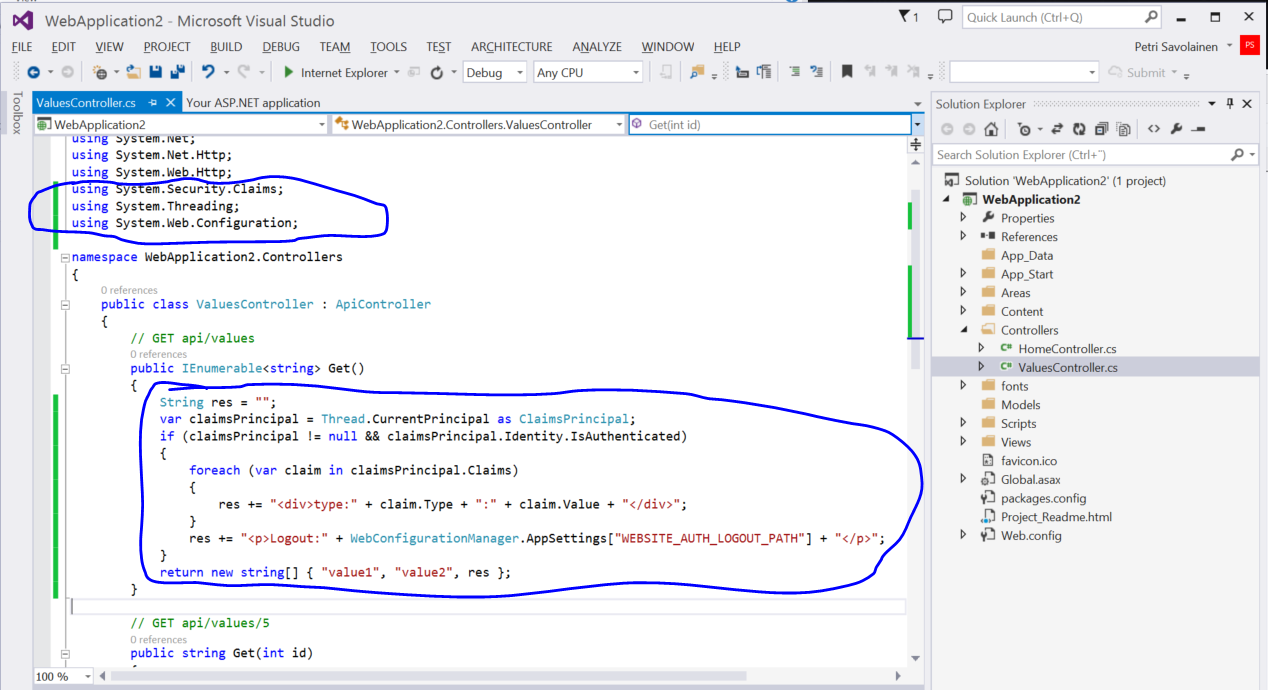
Header:
  using System.Security.Claims;
 using System.Threading;
 using System.Web.Configuration;
Code:
  public IEnumerable<string> Get()
 {
 String res = "";
 var claimsPrincipal = Thread.CurrentPrincipal as ClaimsPrincipal;
 if (claimsPrincipal != null && claimsPrincipal.Identity.IsAuthenticated)
 {
 foreach (var claim in claimsPrincipal.Claims)
 {
 res += "<div>type:" + claim.Type + ":" + claim.Value + "</div>";
 }
 res += "<p>Logout:" + WebConfigurationManager.AppSettings["WEBSITE_AUTH_LOGOUT_PATH"] + "</p>";
 }
 return new string[] { "value1", "value2", res };
 }
Let’s deploy this to azure.
If You didn’t already create a publishing profile while creating the product do it now:
- Stop the debug, Right click Your project name and choose “publish”
- As publish target choose “Microsoft Azure Website”
- If You don’t have existing websites choose new.
- Either way now You have a website picked, Validate the connection
- On File publish options choose : “Remove additional files” and hit publish
- After few minutes Your site should come up. go to the same relative url “/api/values”
- You should get the exact same response as when running locally
Fine . Now for the magic ….. (drumroll ,please) ….
Goto to : manage.windowsazure.com/ , find Your website and go to configure and find this:
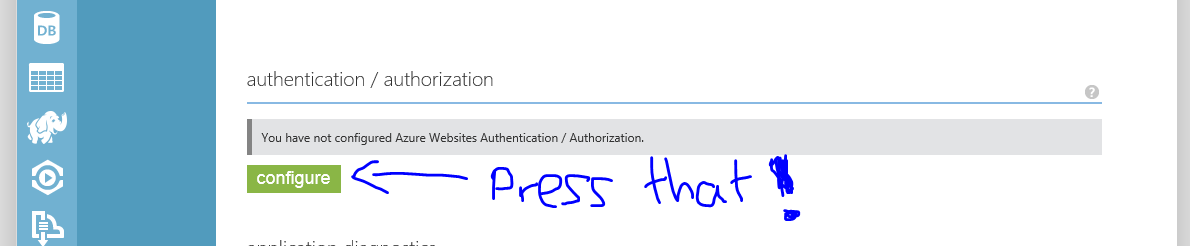
Choose Your directory and “Add Application”.
That’s it. You’re done .
Next take a new browser or inPrivate browsing or whatever it is called in Your browser. The idea being that You should have a browser where You have no ongoing sessions to azure.
This time You are presented with a login screen and once You clear that you go to the same url https://yourapp/api/values
Notice that the returned JSON has all kinds of interesting claims now. Amongst them are your name , email and so on …
Now You know that for every api or page request the caller is going to be identified against Your Azure AD (You can manage the AD as You wish) and You are being told who the caller is.
Isn't this wonderful.
Adding Multi Facet login capabilities
Let's get a little greedy and add some cool stuff while we're at it.
Take a look at here on how to setup Your AD to support multi facet logins : https://azure.microsoft.com/en-us/documentation/services/multi-factor-authentication/
I have Azure AD premium so I just enabled the feature and made one of my users to require some additional authentication.
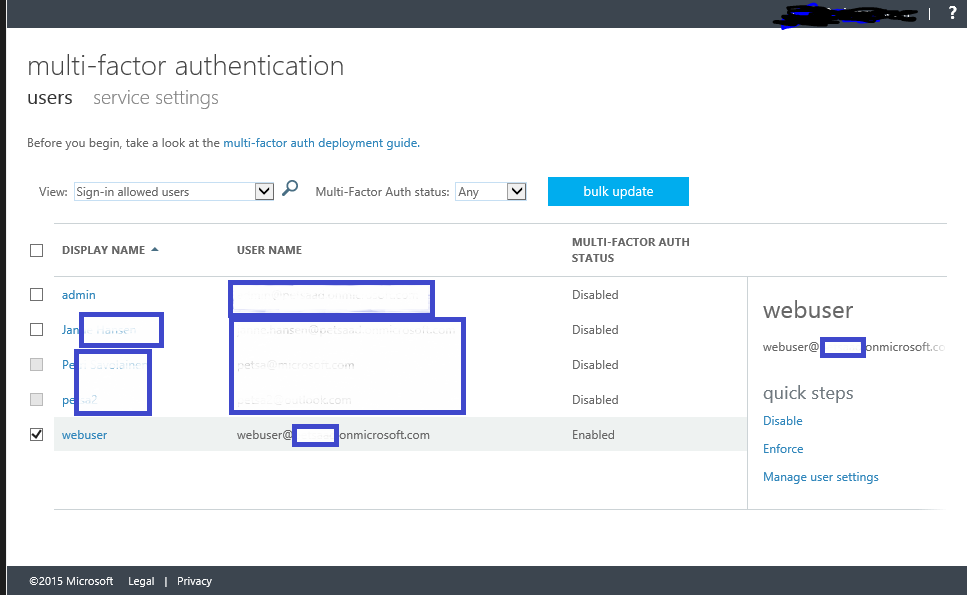
Then I logged in with that user and was presented with a request to use my mobile app for extra credentials.
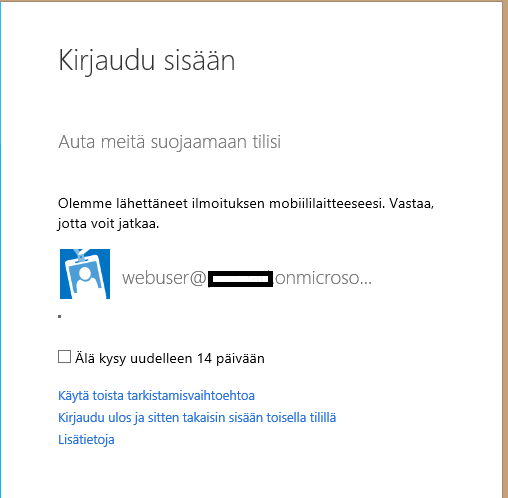
Sorry , this is in Finnish, but You probably can guess what is says.
So the application in my mobile came up and I chose “verify” and Boooom … I got in to my little sample application .
And sure enough, the returned JSON message from "/api/values" had my webusers details in it.
Easy breezy multi-factor-authentication-implemented-with-no-code
This is so cool .
Next time we’ll start to implement the actual application itself since we now got this super cool authentication implemented in no time.
There are still things to wish for. Group-support is one of them but it is coming.
Read more from here: https://azure.microsoft.com/blog/2014/11/13/azure-websites-authentication-authorization/
Until next time …