Time Intelligence Post Formula Filters
Time Intelligence Post Formula Filters
The Time Intelligence Post Formula Filters allow you to pass dynamic time periods into your scorecards and report views and have each view display a different set of time values, but all based on the selected date from the filter. (If you are new to Time Intelligence, you will also find this blog entry useful for a higher level overview.) This functionality allows for similar functionality as the Edit Filter Formula functionality in the other filters. Additionally, the selection control for the Time Intelligence Post Formula Filter is a calendar control that will always default to the current calendar date. This is unlike the other filter controls that will persist your last selected value, the Time Intelligence Post Filter Formula will always dynamically reset to the current calendar date. To create a Time Intelligence Post Filter Formula, follow the below steps:
1. Select New Filter from the Dashboard Filters tab.
2. Select the Time Intelligence Post Formula filter type and click OK.
3. Name your filter, optionally provide a description and click Next.
4. Select the data sources you want your filter to apply to, click Next. This list would include all of the data sources being used in your dashboard that have Time Intelligence mapped.
5. Click Finish. Note, you are not prompted for any time intelligence formulas during the filter creation, these all happen during the mapping of the filter to the view. Additionally, there is only one display for your filter and that will be a calendar display.
Now, add the filter to your dashboard and map it to your views as follows:
1. Select the correct data source in the available fields of the parameter and drag that into the input field of your first scorecard/report view. For this example, I will map it to a scorecard.
2. Within the Edit Filter Link dialog, select the dashboard item endpoint (in this example, I will place it on columns).
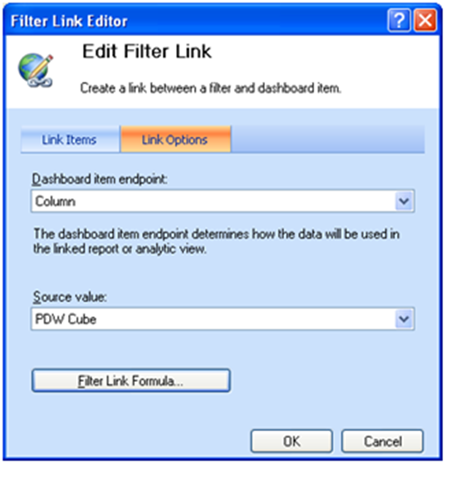
3. Click the Filter Link Formula button (note, this is required for Time Intelligence Post Formula Filters). Enter your Time Intelligence Filter formula in the dialog, an example is shown below:
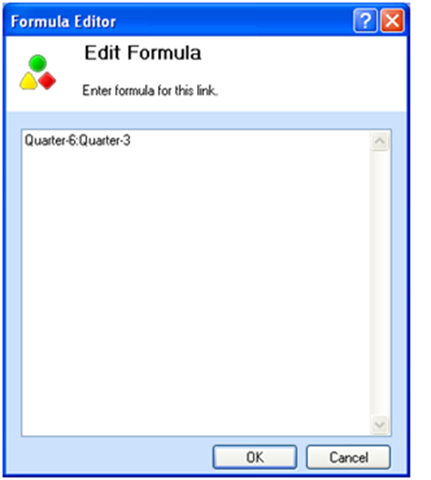
4. All formulas will be based on the selected date in the Time Intelligence Filter. By default, the Time Intelligence Post Filter will default to the current date (Aug 22, 2007 at the time of this post), so this formula would show quarters Q1-Q4 of 2006, basically taking the current date and backing up 6 quarters to Q1, 2006 and running through 3 quarters back to Q4, 2006.
5. Click OK.
6. Repeat steps 1-5 for each view that you wish to map the filter to. Here is an example of mapping the formula to an Analytic Chart, where I want to display the 12 months of 2006.
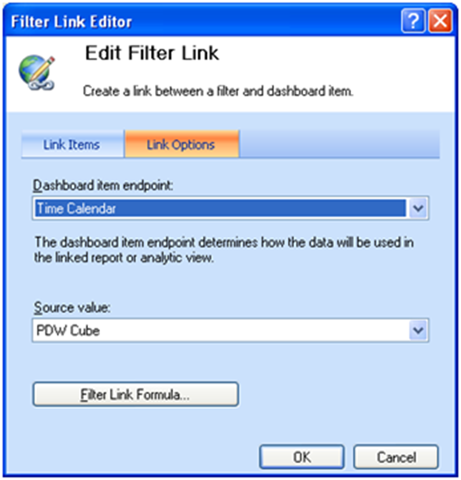
7. Note, that I map my Time Intelligence Filter to the Time Calendar hierarchy in my analytic chart. My Filter Link Formula is as follows:
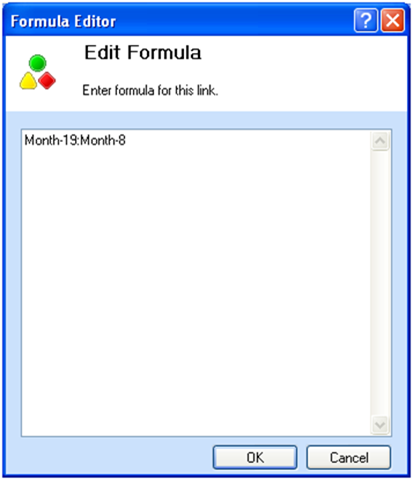
8. The resulting dashboard displays as follows:
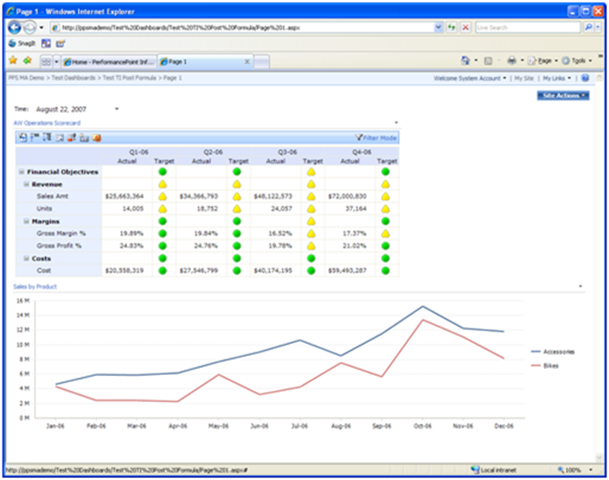
Changing the filter brings up a calendar as follows:
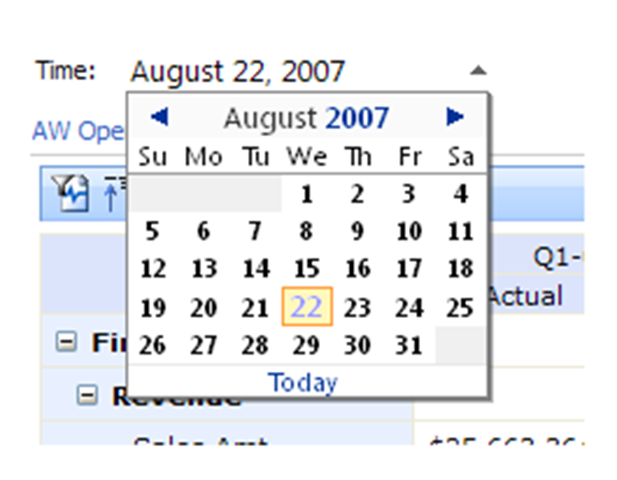
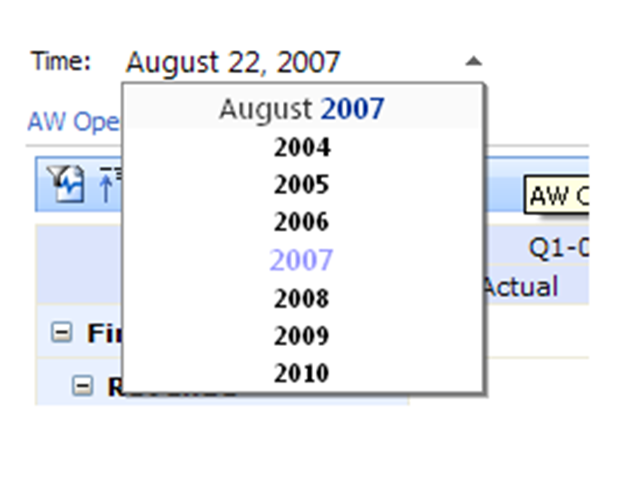
Navigate through months by clicking on the arrows, years by clicking on the Year.
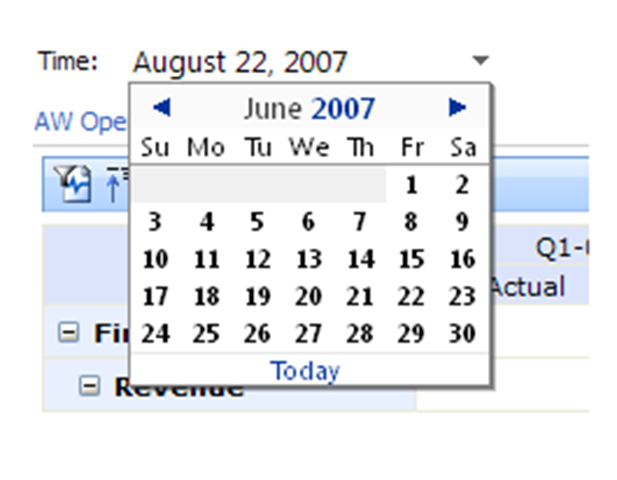
Selecting June 22, 2007 would yield the following:
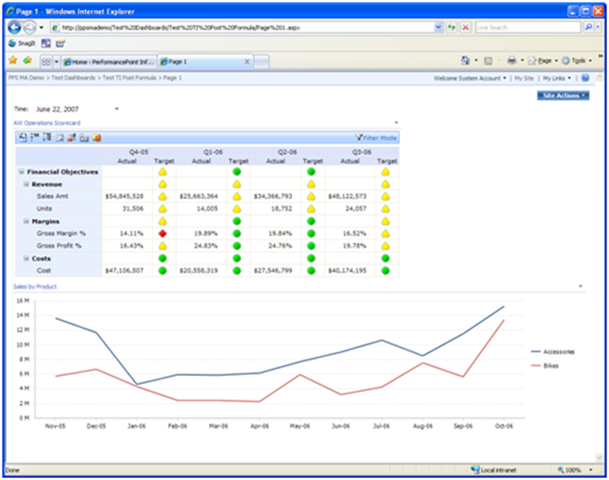
Time Intelligence Post Filter Formulas are most powerful when used with your existing cubes are updated regularly. This allows for a very time dynamic dashboard that will continuously provide your users with current active data. Unfortunately, the sample cubes don't exhibit this changing data but hopefully you can extrapolate the value from what I have shown in these samples.
Alyson Powell Erwin (alysonp@microsoft.com)