Creating an Item Template Extension (Addendum)
There are a couple of other ways to create project/item template extensions besides using the VSIX Explorer. So, I’m going to give some quick steps here for folks that would like to use an alternative… Just replace Part 2 of my earlier posts with either of the ones described below.
A – Using VSIX Project Template
The VSIX Project template is shipped with the VS SDK. You can install the SDK from MSDN Download Center.
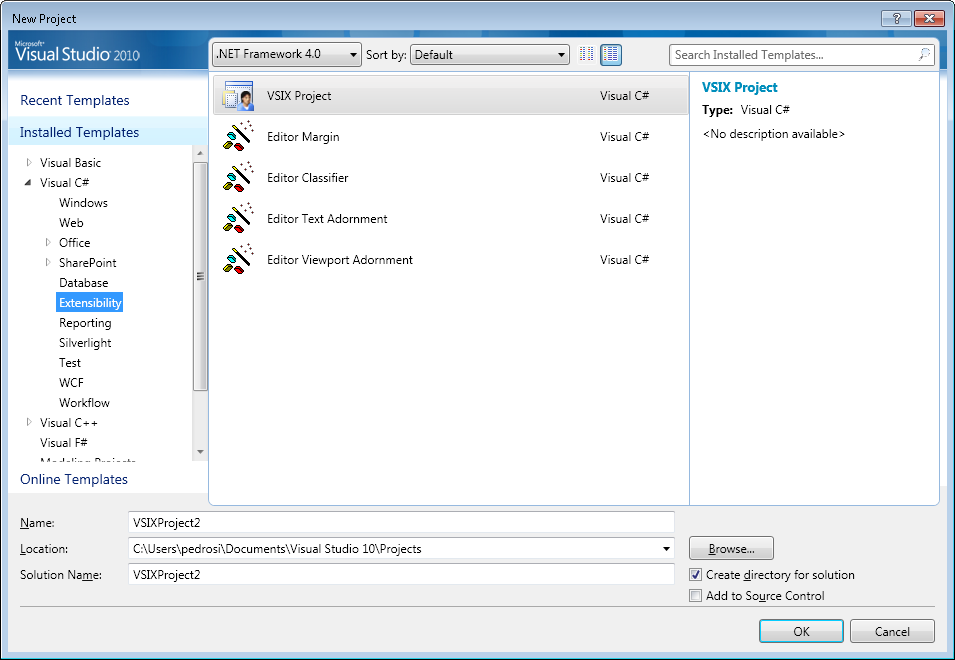
To use the template, launch the New Project dialog and navigate down to Visual C# (or Visual Basic) > Extensibility node. And, select VSIX Project from the list. This will create a new blank Extension project.
In the Solution Explorer, right click on the Project (VSIXProject2), and select Add > New Folder. It doesn’t matter what you name it, but for our example I’m using “Item”.
In that folder, you need to add a zipped up template file. To do this, right click on the folder, and select Add > Existing Item. This brings up a File Open dialog, so navigate to where we created our Item template from Part 1. [Note: Be sure to change the file filter to All Files (*.*) or you might not see your template.]
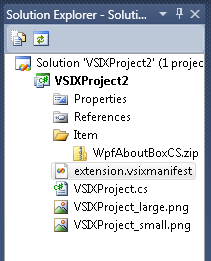
One thing you *MUST* do to make this packaging work is tag the template zip file to “Copy to Output”. Select the zip file (WpfAboutBoxCS.zip), and view its properties. In the Property tool window, change the Copy to Output Directory property to Copy Always. The build tools for this project, put everything in the output folder into the built VSIX file, so if you don’t do this, your template won’t be part of the VSIX file.
You can then edit the VSIX manifest data in an editor that’s shipped as part of the SDK. Just double-click the extension.vsixmanifest file in the Solution Explorer.
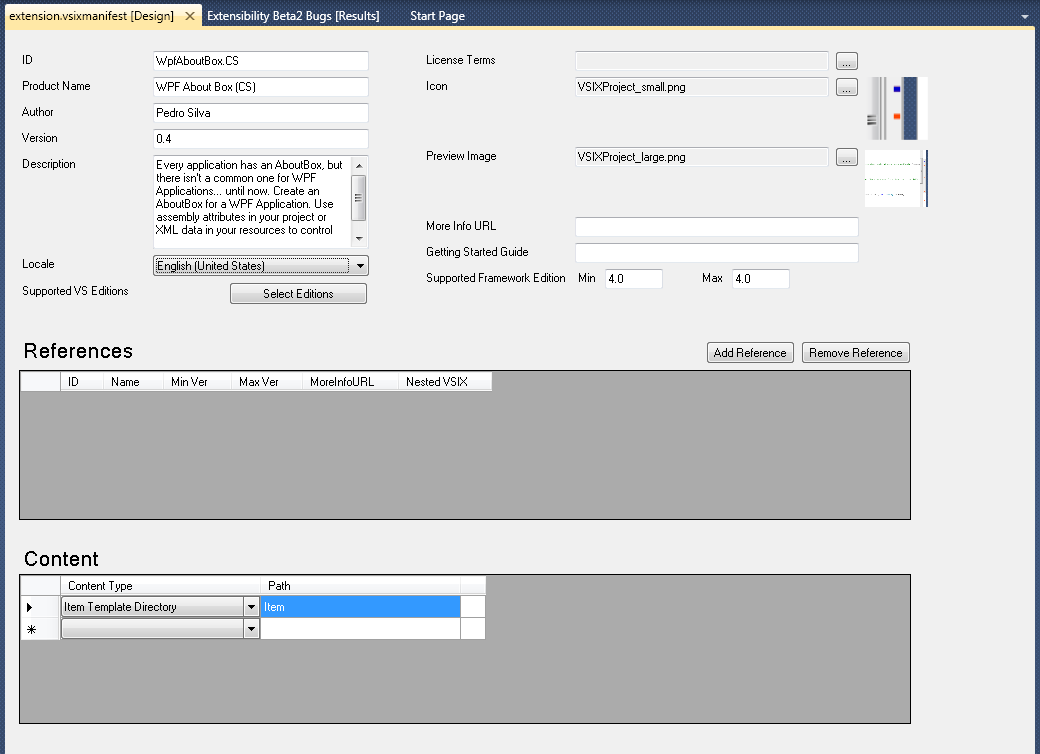
This is very similar to editing the metadata in the VSIX Explorer, except that it has better binding support, so you don’t need to drop into XML to edit it by hand. So, I won’t go into too much detail about each field. But, you’ll notice that the Content section of this page is plugged in, so we can edit the content of your VSIX more easily. Also, the icon and preview image starts with the defaults, but you can either add your own images to this project, or just edit the icon and preview image files that are in this project.
Now, build the solution, and you will get a VSIX file in the output directory (.\bin\Release). You can navigate through the Windows Explorer to find the file under your project directory.
The one issue with following this process is that the VSIX Project also builds an empty assembly in addition to the template. So, the VSIX file actually contains a DLL and PDB file that was output from this project. This is not great because you would be installing it on the end user’s machine even though they are unnecessary.
Thanks to Aaron for the following work around to get the unnecessary DLL & PDB files not to be packaged into the VSIX:
Preventing the DLL/PDB from being added to the VSIX
One thing you may notice is that the DLL and PDB built from the project (that you don’t need if you’re just packaging up some templates) gets included in the VSIX file. To suppress this, you could either use the VSIX Explorer tool to edit the file post-build (tedious since you need to do this for each build)…or simply add the following XML snippet to your CSProj/VBProj to prevent the DLL or PDB from being included in the VSIX file at all:
<PropertyGroup> <CopyBuildOutputToOutputDirectory>false</CopyBuildOutputToOutputDirectory> <SkipCopyingSymbolsToOutputDirectory>true</SkipCopyingSymbolsToOutputDirectory><br></PropertyGroup>
B – Raw Editing of VSIX
As I mentioned in earlier posts, the VSIX file is just an OPC compound file. This file is actually compatible with a ZIP file. So, you can create a VSIX just by starting with a ZIP file.
Create a new ZIP file in the Windows Explorer by right clicking on a folder and selecting New > Compressed (zipped) Folder. Name it to the extension name you desire.
Copy in the contents that you want in your extension zip file: the icon, the preview image, the Item folder, and the zipped up template (under that folder).
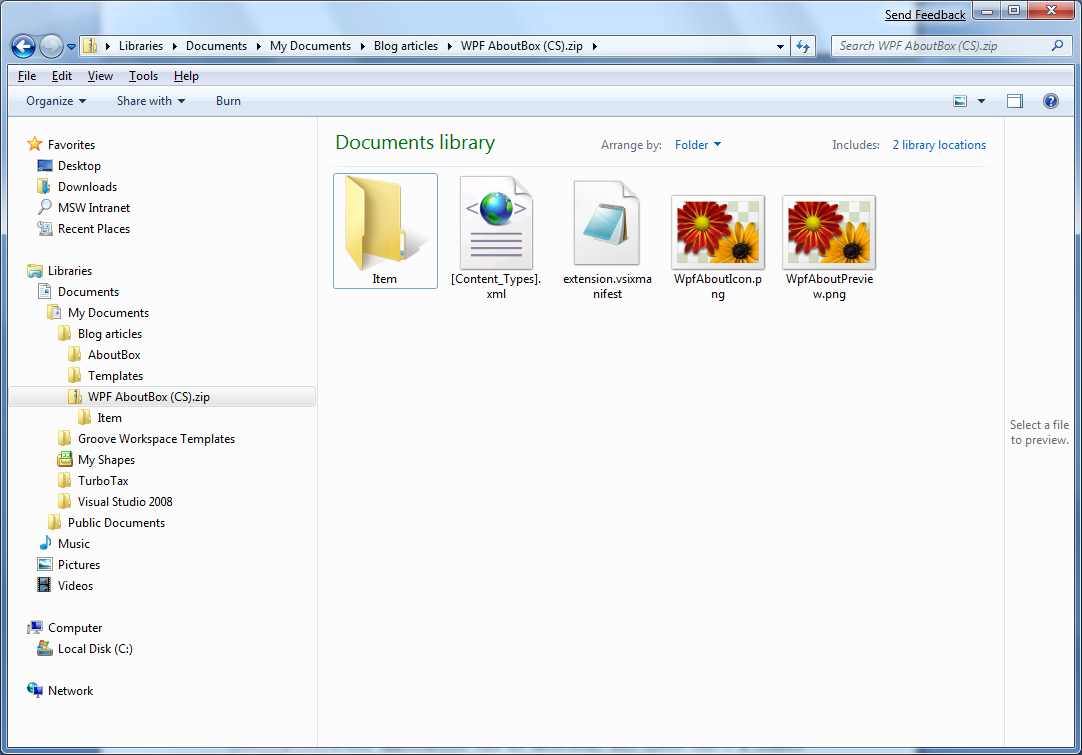
Now, you need to create an extension.vsixmanifest file at the root of the ZIP file. This is an XML file that describes your extension… the data that you want to publish about it, and what components make up your extension. In the previous steps, we’ve used GUI editors to edit this file, but you can just create the raw XML as well. For the AboutBox template that we’ve been working with, the following XML will be needed:
<?xml version="1.0" encoding="utf-8"?>
<VSIX xmlns="https://schemas.microsoft.com/developer/vsx-schema/2010" xmlns:xsi="https://www.w3.org/2000/10/XMLSchema-instance">
<Identifier ID="WpfAboutBox.CS">
<Name>WPF About Box (CS)</Name>
<Author>Pedro Silva</Author>
<Version>0.4</Version>
<Description>Every application has an AboutBox, but there isn't a common one for WPF Applications... until now.
Create an AboutBox for a WPF Application. Use assembly attributes in your project or XML data in your resources
to control what data is displayed in the dialog.</Description>
<Locale>1033</Locale>
<Icon>WpfAboutIcon.png</Icon>
<PreviewImage>WpfAboutPreview.png</PreviewImage>
<SupportedVSEdition version="10.0">
<Edition>Pro</Edition>
<Edition>VCSExpress</Edition>
<Edition>VST_All</Edition>
</SupportedVSEdition>
<SupportedFrameworkRuntimeEdition minversion="4.0" maxversion="4.0" />
</Identifier>
<References />
<Content>
<ItemTemplate>Item</ItemTemplate>
</Content>
</VSIX>
As you can see, the XML for this extension is fairly concise, and the Elements and Attributes map pretty cleanly to the UI you’ve seen earlier. Also, in Visual Studio 10, we are shipping the XSD for the manifest, so you will get intellisense when you edit a file of this type. I’m not going to go into each entry in the XML, you can look at the schema or Help documentation, if you’d like to know exactly what everything does.
Then, you need to create a special file called [Content_Types].xml, that’s used by the packaging API. This file is always the same for templates, so feel free to duplicate the XML below in your template extensions.
<?xml version="1.0" encoding="utf-8" ?>
- <Types xmlns="**https://schemas.openxmlformats.org/package/2006/content-types**"\>
<Default Extension="vsixmanifest" ContentType="text/xml" />
<Default Extension="zip" ContentType="application/octet-stream" />
<Default Extension="ico" ContentType="application/octet-stream" />
<Default Extension="png" ContentType="application/octet-stream" />
</Types>
Finally, just rename you NewExtension.zip file to NewExtension.vsix… and voila you now have a packaged up VSIX extension. Double clicking it will go through the local installation process, or you can now upload it to the VS Gallery. This is quite a bit of manual intervention, and has the possibility for errors in the extension.vsixmanifest and [Content_Types].xml files. But, the cool thing is that you could do it by hand if you had to.
I hope you enjoyed these alternatives for creating VSIX packages. These were shown for creating templates in particular, but the same principles hold for all new Visual Studio 10 extension types. And, with subsequent Beta and RTM releases of the product and SDK, I’m hoping that these posts won’t even be needed in the near future. J