Change Application Background using Visual States through Settings Charm
Today we will be looking at how we can change application background using Visual States through The Settings Charm.
Step1 : Create a project for Windows 8.1 in Visual Studio 2013
Step2: Right click the Project and click Add > New Item
Select Settings Flyout from and Window as shown
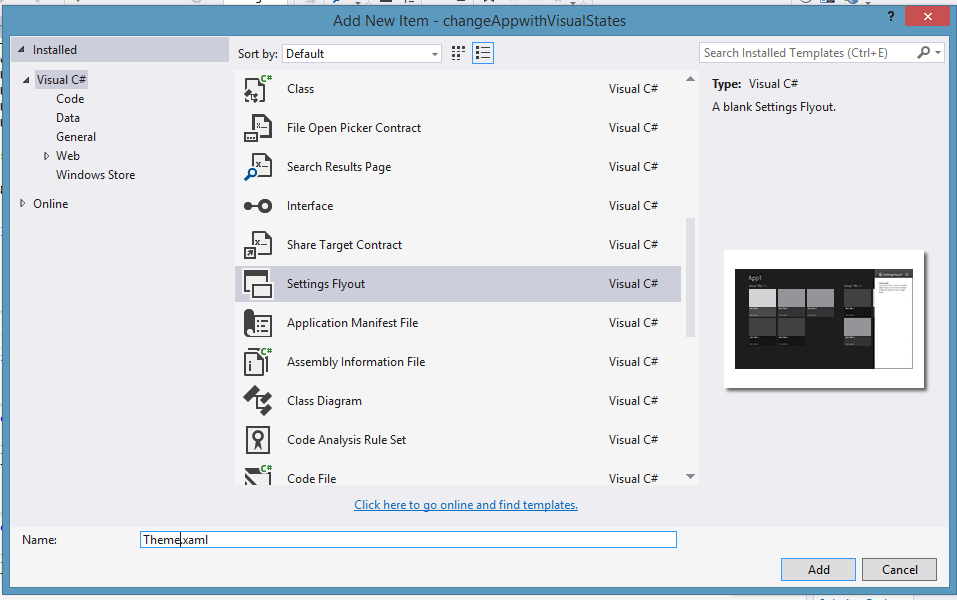
Name this Theme.xaml
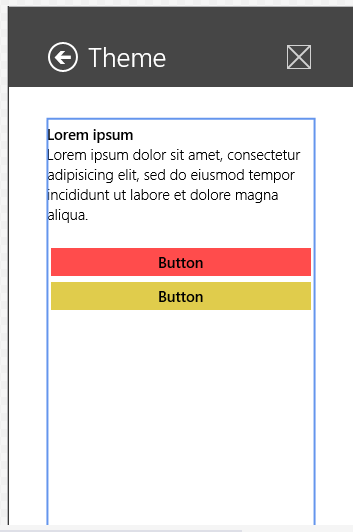
Step3: once the flyout is in the solution, open it and insert two button in the flyout as shown below
Step4: open the Code behind file for Theme.xaml (Theme.xaml.cs) and declare a string by the name ButtonSelection that should be Public Static
 public sealed partial class Theme : SettingsFlyout
 {

 public static string ButtonSelection = string.Empty;
 public Theme()
 {
 this.InitializeComponent();
 }
Step5: Create Events for the Buttons in the Flyout by double clicking on them and write the following code inside the Events
 private void Yellow_Click(object sender, RoutedEventArgs e)
 {
 ButtonSelection = "Yellow";
 }
 private void Yellow_Click(object sender, RoutedEventArgs e)
 {
 ButtonSelection = "Red";
 }
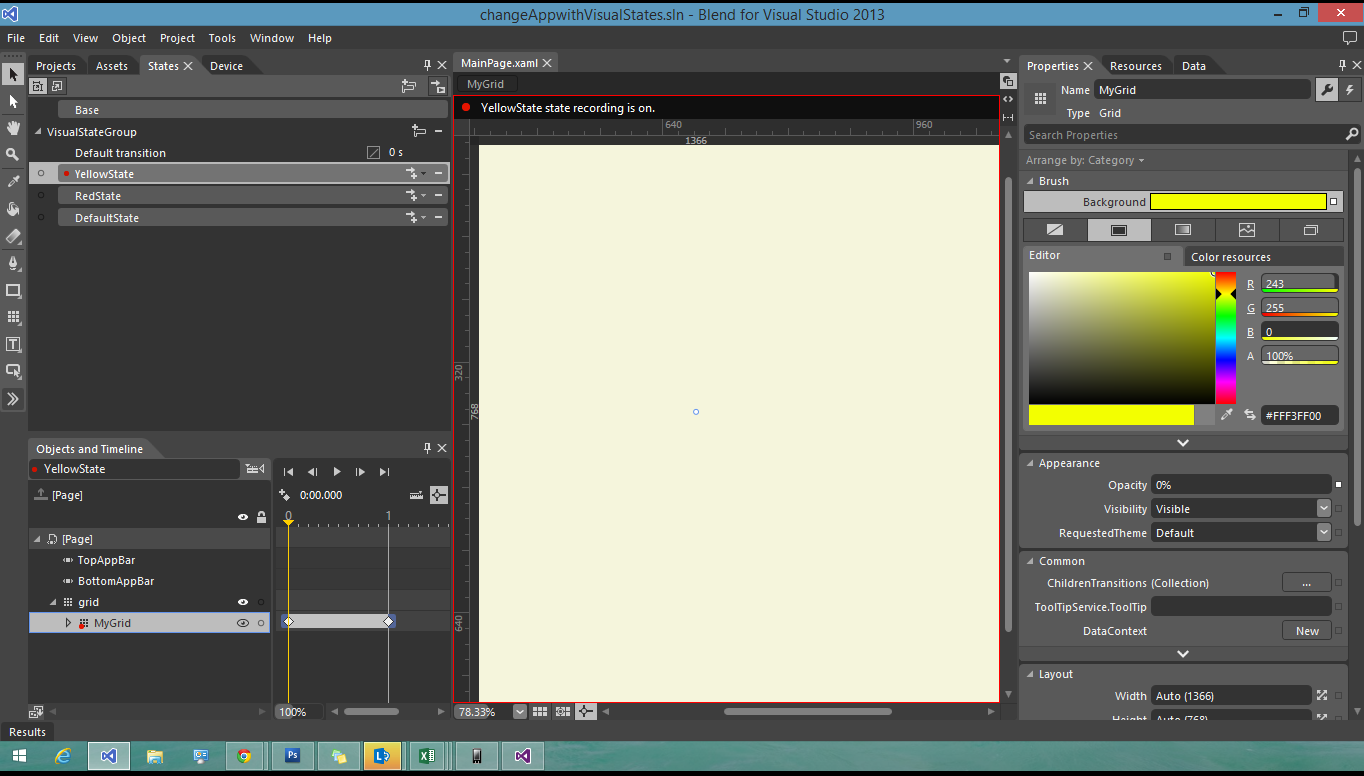
Step6: Right click on the project and click open in Blend... from the Menu
Once the project is open in Blend, make sure the mainPage.xaml is open, Goto the States Tab as shown and define three States for the Page, DefaultState, YellowState and RedState

Step7: click the YellowState, its Recording will be on as shown in the Picture, Select the Grid you want to change the color, from the Brush Menu in the right hand side, change the color to Yellow, as shown
Step8: do the same for the other states as well and click save all, Move back to Visual Studio, it will prompt to reload the Solution, Click "Yes to all"
Step9: open MainPage.xaml.cs and create DispatcherTimer object. Also create Tick event for the timer and defin the interval for it as well.
  public sealed partial class MainPage : Page
 {
 DispatcherTimer timer = new DispatcherTimer();
 public MainPage()
 {
 this.InitializeComponent();
 timer.Tick += timer_Tick;
 timer.Interval = TimeSpan.FromMilliseconds(0.1);
 timer.Start();
 }
Step10: In the timer_tick Method, write the following code
 void timer_Tick(object sender, object e)
 {
 //mygrid.Background = Theme.Colour;
 if (Theme.ButtonSelection == "Yellow")
 {
 VisualStateManager.GoToState(this, "YellowState", true);
 }
 else if (Theme.ButtonSelection == "Red")
 {
 VisualStateManager.GoToState(this, "RedState", true);
 }
 }
Step11: Click Save All, and Run the Project, if everything goes rite you will see that upon clicking the Buttons in the settings Panel, the App will change its background color using visual States. You can also further modify and add animations to the Visual States defined in Blend