Getting started with Windows Azure - part 3
In my last blog post on the series of getting started with Windows Azure as a Modern application developer, I’m going to walk you through to consume the Windows Azure Cloud Service ( the steps to create this service can be found on following blog post ) in Windows Phone and Windows Store.
Windows Store Test Client
Let us first create a test client in Windows Store that allows us to add rows in our Azure hosted database. For that purpose create a New Project > Select Windows Store Blank App Template. I’m going to place a text box to input English surah names and a button upon clicking which the row will be added in the our database table using WCF Services exposed in last blog post,
 <Grid Background="Black">

 <Grid.RowDefinitions>
 <RowDefinition Height="25*"></RowDefinition>
 <RowDefinition Height="50*"></RowDefinition>
 <RowDefinition Height="25*"></RowDefinition>
 </Grid.RowDefinitions>

 <Grid.ColumnDefinitions>
 <ColumnDefinition Width="25*"></ColumnDefinition>
 <ColumnDefinition Width="50*"></ColumnDefinition>
 <ColumnDefinition Width="25*"></ColumnDefinition>
 </Grid.ColumnDefinitions>

 <StackPanel Grid.Row="1" Grid.Column="1">
 <TextBlock FontSize="30">Add Surah</TextBlock>
 <StackPanel Orientation="Horizontal">
 <TextBlock Width="100" >English:</TextBlock>
 <TextBox Name="TextBoxSurahNameEnglish" Width="150"></TextBox>
 </StackPanel>
 <Button Click="Button_Click" HorizontalAlignment="Right">Add Surah</Button>
 </StackPanel>
 </Grid>
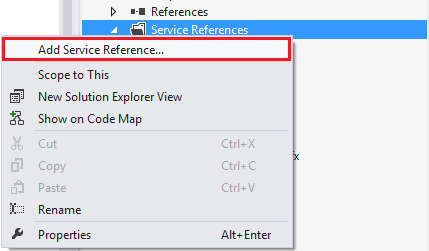
Now let’s add the service in our project. Right click in project reference and select ‘Add Service Reference’, copy the WSDL link of your service (see this blog post) and press Go, Visual Studio will fetch the service details and load the methods exposed by this services. Press OK and VS will create client side stub and relative Surah class that we exposed in our WCF Service.
Now it is time to code behind the button. Here’s how the call to AddSurah looks like (you can add exception handling),
  private async void Button_Click(object sender, RoutedEventArgs e)
 {
 ServiceReference1.Service1Client client = new ServiceReference1.Service1Client();
 await client.AddSurahAsync(TextBoxSurahNameEnglish.Text);
 TextBoxSurahNameEnglish.Text = String.Empty;
 }
Launch the app and add multiple Surahs. The call to Delete and update methods will be analogous.

Windows Phone Client
Let’s now create a Windows Phone client that fetches all Surah objects and renders them as a list. Here’s how the XAML of a Phone client page looks like,
  <Grid x:Name="ContentPanel" Grid.Row="1" Margin="12,0,12,0">
 <StackPanel>
 <ProgressBar Name="ProgressBar1" IsIndeterminate="True" Visibility="Collapsed"></ProgressBar>
 <ListBox Name="ListBoxSurahs">
 <ListBox.ItemTemplate>
 <DataTemplate>
 <StackPanel>
 <TextBlock Text="{Binding SurahName}" FontSize="30"></TextBlock>
 </StackPanel>
 </DataTemplate>
 </ListBox.ItemTemplate>
 </ListBox>
 </StackPanel>
 </Grid>
Similar to above, add a service reference and upon page load, call the GetSurahs method. Note the use of progress bar to indicate progresses until the response is received and list is rendered,
  void MainPage_Loaded(object sender, RoutedEventArgs e)
 {
 ServiceReference1.Service1Client client = new ServiceReference1.Service1Client();
 client.GetSurahsCompleted += client_GetSurahsCompleted;
 client.GetSurahsAsync();
 ProgressBar1.Visibility = System.Windows.Visibility.Visible;
 }

 void client_GetSurahsCompleted(object sender, ServiceReference1.GetSurahsCompletedEventArgs e)
 {
 try
 {
 ListBoxSurahs.ItemsSource = e.Result;
 }
 catch(Exception ex)
 {
 MessageBox.Show(ex.ToString());
 }
 finally
 {
 ProgressBar1.Visibility = System.Windows.Visibility.Collapsed;
 }
 }