Getting started with Power BI On Premise Gateway & MariaDB
Power BI Desktop is a jack-of-all-trades when it comes to data visualization, self-service BI and ad-hoc analytics. With interactive and rich visuals in addition to a robust query tool it has become my go-to tool for querying and visualizing data no matter if the data is living in structured RDBMS (Amazon Redshift, Azure SQL Data Warehouse, Azure SQL Database, IBM DB2, MySQL, Oracle, PostgreSQL, SQL Server, Sybase, Teradata) or if it's a sample dataset from a public source (often CSV or JSON or some other text format) or a distributed storage tool like Hadoop HDFS, JSON-based DocumentDB, Azure Data Lake Store or SnowFlake.
A great feature of Power BI Pro is the Gateway. Power BI Gateway comes in 2 variations, Personal & On Premise. Personal is just that – used for testing on a developer computer and only runs when the user is logged in. On Premise is used run under a service account on a server and has some extended capabilities for live or Direct querying of SQL Server/Analysis Service data sources.
I work with healthcare customers and many times there is a need to plan a hybrid cloud strategy involving both on premise and Azure. I recently worked with a customer to use Power BI for internal reporting and dashboards with both Azure-based and on premise-based data sources.
Here are the steps used to stand up Power BI On Premise Data Gateway and create reports using an on premise MariaDB data source (MariaDB is an open source database service that is "drop-in compatible" with MySQL).
Install the MySQL Connector/Net, ADO.NET Driver (to be completed on the gateway server)
Depending on your setup, this might already be available on your system. You should just need the driver, not necessarily the MySQL for Visual Studio integration tool. I was directed to download the driver from the MySQL site here: https://dev.mysql.com/downloads/connector/net/6.6.html
Setup the Power BI On Premise Data Gateway (to be completed on the gateway server)
Login to https://www.PowerBI.com with your work/Pro credentials.
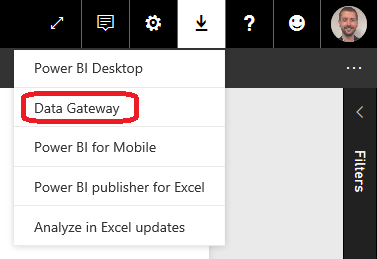
In the upper right-hand side of the page click the download menu and select Data Gateway
Download the software and run the install.
Click Next.
Select On-Premises Data Gateway (not Personal Gateway) during the install.
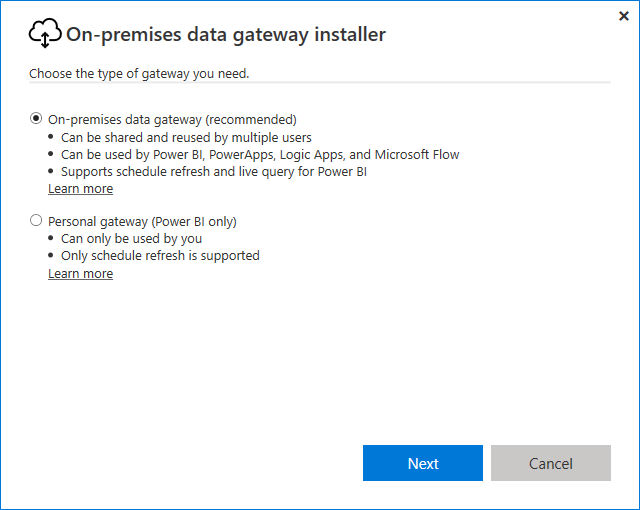
Click Next.
Click Next.
Confirm location for software to be installed & confirm terms of use. Click Install.
You should see confirmation that installation was successful. Click Sign In to continue. Sign in with your workplace/Power BI Pro credentials.
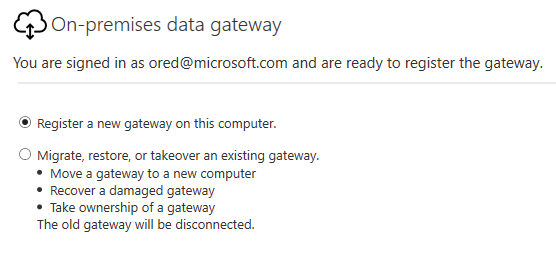
Select Register a new gateway on this computer. Other option is for cases when you might need to migrate an existing gateway to another server for example.
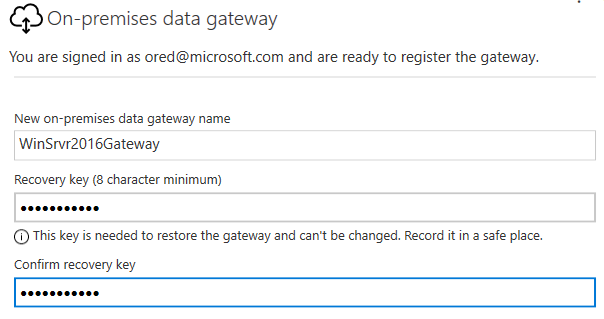
Give your new gateway a name and provide an 8-character recovery key:
Click Configure.
Confirm that the gateway configuration completed and is ready to use with a message like this:
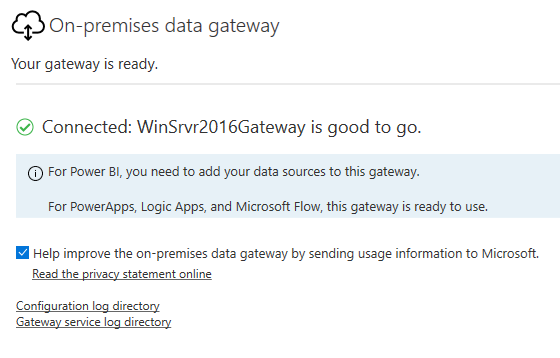
Click Close.
Add a Data Source to your Gateway (to be completed on any computer with a browser)
Login to https://www.PowerBI.com with your work/Pro credentials.
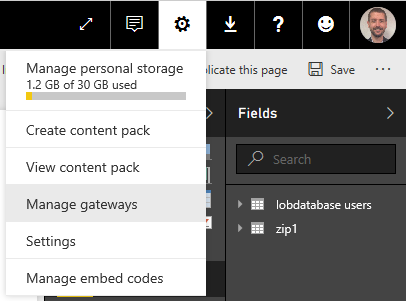
In the upper right-hand side of the page click the download menu and select Manage Gateway.
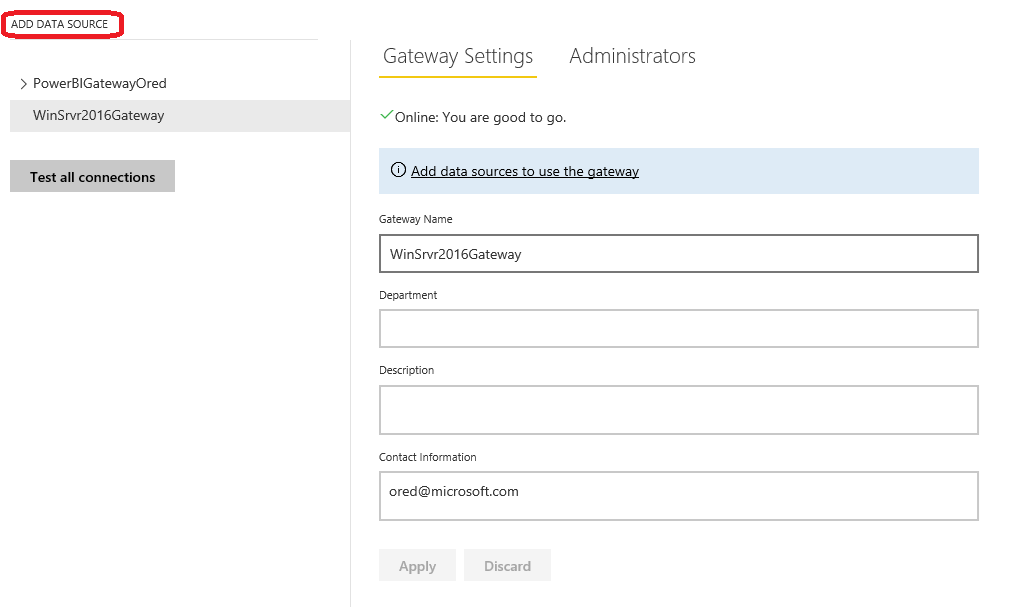
Your new gateway should be listed by name on the left-hand side. Click ADD DATA SOURCE to add a new data source to the gateway.
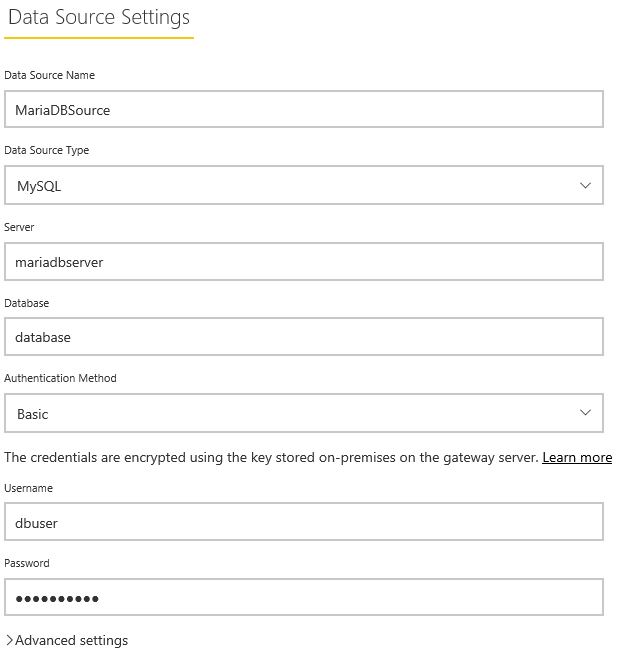
Enter the details of your new data source:
Data Source Name
Data Source Type (select MySQL)
Server
Database
Authentication Method (Basic or Windows. For my testing, I'm using a user account managed on the MariaDB server, so I need Basic)
Username
Password
Advanced Settings are used to set the Privacy level of this data source. On-premises data gateway can be used by users across your organization so it may be important to set the Privacy level of data sources using this setting.
Click Add. The gateway service will confirm that it can access the data source you are attempting to add.
Click Users tab.
Add users to the data source by entering their address. Click Add. This is also where you can remove users.
Create your Power BI report/PBIX (to be completed with Power BI Desktop)
If you've never used Power BI to create a report using an on premise data source, you can use these articles to walk you through the process:
Get started with Power BI: https://Power BI.microsoft.com/en-us/documentation/Power BI-service-get-started/
Create a new Power BI report: https://Power BI.microsoft.com/en-us/documentation/Power BI-service-create-a-new-report/
Power BI – basic concepts for Power BI service: https://Power BI.microsoft.com/en-us/documentation/Power BI-service-basic-concepts/
You don't need to tell Power BI that you will be connecting to the on premise data source via a gateway, just connect directly to the source. When you publish the PBIX file, the Power BI Portal will handle sourcing the data through the gateway for published reports.
Publish Power BI report (to be completed with Power BI Desktop)
Starting with a Power BI report that is ready to be published.
Click the Publish button in the Home tab of Power BI Desktop

Select publishing destination, likely you'll want to publish to your Power BI Workspace ("My Workspace").
Power BI Desktop will publish the PBIX file to your Workspace in the Power BI Service. You should receive confirmation with a link to the published report.
Appendix
Ensure proper gateway is selected for the data source
Depending on your setup you may have other gateways setup in the Power BI Service. In order for data updates/refreshes to flow through from an on premise source like MariaDB to the Power BI Service you'll need to ensure the proper gateway is selected.
Login to the Power BI Portal: https://www.PowerBI.com with your work/Pro credentials.
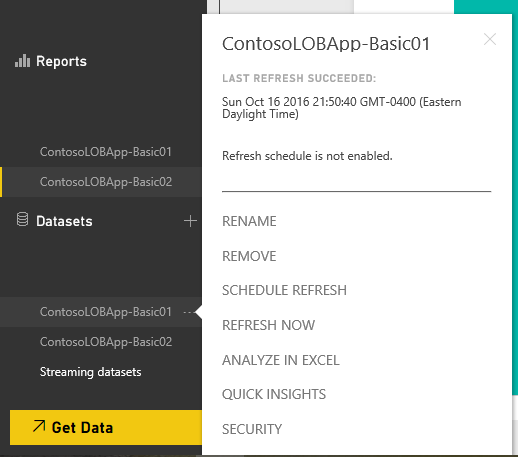
In the left-hand navigation menu scroll down to the Datasets section.
Click the … button for your newly published dataset (should be the same name as your published Power BI report).
Click SCHEDULE REFRESH, this will open the report preferences.
Datasets tab should be selected, click Gateway connection and then ensure the proper gateway is selected. You will also notice a status for each gateway
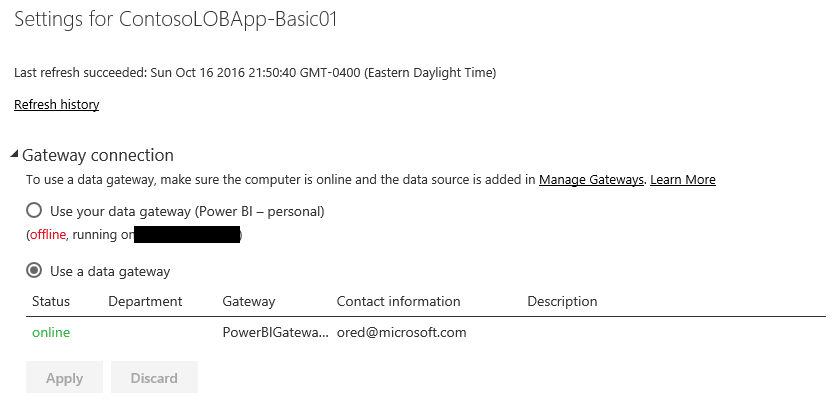
Click Apply if changes are made.
Initiate a manual refresh by selecting REFRESH NOW from the dataset menu.
Schedule refreshes
Once a Gateway connection is setup (per instructions above) you should be able to initiate a manual refresh of data from the on-premise source. You'll also be able to keep data in your workspace up-to-date via daily or weekly refreshes.
- Click Schedule Refresh under the Datasets tab.
- Change the selector to Yes for keep your data up to date.
- Select a refresh frequency (Daily or Weekly).
- Select a time zone.
- Select a preferred time for the refresh to run.
- Suggestion: Keep Send refresh failure notification email to me checked to ensure notification if the gateway runs into issues.
- Click Apply.
- Enjoy the fresh data in your awesome Power BI reports!
Let me know if there are any questions in the comments. Thank you!