OpenXML Styles 101 - Creating Custom Styles and Understanding Style Inheritance
Introduction
This will be the first in a series of articles on various OpenXML topics. This article provides an expanded description of how Style Inheritance works. We will be using an example created in Microsoft Word 2016 and then manually modifying the package contents.
By simply reading through this blog you should be able to grasp how to manually create your own custom styles and how to build more complex styles using Style Inheritance. However, nothing beats getting some actual hands-on experience. I highly encourage you to perform the steps as they are presented here and experiment on your own.
Resources
This article will refer exclusively to information contained in ISO/IEC 29500-1. The latest version, as of this article's release date, was published in September of 2012 and can be downloaded from the following location.
https://standards.iso.org/ittf/PubliclyAvailableStandards/index.html
Getting Started
We will start by creating a very simple document that contains three paragraphs. The actual contents of the paragraphs isn't very important, but it makes it easier to identify each one in the XML if they are numbered on some way.
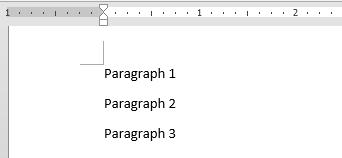
Figure 1: Three paragraphs in the default style.
Save the document and then rename the file with a .zip extension.
Note: It is assumed that you already understand that the .DOCX, .XLSX, and .PPTX file formats are actually special .ZIP packages that contain all of the XML files used to construct the document. ISO/IEC 29500-1 section 9 contains a summary of the package format. ISO/IEC 29500-2 deals exclusively with the Open Packaging Conventions (OPC) format.
Examining the Package Contents
Once you have renamed the file to have a .zip extension, go ahead and extract the contents. Open the folder and then examine the contents of the "word" folder. The contents should look similar to this.
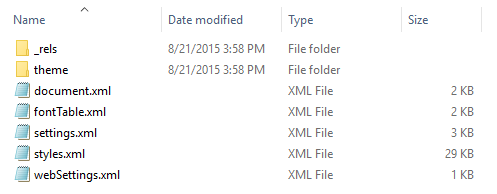
Figure 2: The contents of the "word" folder.
The two files that we will be working with are document.xml and styles.xml. Go ahead and open the document.xml and styles.xml files in a basic text editor. The first thing you will notice is that the contents are one big blob of text without any kind of formatting unless you are using an application that was designed specifically for editing XML files. There are a few different ways to fix this, but if you are a Visual Studio user you can use the Edit -> Advanced -> Format Document command.
The section of the document.xml file that we will be working with is in the middle that has our three paragraphs.
document.xml
<w:p w:rsidR="00BA6E33" w:rsidRDefault="009A7F68">
<w:r>
<w:t>Paragraph 1</w:t>
</w:r>
</w:p>
<w:p w:rsidR="009A7F68" w:rsidRDefault="009A7F68">
<w:r>
<w:t>Paragraph 2</w:t>
</w:r>
</w:p>
<w:p w:rsidR="009A7F68" w:rsidRDefault="009A7F68">
<w:r>
<w:t>Paragraph 3</w:t>
</w:r>
<w:bookmarkStart w:id="0" w:name="_GoBack"/>
<w:bookmarkEnd w:id="0"/>
</w:p>
There isn't anything in the styles.xml file that we really care about right now. The only thing worth taking note of is the "Normal" style near the bottom of the file.
styles.xml
<w:style w:type="paragraph" w:default="1" w:styleId="Normal">
<w:name w:val="Normal"/>
<w:qFormat/>
</w:style>
Creating a New Style
Additional details on the style element can be found in ISO/IEC 29500-1 section 17.7.4.17. For now, we will create a very simple style that is based on the Normal style, sets it to be Bold, and increases the font size.
styles.xml
<w:style w:type="paragraph" w:styleId="MyCustomStyle1">
<w:name w:val="My Custom Style 1"/>
<w:basedOn w:val="Normal"/>
<w:rPr>
<w:sz w:val="32"/>
<w:b w:val="true"/>0
</w:rPr>
</w:style>
Next, we will assign this style to the first paragraph of our document.
document.xml
<w:p w:rsidR="00BA6E33" w:rsidRDefault="009A7F68">
<w:pPr>
<w:pStyle w:val="MyCustomStyle1"/>
</w:pPr>
<w:r>
<w:t>Paragraph 1</w:t>
</w:r>
</w:p>
After you make those changes and save the files you will need to update the package contents. It's important to understand that you can't just re-zip the main folder and put a .docx extension on it. It will be missing all of the metadata. The best way to update the package contents is to overwrite the existing files in the original .zip package with the updated ones and then rename back to the .docx extension. After you do that and open the file it Word it should look like this.
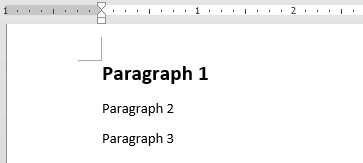
Figure 3: MyCustomStyle1 applied to the first paragraph.
Inheriting From a Custom Style
For the second paragraph lets create a new style that inherits from the one used in the first paragraph. We will add a new element and change an existing one to demonstrate how the style at the leaf level overrides the style(s) further up the inheritance tree.
styles.xml
<w:style w:type="paragraph" w:styleId="MyCustomStyle2">
<w:name w:val="My Custom Style 2"/>
<w:basedOn w:val="MyCustomStyle1"/>
<w:rPr>
<w:b w:val="false"/>
<w:color w:val="FF0000"/>
</w:rPr>
</w:style>
And assign the new style to the second paragraph…
document.xml
<w:p w:rsidR="009A7F68" w:rsidRDefault="009A7F68">
<w:pPr>
<w:pStyle w:val="MyCustomStyle2"/>
</w:pPr>
<w:r>
<w:t>Paragraph 2</w:t>
</w:r>
</w:p>
Update the package contents again and let's take a look at the result.
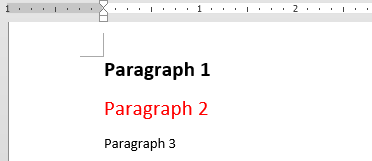
Figure 4: MyCustomStyle2 applied to the second paragraph
As you can see the text in the second paragraph is still 16pt in size which was inherited from MyCustomStyle1, is no longer bold, and is now red.
Overwriting Everything
Regardless of what is inherited from previous styles in the tree, it is possible to simply overwrite everything. There is no real practical use for this. Creating a new style that doesn't inherit from another style is probably a better choice and will give the same results, but we are doing this for demonstration purposes. Here is a third style that inherits from the second style that overwrites each property set previously.
styles.xml
<w:style w:type="paragraph" w:styleId="MyCustomStyle3">
<w:name w:val="My Custom Style 3"/>
<w:basedOn w:val="MyCustomStyle2"/>
<w:rPr>
<w:sz w:val="64"/>
<w:b w:val="true"/>
<w:color w:val="0000FF"/>
</w:rPr>
</w:style>
And apply it to the third paragraph…
document.xml
<w:p w:rsidR="009A7F68" w:rsidRDefault="009A7F68">
<w:pPr>
<w:pStyle w:val="MyCustomStyle3"/>
</w:pPr>
<w:r>
<w:t>Paragraph 3</w:t>
</w:r>
<w:bookmarkStart w:id="0" w:name="_GoBack"/>
<w:bookmarkEnd w:id="0"/>
</w:p>
And take a look at the result.
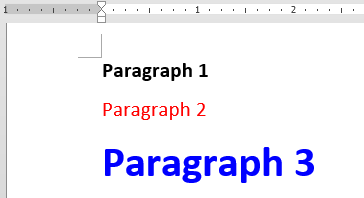
Figure 5: MyCustomStyle3 applied to the third paragraph.
As you can see the font size is now set to 32pt, bold has been turned on again, and the text is blue.
Summary
Thank you for taking the time to read through this article. This was a simple introduction to how Style Inheritance works in Open XML. I hope that this was useful for you and answered any questions that you may have had on the subject. In future articles we will dig deeper into styles and explore other topics such as the Style Hierarchy, Linked Styles, and more.
I encourage you to send you feedback or questions regarding this article, or any other Open XML related topics to Microsoft Interoperability Support at dochelp@microsoft.com or posted on the Office XML, ODF, and Binary File Formats forum on MSDN.