Improve User Experience in Enterprise Search Step By Step - Part I
Here comes the first part of my "improve user experience" series. In this part I'll cover XSLT tricks for Core result webpart in SharePoint family(WSS, MOSS, MSS, MSSE). If you are a XSLT guru, just skip this article, I'm sure many ppl can do such things better than me. But if you are not very familiar with it, follow me and you will have a quick start.
When you search for something on the Internet, most of the time you only want a simple description in search results. But when you search for something in intranet, you may want to have it customized against different content source. For example, some departments heavily used custom metadata to tag their documents, these metadata should be displayed as a part of search result, what should you do? You don't like the default appearance of SharePoint search result, how can you change it?
The answer is XSLT in core search result webpart. Just like its name, XSLT do a transform job for XML. Using XSLT, you can pick out different part of XML and combine it to another appearance. Although you can deal with XSLT with any text editor, or even the dialogue inside webpart settings, I suggest that you should use an editor which can highlight the syntax and check if the file is well formatted. Visual Studio is a good editor, but if you don't want the huge monster, you may want to try emeditor(www.emeditor.com), and install xslt syntax file. The free version is enough, and it's pretty fast compared to other editors.
Scenario 1. Change hit highlight appearance in search result by XSL

This is the default appearance of search result. Because "SharePoint" is the keyword, it is highlighted by BOLD font. But maybe you want change the style, let it be red, blue, or even backcolor blue with forecolor white! It's easy to do such customization, but you need to know where it is...
First, open the settings panel of search core result webpart. click XSL editor button, and you will see this dialogue.
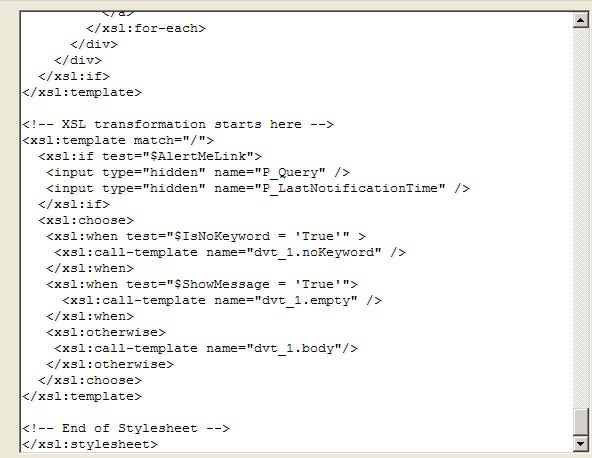
Copy the content of XSL to your favorite editor. Do a search for <xsl:template match="c0">, you will find it at about line 199. This part of XSL looks like this:
<xsl:template match="c0">
<b><xsl:value-of select="."/></b>
</xsl:template>
<b></b> means this part of string should be bold. So we want it to be italic. Add a <i></i> to XSL. Now it changes to:
<xsl:template match="c0">
<b><i><xsl:value-of select="."/></i></b>
</xsl:template>
Save it back to the webpart, apply the settings, you will see the result:

Piece of cake. Yeah, this is easy, but what means "c0"? And what're the other parameters, "c1","c2"...?
Do a search for "SharePoint resources", and you will find although "SharePoint" is italic, "resources" is not.

That's why there're many c0,c1 c2...Every parameter represents a word. If you change c1, this will affect the second word. If you are searching for languages like Chinese, Korean and Japanese, which do not use space to separate words, the sentence will be broken into several parts by a word breaker. And in this case, c0 represents the first part, c1 represents the second part. So we can modify them to show different results. You can use <u></u> for underline style too.
Well, it's boring we only have black and white here. So now we want to change it to other color.
<xsl:template match="c0">
<b style="background-color:#ffff00;color:#ff0033"><i><xsl:value-of select="."/></i></b>
</xsl:template>
Color:#ff0033 means the font color should be red. background-color:#ffff00 means the background of this part of sentence should be yellow. So it will show the following style.
