Outlining in OneNote
One of the greatest things about OneNote is its outlining capabilities. It's perhaps the most underrated feature as well as the one we most often take for granted. People often use outlining without even knowing they're using it.
What is outlining you ask? Well, Webster defines it as "a condensed treatment of a particular subject <an outline of world history> " or "a summary of a written work: synopsis: a preliminary account of a project. "
In OneNote each note you take is an element of an outline. It might be a paragraph of text, or just a single list item. Each outline appears in a container, surrounded by a thin line and a grab-handle along the top edge.
| If you need to move the outline, just grab it by its grab handle. If you need to be precise in your movements you can hold down the <Alt> key while dragging it. Or just right-click the outline and choose Move. Then press <Ctrl + arrow keys> to move the outline with very fine movements. | 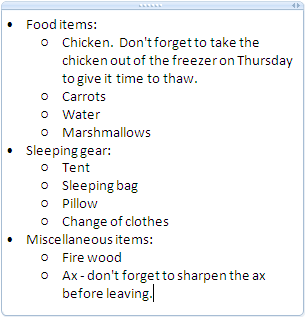 |
To resize the outline just click the resize handle  of the top border and begin dragging. Or you can click anywhere along the right border of the outline.
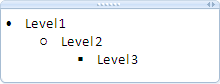
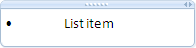
If you're making a list of items you plan to take with you on an upcoming camping trip. You might begin with something looking like this:
| You can also hide levels of your outlines like this. Just double-click the grab-box to hide all element levels beneath the current one. Double-click the grab-box again to show the levels. | 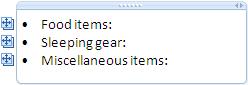 |
Each outline element has a small grab box on its outside edge. It's appearance conveys different meanings. For example, it might look like this,  which means you can grab it and drag it around to rearrange the order or level, or even drag it outside of the outline. It only appears when you mouse over the element. Or it might look like this,
  which means it's currently a selected element. It might also look like this,
  which means it's in a collapsed state.
| When you click on the top border of an outline, it selects the entire outline. However, clicking on the grab box of an element will select the current element and all of its children. If you press <Ctrl + A> it will select an entire element, minus its children. Pressing <Ctrl + A> again will select all children, if they exist, finally, press <Ctrl + A> again to select all content on the page. | 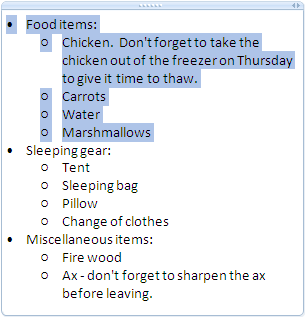 |
You can also drag-to-select, similar to selection in other Windows applications.
| You can also draw a selection rectangle around the item(s) you want to select. Just begin by clicking outside of the outline and then dragging the mouse inside the outline to touch only the item(s) you want selected. Finally, you could use the Lasso Selection tool to draw a freeform area around the item(s) you want selected. It's found on the Writing Tools toolbar. This is generally most useful when using a stylus on a Tablet PC. | 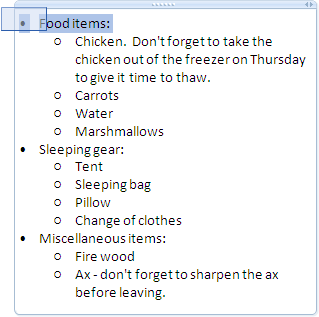 |
You can also right-click the grab box of a given element and choose Select All at Same Level. This will select all children at the given level.
Each outline is self-contained. This means that all formatting changes are contained only within itself. For example, you might decide to change the text style to a different font. Then when you click elsewhere on OneNote's page surface to begin a new outline, the font you selected previously won't be in effect.
This also holds true for bullets and numbering styles.
| When multiple outlines exist on a page, they can sometimes get in the way of each other. Generally this does not cause too much of a problem because the outline containers disappear when your mouse is not over them. However, sometimes it might be necessary to overlay bring an outline to the foreground. | 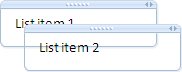 |
You can do this by right-clicking on the outline's grab-handle. Then you can select Order from the menu and choose Bring to Front, Send to Back, Bring Foreword or Send Backward.
Tips:
- You can set the alignment of an element by pressing <Ctrl + E> for Center, <Ctrl + R> for Right and <Ctrl + L> or for Left.
- To discontinue showing the outline containers on the page, click Tools -> Options -> Display -> remove the checkmark from Show note containers on pages.
- To automatically begin a bulleted list type an asterisk, * , followed by a space or a tab.
- You can also type any number, followed by one of these character: " ) ", " > ", " - " (dash) or " . " (period) and a space or tab.
- Or you also can type any letter, followed by a character to begin a list.
- To begin your list with roman numerals, type "i" or "I" followed by the character you wish to follow.
- When you press <Enter>, OneNote automatically continues the bulleted or numbered list
- To discontinue the list on the next element, press <Shift + Enter>.
- If you wish to disable auto bullets & numbering permanently, click Tools -> Options -> Editing and remove the checkmark from Apply numbering/bullets to lists automatically.
- Press <Tab> to decrease the list level.
- Press <Shift + Tab> to increase the list level.
- To quickly switch from a bulleted list to a numbered list, press <Ctrl + / >.
- Or press <Ctrl + . (period)> to switch from a bulleted to a numbered list.
- These shortcut keys can also be used to turn bullets and numbering on or off.
- Double-click the element's grab box to collapse it.
- Double-click again to expand it.
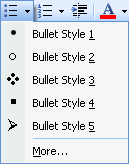
- You can change the style of your bullets & numbering.
|
 |
|
 |
- You can customize your bullet/numbering properties by clicking on the More menu item beneath either of the above menus. Or you can double-click on the bullet/number.
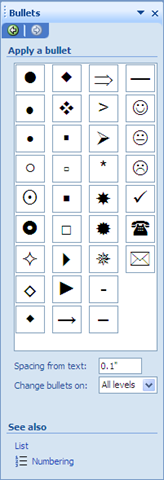
| You can select from various bullets in the Bullets task pane.
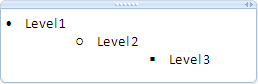
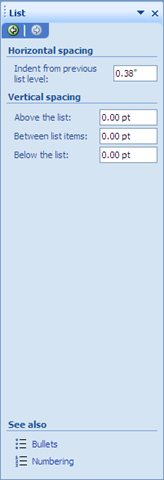
You can adjust the spacing between the text and the bullet. The default is 0.1", but can be set to a maximum of 10".
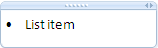
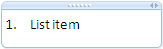
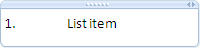
Here's a sample of a numbered outline at the default of .1".
|
 |
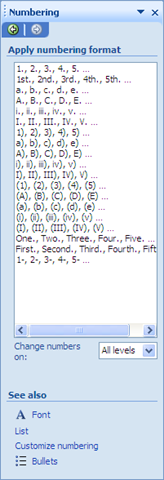
| You can select from various numbering formats in the Numbering task pane.
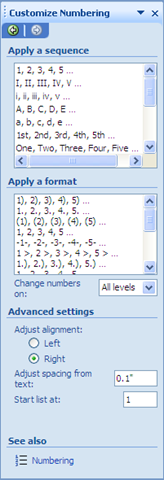
You can customize the numbering sequences and format. Just click the Customize numbering link at the bottom of the task pane.
You can also adjust the alignment, spacing and starting number.
Here's a sample number at the default of .1"
|
 |
 |
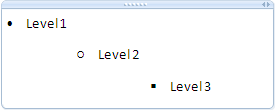
- This one's been changed to .5".
|
|