Getting up and running with SQL Server Denali for Business Intelligence (Crescent and PowerPivot in CTP3)
In this post, I’ll go over how you can quickly (and easily) setup SQL Server Denali to work with SharePoint, and get going creating some amazing Business Intelligence solutions.
Here’s the checklist of what you’ll need:
A machine (or VM) that meets the system requirements. I have a VM setup with at least 8GB of RAM (16+GB ideal), 2+ Processors. Follow the system requirements for both SQL Server Denali and SharePoint Server 2010.
Downloaded SharePoint 2010 SP1
Hopefully by now you have had a chance to download the latest CTP of SQL Server Project Denali.
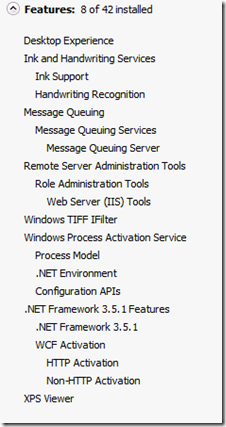
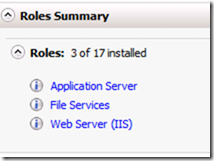
My assumption here is you are putting this together on a single machine and its all a clean install (nothing but Windows Server 2008R2 SP1 + all the latest updates since then, with Web Server/Application/File Server roles) and is part of a domain (needed for SharePoint). It’s okay if this machine is the domain controller. I also have the following features installed on my image. Check with the install guide for SharePoint and SQL Server Denali to ensure you have the right / minimal requirements met).
|
Roles |
 |
 |
Let’s get started by installing SharePoint Server 2010. You’ll need an Enterprise key for SharePoint Server 2010 to have PowerPivot and Crescent install and configure. Kick start the process by installing the pre-requisite software. Once done, I tend to remove the SSRS 2008R2 plugin that SharePoint installs (go to Control Panel –> Programs and Features and remove SSRS 2008R2 Plugin).
Install SharePoint Server 2010, by selecting a Server Farm install, and then selecting Complete – Install all components. After the install, uncheck the configuration option and then click Close. You’ll now need to install SharePoint 2010 SP1.
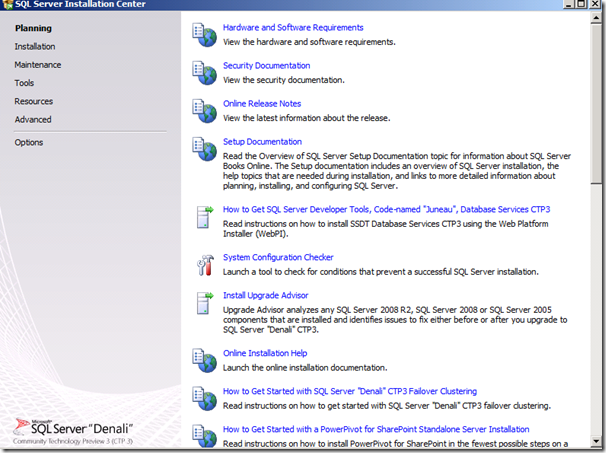
Once SharePoint is installed, let’s install SQL Server Denali CTP. Double-click the install.exe and it will unpack onto your local drive. I had to go into the Temp directory to also kick start the install wizard (SETUP.EXE) so watch for the path it installs into (mine was something like c:\users\<username>\appdata\local\temp\1\<longkeyhere>\SQLFULL_X64_ENU). You should now be looking at the SQL Server Installation Center
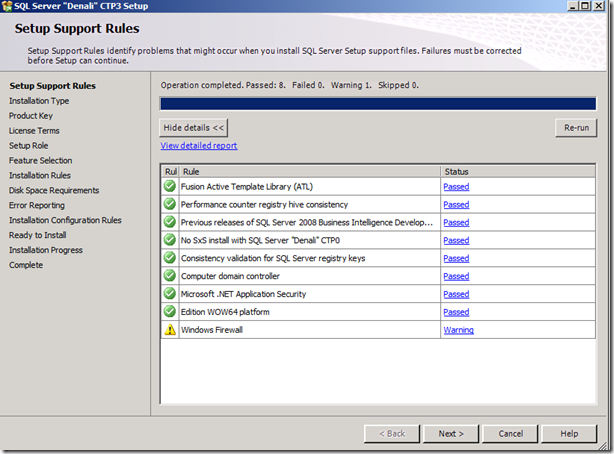
Select Installation on the left, and then NEW SQL Server stand-alone installation… option (first one). Some system checks will take place and then the necessary setup files will be installed. As long as the major of the setup support roles pass, you can move forward.
Select Perform a new installation of SQL Server “Denali” CTP3 and click next. Leave the default choices on the next screen as is, and select next. Accept the license terms and click Next. Now we are going to install the SharePoint integrated components first. Select SQL Server PowerPivot for SharePoint (and ensure the checkbox is checked for adding the RDBMS engine), and click next. All the components will need to be checked (which are by default) and you can click next. You should have another series of checks pass, and then add information for the database engine, add account names for services and administration, etc… I took the default, and added the local user account and clicked next until the install screen. Click next to start the install. Once installed on the summary screen, select the Please launch PowerPivot Configuration tool option. Don’t worry if you have already closed the window. You can get to it from the Start menu –> All Program –> MSS Denali CTP3 Folder –> Configuration Tools and click PowerPivot Configuration Tool. Click the configure or Repair PowerPivot for SharePoint and fill in the fields. Once done, click validate and then run. You’ll see it start the config process and update the steps on the left pane.
Once this is installed and PowerPivot is configured you’ll need to do another install of SQL Server, but this time, choose Perform a new installation of SQL Server Denali CTP3
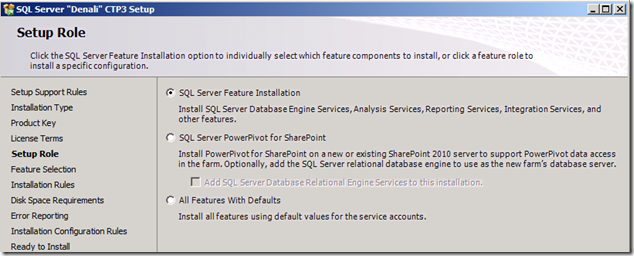
and select SQL Server Feature Installation from the Setup Role screen
I checked everything other than Reporting Services- Native, Distributed Replay Controller and Distributed Replay Client. This gives me a new instance of SQL Server RDBMS for my data files, SSAS and SSRS interop with SharePoint. Also installed is the new Data Quality Services, and updated Master Data Services capabilities and of course SSIS.
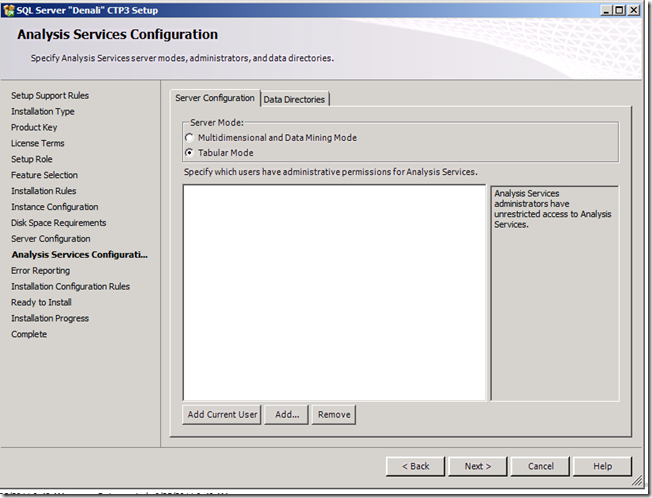
You’ll need to answer the same RDBMS prompts again as well as name your instance (I took the default). For the Analysis Services Configuration screen you’ll notice something new this time. You have the option of installing an instance of SSAS in either Multidimensional or Tabular mode. You can have both installed on the same machine but will need to run the setup again to do so. For this time, choose Tabular which is the new in-memory column store engine, and add the current user.
Click all the way to the install. If you want to install a Multidimensional instance, run the SQL Server Denali setup again, and select new instance/features (as above), select Analysis Services again, and when you reach the Analysis Services Configuration page, select Multidimensional.
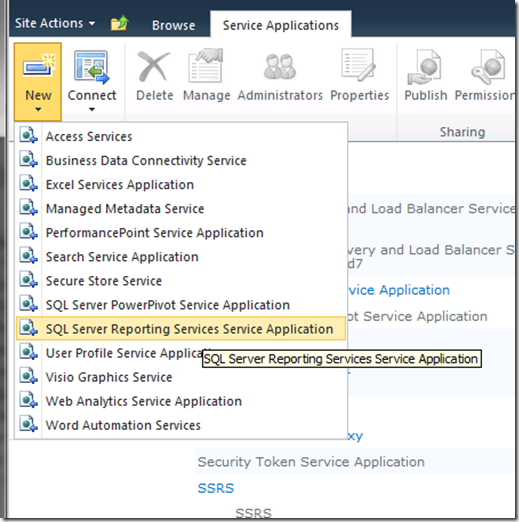
Now that you have SharePoint and SQL Server Denali CTP installed and configured we need to do a couple of more things and you are ready to try out the new features, namely Crescent and Self-Service Alerting, as well as use your PowerPivot workbooks to create your first Crescent reports. Go to the SharePoint 2010 Central Administration site. Select Manage Service Applications. Select New (top left) and then SQL Server Reporting Services Service Application.
You’ll now need to fill this in with the credentials. If you followed the steps above to a tee, for the database server enter <machinename>\powerpivot for the relational instance to use. Make sure you check the default web application association (bottom of form). Once done you are pretty much set.
Go here and download some samples and start using Crescent, Self-Service Alerting, and of course PowerPivot –>https://social.technet.microsoft.com/wiki/contents/articles/sql-server-samples-readme.aspx#Readme_for_Crescent_Samples_Denali_CTP3
I’ll do a video of this as well but this should get you started and using the Denali CTP bits and Project Crescent. If you have any questions let me know. I’ll do another post on how to get the samples going, using your own PowerPivot workbooks, and a few other tidbits that are in Denali.
-Pej.
