Windows 8: Connected Accounts
My Top-10: Connected Accounts
Overview
Microsoft® Windows® 8 introduces a new concept called a Connected Account. A Connected Account allows you to sign in to Windows with your Microsoft Account (formerly known as Windows Live ID) and do things like roam your settings between Windows 8 PCs and seamlessly sign in to Windows Live services and apps.
Creating a Connected Account
The default method for creating an account is to create a Connected Account. This is the best experience for the user and enables many of the new features in Windows 8. In this discussion we will talk about four different methods for creating a Connected Account.
- Creating a new account during Windows Welcome
- Creating a new account in the Users Control Panel
- Connecting a local account
- Connecting a domain account
Creating a new account during Windows Welcome
During the Windows Welcome phase of Windows Setup, you can customize the PC by defining things like a computer name, preferred wireless network, and how they would like to sign in. In previous versions of Windows, home users were just asked for a user name and password and an account was created locally with that information. Now the default option is to create a Connected Account.
After the Settings page (or pages if you chose the Customize option) of Windows Welcome, you are asked to enter an email address to use for signing into Windows. The email address provided here should be a Microsoft Account, although if you don't have a Microsoft Account you can create one from this interface. If you want to continue using the old method for signing into Windows, you can create a local account by clicking the Sign in without a Microsoft Account link.
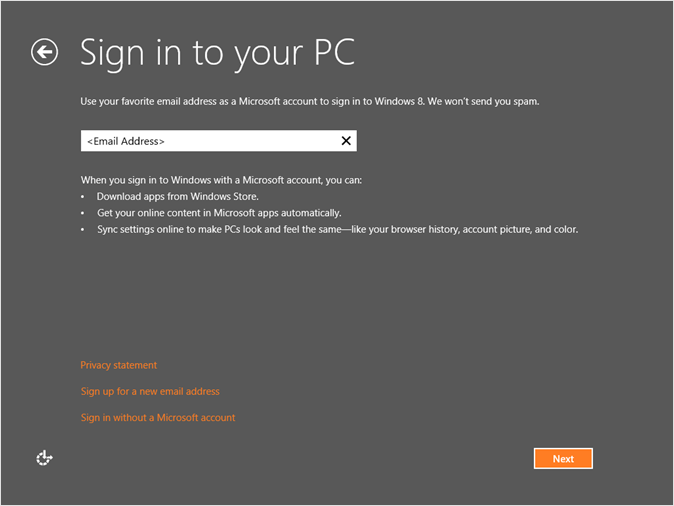
Figure 1: Sign-in screen
After entering your Microsoft Account and clicking Next, enter the password for your Microsoft Account. The email address field will be automatically populated with the Microsoft Account entered on the previous step. After entering the password and clicking Next, you will be signed into Windows 8 using your Connected account.
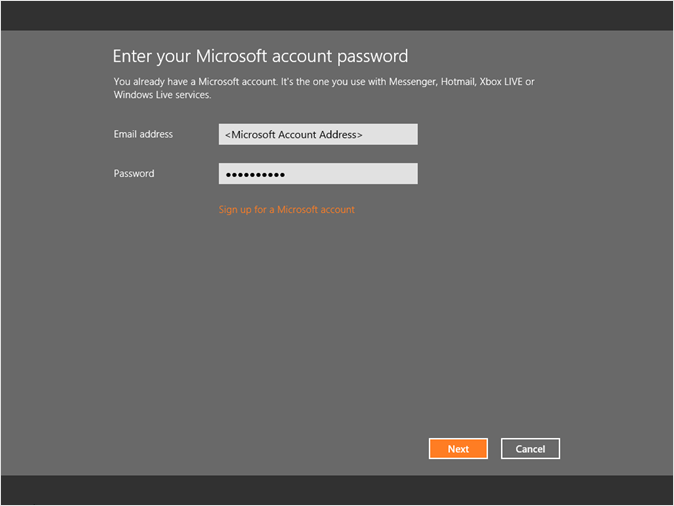
Figure 2: Password screen
After entering your password on the previous screen, you will be prompted to enter security verification information to help ensure that in the event you forget your password, you have a method for recovering it. This prompt happens on the Enter security verification info screen, which is shown in the screenshot below. After clicking Next, you will be signed in with your Connected Account.
Note: The specific items that are requested will vary depending on your account. Some accounts will ask for a phone number, while others may also ask for a secret question. Additionally, the Microsoft Account team has the ability to change what information is asked for, so you may see a difference in these prompts from time to time after Windows 8 is released to the public.
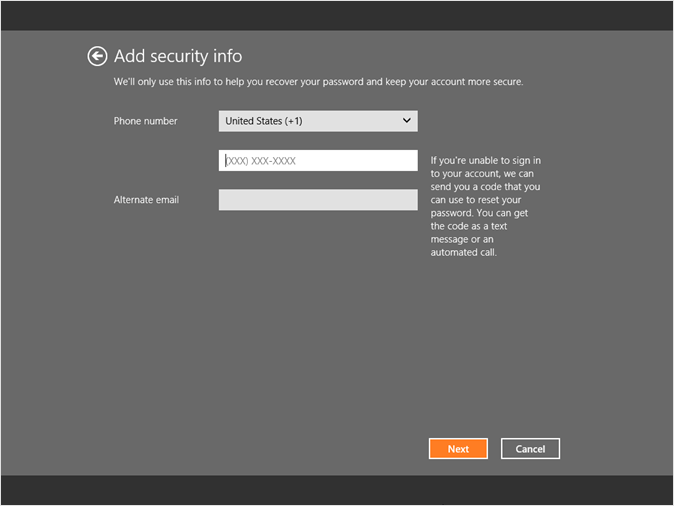
Figure 3: Keep Your Account Safer screen
Network Connectivity
If the PC cannot connect to the Internet during Windows Welcome, you will not be given the option to create a Connected Account. Instead, the only option you will see is to sign in using a local account. Once Internet access is restored, you can use the Users section of PC Settings to convert that local account to a Connected Account.
Email address is not a Microsoft Account
If the email address that you enter is not a Microsoft Account, Windows Welcome will walk you through the process of turning your existing email address into a Microsoft Account. This does not change your email account at all, and does nothing to the configuration of the account on the email server. The Microsoft Account is effectively just using that email address as a name to identify you, as well as a contact address if needed.
Immediately following the Sign in to your PC screen, if Windows Welcome determines that the email address that was entered is not already a Microsoft Account, it will take you through a series of steps that are designed to gather the necessary information required to create the Microsoft Account. The Microsoft Account that is created is just like a Microsoft Account created at a site like https://accounts.live.com.
First, you will be taken to a screen where you can make your existing email address a Microsoft Account. You must provide all of the information shown in the screenshot below.
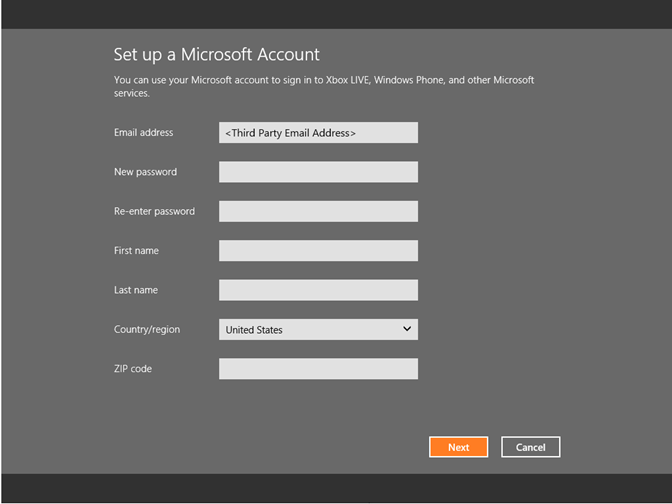
Figure 4: Account setup screen
After clicking Next, you must then provide two forms of security verification. Three are asked for, but only two are required if, for some reason, you do not wish to use one particular form of verification. This security verification info will be used in the event that you forget your password and need to have it reset.
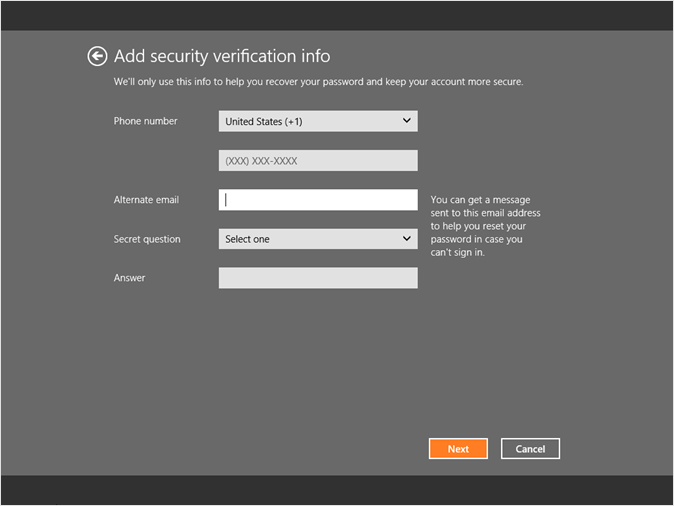
Figure 5: Security Verification screen
After clicking Next, the last bit of information that is required to create the account is requested.
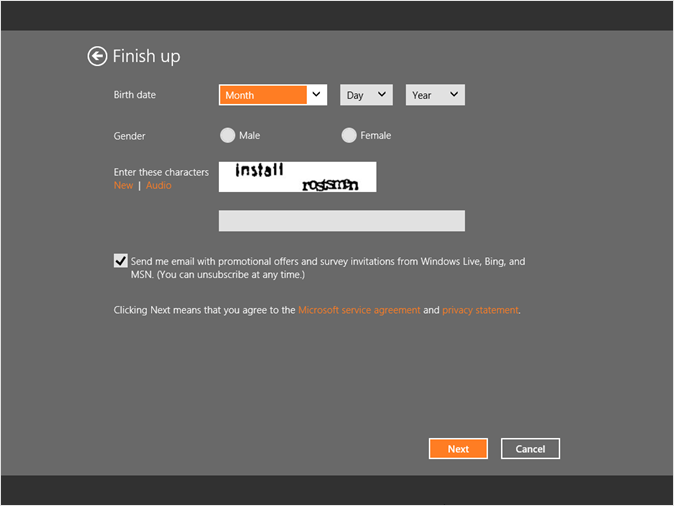
Figure 6: Finish screen
At this point, the Microsoft Account has been created and is used to create the Connected Account. After clicking Next above, your account is created on the PC and you are signed in.

Figure 7: Creating Account screen
Creating a new account in the Users Control Panel
You can create additional Connected User accounts in the Users section of PC Settings. Use the following steps to accomplish this.
- From the Settings Charm open More PC Settings > Users
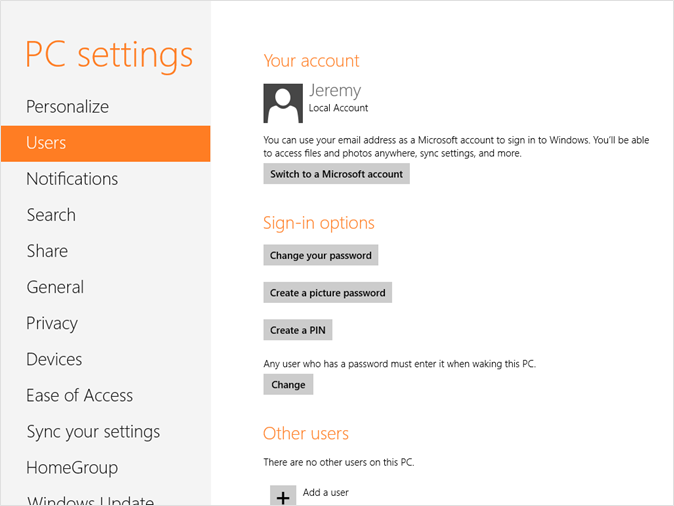
Figure 8: Users screen
- Click the plus sign next to Add a user in the Other users section.
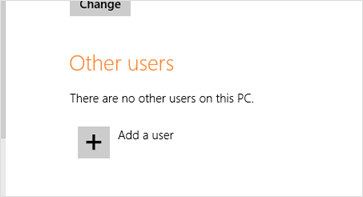
Figure 9: Add a user
- In the wizard that appears, enter the Microsoft Account for the user that you wish to add.
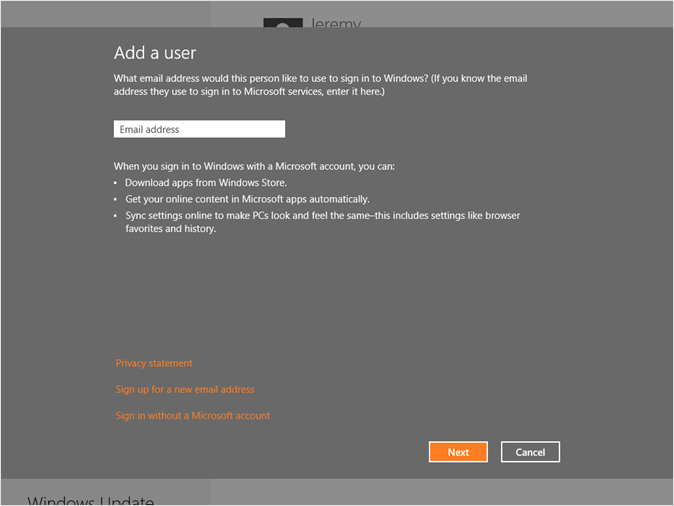
Figure 10: Add User screen
- Click Next, and then Click Finish on the confirmation screen.
You are not prompted to enter any additional information at this step. We do not require you to know or obtain the password for the other user's Microsoft Account to add their account to the PC. You only need to know their Microsoft Account.
Note: You must be an administrator on the PC to create additional accounts.
After adding the Connected Account for the other user, a user tile for that user will appear on the sign in screen. Until the user signs in for the first time, the user tile will have a generic user tile icon and show the email address for the Microsoft Account as the name of the account. After that user signs in for the first time, Windows will retrieve their user tile and display name from the Microsoft Account servers, and those will be displayed on the Start screen and the sign in screen going forward.
Key Points
- Although you are not required to be connected to the Internet at all times to use a Connected Account, the first time you sign in to a Connected Account you must be online.
- Any Connected Accounts that are created using this method are created as standard users. You can convert these accounts from standard users to administrative users using the desktop Control Panel.
- Open the desktop Control Panel.
- Select Change account type under User Accounts and Family Safety.
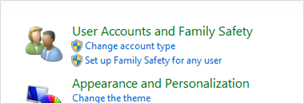
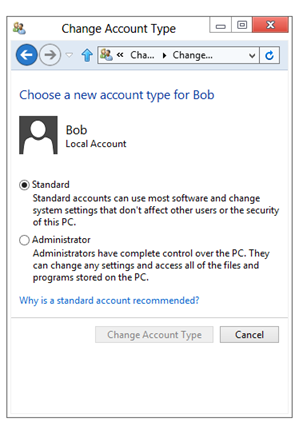
Figure 11: Change account type
- Select the account you wish to change.
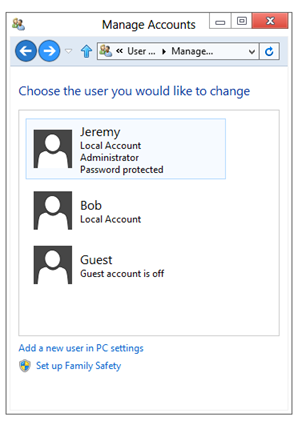
Figure 12: Select user to change
- Select change the account type.
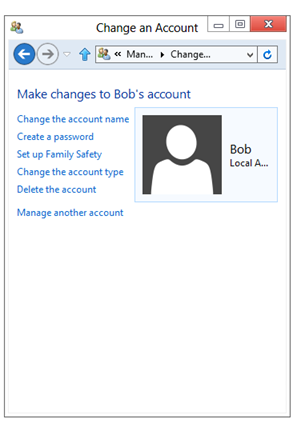
Figure 13: Change user account
- Select Administrator and click Change Account Type.
- You can create a Local account from the wizard described above as well. To do this, follow the steps below:
- From the Settings Charm open More PC Settings > Users.
- Click the plus sign next to Add a user in the Other users section.
- Click the link titled Sign in without a Microsoft Account.

Figure 14: Sign in
- Click the Local account button.
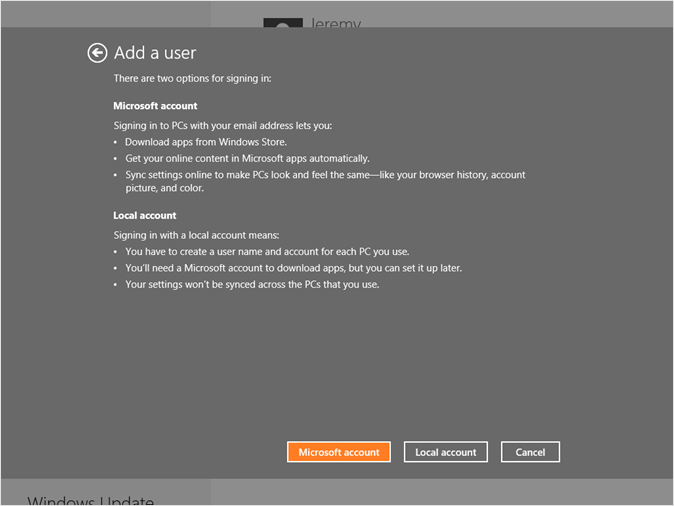
Figure 15: Local account
- Enter your name, password, and password hint where prompted and click Next.
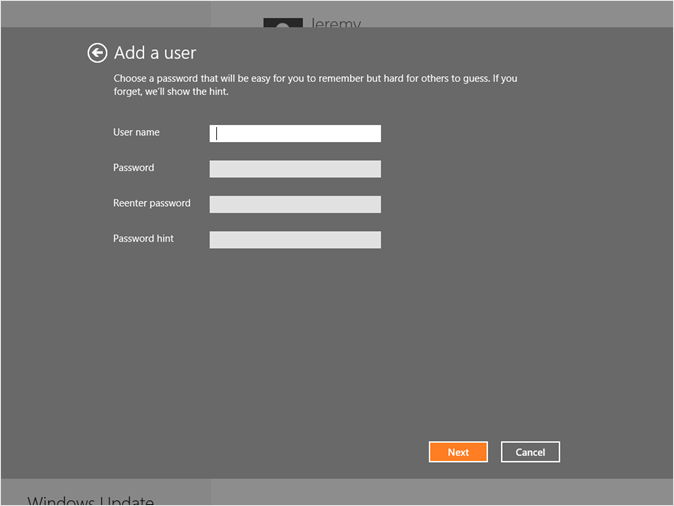
Figure 16: Add a user
- Click Finish.
Note: Similar to creating a Connected Account, a Local Account created in this way is created as a standard user.
Connecting a local account
If you are currently using a local account, you can convert it to a Connected Account. To do this, follow the steps below:
- From the Settings Charm open Change PC Settings > Users.
- Click the Switch to a Microsoft Account button in the Your account section.
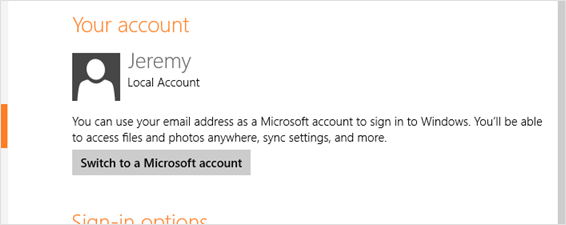
Figure 17: Switch to a Microsoft account
- The Sign in with a Microsoft Account wizard appears. The first thing you are prompted to do is enter your password. This will be the password for your local account. Enter that password and click Next.
- Next, enter the email address and password for your Microsoft Account.
Note: If the email address that you enter is not a Microsoft Account, you will see the same message that we described above when we encountered the same scenario in Windows Welcome.
- Click Finish at the confirmation screen.
- You will need to sign out and then sign in using the new Connected Account to make the changes take effect.
Note: You can also convert a Connected Account to a Local account. You can do this in the User Accounts section of the desktop Control Panel. The option that accomplishes this is Change to a local account.
Note: You cannot convert a Local Account to a Connected Account using a Microsoft Account that is already being used for a Connected Account on the same PC. This will fail with an error "0xd0000063: We're sorry, but something went wrong. This user wasn't added to this PC." In order to convert the Local Account to a Connected Account in this scenario, the existing Connected Account with the Microsoft Account you want to use will first need to be deleted using Manage Users in the Desktop Control Panel.
Connecting a domain account
Windows 8 also provides the ability to connect a domain account to a Microsoft account. This is a different process for domain accounts however, and we don't actually change the way that you sign in. You are associating your domain account with your Microsoft Account, but it is only used for authentication to Microsoft services and connected features such as the ability to sync your settings.
To connect your domain account to your Microsoft Account, you can perform the following steps:
- From the Settings Charm open Change PC Settings > Users.
- Click the Connect button below your domain account.
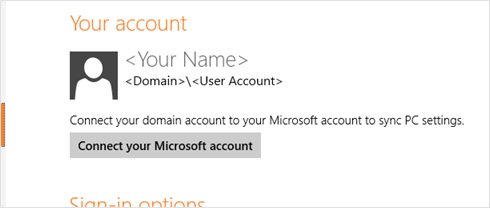
Figure 18: Connect your Microsoft account
- The Connect to a Microsoft Account wizard appears as a green strip across the center of the screen. You are asked to choose which shared settings you want to sync between the PCs you use. The options you have are shown below. They are all checked by default.
- Personalization
- App Settings
- Desktop theme
- Web browser settings
- Accessibility
- Windows settings
- Language settings
- Credentials
- After clicking Next on the previous screen, you are asked to enter the email address and password for your Microsoft Account.
Note: If the email address that you enter is not a Microsoft Account, you will see the same message that we described above when we encountered the same scenario in Windows Welcome.
- Click Finish on the confirmation screen. The change takes effect immediately and you do not need to sign out.
Note: Administrators will have the ability to restrict or disable this functionality through Group Policy.
Potential Issues related to Connected Account creation
Windows Welcome is not showing the option to create a Connected Account.
- Connected Account settings have been disabled using unattend settings for setup.
- No network connectivity during Windows Welcome. In this case, Windows Welcome will only offer the option to create a local account.
Can't sign in using an existing Microsoft Account
- The password is invalid.
- You may have Network Connectivity issues.
Not able to sign up for a new Microsoft Account
- The account is already in use by someone else.
- Typing user@live.com or user@hotmail.com at an EASI ID sign-up page.
- Birth year is set such that you are less than 13 years old.
- You are entering a user name or password that uses characters in an invalid character set, such as Unicode.
Other known issues
- Can't switch built-in Administrator or Guest account to a Connected account. (This is by design.)
Signing in with a Connected Account
The first time that you sign in with a Connected Account, you will need to be connected to the Internet so that Windows can validate your Microsoft Account and password against the Windows Live servers. After the first signin, the credentials that you used to validate your Microsoft Account are cached locally so that any further attempts to sign in do not need to go back out to the server. You do not need to be connected to the Internet again during signin after that first time, as the credentials are cached indefinitely.
If you sign in to a Windows Live website from another PC and change your password, you will continue to be able to sign in to Windows with your old password. That will be the case as long as you don't attempt to use your new password. As soon as you use your new password while you are connected to the Internet, Windows will attempt to validate that password against the locally cached credentials and that will fail. At this point, Windows will validate the new password against the Windows Live servers, and if it succeeds, it will cache those new credentials and allow you to sign in. This process will be seamless, and you will not be notified that your credentials failed the first check as long as the subsequent checks were successful.
This process is optimized around not only being secure but also to help ensure that we have minimized as much as possible the chance that you will be locked out of their PC.
Sync PC Settings
One benefit to using a Connected Account in Windows 8 is the ability to Sync your PC settings. All of the Windows 8 PCs that you have where you are using the same Connected Account can sync many of their settings so that the experience and configuration that you have is similar regardless of which PC you are sitting in front of. Make a change to your wallpaper or create a new favorite in Internet Explorer, and those changes will roam to all of the PCs where you are signed in with that same Microsoft Account.
The Sync feature is able to sync many of your settings between PCs including the following:
- Personalization settings such as Start screen colors, background, and lock screen image
- Themes such as the desktop background and sounds
- Ease of Access settings such as Speech Recognition, Magnifier, On-screen Keyboard, and Narrator
- Language preferences such as keyboard settings, other input methods, and display language
- Web browser settings such as history, pinned sites, and favorites for both versions of the browser
- Taskbar settings such as pinned items and which side of the monitor the taskbar is attached to
- Folder and Search settings for Windows Explorer
- Mouse settings
- Your accounts picture (user tile)
- Per-app notification state
- Settings for Windows Store apps, including third-party apps
- HomeGroup password
- Saved network passwords (Credential Vault) and Wi-Fi passwords
- These passwords will only sync to PCs considered trusted by Windows Live. More information on this is provided below.
Note: The list above is not a comprehensive list.
You can configure which items will be synced between PCs in the Sync your settings section of PC Settings. Some of these settings are logically grouped together, such as personalization settings like Start screen colors, backgrounds, and the lock screen image. It is not possible to configure syncing in a more granular fashion than these logical groupings.
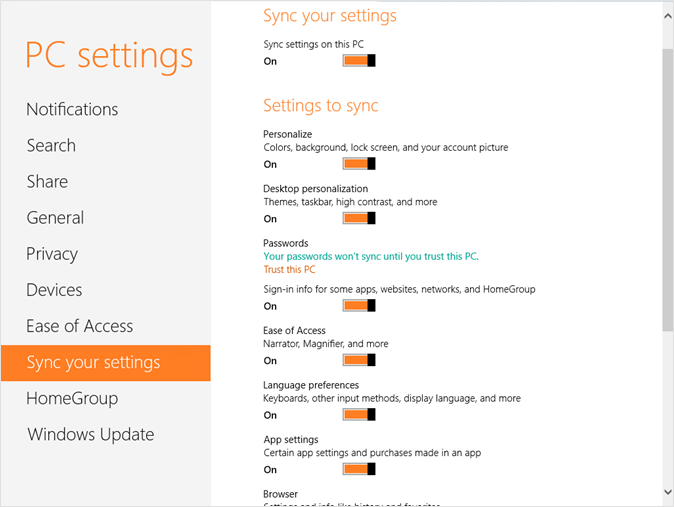
Figure 19: Sync your settings
From this section, you can do the following:
- Enable or disable settings sync for the PC
- Enable or disable specific logical groups of settings
- Enable or disable syncing on metered networks
Note: Passwords will not sync to or from a PC that is not a Trusted PC. As you can see in the screenshot above, you can trust your PC by clicking the appropriate link under Passwords.
Simplified Logon
In addition to the new Connected Accounts feature, Windows 8 introduced two new methods for signing in to Windows that make the process of entering your password much easier on a touch device.
- PIN Password – sign in to Windows using a 4 digit PIN.
- Picture Password – sign in to Windows by drawing a specific pattern on a picture that you specify.
You can enable PIN or Picture passwords from Users in PC Settings. After enabling one of these new sign-in methods, it will appear as an additional signin method on the signin screen.
Demo: Simplified Logon
Demonstrate enabling PIN Password and Picture Password on your user account, and then use each option to sign in after locking the PC.
Try This: Connected Accounts
- Try converting your Connected Account into a Local Account.
- If you have access to an email address that is not a Microsoft Account, try using that email address to convert your Local account into a connected account.
Note: You cannot use your Microsoft.com address for this.
- Partner with someone in the room. Have them add your Microsoft Account as an additional user account on their PC. Sign in with that account on their PC as well.
- Change your Lock screen background, user tile, the position of your taskbar on the desktop, and pin a website to Start.
- How long does it take for those changes to show up on the other PC?
- Enable both Picture and PIN passwords on your PC, and use them both to sign in.
For More Information
Your life, connected
https://windows.microsoft.com/en-us/windows-8/microsoft-account#1TC=t1
ONiehus, Microsoft