Windows 8: Language
My Top-12: Language
Overview
Windows® 8 includes improvements to the way users add and configure input and display languages. The main changes are:
- Central location for configuring Languages
- In Windows 7, users needed to check several locations to understand what language support was installed, and then to install needed support. While input languages were installed through the Region and Language interface in Control Panel, the installation of display languages required going through Windows Update.
- Windows 8 brings these settings together in one Language Control Panel.
- Display Languages now available on all editions
- In Windows 7, display Language Packs were not available except on Windows 7 Ultimate and Enterprise Editions. Limited local language support was available for more editions via Language Interface Packs, but this did not give users access to the full range of display languages available unless they were running on Ultimate or Enterprise.
- Windows 8 brings installable display languages to all editions. This means that you can install any optional display language, regardless of your edition.
Upgrading with Installed Language Packs
If you upgrade a Windows 7 PC that has one or more display language packs installed, those display languages will be absent from Windows 8. There is a compatibility message shown during setup to inform you of this change.
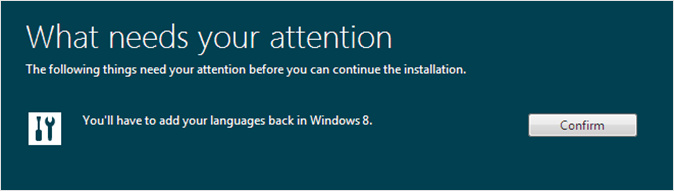
Figure 1: Upgrading with Language Packs
When you press the Confirm button, setup can continue. This kind of notification is provided to help ensure that you do not find yourself unexpectedly without the language support you expect.
Language Control Panel
The new consolidated Language configuration interface is found in the Control Panel, in the Clock, Language, and Region category. The main interface is shown below.
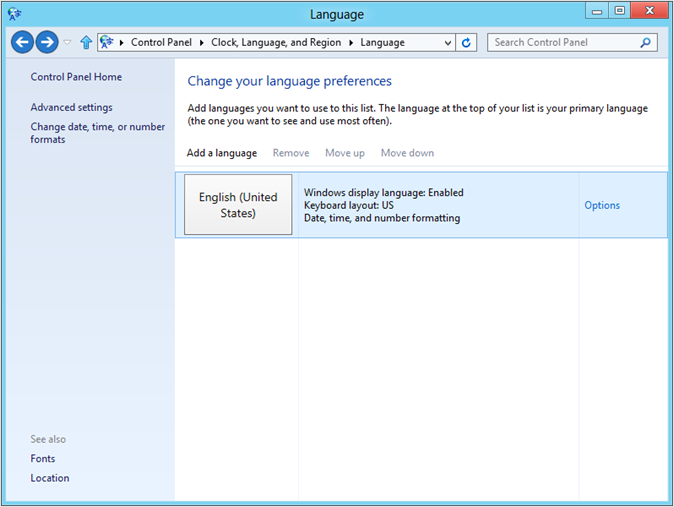
Figure 2: Language Control Panel
The language selected during setup, or selected by setup based on the previous Windows installation, will be listed in this interface, as shown above. When you add languages, the order in this interface is used to determine priority for use—move your preferred language(s) up and other languages down.
You can also access this interface using the Language icon on the taskbar, which appears when you have multiple input languages installed. This is shown below.
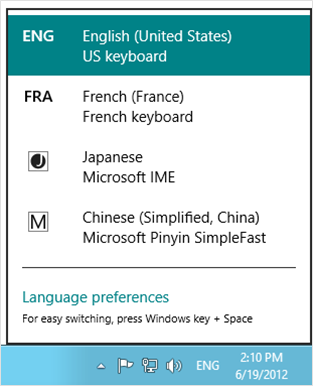
Figure 3: Language Selection
Adding Languages
When adding a language, the user does not need to specify whether they need an input or display language (or both). The user simply clicks Add a language to see a list of available languages, as shown below.
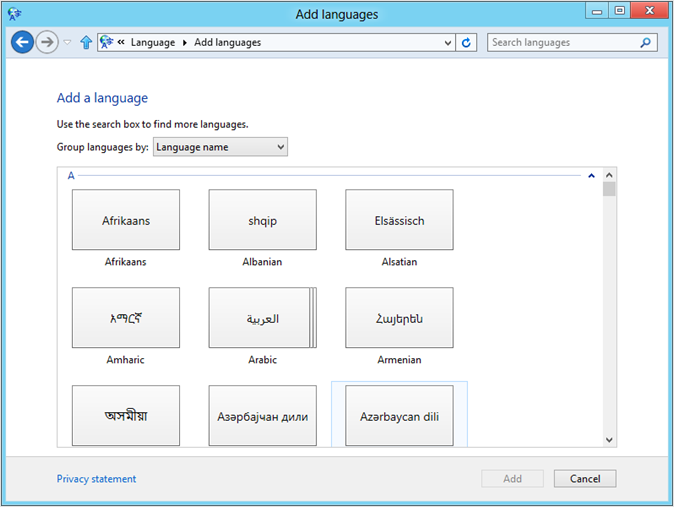
Figure 4: Add Language
If the user selects a language with multiple available regional variants, the Add button becomes Open, as shown when selecting French above.
Then the user chooses the regional variant needed, and clicks Add to complete the procedure.
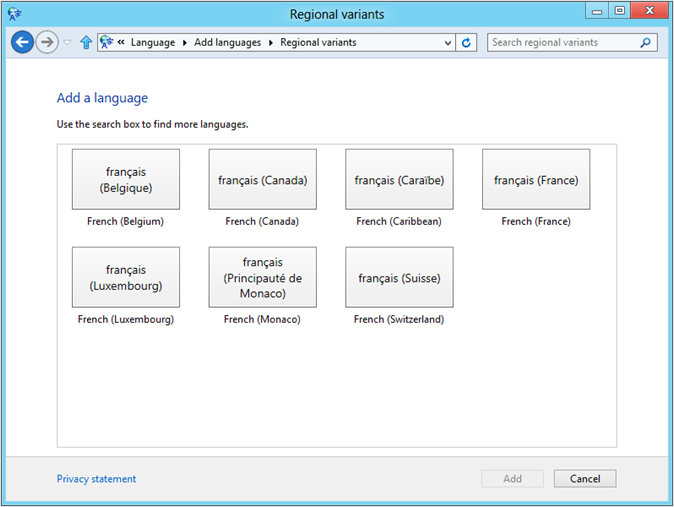
Figure 5: Add Language Regional Variant
Configuring Languages
After the language is added, the user is returned to the main Language interface where they can then view options for each language. The language options for French are shown below.
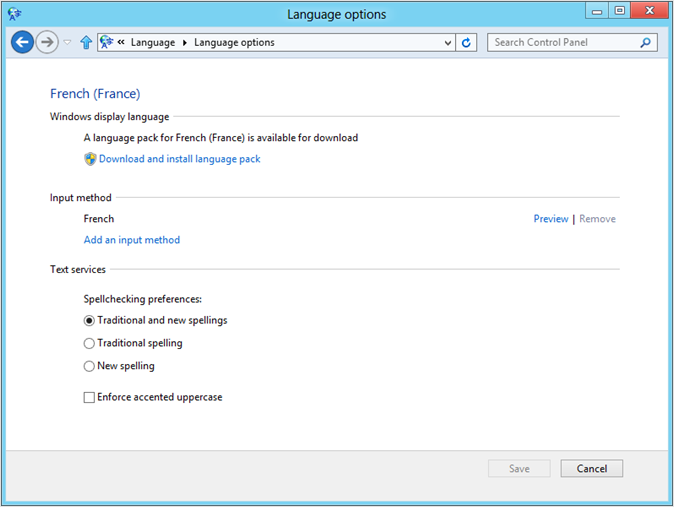
Figure 6: Language Options
Notice the language-specific text services which appear here. The options exposed will depend on the language selected.
If there is a display language available for the user's language and edition of Windows 8, it will be shown as available for installation in this interface. This is designed to make display language packs much more discoverable and easier to install in Windows 8.
Keyboard Input Methods
The Preview link provided for a Keyboard input method, as in the French example above, opens a keyboard layout preview. This is shown below.
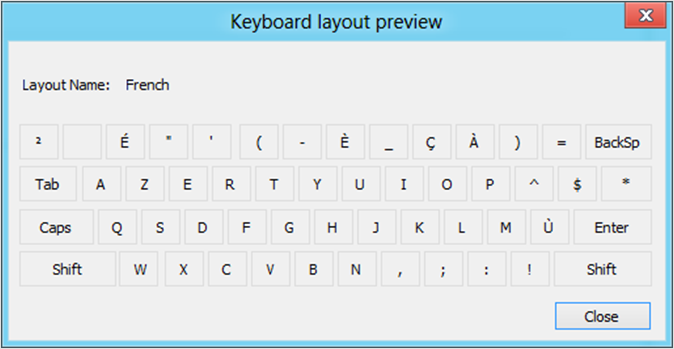
Figure 7: Keyboard Layout Preview
Input Method Editor (IME)
Languages that use an Input Method Editor (IME) will expose a different choice for the input method. IME configuration can be started by clicking the Options link when viewing the language options for the language.
Example: Japanese
The Language options for Japanese are shown below. The user can click Options to view the IME configuration settings for Japanese input.
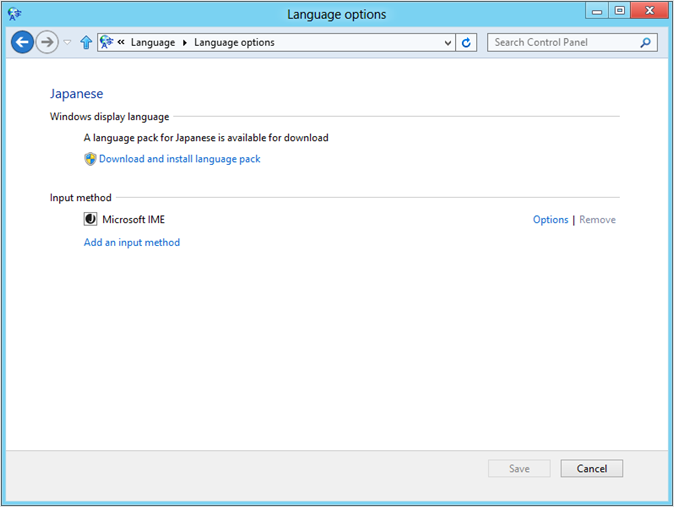
Figure 8: IME Example–Japanese
This leads to the Settings interface shown below where the user can configure predictive input and whether mis-conversion problem reports are sent automatically.
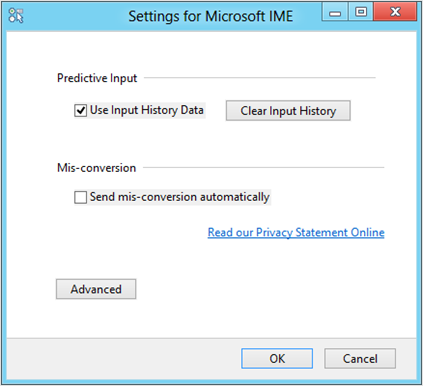
Figure 9: IME Example–Japanese options
Click the Advanced button in the Settings interface to view the full IME properties.
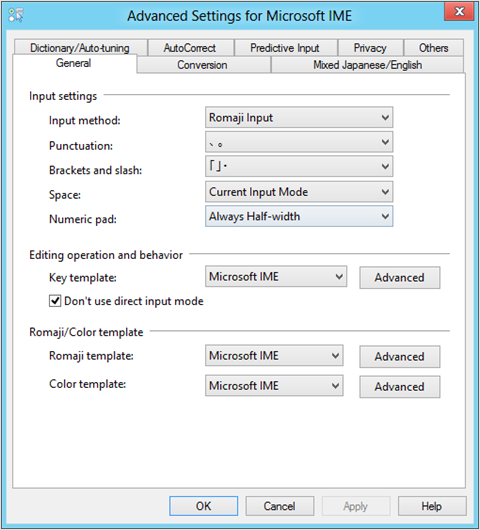
Figure 10: IME Example–Japanese Advanced Settings
This interface provides a similar set of configuration options as with previous IME properties. Additions include Predictive Input, enabling a user to type more quickly, and Privacy settings that enable you to remove user-specific information, including auto-tuning information, predictive input history, and mis-conversion error logging.
Example: Simplified Chinese
The default input method for Simplified Chinese is the Microsoft® Pinyin SimpleFast method, which was introduced with the Microsoft Pinyin Input Method 2010—included in Chinese versions of Office 2010. Note that some input methods may not work with Windows Store apps. This is denoted with the Only works on the desktop indicator, as shown for the Microsoft Pinyin NewExperience method in the previous example.
Options for the Microsoft Pinyin SimpleFast method are shown below. These options largely match what was provided by the Microsoft Pinyin Input Method 2010, with some reorganization for ease of use.
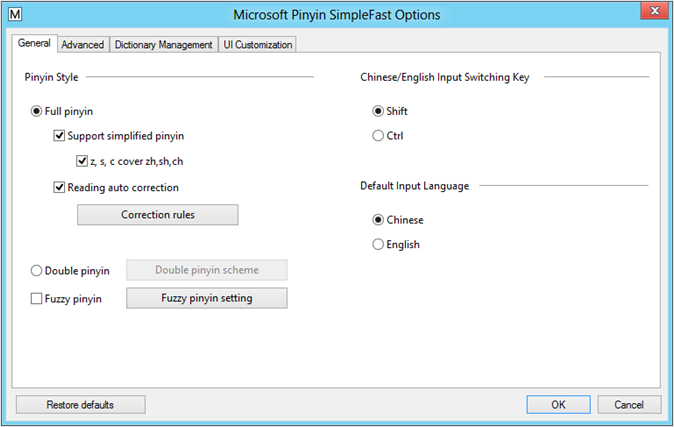
Figure 11: IME Example–Microsoft Pinyin SimpleFast
The UI Customization tab provides new options for configuring the user interface, as shown below.
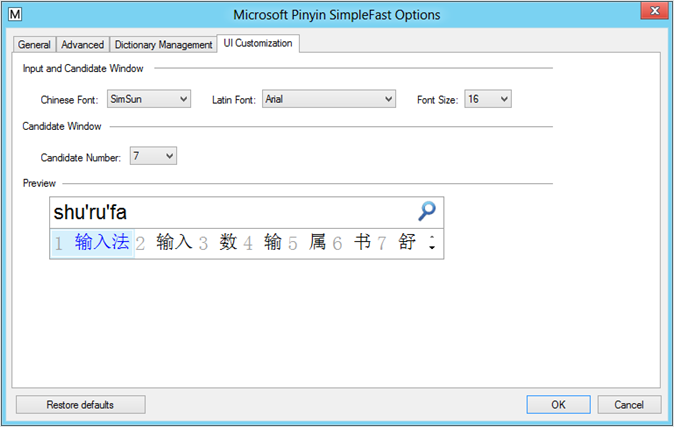
Figure 12: IME Example–Microsoft Pinyin SimpleFast UI Customization
Input Method Editor (IME) in Windows Store Apps
When Windows is configured to use an IME for input, the user will see an icon for the IME when the selection point is in a text input control. An example of this is shown in the image below.
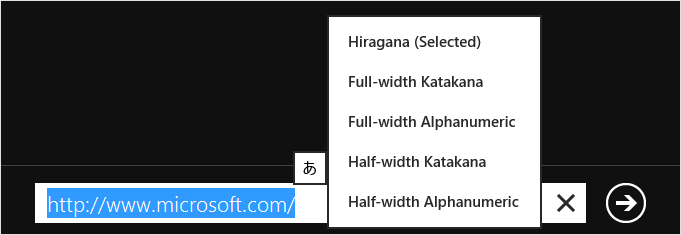
Figure 13: IME Language Interface in Windows Store App
This enables the user to interact with the IME, but it does not expose IME settings. The input language used is based on the order of languages in the Language Control Panel.
IME Compatibility Issues
Due to the user interface changes related to language settings and input language selection, third-party IME software would need to be updated for full compatibility.
While updating the IME software is recommended, IME software that is compatible with Windows 7 should work on a Windows 8 PC for Desktop apps. The Language Bar is still available, as is Taskbar-invoked language selection.
If you have a non-compatible IME selected as the current input language and then switch to a Windows Store app, the input method will shaded gray and unavailable. Changing back to the Desktop or an app running on the Desktop makes the IME available for use again.
For more information in IME changes and any updates required, please read the following article:
Third-Party Input Method Editors
https://msdn.microsoft.com/en-us/library/windows/desktop/hh848069%28v=vs.85%29.aspx
Advanced Language Settings
The Language Control Panel has an Advanced Settings link on the left side. This link opens the settings interface below. This is where you can make further changes to the way that Windows handles language.
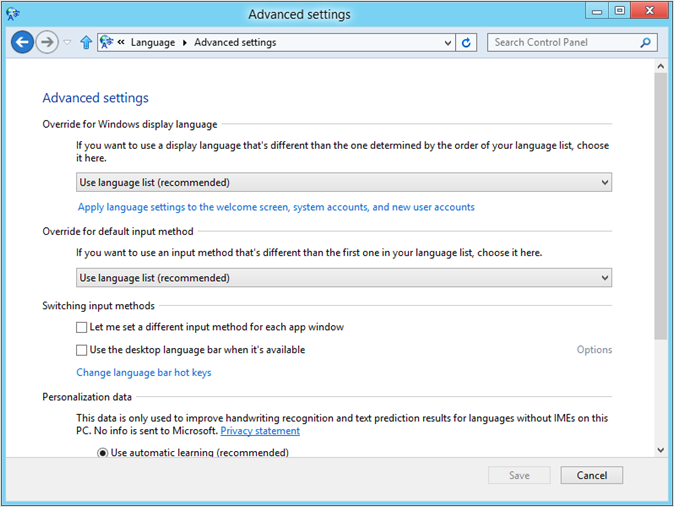
Figure 14: Advanced Language Settings
The options include:
- Override for Windows display language - This is useful if you want to use one language as your default input language, but another as the main Windows interface language. This is handy because the primary language is one factor used to select the information you see in apps and the Windows Store. So you may want to have a primary that is not your display language.
- Override for default input method - Like the above option, you can select a different default input method so that the primary language is not the default.
- Switching input methods - This enables you to configure language input settings per app, or configure the use of the language bar.
- Personalization date - This setting gives Windows permission to learn your handwriting and keyboard input patterns to help make input easier.
- Language for web content - The last setting in this interface gives you an option to prevent websites from accessing the list of installed languages. This information is available for websites to customize how information is presented. If you disable this option, the date, time, and number formatting configuration will be used instead.
Installing Display Languages
Installing display languages is more connected to the Language input settings than on previous Windows versions. When a language pack is available for a language, you will see a download link in the language properties.
Clicking the link starts the language pack download and installation process, which works the same as it did on Windows 7. This is shown below.
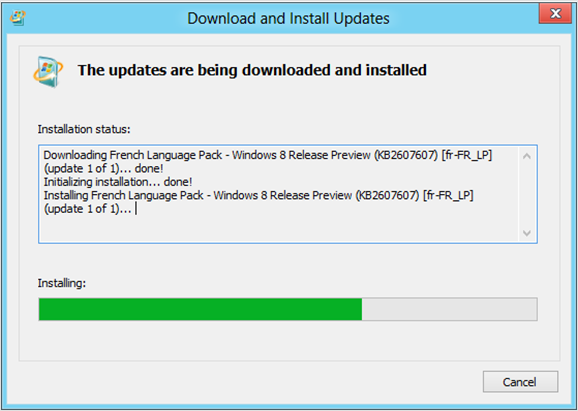
Figure 15: Install Display Language
When the installation is complete, you see the confirmation as shown below.
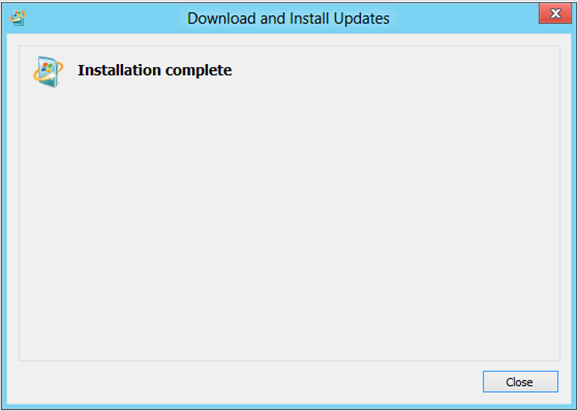
Figure 16: Install Display Language
With a display language installed, you will see a Make this the primary language link when viewing the options for the language. You can click this link to change your display language. This will also move the language to the top of the list, making it the default for input as well.
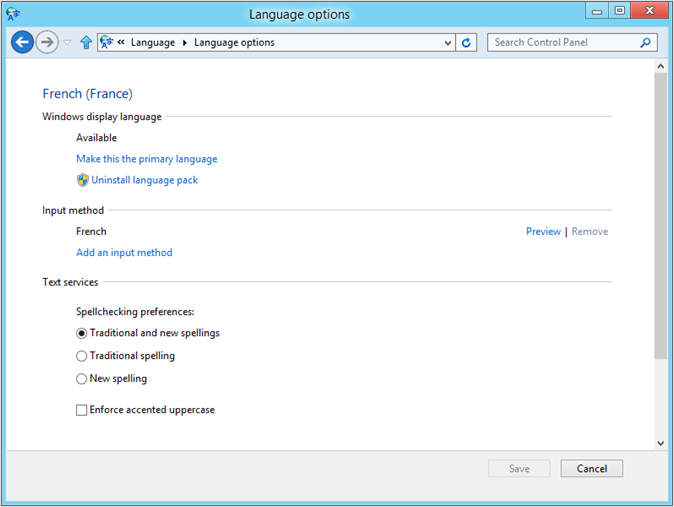
Figure 17: Change Display Language
A log off is required to change your display language.
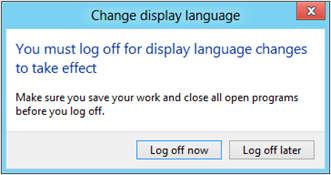
Figure 18: Change Display Language
The Language Options interface is also where you go if you want to remove a language pack. Language packs are large, and they increase the processing required when installing updates and performing other servicing activities. As a result, you should keep only your required languages installed for best performance. Note that the uninstall option is not shown for a language pack currently in use as your display language.
When you click on the Uninstall language pack link, the uninstall procedure is started. This is shown below.
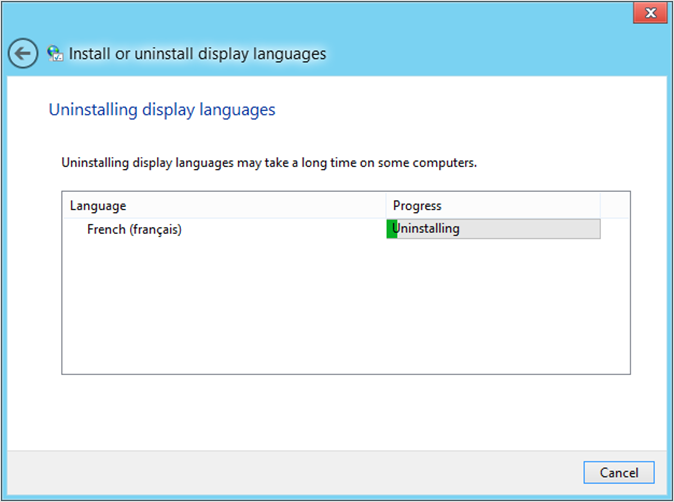
Figure 19: Uninstall Display Language
A restart is required to complete the uninstall.
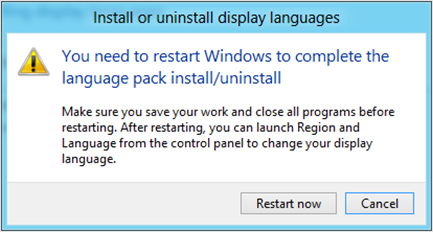
Figure 20: Uninstall Display Language
Another consideration when removing display languages is that you cannot remove the originally installed language. In the example below, the US-EN version of Windows 8 was installed, and the display language was changed to French. As you can see, there is no option to uninstall the language—only an option to set English (US) as the primary language.
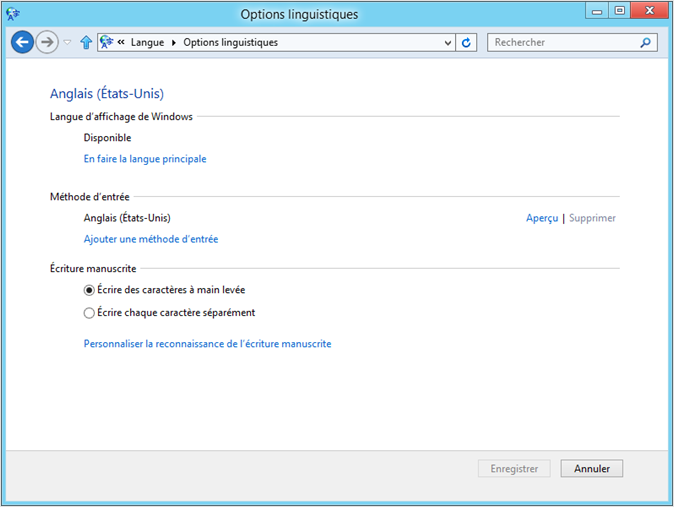
Figure 21: Install Language Not Set to Primary
Troubleshooting Language Packs
Language pack installation and uninstall actions are performed by the Language Pack Installer, which uses Windows Servicing (the Trusted Installer service and related components) to perform the work of the installation.
If you encounter an issue with language pack installation, the troubleshooting approach should be based on the failure scenario:
- Failure during download: Download issues should be resolved using standard Internet Explorer and Background Intelligent Transfer Service (BITS) download troubleshooting. These steps are a good start:
- Check for and resolve general connectivity issues.
- Check for and resolve Windows Update download issues.
- Clear the BITS queue and retry the download.
- Failure during installation or uninstall: If the installation progress shows that download completed, but the installation is failing, the troubleshooting should follow what is done for Windows Update installation issues. This is true for uninstall issues as well. Recommended steps include the following:
- Check for and resolve any existing Windows Update installation issues.
- Use SFC.exe and DISM.exe to repair the Windows system files and obtain updates through corruption repair if needed. See the Update and Maintenance section of this training for details on this corruption repair mechanism, which is new in Windows 8.
For More Information
Change the display language
https://windows.microsoft.com/en-US/windows-vista/Change-the-display-language
Language packs are available for Windows 8 and for Windows RT
https://support.microsoft.com/kb/2607607
ONiehus, Microsoft