Windows 8: Recovery and Troubleshooting
My Top-9: Recovery and Troubleshooting
Overview
Windows® 8 includes several new resources for troubleshooting and options for recovering your system from errors or problems. The set of topics covered in this section includes the following:
- Support Resources
- Push-Button Reset
- File History
- Windows 7 File Recovery
- Boot Menu and WinRE
- Other Troubleshooting Changes
Support Resources
There are a number of good resources you can use to get information on Windows 8:
Windows Online
https://windows.microsoft.com
Building Windows 8 Blog
https://blogs.msdn.com/b/b8/
Windows Experience Blog
https://windowsteamblog.com/windows/b/windowsexperience
Answers
https://answers.microsoft.com/en-us/windows/forum/windows\_8
TechNet
https://technet.microsoft.com/en-us/windows/hh771457
There is already a great deal of troubleshooting guidance for specific Windows 8 issues. Even when specific resolutions may only apply to preview versions of Windows 8, you can often gather troubleshooting tips by reviewing this pre-release information.
Tip: You can find the resources listed above, as well as several other Windows 8 related resources in the Resources tab in the top-left corner of this training.
Information for Customers: Help and Support
Educating customers on available help resources for Windows 8 is another important support-related task. Consumer-facing help for Windows 8 is available from several sources:
- Microsoft: Help & Support in the product, Windows Online
- OEM Help Content
- Community Content, such as in Microsoft Answers
Windows 8 has been designed to help you find and access relevant help content from each of these sources. The pages that follow show how help content is accessed, and how these various sources are represented in each interface.
Settings Charm
When you are on the Start screen, you can bring up the charms by swiping in from the right on a touch PC, or move the mouse pointer to a right-side corner. Use the Settings charm to access help. Click or tap in the Settings as shown in the image below.
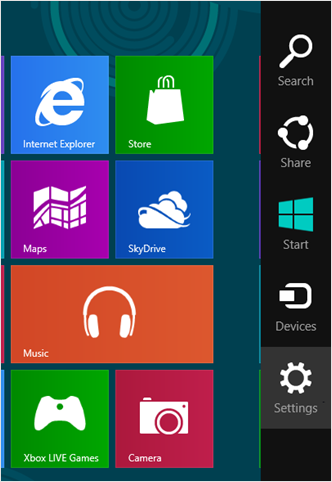
Figure 1: Start Charms
Then, click Help.
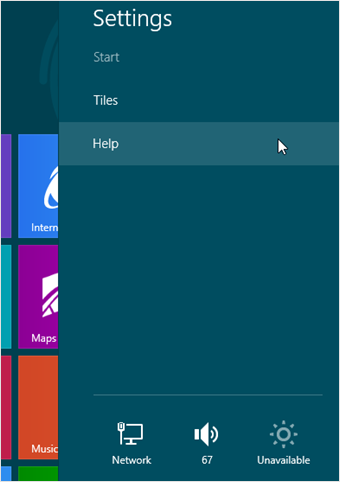
Figure 2: Location for Help
Help provided in this interface is focused on key usage tasks for which new Windows 8 users may need help.
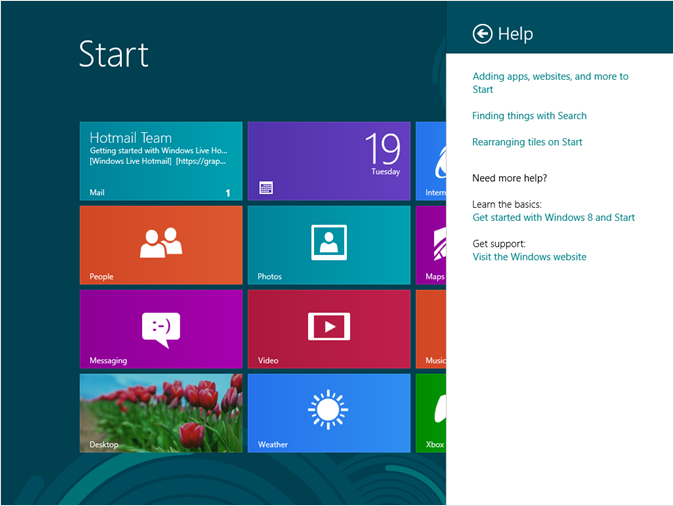
Figure 3: Help from Start screen
Links out to help information on the Microsoft website is displayed in Microsoft® Windows® Internet Explorer®, so that users are getting the most up-to-date content.
While in an app, the Settings charm provides app-specific help. An example in pre-release Windows 8 is shown below.
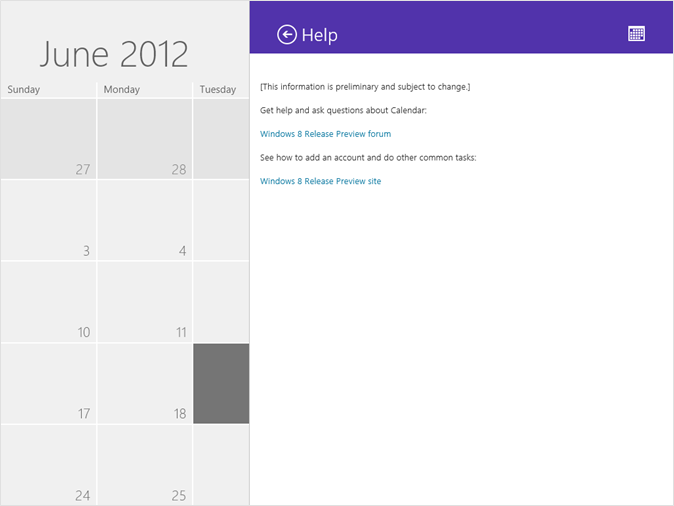
Figure 4: Help in an App
This Help interface is available for use by any app, based on a standard API. As with the Start screen Help, this Help content can be context-specific. This can help guide users on specific actions, based on what they are doing in the app right now.
While at the Desktop, the Settings charm opens Windows Help and Support, shown below.
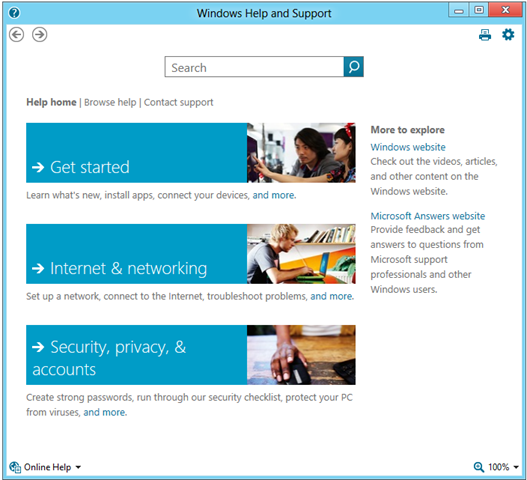
Figure 5: Help on the Desktop
This interface supports some of the same Help customization and online access as Help and Support in previous Windows versions. Beyond that, it has been updated for Windows 8 with a new look and a better touch input experience.
Search for Help
If you search for "Help" you will see Help & Support as an option. This opens the Desktop help interface shown above.
Searching for a specific keyword in a problem scenario can bring more targeted results. The example below shows the search for "sound." By selecting the Settings option in the search pane, you have access to top troubleshooters related to the keyword.
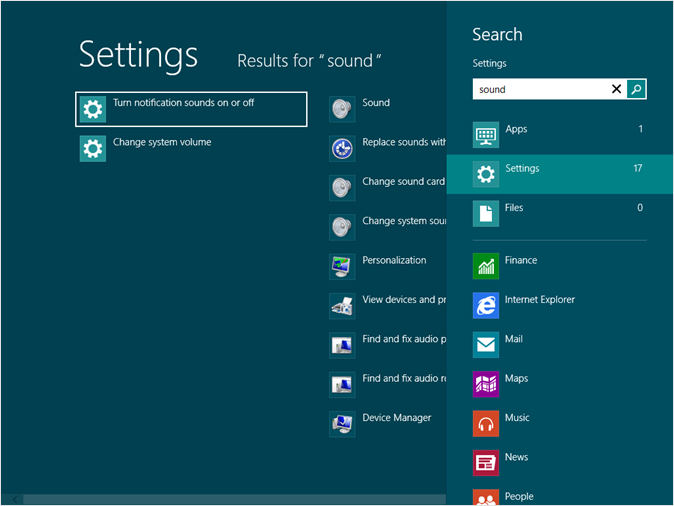
Figure 6: Search Help
When you search within the Desktop Help interface, you have access to multiple information sources. This includes:
- Windows Help content
- Answers community content
- Help content from your OEM, if the OEM customized the Help configuration
An example of this is shown below, with a search for "security". The Show results from selection lets you choose which type of help content to view.
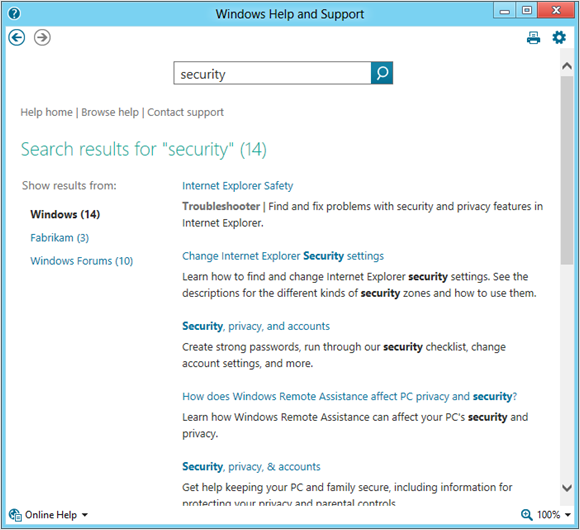
Figure 7: Search Help and Support
This is particularly useful given the movement to more community-based support content from Microsoft®. Increasingly, you will find targeted, issue-specific troubleshooting guidance in Answers posts, rather than in Knowledge Base articles. In Answers, these posts can be discussed and expanded by the Windows community.
Push-Button Reset
Windows 8 includes a feature called Push-Button Reset that gives you options for returning your PC to a known configuration. You can use this to recover from a problem, or to return it to the factory state. This can be handy if you are selling a PC, or giving it to another member of the family and want to give them a fresh start.
Push Button Reset provides two options:
- Refresh your PC without affecting your files
- Remove everything and reinstall Windows
These options are provided on the General page in PC Settings as shown below.
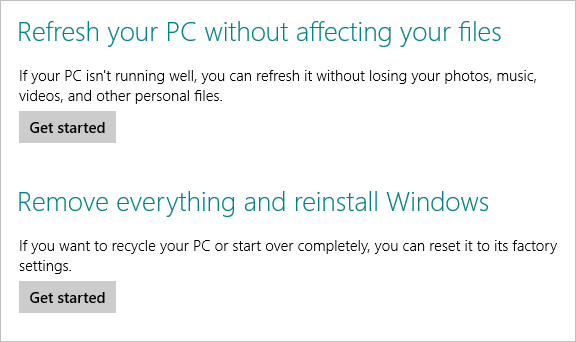
Figure 8: Push-Button Reset
When you click one of the Get started buttons, the reset actions are presented in system notifications.
In order to use these options, you must have one of the following:
- A preloaded recovery partition on the PC, configured by the OEM.
- Recovery media provided by the OEM.
- Installation media, such as a Windows 8 DVD or USB flash drive.
Each of the reset options is reviewed in the pages below.
Refresh Your PC Without Affecting Your Files
The Refresh option is primarily a repair method. It is a great method of returning your PC to a known good state while preserving your files and a great deal of your configuration.
With the Refresh your PC option, user accounts, data files, and some settings are preserved on your PC without the need to create a backup, or make choices about what to keep or remove.
The table below shows the type of items that are preserved and removed when you perform a refresh.
Table 1: Elements preserved and returned to default state
Preserved |
Returned to Default |
|
|
Note: For additional detail on the configuration elements that are preserved, see this TechNet article:
https://technet.microsoft.com/en-us/subscriptions/jj126997
Tip: At the end of the refresh process, an HTML file called "Removed Apps.html" is placed on the desktop with a list of all of the desktop apps that will need to be reinstalled.
Refresh Steps
The Refresh proceeds in the following steps:
- Open the General section of PC Settings.
- Click the Get started button under Refresh your PC without affecting your files.
- Click the Next button at the Refresh your PC step of the wizard.
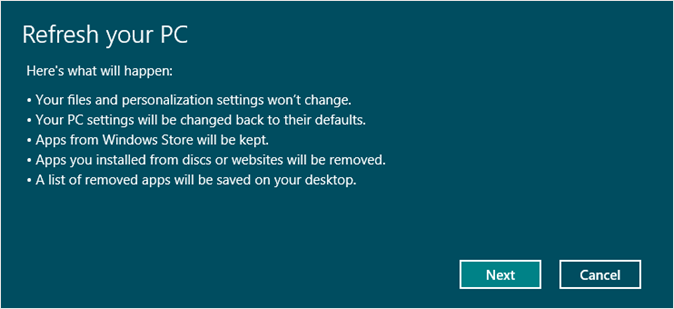
Figure 9: Refresh your PC
- You may be prompted to insert installation or recovery media if there is not a recovery image preconfigured on your PC.
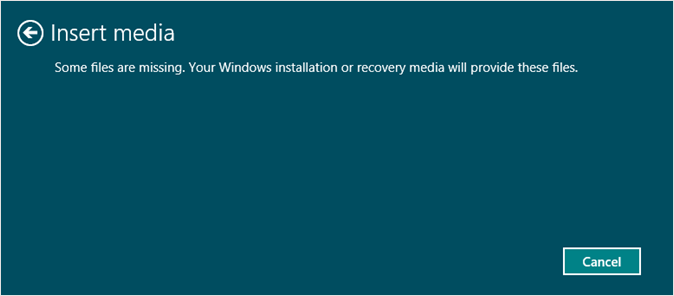
Figure 10: Refresh insert media
- Click the Refresh button at the Ready to refresh your PC step.
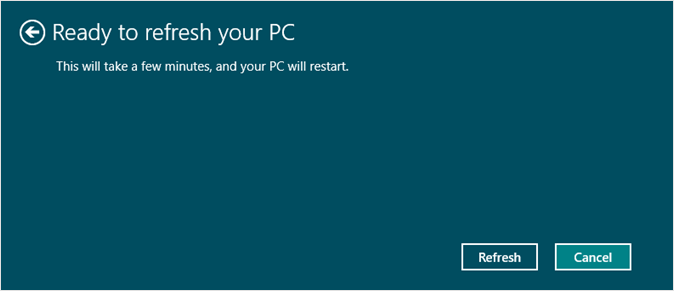
Figure 11: Refresh ready
- At this point, the PC is restarted, and the refresh actions are completed.
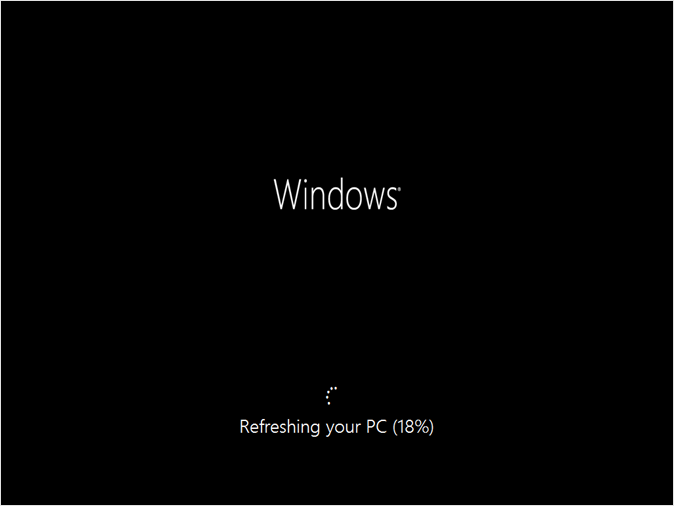
Figure 12: Refreshing your PC
There is no further action needed by you until login when the Windows lock screen appears.
Remove Everything and Reinstall Windows
This option, also called Reset your PC is useful when a PC is changing hands, or when you want to get a completely fresh start on a PC, with no previous files or configuration retained.
The Remove everything and reinstall Windows option permanently removes your personal files and apps from the PC and returns Windows 8 to its original state. That original state is either a clean install of Windows 8, or the OEM factory default configuration, depending on the media used for the operation.
Table 2: Elements preserved and returned to default state
Preserved |
Returned to Default |
Activation State Files on non-Windows drives (optional) |
Everything Non-Windows drives (optional) |
Important: Exercise caution when using this option. It is a procedure that causes data loss by design.
Activation State
The only element of your configuration preserved by a Refresh is the Windows activation state. This is to help provide a better post-Reset experience. In most cases, Windows should be activated automatically at the end of Reset without user action.
One exception to this is on a PC where you used the Add features to Windows to install the Pro Pack or Media Pack to upgrade your Windows edition.
Remove Everything and Reinstall Windows Steps
The Remove Everything option proceeds in the following steps:
- Open the General section of PC Settings.
- Click the Get started button under Reset your PC and start over.
- Click the Next button at the Reset your PC and start over step of the wizard.
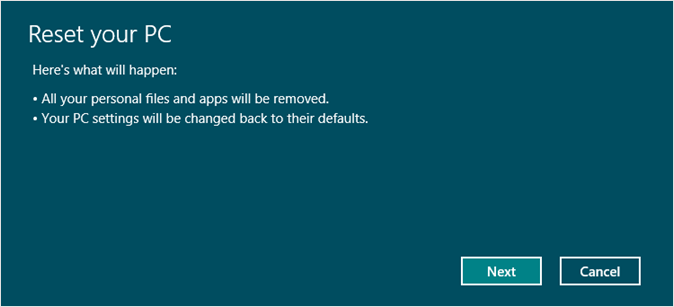
Figure 13: Remove everything
- As in the Reset steps, you may be prompted to insert Windows 8 installation or recovery media.
- If you have multiple drives on your PC, the next step gives you a choice of how you want files removed. You can remove files from the Windows drive only, or from all drives.
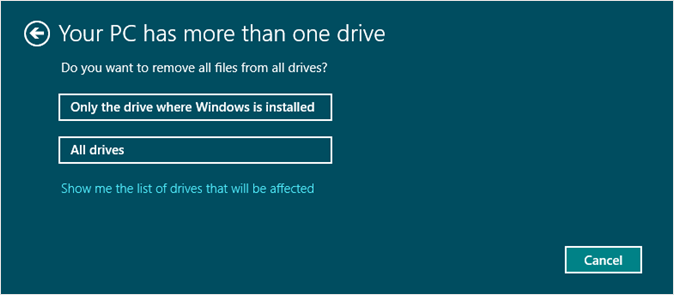
Figure 14: More than one drive
- Next, you will be asked if you want to fully clean your drive. You can choose to Just remove my files or a more complete removal with the Fully clean the drive option. Neither option provides a guarantee that the data will be unrecoverable, but the fully clean option will make it significantly more difficult.
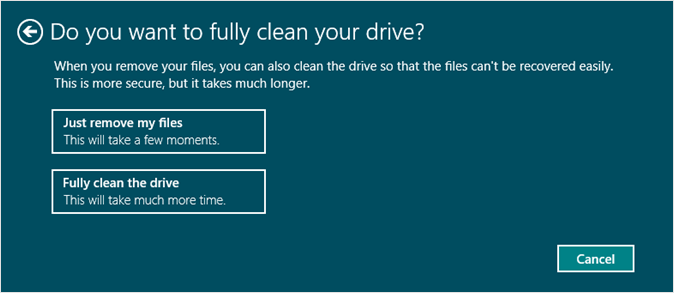
Figure 15: Remove everything file removal
These options are explained in more detail in the table below.
Table 3: File removal options
Option |
Description |
Just remove my files |
This option performs a quick format of the disk. This deletes the table on the drive that contains file system pointers to your data files. It does not delete the actual file data or touch the parts of the disk where the data exists. |
Fully clean the drive |
The behavior of this option will vary depending on if the drive is encrypted with BitLocker. If the volume is not encrypted, then this option performs a full format of the disk and writes zeroes to every sector. This will take quite a long time. This is similar to running the command below: format.exe c:\ /P:0 If the volume is encrypted with BitLocker, only a quick format is performed, as that wipes all of the information necessary to decrypt the disk. With no way to decrypt the disk, the data is effectively lost. Note that this procedure will take much longer than the quick format. It could take hours on a large hard drive. This is not something that you would want to do live with a customer. It would be better to start it and arrange a follow-up later. |
- To proceed, click the Reset button at the Ready to reset your PC step, shown below.
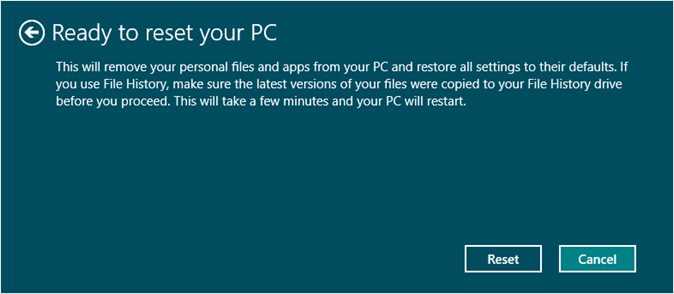
Figure 16: Remove everything ready to reset
- At this point, the PC is restarted into a full-screen progress screen.
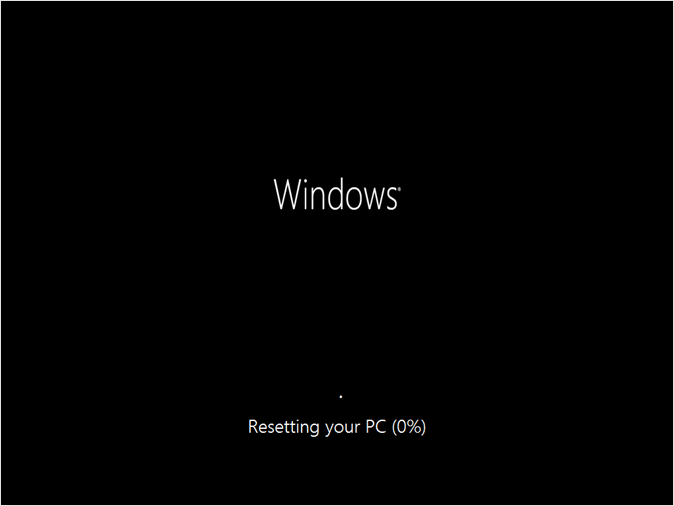
Figure 17: Remove everything - resetting
- The next step on a PC where the Pro Pack or Media Pack was installed is shown below. In these scenarios, you will need to enter your Product Key. Notice that there is a Skip button here. This would enable you to complete the Reset without entering your key. That can be useful if you are selling a PC and want to retain a retail Windows 8 license that you installed on it.
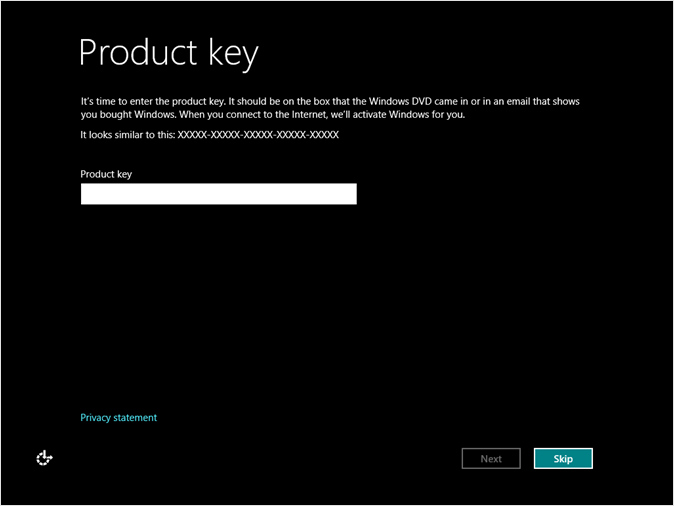
Figure 18: Remove everything
- The final step is the License Terms. Click Accept in this step to complete the reset.
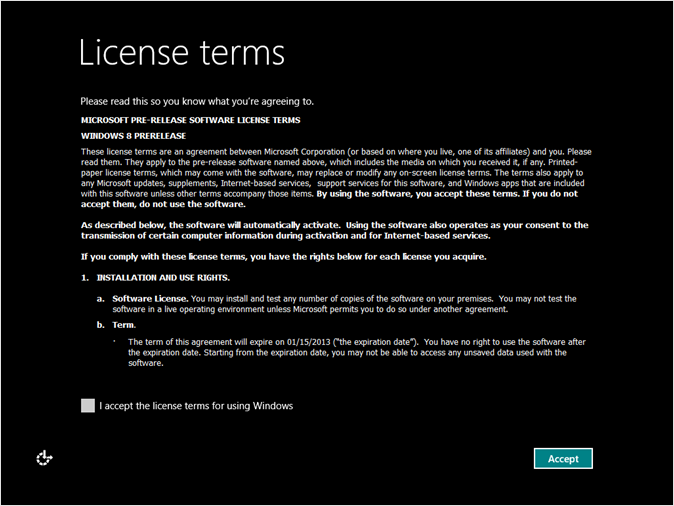
Figure 19: Remove everything
After you are past the License Terms, you will find yourself in Windows Welcome, with all the same choices as you saw during Windows 8 Setup. At this point, the PC has been returned to the original Windows 8 state.
Troubleshooting Push-Button Reset
In the event of a problem with Push-Button Reset, you should apply the same type of troubleshooting as you would use for Windows 8 setup.
Logging events for the Push-Button Reset features are written to the locations noted in the table below.
Table 4: Button Reset logging
Log File |
Event Types |
Description |
SystemResetPlatform.log, in one of the following locations: %LocalAppData%\Temp\ \Windows\Logs\PBR\PreRollbackLogs |
Early actions, user account and app identification. |
This log captures activity prior to the start of the normal setup engine logging. Note that the date and time used is in GMT, rather than the local time zone used in the other log files. When comparing this to other log files, remember to add or subtract hours as-needed to align for comparison. |
\Windows\Logs\PBR\Mig\setupact.log |
Refresh log for setup and migration activity. |
This is where you can find errors and events related to the migration of data files and settings during a Refresh. Some of this activity is logged to the normal setupact.log location, but this log should be more complete. |
\Windows\Panther\setupact.log |
Reset log for setup engine events and errors. |
Use this log and the setuperr.log in the same location to check for and research problems encountered during setup activities in a Reset. |
\Windows\Logs\PBR\DISM.log |
Servicing related activities. |
This log contains entries created during the early part of the Reset or Refresh, including setting up temporary folders, identifying the edition of Windows, and locating the installation source or OEM reset files. |
This \Windows\Logs\PBR folder also contains a backup of the BCD configuration, used during the reset procedure. Additional troubleshooting considerations for each feature are discussed below.
Reset
In the event of a failure during the Reset after the first restart, you can expect to see the following message:
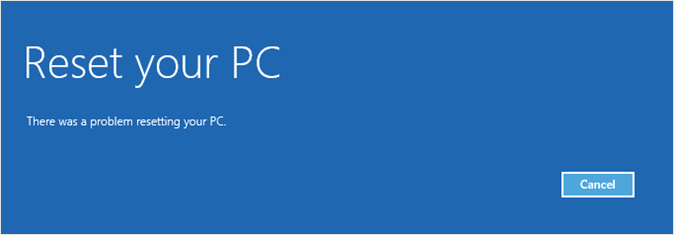
Figure 20: Reset Problem
When you click Cancel at the above message, you are taken to the normal startup menu, providing an option to troubleshoot. You can re-start the Refresh by clicking Troubleshoot and then Reset your PC. This is recommended for an OEM Windows 8 PC, where Refresh is the primary method for reinstalling Windows 8 clean. If the PC did not have Windows 8 preinstalled, you could simply clean install Windows 8 by booting from Windows 8 media.
Troubleshooting considerations for issues with Reset prior to the restart include:
Table 5:
Recovery image partition |
An OEM PC includes the recovery image on a hard disk partition. If this partition is missing or damaged, there could be errors in the process as a result. Watch for errors indicating missing or damaged installation files. You can expect similar errors as when running Windows setup from a damaged DVD. If a Windows 8 OEM PC continues to experience failures during a Reset or Refresh, you may need to either contact the OEM for assistance or reinstall Windows using replacement media |
Formatting issues |
If there are more significant hard disk issues on the PC, you may see errors during the format step early in the Reset. Use Chkdsk.exe in WinRE to check for disk issues. If Chkdsk.exe does not resolve the issues, recommend hardware diagnostics, such as a manufacturer-provided disk checking utility. |
Product Key |
You will typically not be prompted for a key on an OEM Windows 8 PC. If you are prompted for a key, you must enter a key that matches your Windows 8 edition. If the key does not match your installed edition, you will see the message "This key won't work with this edition of Windows, so try a different key." |
Feature Pack |
If you upgraded your Windows 8 edition by adding a feature pack, you will need to enter the original Windows 8 edition product key. After the Reset is complete, repeat the process of adding features with the feature pack key to restore full functionality. |
Refresh
If the Refresh is interrupted by a power failure or other unexpected event, it will use a rollback mechanism to return you to the original configuration. When you return to Windows 8, the following message is displayed to indicate that there was a problem.
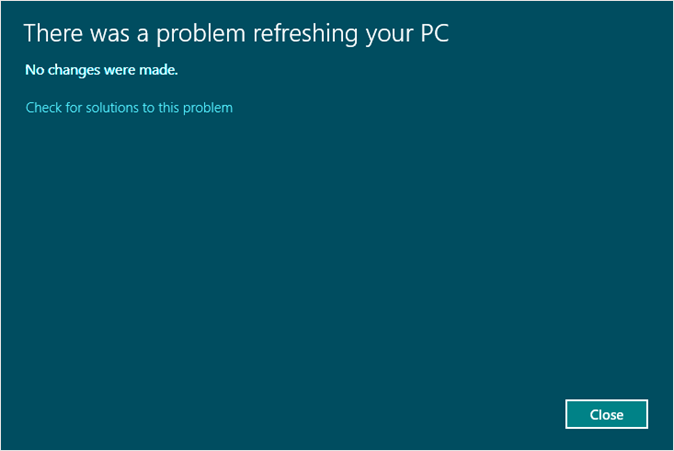
Figure 21: Refresh failed
You can search for solutions to the problem using the link in this message. Windows Error Reporting is used to submit details, and if there is a researched solution available, such as a Windows or driver update, it will be offered. In such situations, you can simply re-start the Refresh, or use an alternate resolution for the original underlying issue.
Troubleshooting considerations for Refresh also depend on the type of issue encountered:
Migration issue |
You could see errors with file migration just as you would during setup. This could include issues with file paths beyond the maximum path length, damaged files, and other problems encountered collecting files for migration. Use the migration log to collect information about specific files that may be causing the issue. If there are files missing after the Refresh is complete, you can source files from the Windows.old folder. |
Setup actions |
The Refresh procedure works like a setup with migration. Troubleshoot as you would a setup issue, using the setupact.log and setuperr.log as a resource.Logs for the failed installation will be present in the folder: \Windows\Logs\PBR\PreRollbackLogs |
Refresh and Windows Update
One additional consideration with the Refresh procedure relates to Windows Update. Updates that have been downloaded and staged by Windows Servicing in the component store are preserved during a Refresh. This has two consequences from a support perspective:
- Benefit: Updates do not need to be re-downloaded. When Windows Update determines that updates are available, and negotiates with Windows Servicing to install them, there will be no download needed.
- Risk: If you are trying to get a clean Windows Servicing state, due to some kind of issue with the component store, a Refresh may not be the best approach. If the new corruption repair capabilities in Windows 8 have not resolved the issue, you may need to perform an in-place upgrade of Windows, just as was done with Windows 7. Reset would also be an option, but only if it is acceptable for the hard drive to be formatted.
Note: This only applies to Refresh. Reset does not retain the update state.
File History
File History is a new Windows 8 feature that offers a novel way to help protect personal files. File History replaces the Windows Backup and Restore and Previous Versions features on Windows 7.
File History is designed to help protect your data by periodically scanning the file system for changes to files in your Libraries and several other important folders under the user profile, such as Desktop, Favorites, and Contacts. This scan is done every hour, by default.
Every time one of your files changes, File History stores a copy of the file on a dedicated storage device that you selected when you set up File History. Over time this storage device will contain a history of changes made to your files.
Accessing Your File History
Any time you want to locate a file or folder from a specific point in time, open File History. The interface is designed to help you quickly find what you're looking for and restore it with one click (or tap). The innovative restore app offers an engaging experience optimized for browsing, searching, previewing, and restoring files. Finding and restoring a version of a file created in the past is as easy as one click.
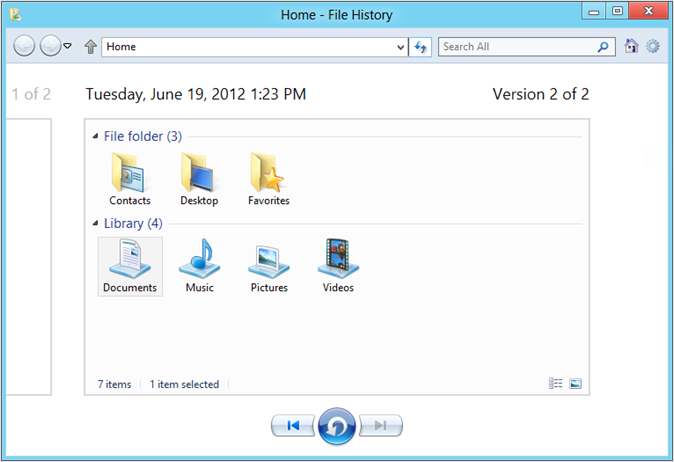
Figure 22: File History restore
Configuration
File History is not enabled by default. You can enable File History from Control Panel.
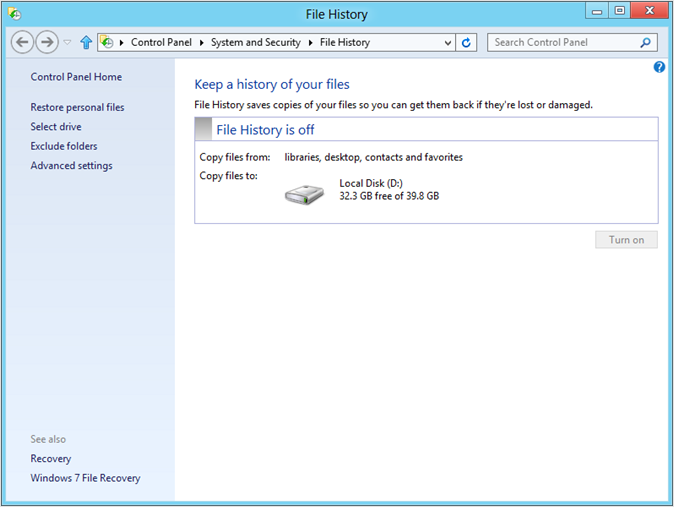
Figure 23: File History
When File History is turned on, the last copied date and time is displayed in the interface, as shown below.
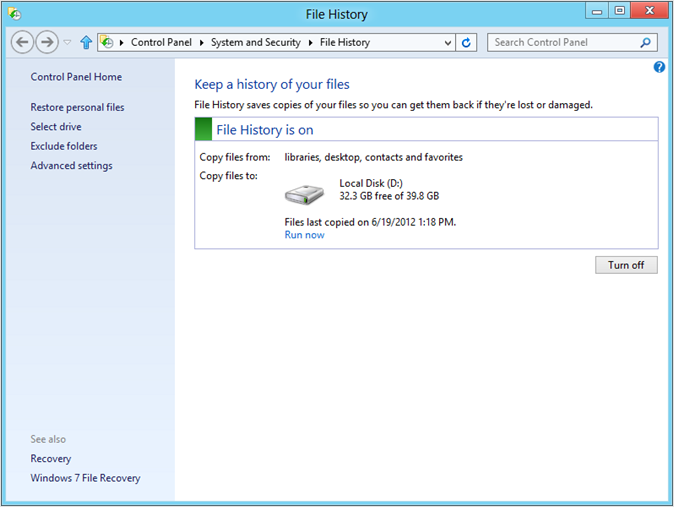
Figure 24: File History
You can also enable File History through Windows Explorer. To do this, open Windows Explorer and click the History button on the Home tab of the ribbon. From the window that opens, click the Turn on File History link, which opens the File History Control Panel.
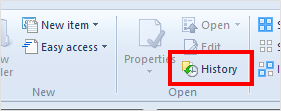
Figure 25: File History in Windows Explorer
Locations in the File History
File History saves changes to files in the following locations:
- Libraries
- Desktop
- Favorites
- Contacts
- SkyDrive folder: If you have the SkyDrive sync app installed, your local SkyDrive folder will be included in File History.
You can change the folders in scope for File History in two ways:
- Add: To add a folder, add it to a Library.
- Exclude: To exclude a folder, use the Exclude folders option on the left side of the File History interface.
Select the File History Target Drive
You can configure File History to make copies of your data onto either a hard disk or a network share. These options ensure that your data always exists on two physical drives. If one of those drives fails, you will still be able to recover the data from the other drive.
The steps to select a different drive are listed below:
- Open File History in Control Panel.
- Click Change drive in the Task Pane on the left.
- All eligible local drives are shown in a list. The physical disk that Windows is installed on will not be eligible. This is true even if the disk is divided into multiple partitions.
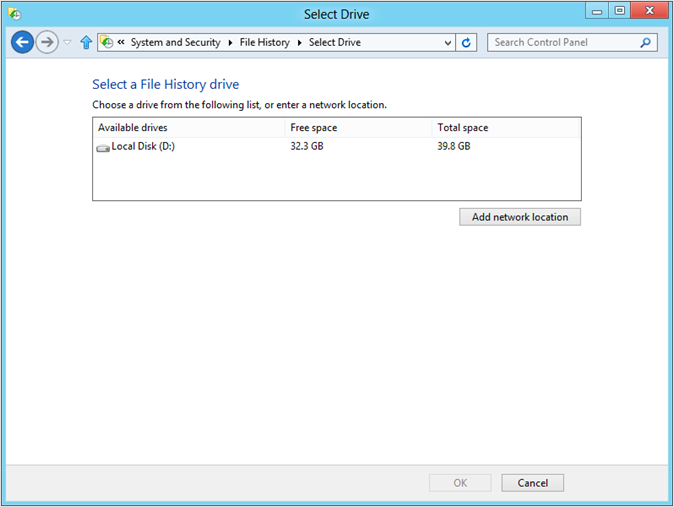
Figure 26: File History Change Drive
- Select your desired target drive and click OK.
- You will see a dialog asking "Do you want to move your existing files, too?"

Figure 27: Move Existing Files?
- Clicking Yes moves the existing copies created by File History to the new location you selected.
- Clicking No does not move your previous File History to the new location, but those previous copies will remain available as long as the drive they are on remains attached.
Configuration with a Network Share
To configure a network share to be used for file copies, you can do the following:
- Open the File History Control Panel.
- Click the Change drive link in the Task Pane on the left.
- Click the Add network location button.
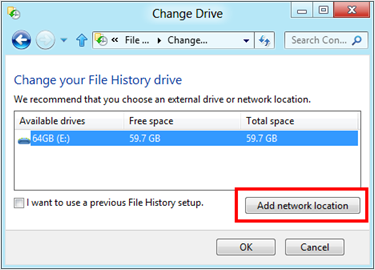
Figure 28: File History Add Network Location
- Browse to the network share where you wish to save your File History copies.
- Alternately you can type the UNC path directly in the Folder text field to bypass the browsing mechanism.
- If you are unable to access the UNC path directly, try appending .local to the server name. For example, instead of \\server try \\server.local.
- Click Select Folder.
- You will see a dialog asking "Do you want to move your existing files, too?"
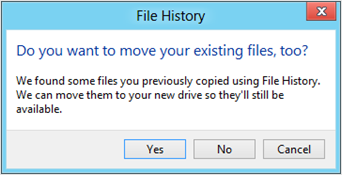
Figure 29: Move Existing Files?
- Clicking Yes moves the existing copies created by File History to the new location you selected.
- Clicking No does not move your previous File History to the new location, but those previous copies will remain available as long as the drive they are on remains attached.
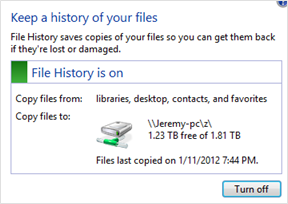
Figure 30: File History Network Location
If you don't have an externally attached hard drive, you will not be able to turn on File History by default. You can get around this by first configuring File History to use a network share using the Change drive option described above. After you do this, you will then be able to turn on File History. However, this is a two-step process. First, you must change to using a network share, and then you can turn on File History.
Recovering Files with File History
You can access the interface for recovering files with File History using a few different methods. In Windows Explorer you can select the History button on the Home tab of the ribbon.

When opening the File History window using Windows Explorer, it will show the history for the folder that is currently selected in Windows Explorer.
Another method starts in the File History Control Panel. The Restore personal files link at the bottom of the task pane opens the File History window.
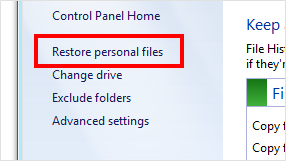
Both of these steps open the File History window where you can view previous version of files that have been saved.

Figure 31: File History
Within this folder, you can perform the following actions:
- Click the Home button on the top-left view all of the folders and libraries that are being protected by File History.
- Use the right and left arrows at the bottom to navigate between days and times.
- Click to select the files and folders you would like to restore. Use CTRL-Click to select multiple items, and use Shift-Click to select a range of items.
- After selecting all the files you would like to restore, click the blue button with the circular arrow at the bottom-center of the window to restore the files back to their original location.
- You can also restore files to a location other than their original location by doing the following:
- Click the Settings icon on the top left of the window (it looks like a gear).
- Select File > Restore > Restore To.
- Browse to the folder you want to restore the files and folders to.
- Click Select Folder.
File History Details
This topic examines the storage, cache and other details related to File History.
Storage
You can save the File History to any drive that satisfies these requirements:
- File History can be on a Local internal drive, Local external drive or network share.
- You cannot put the File History on the same physical disk as the Windows drive.
When File History runs, it uses the NTFS USN journal to pick up changes in important folders. It then replicates these files automatically to the target location.
After enabling File History on either a local disk or network share, the following folder structure is created at the root of that drive or share.
\FileHistory\<User Name>
The user name is in the same format as the name of the user profile folder. A separate user name folder will be created for each user that enables File History and points to the same location. A user name folder will also be created for Public since the default configuration for libraries includes not only the data folders in the user profile, but also the data folder in the Public user profile. Backing up a library requires that the data in all folder locations that make up the library are saved.
\FileHistory\<User Name>\ <Computer Name>
The computer name folder allows users on multiple PCs to use the same storage location for File History without conflicting with each other. This is especially important when the same user name is used on multiple PCs.
\FileHistory\<User Name>\<Computer Name>\Configuration
This configuration folder includes a database with the state of all of the files and folders being protected by File History and two XML files with the File History configuration for the given user. Each XML file contains the exact same data.
\FileHistory\<User Name>\<Computer Name>\Data
The Data folder is a peer with Configuration. This is where user data is stored.
\FileHistory\<User Name>\<Computer Name>\Data\ <Full path to user data>
The full path to the user's data is stored starting with a folder named with the drive letter. For example, the path to the documents folder in the Bob user profile would be \c\Users\Bob\Documents\.
\FileHistory\<User Name>\<Computer Name>\Data\<Full path to user data>\ <File name> (<Date>).<extension>
The individual files that are stores have the same file name but have the date in UTC format appended to the portion of the name before the extension. For example, you might see a file with the following format: Photo3694 (2011_09_04 19_32_35 UTC).png. This allows all versions of the particular file to be stored in the same folder without name collisions.
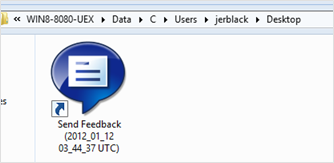
Figure 32: File History Example
Note: Unlike Windows 7 backup, File History does not store files in ZIP or VHD files; instead, it stores the files directly in the folder without any special permissions restricting access to the folder. This will make recovery efforts in the event of a problem with File History much simpler.
Offline Cache
If the external drive or network share that you are using for File History is not available when it is trying to save your data, the data will be copied to an Offline cache in the interim until that storage location becomes available again.
That staging area is located at %LocalAppData%\Microsoft\Windows\FileHistory.
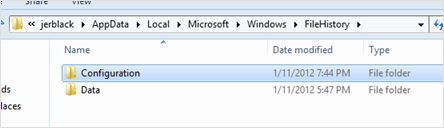
Figure 33: File History offline cache
Settings
By default, File History will keep saved versions of your files forever, it will check for and save changes every hour, and it will use up to 5% of the available disk space for the offline cache in %LocalAppData%. All of these items are configurable in the Advanced settings in the task pane of the File History Control Panel.
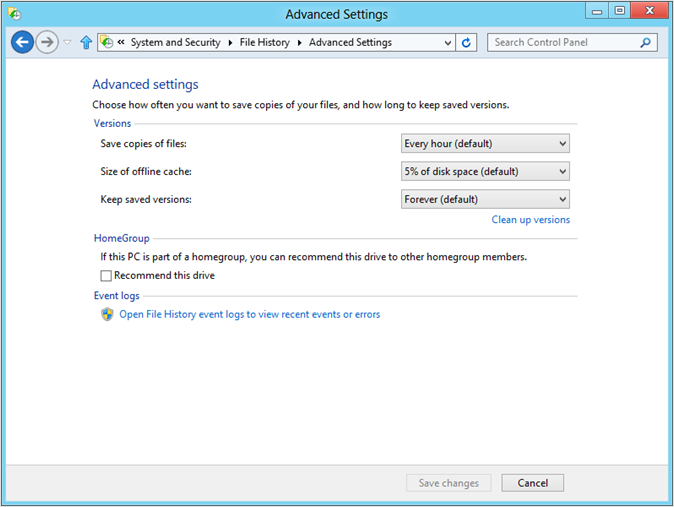
Figure 34: File History
The options are as follows:
- Save copies of files: This configures the delay between scans for changes.
- Size of offline cache: File History supports network and external locations. This offline cache is used to collect changes when the File History location is unavailable. When a connection to the File History location is restored, the cached changes are sent to the drive.
- Keep saved versions: This setting can be used to limit the maximum age of saved file versions.
- Open File History event logs: This opens the Event Log interface with the File History log selected.
- Recommend this drive: This option is for a HomeGroup configuration. If you click this checkbox, other PCs joined to your HomeGroup will see "<Drive> on <Computer name>" as an available choice in the Change drive interface.
- Users on another PC in the HomeGroup will see something similar to the screenshot below if there is a drive that is recommended on the homegroup. The FileHistory share is recommended by HomeGroup in this case.
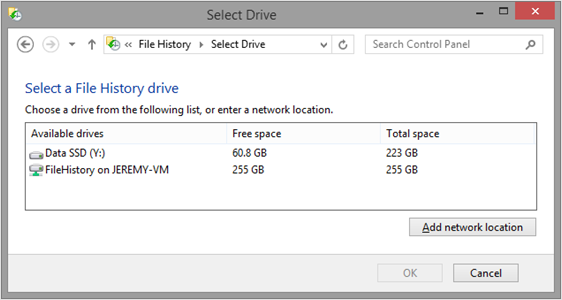
Figure 35: Drive recommended on the HomeGroup for File History
Windows 7 File Recovery
While File History is now the recommended file backup solution for Windows 8, the legacy Windows 7 Backup and Restore functionality is also included in Windows 8. The functionality has not changed, and you can still setup automatic "file and folder" and "system image" backups using the tool. File History is the backup solution that we should be recommending to customers, however.
The continued inclusion of the legacy Windows 7 Backup and Restore has been positioned as a solution that customers can use to restore their Windows 7 backups after moving to Windows 8, which is why it is located in the Control Panel under Windows 7 File Recovery.

Figure 36: Windows 7 File Recovery
Functionality and troubleshooting for this feature has not changed from Windows 7. The existing Backup training in the Windows New Hire course continues to apply.
Boot Menu and WinRE
The Startup menu and Windows Recovery Environment (WinRE) interfaces have been dramatically updated in Windows 8. The interfaces are graphical and support touch and mouse input. Many of the options are still the same; however, they are just presented to the user using this new touch-friendly interface.
An example of this new interface on a dual-boot configuration is shown below.
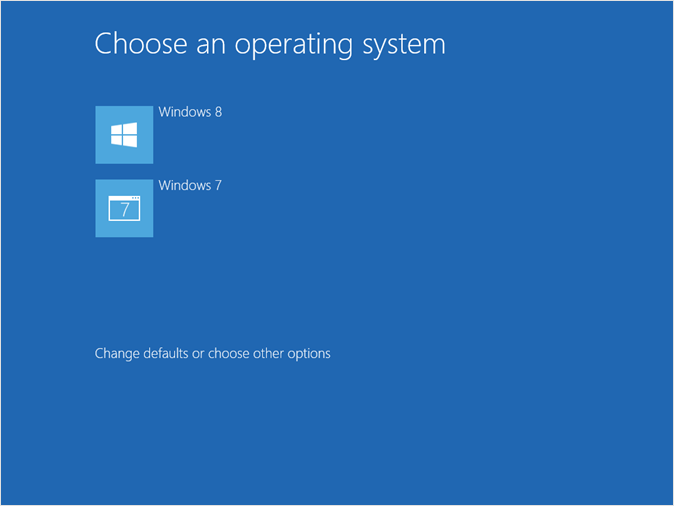
Figure 37: Windows 8 Startup Menu
The WinRE options menu uses the same style, as shown below.
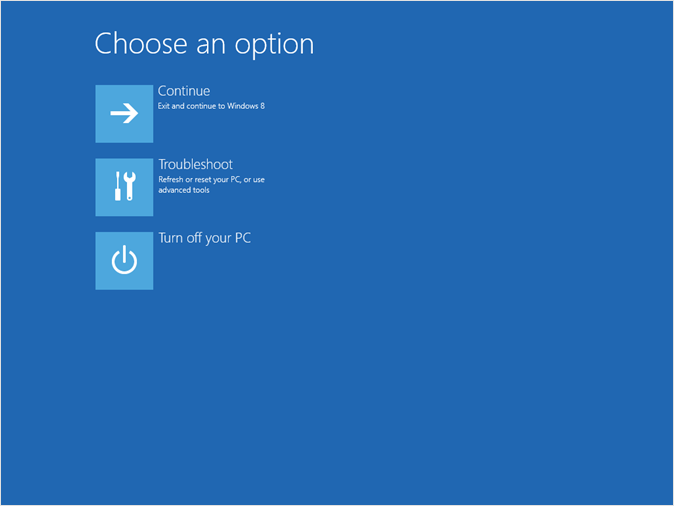
Figure 38: WinRE options menu
Troubleshooting Options
Troubleshooting tools are available from both of the menus above:
- On the Startup menu, click Change defaults or choose other options, and then click Troubleshoot.
- On the WinRE Options menu, click Troubleshoot.
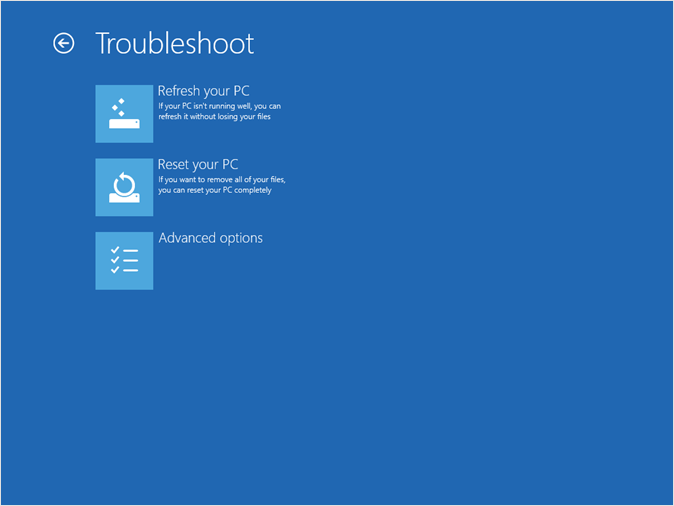
Figure 39: Troubleshoot Menu
The following options are available on this menu:
- Refresh your PC
- Reset your PC
- Advanced options
This last choice brings you to a menu showing a selection of tools similar to what you find in the Windows 7 WinRE interface.
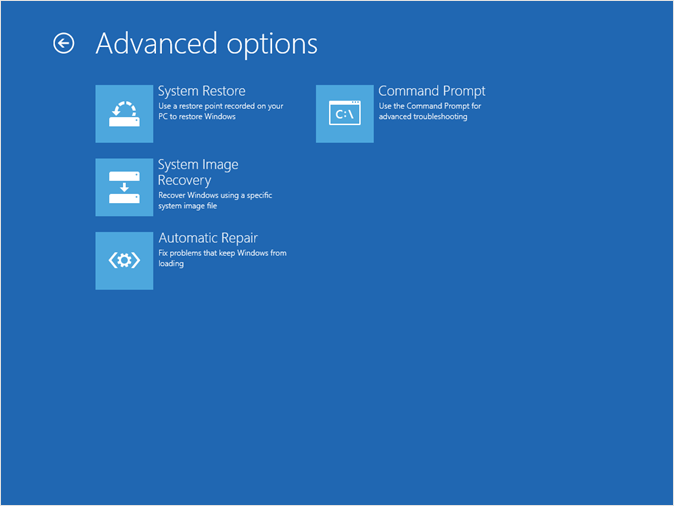
Figure 40: Troubleshooting Advanced Options
The tools available here include:
- System Restore
- System Image Recovery
- Automatic Repair (launches Startup Repair)
- Command Prompt
For more information on the startup menu, see the Startup module in this course.
Other Troubleshooting Changes
Windows 8 introduces a few other troubleshooting tool changes not listed above:
- MSConfig
- Last Known Good Configuration Removal
- STOP Errors
- Windows PowerShell
MSConfig
The Startup tab in MSConfig has been replaced in functionality by the new Task Manager. The features in Task Manager include performance impact assessment, and the ability to disable startup items, just as you could in MSConfig. MSConfig provides a link to open Task Manager to help direct you to the best tool for startup troubleshooting.
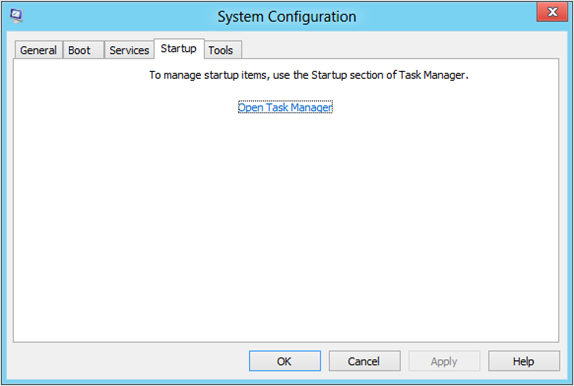
Figure 41: MSConfig Startup
Warning: Due to this change, if you use MSConfig in the Selective or Diagnostic startup configurations, Startup items will not be disabled.
Last Known Good Configuration Removal
The Last Known Good Configuration mechanism has been disabled in Windows 8. This was used in earlier versions of Windows to provide a quick return to the state of the System registry hive and limited OS files from the last successful startup.
As Windows has become more complex and implemented other recovery features, Last Known Good has become less useful, while still incurring some overhead during startup.
In Windows 8, you will see this reflected in the structure of the System registry hive under HKLM\System. There is only one ControlSet – ControlSet001. CurrentControlSet remains an alias for backward compatibility.
STOP Errors
As part of the change in style for lower level interfaces, Windows 8 has replaced the STOP error screens with a simpler error message. An example is shown below.
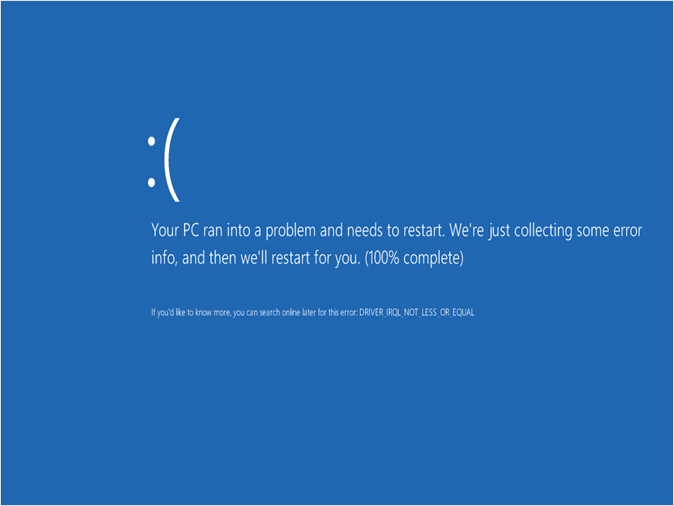
Figure 42: Error
Notice that the text version of the STOP code is displayed in the message (DRIVER_IRQL_NOT_LESS_OR_EQUAL in this case), but the numeric value STOP code is not displayed. This text string is the same as have been shown with the error code on previous Windows versions. This makes the text string a useful search term when troubleshooting.
To collect more details on the error, use one of the following methods:
- Open the Error Reporting interface and sort the list of error reports to find the one you are looking for.
- View the Reliability History in Action Center to see a history of error events on the PC.
- Use the Windows Error Reporting events in the System log to source details on an error.
Windows PowerShell
The Windows PowerShell™ environment is increasingly important for Windows management and support. Windows 8 is the first version of Windows where some consumer troubleshooting actions are only possible using Windows PowerShell.
So it's time to start (or continue!) working with Windows PowerShell, and getting familiar with the syntax and usage.
- There is guidance on performing a variety of general tasks with Windows PowerShell on TechNet here:
https://technet.microsoft.com/en-us/scriptcenter/dd772285.aspx - There is also a great video series here:
https://technet.microsoft.com/en-us/scriptcenter/dd742419.aspx - And the Windows PowerShell User Guide is here:
https://technet.microsoft.com/en-us/library/cc196356.aspx
Command Line and Scripting
One thing you will notice very quickly when searching for information on Windows PowerShell is that much of the guidance is focused on scripting – using Windows PowerShell as a scripting environment rather than just a command-line interface.
If you have little scripting experience, don't let this worry you. This is similar to how our regular old command prompt can become a script environment when you start creating batch files.
Windows PowerShell is really intended to provide a broad and flexible interface to many Windows subsystems which can be leveraged at the command line or through scripts (or even compiled programs).
How far should you go?
Our focus is on getting comfortable with the syntax so that we can use the Windows PowerShell commands (which are called "cmdlets") in Windows 8 for troubleshooting.
Consistent Syntax
One of the big benefits of Windows PowerShell is that it uses much more consistent syntax than the 20-50 Windows command-line tools you have used.
The power of Windows PowerShell comes from this consistency, and the fact that it returns objects, not just text. This means you can pass output from one cmdlet as input into another.
Examples:
Get-service
Get-service -name wuauserv
Get-childitem -path hklm:\Software\Microsoft\Windows\CurrentVersion
Get-childitem -path c:\Windows\Logs\CBS
Get-bitstransfer
Get-process -name explorer
Get-process -name explorer -module
If we wanted to collect this kind of information in CMD, we would be using many different sets of syntax rules. You can also start programs and use very CMD-like syntax within Windows PowerShell. So, if you need to open a log file in Notepad, you don't need to step out to a different shell to do it.
When you add the ability to format output, filter, and chain cmdlets together, there is a great deal of flexibility in Windows PowerShell.
Cmdlets in Windows 8
Our ambition in this training must be a great deal more modest, however. The most important thing for us to learn is the existence and usage of several cmdlets that are new in Windows 8 and impact troubleshooting.
TechNet provides a list of cmdlets added or expanded in Windows 8 here:
Windows PowerShell Support for Windows 8 Release Preview
https://technet.microsoft.com/en-us/library/hh994630
Our focus will be on a subset of these – cmdlets for App installation and management and for Windows Servicing.
First Things First: Get-Help
Before we jump into these unfamiliar cmdlets, you should make yourself very familiar with the get-help cmdlet. This is the /? of Windows PowerShell. Need to know how to run that get-process cmdlet above? Just run this:
Get-help get-process
Didn't remember that get-process was called get-process? Search for a keyword:
Get-help process
After you think you've found the right cmdlet, get-help with give you example commands that use the cmdlet:
Get-help get-process -examples
App Cmdlets
See the TechNet detail here:
App Installation Cmdlets in Windows PowerShell
https://technet.microsoft.com/en-us/library/hh856045
This set of cmdlets enables you to interact with the state of the Windows Store apps on the PC. The cmdlets you are most likely to use in this group are listed in the table below.
Table 6: App cmdlets
Cmdlet |
Description |
Get-AppxLastError |
Get the last error reported in the app package installation logs. |
Get-AppxLog |
Gets an app package installation log. |
Get-AppxPackage |
Gets a list of the app packages (.appx) that are installed in a user profile. |
Remove-AppxPackage |
Removes an app package (.appx) from a user account. |
These cmdlets will give you insight into the apps that have been installed from the Windows Store, errors encountered, the ability to get a log file (try this: get-appxlog > %userprofile%\desktop\appxlog.txt), and the ability to remove a problem app that can't be run or reinstalled using Windows Store.
DISM Cmdlets
See the TechNet detail here:
DISM Cmdlets in Windows PowerShell
https://technet.microsoft.com/library/hh852126.aspx
The cmdlets in this group largely parallel functionality in DISM.exe. There is a subset that you may find useful, but there is no difference in capability between the cmdlets below and their parallel functionality in DISM.exe.
Table 7: DISM cmdlets
Cmdlet |
Description |
Disable-WindowsOptionalFeature |
Disables a feature in a Windows image. |
Enable-WindowsOptionalFeature |
Enables a feature in a Windows image. |
Get-WindowsEdition |
Gets edition information about a Windows image. |
Get-WindowsOptionalFeature |
Gets information about optional features in a Windows image. |
Get-WindowsPackage |
Gets information about packages in a Windows image. |
Repair-WindowsImage |
Repairs a Windows image in a WIM or VHD file. |
Set-WindowsEdition |
Changes a Windows image to a higher edition. |
Set-WindowsProductKey |
Sets the product key for the Windows image. |
Using these DISM cmdlets, you can enable and disable Windows features – and remove them from the hard drive as well, using an option with the disable-windowsoptionalfeature cmdlet.
You can also get information on the Windows edition, and do a command line equivalent of the Add features to Windows procedure.
Also in this group is the Repair-WindowsImage cmdlet, which exposes the functionality offered by DISM /online /cleanup-image.
Demo: Windows PowerShell
Demonstrate the usage of Windows PowerShell to collect information on the following:
- The state of installed apps.
- The state of Windows features.
- Viewing the contents of the C:\Windows\Logs folder.
- Viewing the contents of the HKLM\Software\Microsoft\Windows\CurrentVersion registry key.
For More Information
Refresh and reset your PC
https://blogs.msdn.com/b/b8/archive/2012/01/04/refresh-and-reset-your-pc.aspx
Create a USB recovery drive
https://windows.microsoft.com/en-US/windows-8/create-usb-recovery-drive
How to restore, refresh, or reset your PC
https://windows.microsoft.com/en-US/windows-8/restore-refresh-reset-pc
ONiehus, Microsoft