Enroll a Windows 10 Machine into Windows AutoPilot
You’ve probably heard of Windows AutoPilot by now and If you haven’t I’ll tell you what it is.
Official Microsoft Definition:
Windows AutoPilot is a collection of technologies used to setup and pre-configure new devices, getting them ready for productive use. In addition, you can use Windows AutoPilot to reset, repurpose and recover devices.
My Definition:
A collaboration between multiple cloud services to make Windows 10 deployment easier and give more time back to the IT Admin and the User.
Why is Microsoft changing things? Well walk into any IT department and mention the word Deployment and you’d think you just threw salt on an earthworm or Garlic on a vampire or…you get the picture. Creating customized images with all the necessary applications and tools takes time. Walk into any IT department and ask them how long their deployment takes and check the reaction you get. Yes we love what we do but I'm yet to meet one person that loves spending countless hours customizing and updating their image. Windows Auto Pilot is one more option being provided by Microsoft to take some of the heavy lifting of the IT Admin and in some cases the End User.
The scenario is that a user buys a machine from a store and turns it on. The machine is running a consumer version of Windows 10 but as the user signs in with their corporate credentials magic happens in the background and we start configuring the machine for corporate use.
If you want a more detailed break down of what Windows AutoPilot is you can look .
/en-us/windows/deployment/windows-10-auto-pilot
What I’ll like to do is provide a walkthrough on how to go through this whole process. Something to keep in mind is that to do it's magic behind the scenes Auto Pilot uses Azure AD and a device ID pre-populated in the Microsoft Cloud to make it happen.
- You need to have Azure Active Directory P1 or P2
- Windows 10 1703 [July Update] and above is needed on the Client Machine going through this process
- Internet access is required when going through the OOBE. It’s how we connect to the cloud service
- The Device must be registered to your Organization.
Let's Walk through these one at a time.
Azure AD P1 or P2:
If you don’t know the difference between the Azure AD offerings, you can see the table here which explains it better than I can
https://www.microsoft.com/en-us/cloud-platform/azure-active-directory-features
Azure AD has different offerings and the higher you go the more features you get. For the Windows Auto Pilot service you need to be at level P1 or P2. If you are running on the free level then this will not work.
Windows 10 1703 [July Update] and above is needed on the Client Machine going through this process:
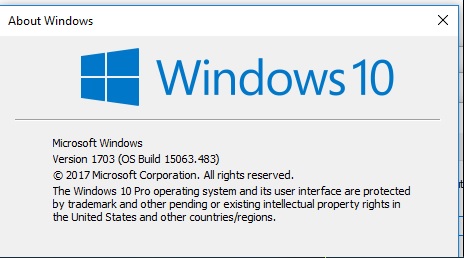
This one is pretty straight forward but you need to be on Windows 1703 with the July update. On my machine the Windows version is
Microsoft Windows Version 1703 (OS Build 15063.601). From my tests things go a lot better when you are on the latest cumulative update for Windows 1703
Internet Access:
If you don't have internet access your machines will not be able to connect to the Windows Auto Pilot service. You'll basically get the normal Windows Out Of Box Experience every other consumer machine gets.
Registering a device to your organization:
Every device [Including Virtual Machines] have a hardware ID and this is what needs to be registered in the Microsoft Cloud. It lets our cloud service know a device is registered to an organization think of it like an asset tag connected to the cloud. When the Auto Pilot service detects a registered hardware ID it connects it to the right Azure AD tenant and all the pre-configured settings start flowing down to the client machine.
Microsoft is working with hardware vendors so that in the future companies purchasing devices can have the vendors Pre-register the devices before they even get delivered to the company purchasing them. For this exercise we'll be using a PowerShell script to extract the hardware ID and uploading it into the Cloud.
The PowerShell Command I'm running can be found here
https://www.powershellgallery.com/packages/Get-WindowsAutoPilotInfo/1.1/DisplayScript
Now I'm going to walk you through the setup of a Windows 10 machine which is registered in my organization and is configured to be enrolled through Windows Auto Pilot. There are two stages I'll show you.
- The first is getting the hardware ID extracted using the PowerShell command.
- The second is getting the hardware ID into the cloud service through Windows Store For Business [WSFB]
- The final stage is turning on the machine and seeing if it works.
EXTRACT HARDWARE ID
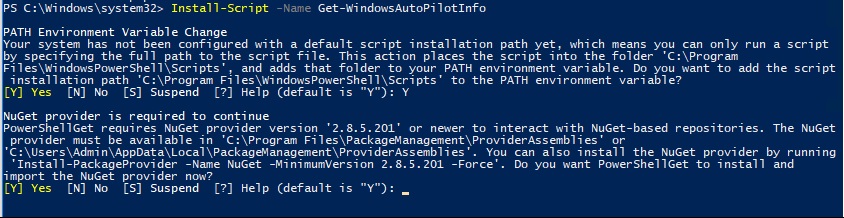
Since we are doing this manually we'll have to extract the hardware ID using a PowerShell script. You want to install the Script on your Windows 10 machine from an elevated Powershell Prompt using this command
PS> Install-Script -Name Get-WindowsAutoPilotInfo
You might get a bunch of prompts depending on if you have done this before talking about running unsigned scripts and having the right permissions. I said yes to everything but this is a demo machine so there are no consequences to doing so. Make sure you are not breaking any organizational policies.
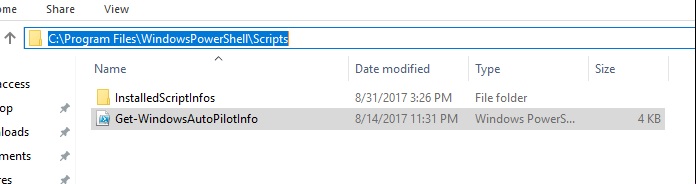
If you run the command and all goes well the script will be in this location
C:\Program Files\WindowsPowerShell\Scripts\
Our next step is to then use the script to pull the device information from WMI. The information will be created and out into a spreadsheet which can then be read by the Cloud Service.
Something to add is that you need to set your restriction policy to allow you run scripts from the location of the PowerShell script. I am on a demo machine so I set mine to unrestricted, but you probably don’t want to do that in a real world environment. The command I ran to set my restriction policy is
Set-ExecutionPolicy unrestricted

The command format is
.\Get-WindowsAutoPilotInfo.ps1 -ComputerName <ComputerName> -OutputFile .\NameOfOutputfile.csv

If everything goes well you should now see a .CSV file with the name you chose in the location from which you ran the command. This means that the command was executed correctly and we can uploaded the device ID into the Windows Store For Business.
Something you might be thinking is how to get these device ID’s of brand new machines without booting into Windows for the first time.
The first thing to note is that Microsoft is working to make sure this manual process is almost never used. We are providing Hardware vendors the means to do this, so you never have to worry about this. However, if you do want to do this today you can do this at the very first step of the OOBE experience.
You can bring up a console at the first step OOBE by pressing [Shift + F10] and then you would can grab the script from a network share or storage device and run it. You’ll generate a .CSV file which you can then copy to another location from where you can access it. It definitely requires getting your hands dirty but with Hardware Vendors being onboarded for this process we expect our customers to not have to go through this for much longer.
UPLOAD HARDWARE ID INTO THE CLOUD [WSFB]
Navigate to the Windows Store for Business and Sign in
https://businessstore.microsoft.com/en-us/store
You need to be a Windows Store For Business Admin to do this by the way so if you’re not this is not going to work
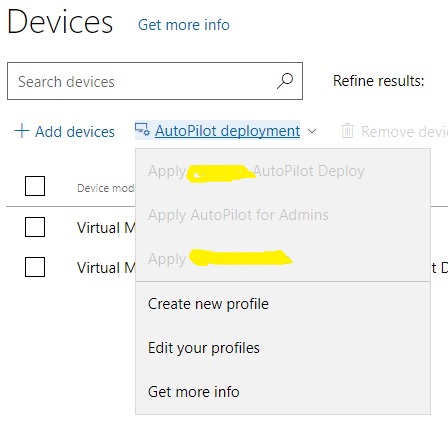
After you login to the store Click on Manage

Click on Devices on the left-hand side of the browser

Click on Add Devices.
If this is your first time doing this then you might have to create an AutoPilot Deployment Profile but more on that later. After you click on “Add Device” Windows Explorer will pop up and you need to point it to the location of the CSV file you created.

After you select the file it will ask you if you want to add it to a group. you have the choice of creating a new group or adding it to an existing group. I simply chose to add it to an existing group previously created.
If all goes well and we read the device ID then you should see a message at the top letting you know that it your request is being processed. I kept refreshing the browser and about 4 minutes later I see a new machine show up.


You have the option of creating a an AutoPilot Deployment Profile and assigning it a different set of settings compared to another profile. An example that comes to mind is giving your IT Admin an AutoPilot profile that gives them Local Admin rights while you have another profile for other users that doesn't give them Admin rights. I decided to create a new Auto Pilot Deployment Profile, so I can assign it the options I want.
To create a new profile I clicked on the arrow next to “Auto Pilot Deployment” and clicked on “Create new Profile”
I can now select the OOBE options I want my users to skip using the buttons on the right hand side
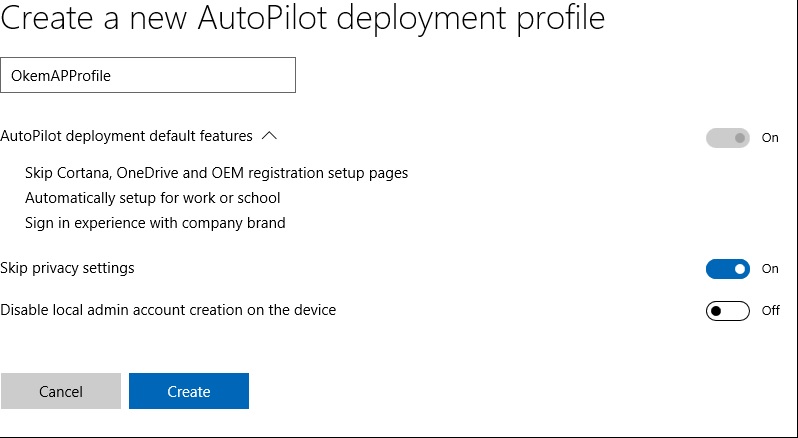
I click create and my profile should now be available.
I then check the box on the device I just added and click on the arrow below “AutoPilot Deployment” and I can now Apply the profile I just created.
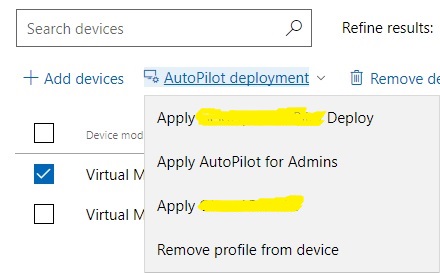
This means that the Auto Pilot settings I’ve activated for that profile will be applied to that device. Now that we’ve done all that I’m going to reset my machine and see what happens, fingers crossed!
TURN ON THE MACHINE TO SEE IF IT WORKS
At this point in the real world all a user has to do is turn on the machine given to them by IT and during the first boot up the machine will contact the Auto Pilot service. Since this is a demo I'm using a Virtual Machine which I just reset.
The first screen I see when I turn on the machine is the Keyboard Layout and I then choose my language.
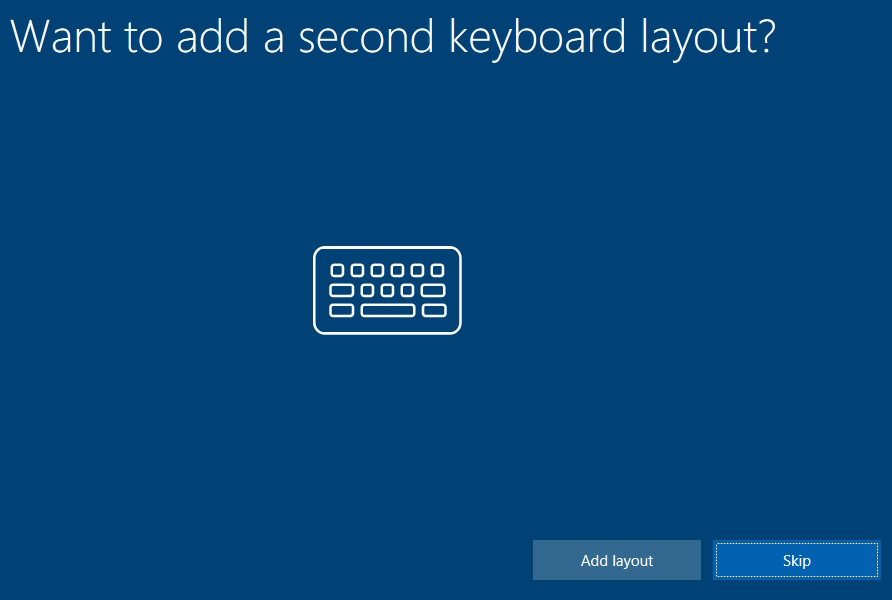
I choose the layout Skip over some basic Windows Setup Questions.
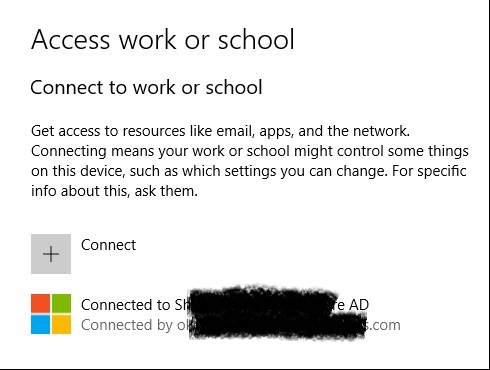
I accept the License Agreement and Install some updates in the background and then I get to the login screen. What I want to see is the name of my Azure AD tenant when I go to login.
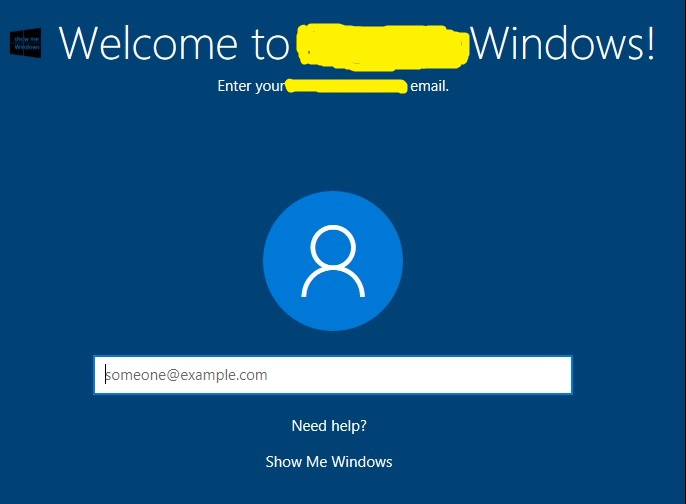
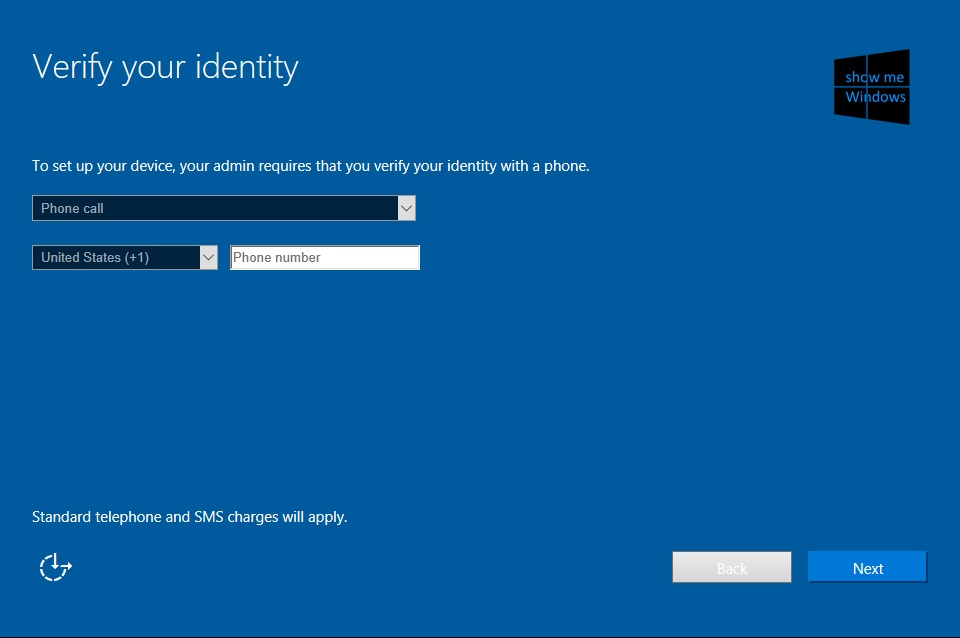
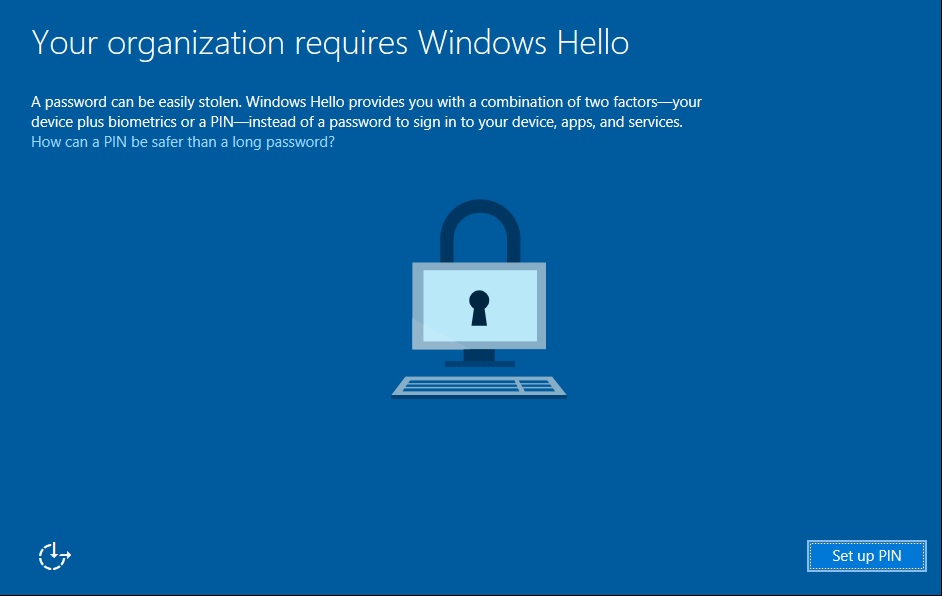
This means we've successfully connected with the Windows AutoPilot service and we are getting settings from our tenant. Once It picks up the organization the device is registered to then we should be fine. Something that you can do is use an MDM service like Intune to push compliance policies to your devices. In my case we have multi-factor authentication turned on so I get prompted to set that up and I also have Windows Hello turned on. If I had applications being pushed to the machine then they'll be getting installed at this point.
And we are on the desktop!
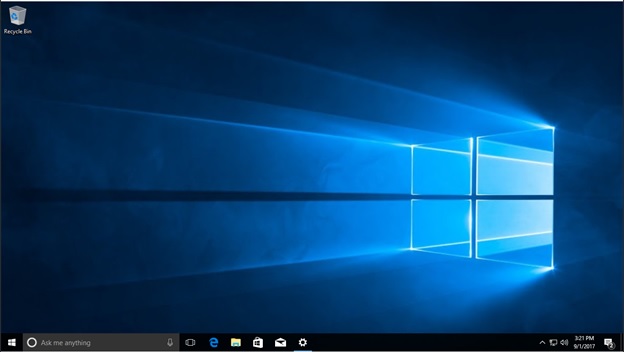
I can go into settings and verify that it is joined to Azure AD, I like when stuff works the first time.
I have the Power BI application assigned to all users in my tenant through the Windows Store For Business and I see it's installed
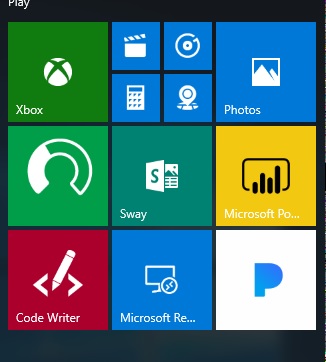
So we are in the program.
What I’ve shown you is me pulling the device ID from a Windows 10 1703 machine and then enrolling the Device into the Microsoft Store through the Windows Store For Business and applying a Windows AutoPilot profile to it. We then deployed the device and during OOBE the device got configured to be a corporate ready device using Intune policies in this case. I hope it helps you!
Until next time may your path to deployment of Windows 10 get even shorter thanks to AutoPilot!