Automating Highlighting of Search Results in an Outlook Message
Do you know about the new Outlook add-in that automates highlighting of your search string in an email message? The Visual How To, Automating Search Highlighting in Outlook 2010, provides a real add-in that you can build in Visual Studio and run with Outlook 2010, and that improves your experience searching for email content. Read on to also learn about doing programmatic searches and customizing the ribbon in Outlook!
Improving Search Experience
In Outlook, you can use Instant Search to search for items in a folder that contain a string of your choice. For example, you can search for “office”. Instant Search returns items that contain “office” in the subject or body, in the Outlook explorer. However, when you open a returned item in an inspector, the search string is not highlighted in the email body, as shown in the following screen shot.
You will have to click Find in the Editing group of the Message tab, enter the search string again, and then click Find Next in order to see the occurrences within that email. These extra steps can be tedious if you are looking through multiple returned results to compare their content in inspectors.
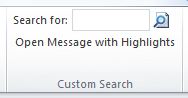
This add-in allows you to use just a single click to open a returned result, and all occurrences in the email body would be automatically highlighted in the mail inspector. See the following screen shot.
The next screen shot shows the custom interface to use this custom search, and the regular user interface of Instant Search provided by Outlook.
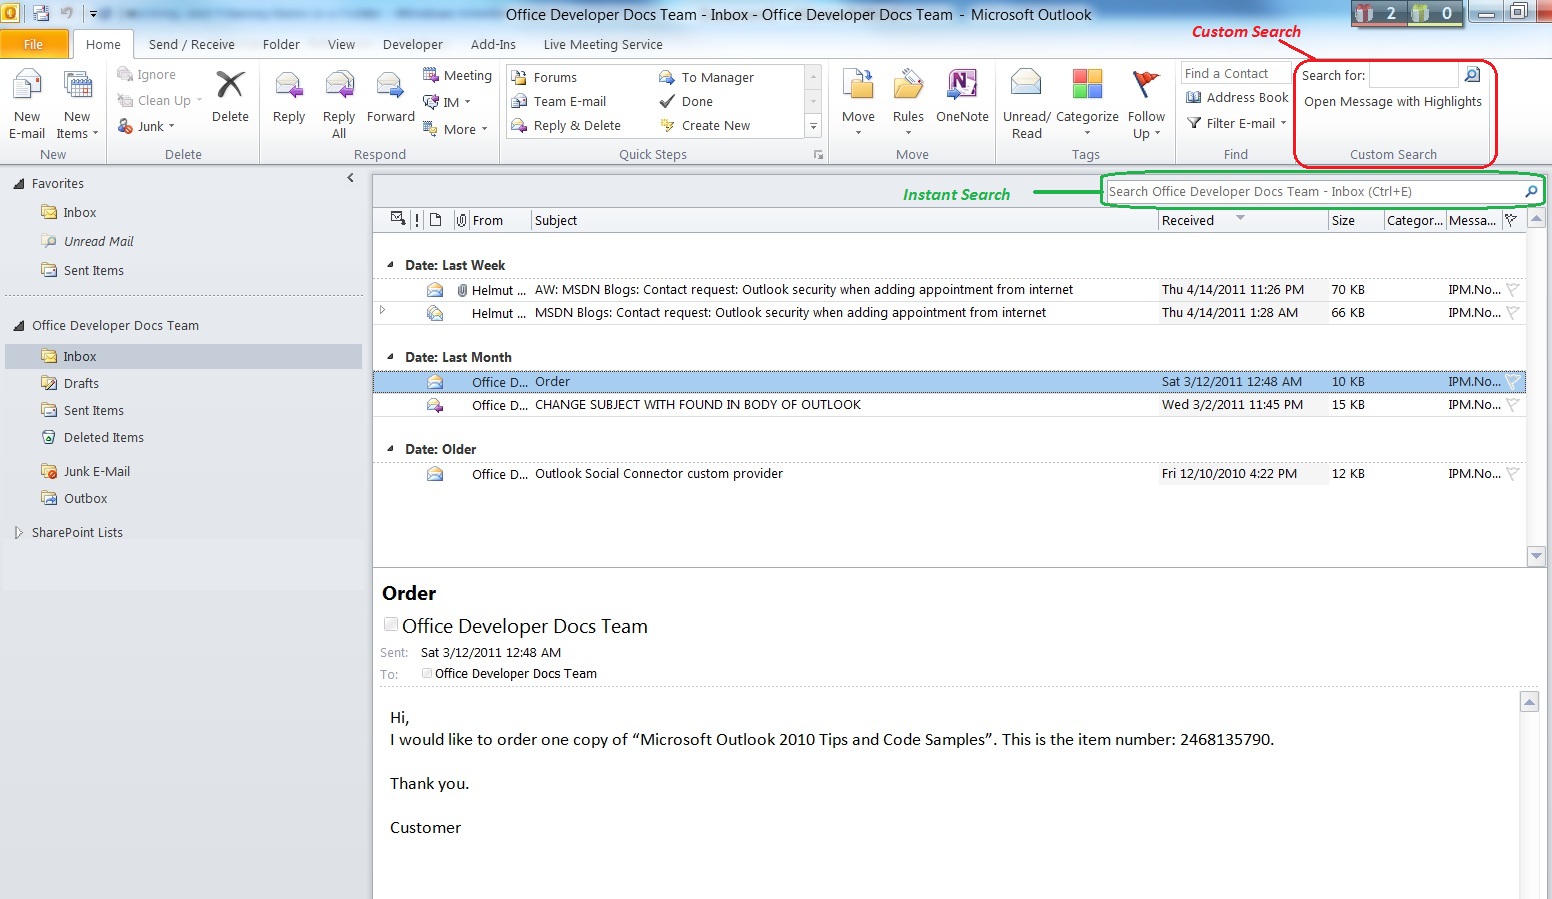
The custom search interface contains a text box, a search icon, and an Open Message with Highlights button.
The text box plays a similar role as the Instant Search text box, and is there just to provide the search string entered by the user to the add-in.
The following is the typical user search scenario:
1. Enter a search string in the text box adjacent to Search for.
2. Click Enter or the search icon to initiate the Instant Search.
3. From the list of search results returned by Instant Search, single-click a result item.
4. Click the Open Message with Highlights button.
5. The add-in opens the item in an inspector with all occurrences of the search string in the item’s body highlighted.
Programmatic Search
Aside from improving the search experience with automatic highlighting, this add-in shows 2 ways of performing programmatic search in Outlook:
· Using Explorer.Search to perform Instant Search on items in a folder
· Using the Microsoft Word object model to search in a mail or meeting item in an inspector. That is, use the Inspector.WordEditor property to obtain the Word Document object, then get the Range object that represents the entire email body, and use the Find object to search and highlight occurrences of the original search string.
Note: In Outlook, because a mail folder can contain mail items as well as other item types such as meeting item responses, before opening a search result item in an inspector, the add-in first has to identify the type of the selected item, and then uses the appropriate inspector to open the item. For example, the add-in uses MailItem.Display if the item is a mail item, and MeetingItem.Display if the item is a meeting item.
There are other ways to perform searches in Outlook, see Enumerating, Searching, and Filtering Items in a Folder for details.
Customizing the Ribbon
This add-in also provides a useful example of how to customize the ribbon to meet its specific needs:
· In order to search only mail folders, this add-in adds a custom tab to the ribbon on the mail explorer, but not to the ribbon for the other explorers such as the contacts explorer. To do that, in the ribbon XML, only specify idMso as TabMail, as shown below:
<ribbon>
<tabs>
<tab idMso="TabMail">
<group id="CustomSearch" label="Custom Search">
· When you initiate Instant Search and when Instant Search returns, Outlook defaults to the Search Tools contextual tab in the explorer. In this scenario, after returning from Instant Search, the user should return to the Custom Search tab in order to use the custom button to open the message with highlighting. To achieve that, after returning from Explorer.Search, do the following:
ribbonUI.ActivateTabMso("TabMail")
· If the user switches to a different folder to do a new search, the add-in should clear the search text box to prepare for a new search. The add-in listens to the Explorer.FolderSwitch event and calls the IRibbonUI.Invalidate method to refresh the custom UI
See the video, and view the code for more details!