Using an OData Service in apps for SharePoint
I am Ayushi Garg, a tester on the SharePoint Developer Experience Team. In this blog post, I will walk you through how you can get started with consuming an OData service easily inside apps for SharePoint.
The Open Data Protocol (OData) is a web protocol for querying and updating data that provides a way to unlock your data and free it from silos that exist in applications today. OData does this by applying and building upon web technologies such as HTTP, Atom Publishing Protocol (AtomPub), and JSON to provide access to information from a variety of applications, services, and stores. (Source: Open Data Protocol site)
You can choose from a variety of such OData services, which are available on the Open Data Protocol site or in the Windows Azure Marketplace. For this walkthrough, I will be using the Northwind service to fetch Customers and Employees Entity information inside my sample app. Business Connectivity Service (BCS), which has been enabled in SharePoint 2013 inside apps, is used to build these apps. If you are not familiar with BCS, don’t worry—this blog will help you get started.
Let’s get started …
Creating an App for Sharepoint
Step1: Create a new project in Visual Studio 2012, and select the App for SharePoint 2013 template. Give a name to the project, and click OK.

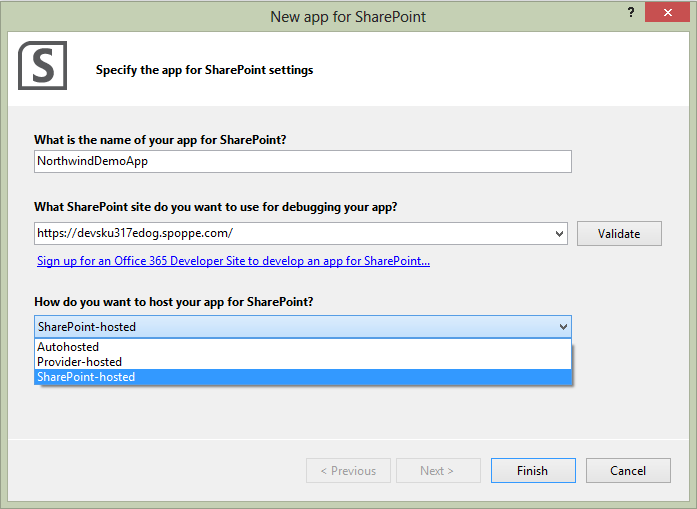
Step2: Specify the app details in the New app for SharePoint wizard.
1. Give a name to the app, like NorthwindDemoApp.
2. Specify the SharePoint URL—either a local SharePoint Server URL or a SharePoint online developer site URL.
3. Choose the kind of app you want to build. For this walkthrough, I use SharePoint-hosted app.
4. You can choose to validate the site entered before proceeding further.
SharePoint-hosted apps provide an out-of-box External List Experience to view the data inside the app. In Autohosted apps, the external list is created, but the out-of-box view is not supported. You have to write custom code to fetch the elements.
After all entries are made, click Finish to create the project. You might be prompted for your credentials to connect to your SharePoint site. Enter your credentials and proceed.
This creates a new SharePoint project for you. At this stage, it is at a Hello World App level. You can build and run your app to see it working.
Adding an External Data Source for the OData Service
Now we will add the Northwind external data to this app.
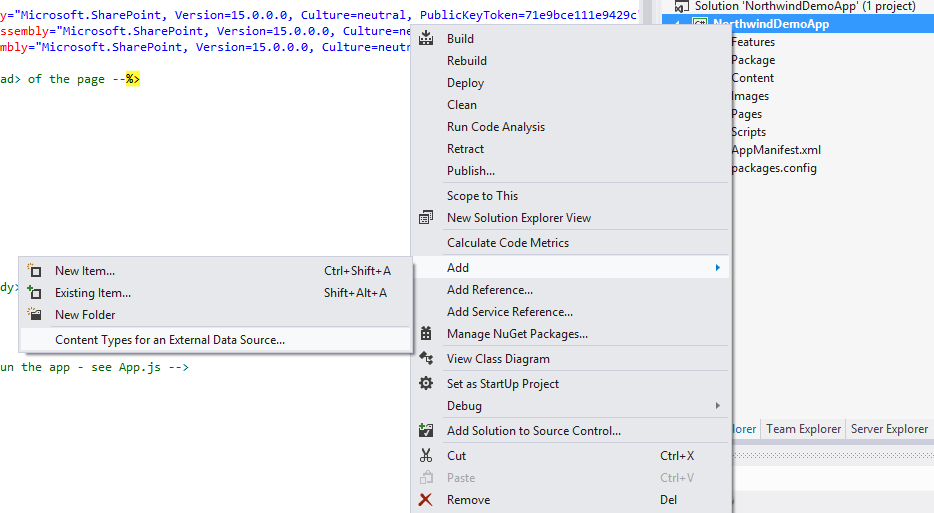
Step 3: Right-click the solution, select Add, and then select Content Types for an External Data Source.
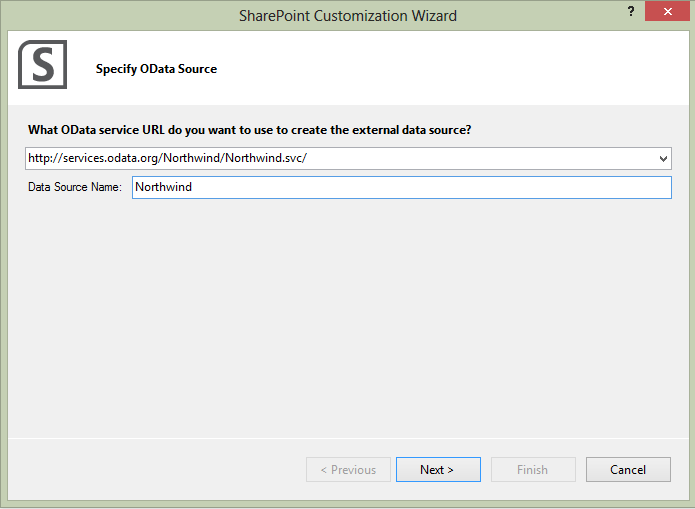
Step 4: In the SharePoint Customization Wizard, specify the Northwind OData Service URL: https://services.odata.org/Northwind/Northwind.svc/ . Specify any name for your service, and click Next.
This is the stage where you will specify the OData service URL against which you are building your app. If you click the drop-down list, you will notice all the recently used service URLs, which is handy when you create multiple projects using the same service.
Data Source Name is just a name for your service. You can specify any value here.
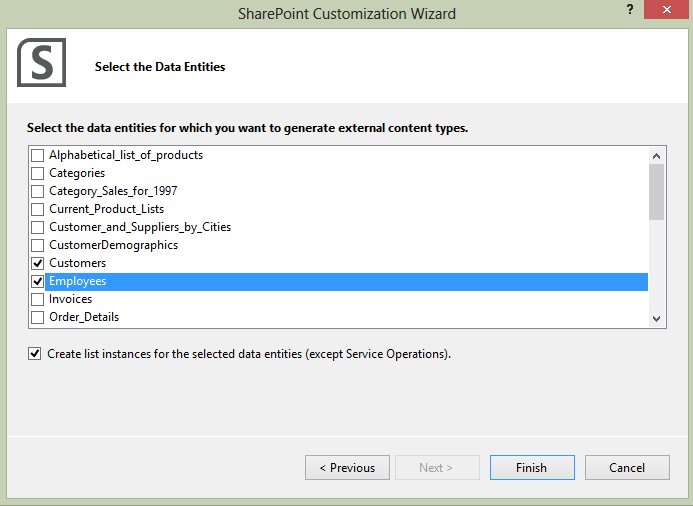
Step 5: Every OData service will have some number of entities to be consumed. At this stage, select the entities you are interested in that contain the data you need to use in your app. I selected all of them for this demo.
Notice the check box that asks to create external lists for the selected entities. Make sure it is selected because we want to autogenerate the lists. If it is not selected, you do not get an out-of-box external list along with the external content type. Then click Finish to complete the wizard.
The external content types (ECT) and the external lists (VL) for each entity in the Northwind service are added to the project. Notice the .ect files for each entity and elements.xml for the external lists.
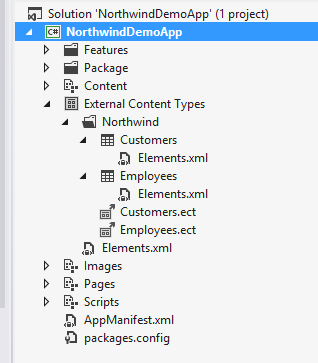
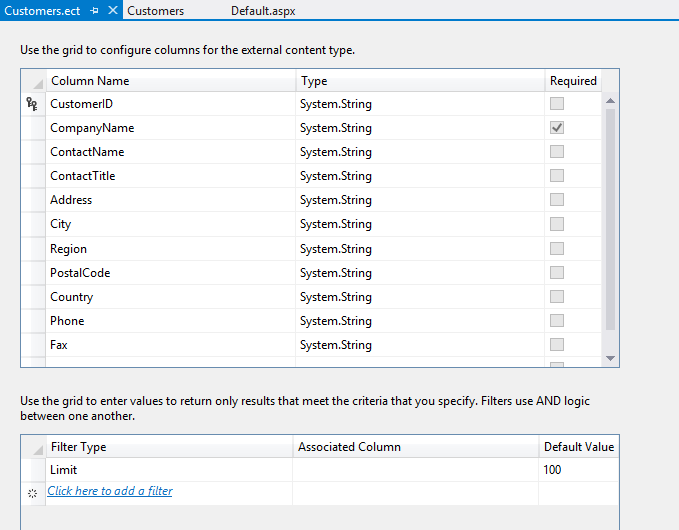
If you open one of the entities (.ect files) , you will see all columns of the entity are included. Instead of the designer view , you can open the ECT in XML. Then you will get the autogenerated BDC Model, which you can hand edit as per your requirements. To understand the BDC Model infrastructure, see BDC Model Infrastructure on MSDN.
Using the Data in the App
Let’s customize the default page to include links to our external lists. All lists are created with a “\Lists\<ListName>” URL . All the external lists also follow the same URL, with the list name the same as the entity name. Add the following code to the Default.aspx page.
<br />
Northwind Data :
<br />
<br />
<a href="..\..\NorthwindDemoApp\Lists\Customers">Customers</a>
<br />
<a href="..\..\NorthwindDemoApp\Lists\Employees">Employees</a>
<br />
You can add new pages as per the requirements of your app, and you can use the BCS client object model to interact with the Northwind data. You can also use the simple List client object model to fetch data, although it is not as extensive as the BCS client object model. You can read about the BCS client object model for SharePoint 2013 in Get started using the client object model with external data in SharePoint 2013.
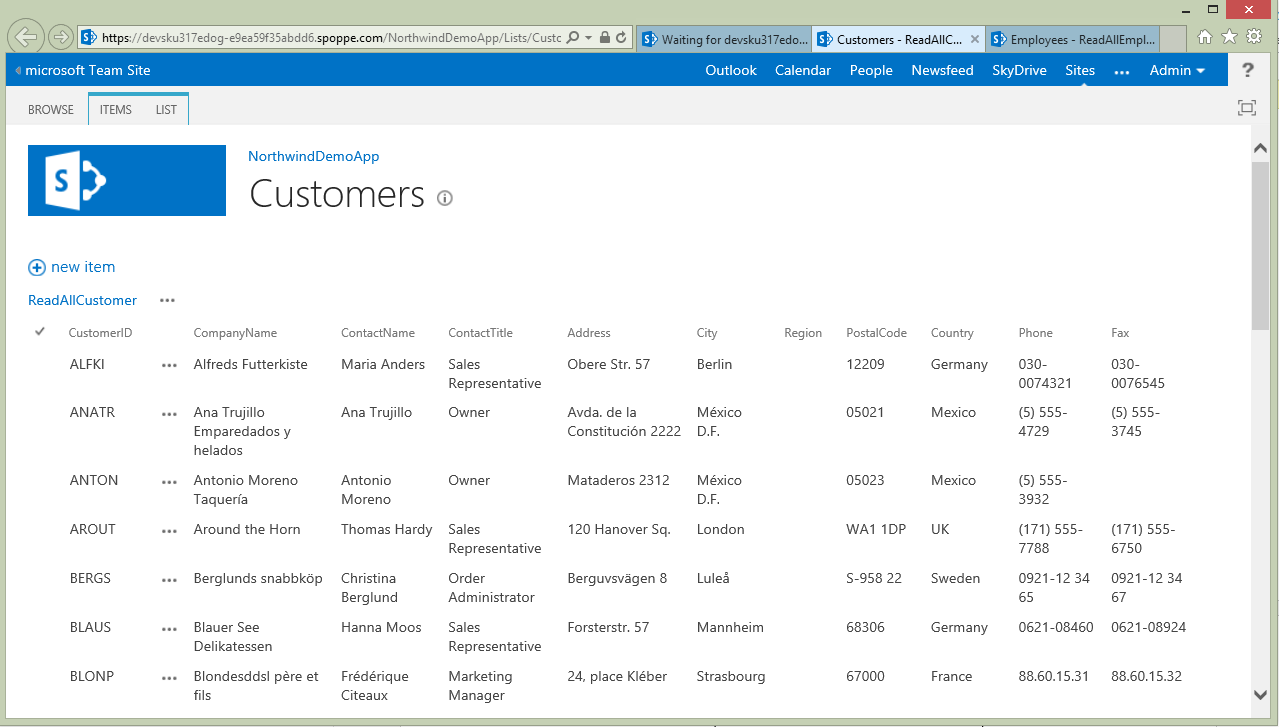
Now build and run your app. Notice the default page showing the links that we added. Now choose the Titles list on the page, and you will be redirected to the external list. The external list contains all the columns of the ECT and associated data.
Customize the app as needed, and publish it once it is ready. Upload the .app package of the app on the marketplace to make it available for installation.
Attached is the source code for reference.
Feedback
Please post your queries or feedback as comments on the blog.