Sharing data from a Windows Store App using WinRT API
In this blog post, I’ll go through the steps of implementing the Share feature in your Windows Store App. Sharing data can be bidirectional, your App can either accept data from another App and/or your App can share data to another App. In this article, I’ll discuss the latter scenario in which you share data with another App and your App acts as a source of information for sharing. I’ll be using the example of TFS Dashboard App in which I connect to OData Service for Team Foundation Server to retrieve data from TFServer. The source code of this App is available for download.
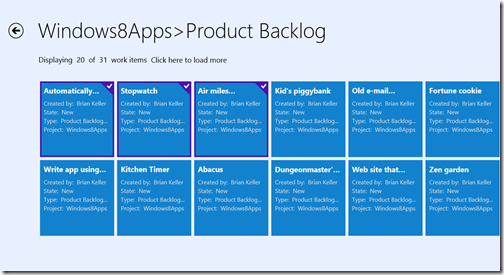
Consider a scenario where you want to share WorkItems from a Windows Store App with a team member. In this App, you can select the WorkItems that you wish to share.
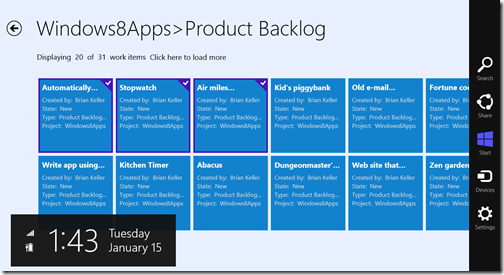
And bring up the Charms bar (Windows key + C or swipe from the right) and hit the Share button.
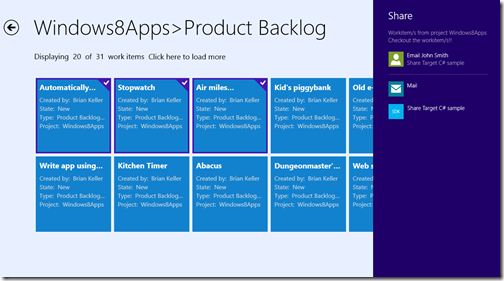
Then from a list of Apps that accept the data format that you are sharing will be available as share targets.
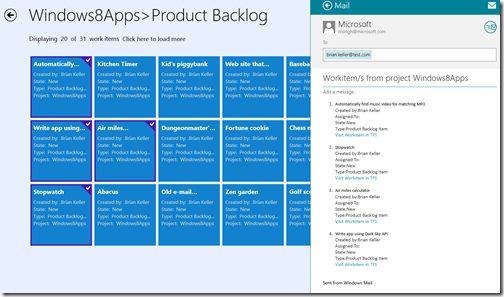
For this example, let’s select the Mail App, and send the WorkItems to my colleague:
Now let’s implement share in our Windows Store App.
Step 1: Add the event “OnDataRequested” towards the end of the LoadState() method of the ItemDetailPage.xaml.cs or the page you want to share the data from.
DataTransferManager.GetForCurrentView().DataRequested += OnDataRequested;
DataRequested event is part of Windows.ApplicationModel.DataTransfer namespace. Hence add the following using statement on the page.
using Windows.ApplicationModel.DataTransfer;
and for StringBuilder class add the namespace:
using System.Text;
Step2: When we bring up the Charms bar and hit the Share button then the OnDataRequested event is called for that App.
We need to handle the OnDataRequested event. Add this event handler to your page, in my case it is ItemDetailPage.xaml.cs.
C#
void OnDataRequested(DataTransferManager sender, DataRequestedEventArgs args)
{
var request = args.Request;
StringBuilder html = new StringBuilder();
if (this.itemGridView.SelectedItems.Count != 0)
{
//if the selected items count is greater than 1 then create an html ordered list – numbered list
if (this.itemGridView.SelectedItems.Count > 1)
{
var items = this.itemGridView.SelectedItems;
html.Append("<ol>");
foreach(WorkItem item in items)
{
html.Append("<li><h4>" + item.Title + "</h4>");
html.Append("Created by:" + item.CreatedBy + "<br/>");
html.Append("Assigned To:" + item.AssignedTo + "<br/>");
html.Append("State:" + item.State + "<br/>");
html.Append("Type:" + item.Type + "<br/>");
html.Append("<a href=\"" + item.WebEditorUrl + "\">Visit Workitem in TFS</a><br/></li>");
}
html.Append("</ol>");
}
else
{
var item = (WorkItem)this.itemGridView.SelectedItem;
html.Append("<h4>" + item.Title + "</h4>");
html.Append("Created by:" + item.CreatedBy + "<br/>");
html.Append("Assigned To:" + item.AssignedTo + "<br/>");
html.Append("State:" + item.State + "<br/>");
html.Append("Type:" + item.Type + "<br/>");
html.Append("<a href=\"" + item.WebEditorUrl + "\">Visit Workitem in TFS</a><br/>");
}
string data = Windows.ApplicationModel.DataTransfer.HtmlFormatHelper.CreateHtmlFormat(html.ToString());
request.Data.SetHtmlFormat(data);
}
request.Data.Properties.Title = "Workitem/s from project " + SampleDataSource.ProjectName;
request.Data.Properties.Description = "Checkout the workitem/s!!";
}
In the above method, I go through the items that are selected i.e. WorkItems on the ItemDetailPage.xaml.cs page. I am selecting certain properties of the selected WorkItems and creating an HTML formatted text for sharing data. CreateHtmlFormat() is a method that checks your formatting and adds necessary headers.
Step 3: Detach the event handler in the SaveState method
// Deregister the DataRequested event handler
DataTransferManager.GetForCurrentView().DataRequested -= OnDataRequested;
That’s it, we are done and ready to share data from our App.
For another sample example of implementing share by using Windows Store App as source of data visit: https://aka.ms/ShareAsSource.
For Share API reference, visit: https://aka.ms/DataTransfer_API.


