SharePoint - Working with ULS Logs
Hi Search Folks
When dealing with SharePoint, the ULS is usually the main source of information you have to rely on. It is almost unavoidable to not dig in the ULS when troubleshooting SP issues.
LogParser Studio (aka LPS) and LogParser are a must have to mine data out of the ULS.
Hereby I will share how to set up LogParser Studio to handle ULS data.
- Download LogParser Studio
https://gallery.technet.microsoft.com/office/Log-Parser-Studio-cd458765
- Open LogParser Studio.
- The tool comes with a fair list of predefined queries.
- I would encourage you to review them (IIS especially)
- All queries are organized in libraries.
- Create a new query
Now that we have a new query we need to set it up to handle ULS input type.
ULS is a Tab-Separated file format so please specify the Input Log Type as TSVLOG 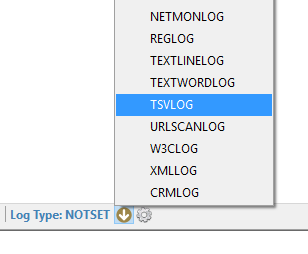
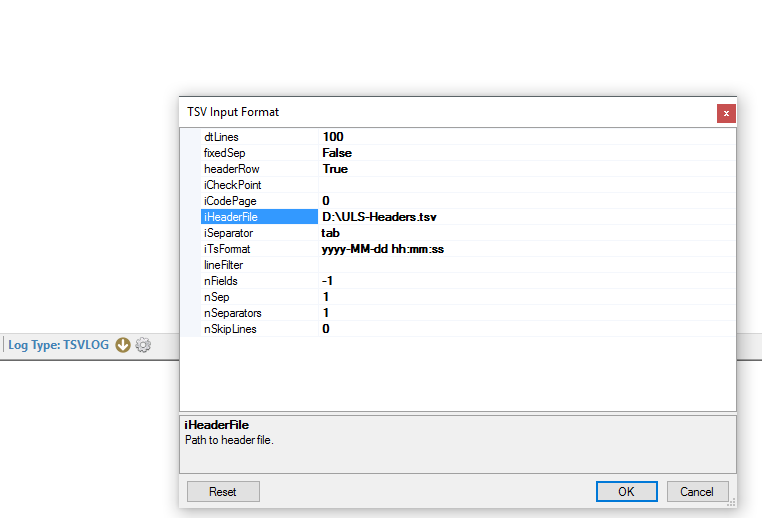
- Once selected, click on the Setting icon (next the TSVLOG type text).
Create a .tsv file to store the ULS Header. Use the below content (tab separated)
Timestamp Process TID Area Category EventID Level Message CorrelationSave your file on disk.
In the Settings iHeaderFile key put the path of the ULS Headers. In my case D:\ULS-Headers.tsv.
iHeaderFile is the only option we would modify at that point. All other settings should be maintained as is.
Click OK
- You are almost there...
- Now it is time to indicate to LogParser Studio where your ULS log files are located.
One very good thing of LogParser is its ability to query against multiple files as input. In that sense, it could allow you to merge multiple ULS files into one.
- Click on the Log File Manager
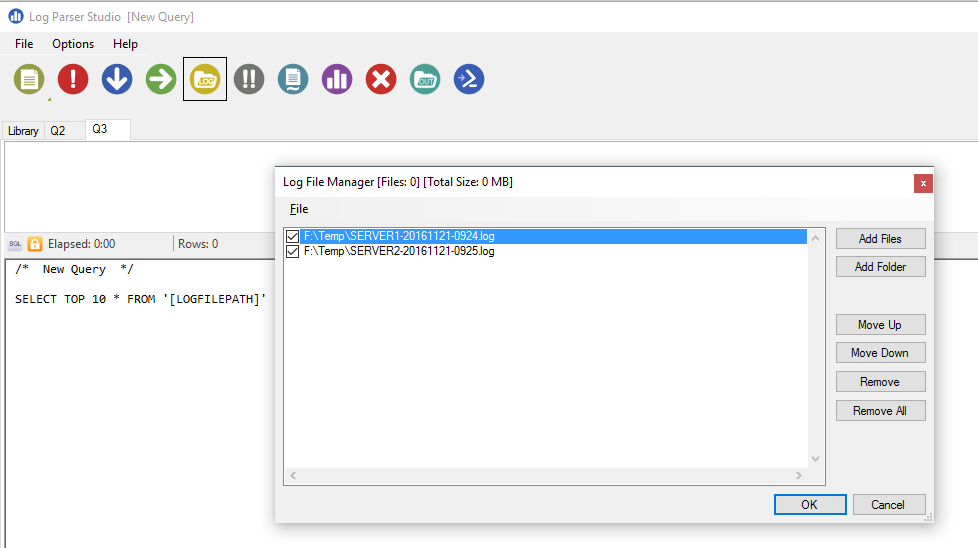
- Add Files or folders containing your ULS logs. In my example I added two ULS log files. Click OK.
- After you're all set to execute our first ULS query in LPS !
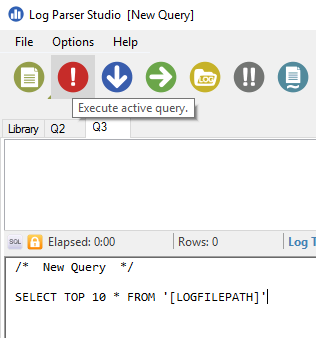
- The default query shows "SELECT TOP 10 * FROM '[LOGFILEPATH]'". You can execute the query by hitting F5 or click on the red ! button.
- The Query results of your query in the upper panel as follows
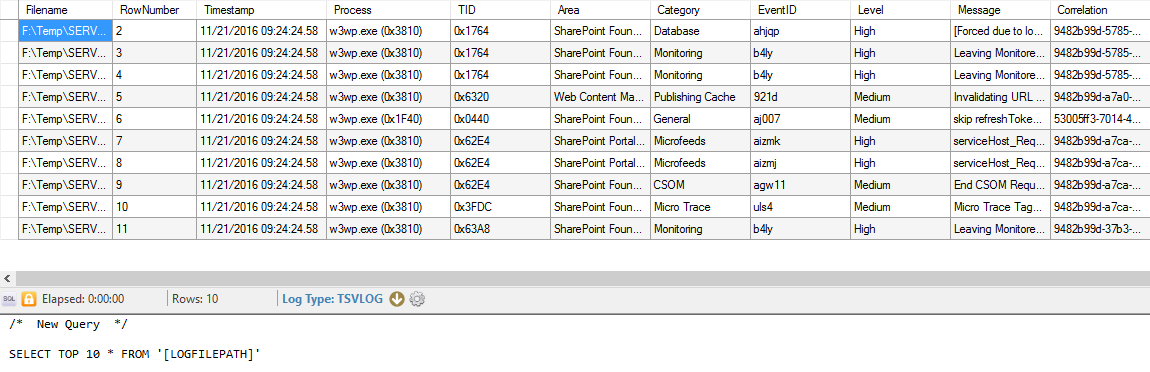
- You would notice two extra columns : Filename and RowNumber. Those are LogParser specific, automatically generated upon processing. They will always appear when executing SELECT * queries. Filename can be used to maintain the origin of your ULS or differentiate ULS logs set.
- Save your query !
Example of queries
 SELECT TOP 10 *
FROM '[LOGFILEPATH]'
WHERE Message like '%Exception%'
 SELECT *
FROM '[LOGFILEPATH]'
WHERE EventID = 'b4ly'
One last thing. You can output the query results into a .tsv file
 SELECT *
INTO 'F:\Temp\mergedULS-test.tsv'
FROM '[LOGFILEPATH]'
WHERE EventID = 'b4ly' and TID = '0x1764'
Time for you to have fun, create your own queries and master your ULS data.
Stay in Search !