Creating a Stretched Network on Microsoft Azure
Take Full Advantage of a Global Array of Data Centres
One of the really powerful advantages of using Microsoft Azure to host any application or workload is the global reach it provides. That is, the ability to take advantage of a global array of data centres to reach new employees or customers. To date, you could do this by deploying multiple applications in different data centres and using Traffic Manager to route traffic to the appropriate data centre. This works great but what if you want to keep the data consistent across both data centres, then you could use SQL Data Sync to synchronise data between the two, and this works great if you are using SQL Server or SQL Azure Database. But what if you wanted to deploy a service across multiple data centres and using VMs that communicate directly with each other, for example, to deploy a SQL Server or MongoDB cluster that spanned the globe? Another challenge is disaster recovery and availability. If we could span our infrastructure across multiple data centres then we will achieve much better availability and resilience in the case of a disaster.
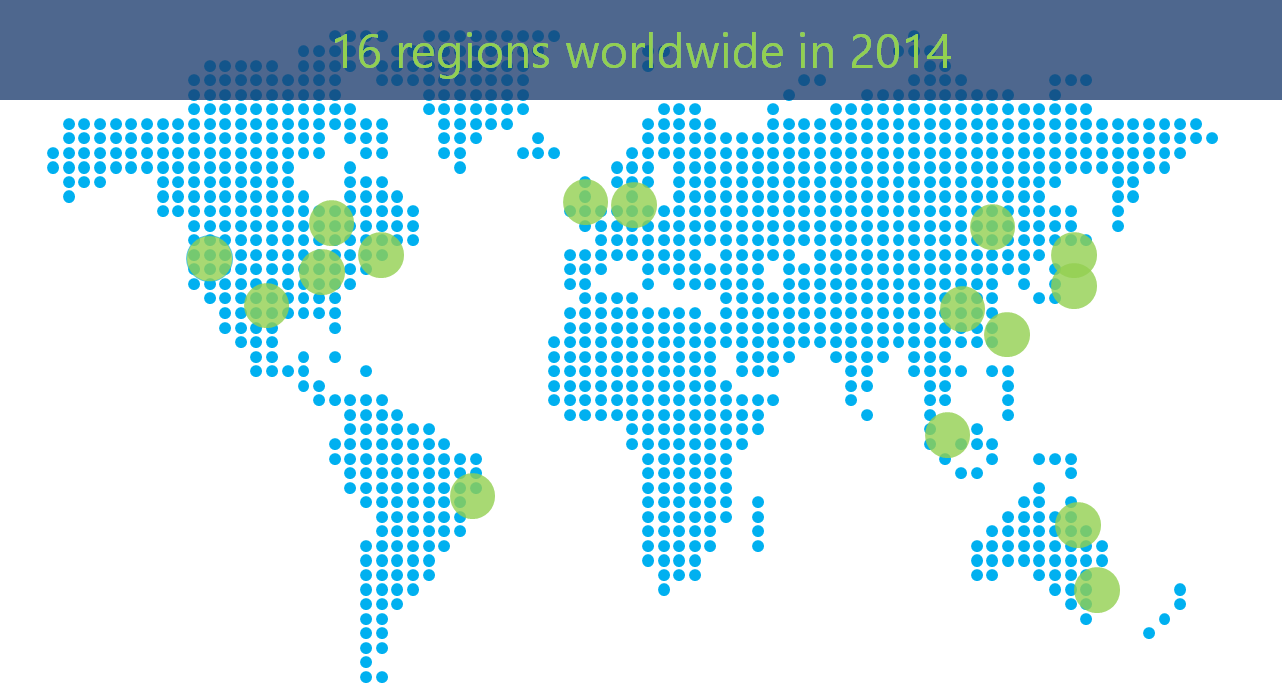
Last week Scott Guthrie announced a host of new features on Azure, you can check them out here, but one that I was waiting for was the ability to connect multiple virtual networks (in different regions) as well as the ability to connect multiple VPN devices on premise to a VNet in Azure. This gives enterprises a much easier way to adopt cloud by creating reliable connections into Azure as well as the ability to then stretch their networks across Azure data centres. The VNet to VNet connections can even span subscriptions, so if you have separate departmental subscriptions or subscriptions for dev & test and production, these can all be connected as if they were one network. It's not just enterprises, start-ups or any company looking to build applications that can span the globe can use this new feature. There is also the benefit of VNet to VNet connections using the Azure backbone for traffic and not the internet.
Setting it Up
To show how to set this up I am going to create a VNet in Dublin (North Europe) and Holland (West Europe). Once we do that we then connect each network to the other using a site to site VPN as if the other was a local on-premise network. It's that simple. So here are the steps.
- Create two affinity groups, one for each data centre you want to span. In my case Dublin and Holland. You can do this through the dashboard or via Powershell.
  New-AzureAffinityGroup -Location "North Europe" -Name Dublin
 New-AzureAffinityGroup -Location "West Europe" -Name Holland
- Create the Virtual Networks. Again you can do this through the dashboard or via Powershell. For PowerShell you need a configuration file which defines all of the network information including the address space and subnets for each Network. You will also need to create a local network for each end of the connection, one for Dublin and one for Holland. The local networks essentially contain the VPN gateway that is used to route the encrypted traffic between data centres. Take a look at the attached file and use it as the basis of your configuration. Point to note is that you do not know the VPN gateway address for both local networks, so just use a dummy address, e.g. 1.0.0.0 and 2.0.0.0 for this step and once the gateways are created later we can update. Once you run the script below with the correct path to the network configuration you should verify that you have two VNets and two local networks.
Set-AzureVNetConfig -ConfigurationPath c:\NetworkConfigVNET.netcfg
- Create the gateways on both sides. You can do this via the dashboard by clicking into each VNet and clicking "Create Gateway". Once done, you should see a disconnected gateway for each VNet. Take note of the gateway address created for each.
  New-AzureVNetGateway -VNetName VNet-Dublin
 New-AzureVNetGateway -VNetName VNet-Holland
- Now that the gateways have been created we can update the local networks with the correct IP addresses. Again you can do this via the dashboard by clicking into the local networks tab and editing each. You can also do it via PowerShell by updating the original network configuration file, and re-running the Set-AzureVNetConfig script. Make sure to update the local-Dublin network with the gateway IP of VNet-Dublin and the same for Holland, getting these the wrong way around will mean the connection will not work.

- The final step requires defining the encryption key for both ends of the tunnel. It is important that these are reset to be the same. As it stands each gateway will have a different key, as they are set by default to connect to an on-premise VPN device. To update the key for both run the following command:
  Set-AzureVNetGatewayKey -LocalNetworkSiteName Local-Dublin -SharedKey mysharedkey -VNetName VNet-Holland
 Set-AzureVNetGatewayKey -LocalNetworkSiteName Local-Holland -SharedKey mysharedkey -VNetName VNet-Dublin
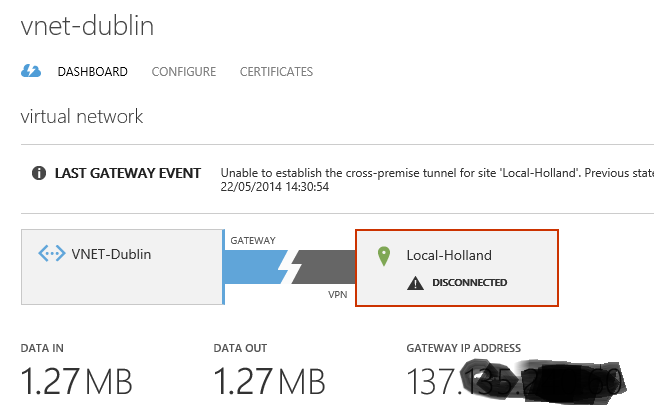
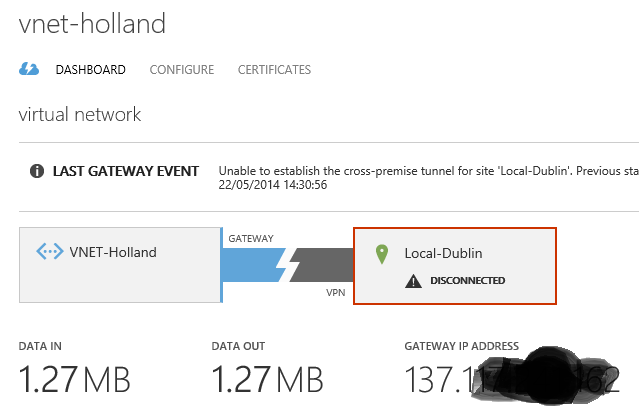
- You should now see that each VNet is connected to the other via the gateways. If not, try clicking the "Connect" option for each VNet.

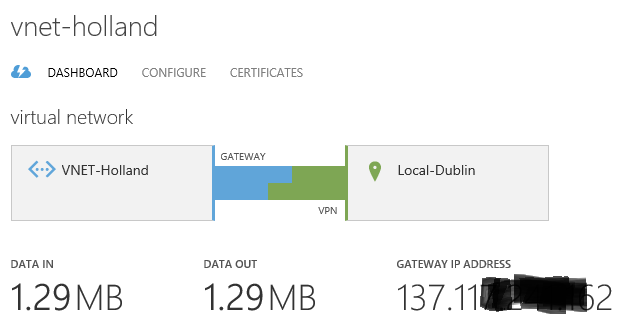
Done
That's it. We now have a virtual network in Azure that spans across two data centres. You can now create VMs and Cloud Services within the VNets as you normally would and they can communicate with each other as if they were on the same network. If you want to create some VMs and reserve internal IP addresses within the VNet then check out my other blog post here:
As always, I would love to know how you are putting this technology to use so feel free to reach out!