How to Build a Flipbook Maker: Part 3
Happy New Year! The Gadgeteer team is back from the holidays and we'll conclude the Flipbook Maker series this week. In Part 1 and Part 2 we assembled the hardware and built the basic software architecture. This post covers using WPF to create a menuing system for the touchscreen display. This will provide the remaining user controls - saving the movie to the SD card, deleting a frame, etc. It will also provide visual cues like frame number and playback status.
Adding Resource Images and Fonts to the Project
We'll create the onscreen buttons and UI controls from GIFs, so the first step is to those images to the FlipbookMaker Resources directory. They're available in a .zip file attached to this post - with a couple of font files that the Flipbook Maker uses, too. Unzip this FlipbookMakerResources.zip and put the files in your project's Resources directory. Update: The entire project is now attached to this post, including the solution, source code and resources. You can use that project and skip this section if you want. This part is a useful reference for how to add resources to your future Gadgeteer projects, though.
Now, let's register the image and font resources with the Visual Studio project. From the Solution Explorer, open Resources.resx. You'll see something like this with the two default Gadgeteer fonts already registered:
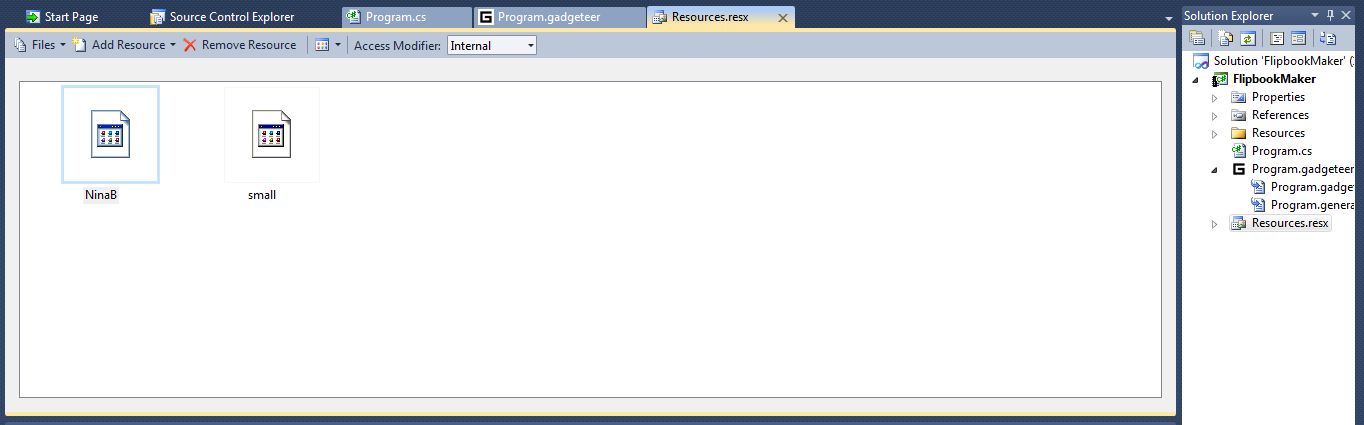
Click the "Add Resouces" button, choose "Add Existing Files". Navigate to the spot where you unzipped the FlipbookMaker image and font resources. Make sure the file filter type is "*.*" so that you can add both the font and image files. Then click "Open".

Setting Up the Display
Let's declare some variables to store the current playback icon, the text of the current frame number, and the WPF Canvas and Window on which these objects will be rendered.
  Image icon;
        Text frameNumber;
        Canvas canvas;
        Window mainWindow;
We'll also create an ArrayList of images by instantiating some of the project image resources.
      ArrayList buttons = new ArrayList();
        Image deleteThisButton = new Image(Resources.GetBitmap(Resources.BitmapResources.DeleteThisButton));
        Image deleteAllButton = new Image(Resources.GetBitmap(Resources.BitmapResources.DeleteAllButton));
        Image saveButton = new Image(Resources.GetBitmap(Resources.BitmapResources.SaveButton));
        Image cancelButton = new Image(Resources.GetBitmap(Resources.BitmapResources.CancelButton));

        bool buttonsVisible = false;
And finally, a setup method which adds the buttons to window. All of the buttons will default to being hidden, but they're ready to be shown when the user touches the screen.
  void SetupDisplay()
        {
            mainWindow = display.WPFWindow;
            canvas = new Canvas();
            cameraImage = new Image(Resources.GetBitmap(Resources.BitmapResources.StartScreen));
            frames.Add(cameraImage.Bitmap);
            icon = new Image(Resources.GetBitmap(Resources.BitmapResources.CALIBRATE));
            frameNumber = new Text(Resources.GetFont(Resources.FontResources.SegoeUI_20), "");
            frameNumber.ForeColor = GT.Color.FromRGB(0, 200, 0);

            canvas.Children.Add(cameraImage);
            canvas.Children.Add(icon);
            canvas.Children.Add(frameNumber);

            canvas.Width = (int)display.Width;
            canvas.Height = (int)display.Height;

            Canvas.SetLeft(cameraImage, 0);
            Canvas.SetTop(cameraImage, 0);

            Canvas.SetRight(frameNumber, 5);
            Canvas.SetTop(frameNumber, 0);

            Canvas.SetLeft(icon, 5);
            Canvas.SetTop(icon, 10);

            // Add and position menu buttons
            canvas.Children.Add(deleteAllButton);
            canvas.Children.Add(deleteThisButton);
            canvas.Children.Add(cancelButton);
            canvas.Children.Add(saveButton);

            Canvas.SetLeft(deleteAllButton, 40);
            Canvas.SetTop(deleteAllButton, 5);
            Canvas.SetLeft(deleteThisButton, 180);
            Canvas.SetTop(deleteThisButton, 5);
            Canvas.SetLeft(saveButton, 40);
            Canvas.SetTop(saveButton, 125);
            Canvas.SetLeft(cancelButton, 180);
            Canvas.SetTop(cancelButton, 125);

            buttons.Add(deleteThisButton);
            buttons.Add(deleteAllButton);
            buttons.Add(saveButton);
            buttons.Add(cancelButton);

            foreach (Image button in buttons)
            {
                button.Visibility = Visibility.Hidden;
            }

            buttonsVisible = false;
            mainWindow.Child = canvas;
        }
A Note on Implementing Lightweight Touch Buttons in Gadgeteer
If you've worked with WPF or Silverlight on other systems, you're probably wondering why the FlipbookMaker hasn't declared any "traditional" controls yet. It turns out that any UIElement subclass, including Image, can register for touch events. None of the onscreen UI needs to do anything more complicated than register touches (other program functions are controlled by the potentiometer and hardware button). So, this turns out to be a very straightorward way to implement a touch button.
When the user taps the screen to show the menu, we'll make each button visible and register a touchDown event handler for it. When the user dismisses the menu, we'll just hide the buttons and remove the event handlers.
  void ShowButtons()
        {
            foreach (Image button in buttons)
            {
                button.Visibility = Visibility.Visible;
            }

            deleteAllButton.TouchDown += new Microsoft.SPOT.Input.TouchEventHandler(deleteAllButton_TouchDown);
            deleteThisButton.TouchDown += new Microsoft.SPOT.Input.TouchEventHandler(deleteThisButton_TouchDown);
            saveButton.TouchDown += new Microsoft.SPOT.Input.TouchEventHandler(saveButton_TouchDown);
            cancelButton.TouchDown += new Microsoft.SPOT.Input.TouchEventHandler(cancelButton_TouchDown);

            mainWindow.Invalidate();

            buttonsVisible = true;
        }

        void HideButtons()
        {
            foreach (Image button in buttons)
            {
                button.Visibility = Visibility.Hidden;
            }

            deleteAllButton.TouchDown -= new Microsoft.SPOT.Input.TouchEventHandler(deleteAllButton_TouchDown);
            deleteThisButton.TouchDown -= new Microsoft.SPOT.Input.TouchEventHandler(deleteThisButton_TouchDown);
            saveButton.TouchDown -= new Microsoft.SPOT.Input.TouchEventHandler(saveButton_TouchDown);
            cancelButton.TouchDown -= new Microsoft.SPOT.Input.TouchEventHandler(cancelButton_TouchDown);

            mainWindow.Invalidate();

            buttonsVisible = false;
        }
The Touch Event Handlers
Here are the handlers for each touch event. First is the event handler for the main window - when the user touches the screen, the menu buttons are shown. Then, the event handlers for each button are activated, too.
 void mainWindow_TouchDown(object sender, Microsoft.SPOT.Input.TouchEventArgs e)
        {
            if (currentMode == PlaybackMode.Stopped && cancelButton.Visibility == Microsoft.SPOT.Presentation.Visibility.Hidden)
            {
                ShowButtons();
            }
        }

        void cancelButton_TouchDown(object sender, Microsoft.SPOT.Input.TouchEventArgs e)
        {
            HideButtons();
        }

        void saveButton_TouchDown(object sender, Microsoft.SPOT.Input.TouchEventArgs e)
        {
            SaveFiles();
            HideButtons();
        }

        void deleteThisButton_TouchDown(object sender, Microsoft.SPOT.Input.TouchEventArgs e)
        {
            if (currentFrame != 0)
            {
                frames.RemoveAt(currentFrame);
                currentFrame--;
                cameraImage.Bitmap = (Bitmap)frames[currentFrame];
                frameNumber.TextContent = currentFrame == 0 ? "" : currentFrame.ToString();
            }
            Debug.GC(true);

            HideButtons();
        }

        void deleteAllButton_TouchDown(object sender, Microsoft.SPOT.Input.TouchEventArgs e)
        {
            frames = new ArrayList();
            cameraImage.Bitmap = Resources.GetBitmap(Resources.BitmapResources.StartScreen);
            frames.Add(cameraImage.Bitmap);
            frameNumber.TextContent = "";
            currentFrame = 0;
            Debug.GC(true);

            HideButtons();
        }
One last thing: Add a call to SetupDisplay to your ProgramStarted method.
      // This method is run when the mainboard is powered up or reset.
        void ProgramStarted()
        {
            // Set up event handlers for modules
            button.ButtonPressed += new GTM.GHIElectronics.Button.ButtonEventHandler(button_ButtonPressed);
            camera.BitmapStreamed += new GTM.GHIElectronics.Camera.BitmapStreamedEventHandler(camera_BitmapStreamed);

            sdCard.SDCardMounted += new SDCard.SDCardMountedEventHandler(sdCard_SDCardMounted);
            sdCard.SDCardUnmounted += new GTM.GHIElectronics.SDCard.SDCardUnmountedEventHandler(sdCard_SDCardUnmounted);

            SetupDisplay();
            // Set up event handlers for timers, and start timers running
            playbackTimer.Tick += new GT.Timer.TickEventHandler(playbackTimer_Tick);
            playbackTimer.Start();

            potentiometerCheckTimer.Tick += new Gadgeteer.Timer.TickEventHandler(potentiometerCheckTimer_Tick);
            potentiometerCheckTimer.Start();

            // Use Debug.Print to show messages in Visual Studio's "Output" window during debugging.
            Debug.Print("Program Started");
        }
The Home Stretch: Saving the Movie
The last bit of software to implement is the SaveFiles() method. First, adding a using directive for System.IO:
using System.IO;
Then add the body for the SaveFiles() method, which creates a new directory for each movie that is saved. Only the raw bitmaps are written - converting this to an actual movie format is pretty easy to do using .NET on the desktop. I'll add a sample of that to a later entry if there's interest.
  void SaveFiles()
        {
            int dirNumber = 0;
            string baseDir = "MyMovie";

            if (SDCard != null)
            {
                Directory.SetCurrentDirectory(SDCard.RootDirectory);

                while (Directory.Exists(baseDir + dirNumber))
                {
                    dirNumber++;
                }

                Directory.CreateDirectory(baseDir + dirNumber);

                for (int i = 0; i < frames.Count; i++)
                {
                    SDCard.WriteFile(baseDir + dirNumber.ToString() + "\\" + "frame" + i + ".bmp", ((Bitmap)frames[0]).GetBitmap());
                }
            }
        }
Phew!
That was a fair bit of code. At this point you can build your FlipbookMaker and use it to start making movies. In the next (and final) entry, we'll talk about some ways to build a neat enclosure for your FlipbookMaker.