Update: Hosting a Workflow Service in IIS
It was January when I initially posted the steps on how to host a workflow, exposed as a WCF service, within IIS. Since then, and more specifically, with the .Net 3.5 SP1 update, a nice feature has been added to ease this process.
So what I will do here is take the same workflow service, or really it can be any workflow service, and go through the steps of how to host it in IIS.
The Workflow Service Project
So, as you may recall, we created a WCF Sequential Workflow Service Library from within Visual Studio 2008. We then changed the interface (contract) file to IProductOrder and we changed the name of our workflow file to OrderProcessWF.cs. Just to make sure we are on the same page, I'll show the code again:
IProductOrder.cs
using System;
using System.Collections.Generic;
using System.Linq;
using System.Text;
using System.Runtime.Serialization;
using System.ServiceModel;
namespace WFHostedInIIS
{
//Service contract
[ServiceContract(Namespace = "https://ncdevguyblog/Workflow")]
public interface IProductOrder
{
[OperationContract]
void SubmitOrder(OrderInfo order);
[OperationContract]
OrderInfo GetOrder(string orderID);
}
//Data type (contract)
[DataContract]
public class OrderInfo
{
private string orderID = default(string);
private string fName = default(string);
private string lName = default(string);
[DataMember]
public string OrderID
{
get { return orderID; }
set { orderID = value; }
}
[DataMember]
public string FName
{
get { return fName; }
set { fName = value; }
}
[DataMember]
public string LName
{
get { return lName; }
set { lName = value; }
}
}
}
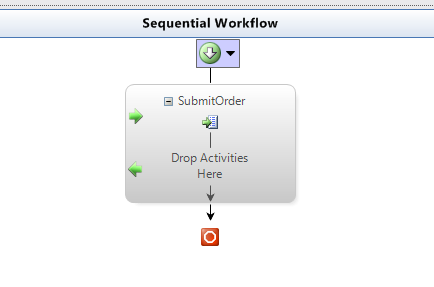
OrderProcessWF.cs (designer mode)
app.config file
<?xml version="1.0" encoding="utf-8" ?>
<configuration>
<system.web>
<compilation debug="true" />
</system.web>
<system.serviceModel>
<services>
<service behaviorConfiguration="WFHostedInIIS.Workflow1Behavior"
name="WFHostedInIIS.OrderProcessWF">
<endpoint address="" binding="wsHttpContextBinding" contract="WFHostedInIIS.IProductOrder">
<identity>
<dns value="localhost" />
</identity>
</endpoint>
<endpoint address="mex" binding="mexHttpBinding" contract="IMetadataExchange" />
<host>
<baseAddresses>
<add baseAddress="https://localhost:8731/Design_Time_Addresses/WFHostedInIIS/OrderProcessWF/" />
</baseAddresses>
</host>
</service>
</services>
<behaviors>
<serviceBehaviors>
<behavior name="WFHostedInIIS.Workflow1Behavior" >
<serviceMetadata httpGetEnabled="true" />
<serviceDebug includeExceptionDetailInFaults="false" />
<serviceCredentials>
<windowsAuthentication
allowAnonymousLogons="false"
includeWindowsGroups="true" />
</serviceCredentials>
</behavior>
</serviceBehaviors>
</behaviors>
</system.serviceModel>
</configuration>
So at this point, I'm assuming you have your project created, compiled and ready for work.
Publishing the Project to IIS
With .Net 3.5 SP1, Microsoft has added a mechanism (wizard) in which we can publish our services to be hosted in IIS. Basically what they did was, they used the ASP.Net publishing wizard and added it as a context menu item.
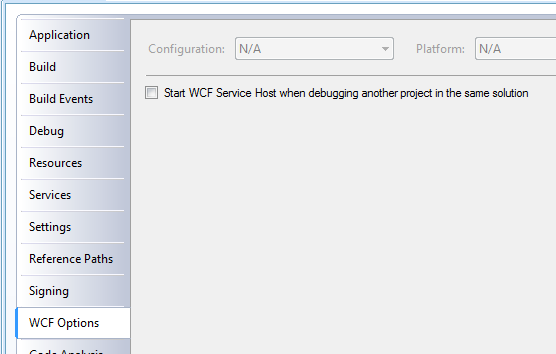
1. First, assuming your project is open, what you will need to do is go into the project properties and de-select the checkbox under the WCF Options tab. This will prevent Visual Studio from trying to provide its default WCF service host. Since we will have IIS for our host, we don't need this. BTW, this checkbox is a new option in .Net 3.5 SP1.
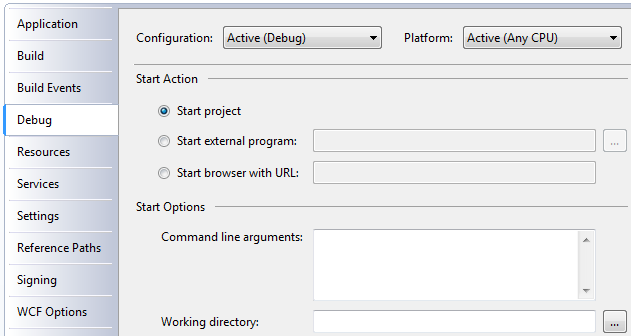
2. Click on the Debug tab and make sure the Command line arguments do not have any reference to the WCFTestClient.exe. You will normally see this there because Visual Studio adds this to WCF service projects created with the Visual Studio project templates.
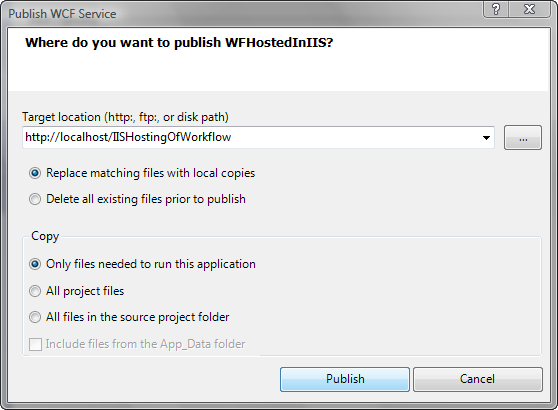
3. Right click on WFHostedInIIS project and select 'Publish' .

4. In the dialog that appears, enter https://localhost/IISHostingOfWorkflow as the Target Location and click the Publish button.
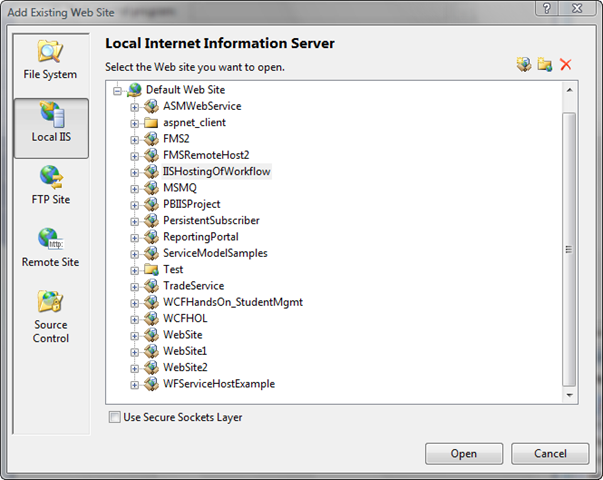
5. Right click the WFHostedInIIS solution and select Add | Existing Web Site...
6. Select the IIS application 'IISHostingOfWorkflow' and select Open.
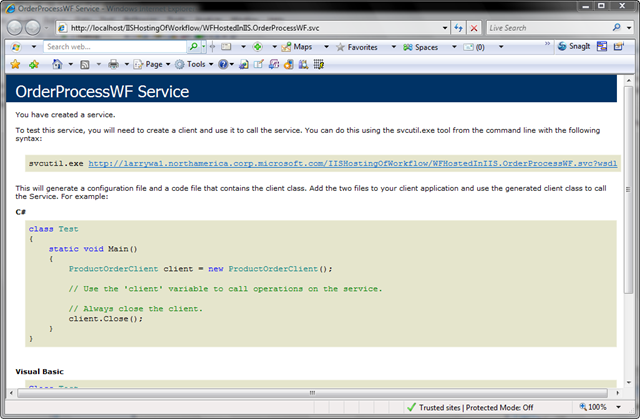
7. To do an initial test, right click on the .svc file and select 'View in Browser' . If everything is working correctly, you should see a service page appear in your web browser.
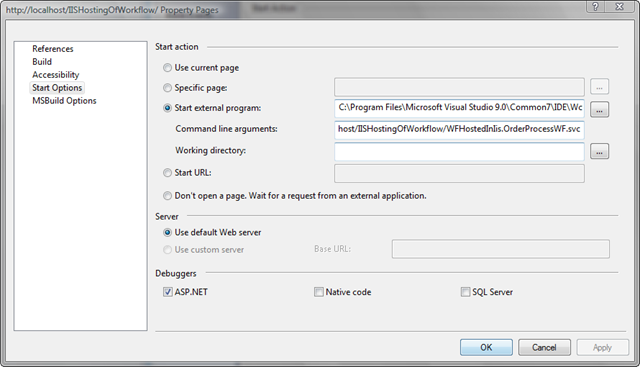
8. Instead of going through the whole process of creating a test client, we can use the WCFTestClient to test our methods. Click on the website project https://localhost/IISHostingOfWorkflow' and then select Property Pages.
9. Click on Start Options.
10. Set Start external program to 'C:\Program Files\Microsoft Visual Studio 9.0\Common7\IDE\WcfTestClient.exe' and Command line arguments to 'https://localhost/IISHostingOfWorkflow/WFHostedInIis.OrderProcessWF.svc' .
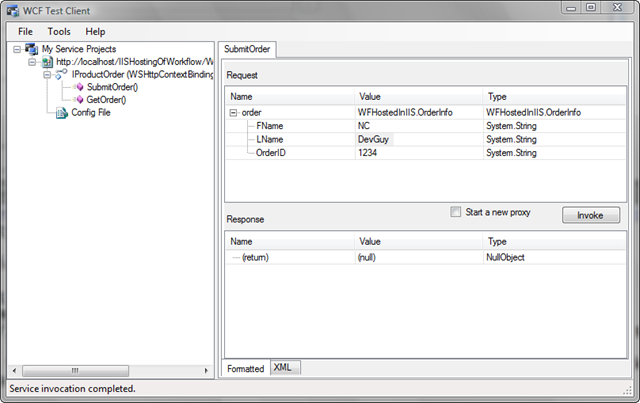
11. To test the service with the WCFTestClient interface, right click on the website project and select Set As Startup Project.
12. Select F5 to begin debugging. The test client should appear and you are able to enter data into the fields for testing.
So there we have it. We could of course build some other sort of client interface, add a service reference and point to the .svc file as the address, but the point is, compared to the old way of doing it, we have relatively few steps to get this up and running.