Synchronizing Company contacts and Person contacts to one dedicated Contacts folder using a new Outlook Synch. Entity
There have been many requests for some weeks if it is possible to synchronize contacts of Company type and contacts of Person type in Dynamics NAV to one single folder in Outlook. The answer is: Yes, this is possible. The question is: How should we do this? This blog posting will describe how this can be done. It is not difficult, but some steps needs to be done very careful.
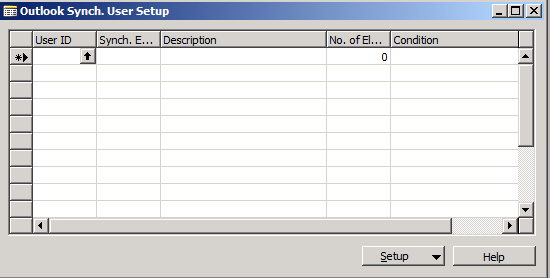
First of all, ensure the Outlook Synch User Setup form is empty. To do so, follow steps below:
- Go to Administration, Application Setup, Microsoft Office Outlook Integration
- Select Outlook Synch. User Setup
- Select all rows and press F4 to delete the lines
- Press Yes to confirm deletion
Second, I would reset all demo entities to default values. To do so, follow steps below:
- Go to Administration, Application Setup, Microsoft Office Outlook Integration
- Select Outlook Synch. Entities
- Select Code and press F5
- Select CONT_SP
- Press Sync. Entity button and select Reset to defaults
- Select Microsoft Dynamics NAV Salespeople
- Press OK
- Repeat the above steps for the other entities taking the following order into account: CONT_COMP, CONT_PERS, TASK and finally repeat the steps for APP entity
Now it is time to create a new entity. To do so, follow steps below:
- Go to Administration, Application Setup, Microsoft Office Outlook Integration
- Select Outlook Synch. Entities
- Select Code and press F3
- Type a name in the Code field, e.g.: CONT_ALL
- Press Sync. Entity button and select Reset to defaults
- Select Microsoft Dynamics NAV Contacts of the Company type
- Press OK
- Select Description and remove Microsoft Dynamics NAV Contacts of the Company type
- Type in a new name, e.g.: Microsoft Dynamics NAV Contacts
Another step that needs to be done is to create the correct dependencies for the TASK entity. To do so, follow steps below:
- Go to Administration, Application Setup, Microsoft Office Outlook Integration
- Select Outlook Synch. Entities
- Select Code and press F5
- Select TASK
- Select No. of Dependencies next to the Outlook Collection Links and press F6
The following will be shown:

- Select a new line to add CONT_ALL as a new Depend. Synch. Entity Code
- Select Table Relation for CONT_ALL and press F6
- Ensure the following line is added WHERE(No.=FIELD(Contact No.))
- Close the Outlook Synch. Entity Element Task 10000 – Outlook Synch. Dependencies form
Similar steps that need to be done are to create the correct dependencies for the APP entity. To do so, follow steps below:
- Go to Administration, Application Setup, Microsoft Office Outlook Integration
- Select Outlook Synch. Entities
- Select Code and press F5
- Select APP
- Select No. of Dependencies next to Recipients and press F6
The following will be shown:
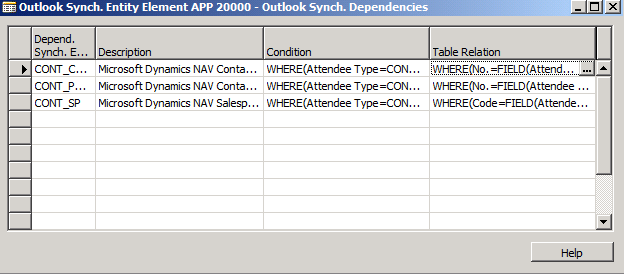
- Select a new line to add CONT_ALL as a new Depend. Synch. Entity Code
- Select Condition for CONT_ALL and press F6
- Ensure the following line is added WHERE(Attendee Type=CONST(Contact))
- Select Table Relation for CONT_ALL and press F6
- Ensure the following line is added WHERE(No.=FIELD(Contact No.))
- Close the Outlook Synch. Entity Element APP 20000 – Outlook Synch. Dependencies form
- Select No. of Dependencies next to Links and press F6
The following will be shown:
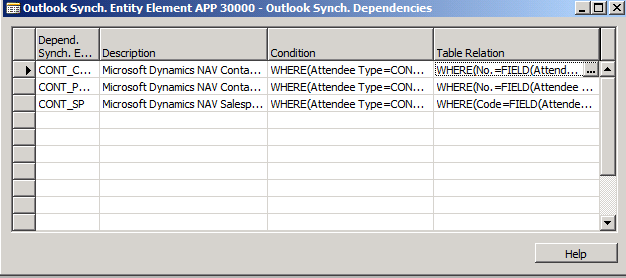
- Select a new line to add CONT_ALL as a new Depend. Synch. Entity Code
- Select Condition for CONT_ALL and press F6
- Ensure the following line is added WHERE(Attendee Type=CONST(Contact))
- Select Table Relation for CONT_ALL and press F6
- Ensure the following line is added WHERE(No.=FIELD(Contact No.))
- Close the Outlook Synch. Entity Element APP 30000 – Outlook Synch. Dependencies form
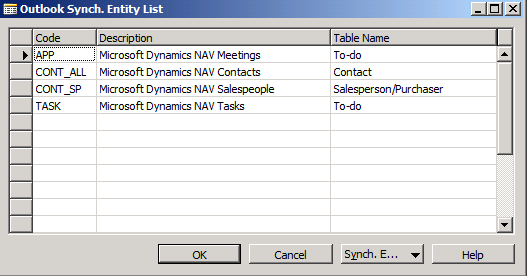
Now, it is time to delete the original demo entities. To do so, follow steps below:
- Go to Administration, Application Setup, Microsoft Office Outlook Integration
- Select Outlook Synch. Entities
- Select Code and press F5
- Select CONT_COMP
- Press F4 to delete the entity
- Press Yes twice to confirm deletion
- Select Code and press F5
- Select CONT_PERS
- Press F4 to delete the entity
- Press Yes twice to confirm deletion
The entity list now looks like this:
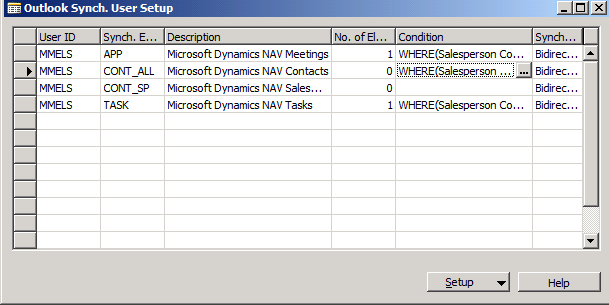
Last but not least, the Outlook Synch. User Setup form will have to be filled in with correct date.
The following could be setup in Dynamics NAV:
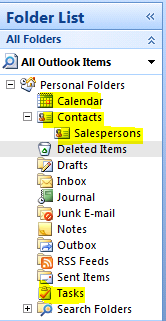
The following could be setup in Microsoft Outlook:
Regards,
Marco Mels
CSS EMEA
This posting is provided “AS IS” with no warranties, and confers no rights