How to Deploy a Workflow with VSeWSS 1.3
Visual Studio Extensions 1.3 has new features that allow the packaging and deployment of a workflow into a SharePoint Solutions Package (.WSP).
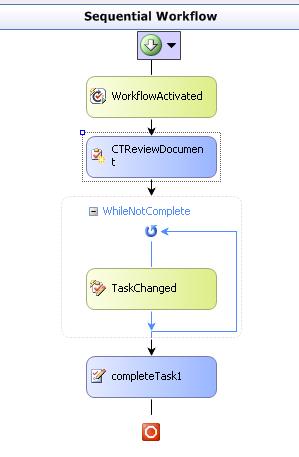
I’m starting off with a real simple workflow. Essentially, when the workflow is activated it will assign a task to a user in my site. It will then wait for the task status to be completed before ending the workflow. For this exercise it doesn’t matter how complex the workflow is or isn’t.
Project Creation
To get started ensure you are running the 1.3 versions of the VSEWSS extensions.
In your workflow solution right click on your existing workflow solution and select Add -> New Project.
Select Language (C# or VB) -> SharePoint -> Empty
![]()
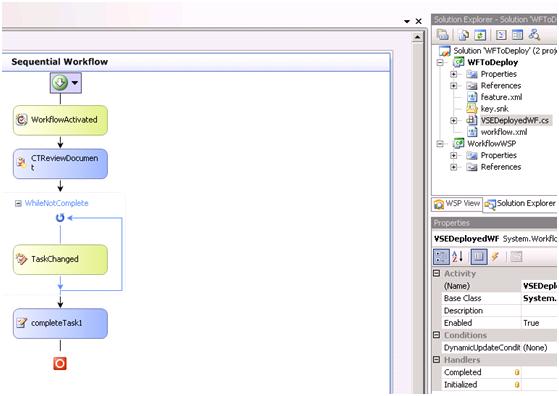
You should end up with something like this:
One of the new features of VSeWSS 1.3 is the ability to deploy additional assemblies (such as workflows) without the need for manually manipulating the manifest and moving around files. This will be our next step.
Add the Workflow Assembly for Deployment
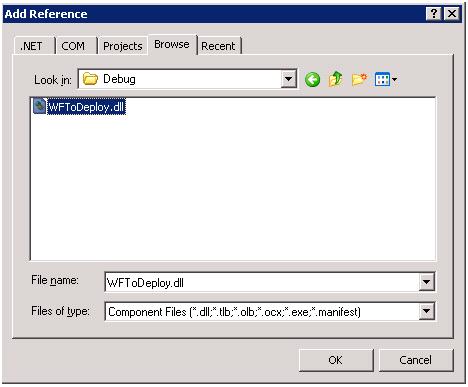
Right click on your newly created Empty SharePoint project and click Add Reference -> Browse and browse to the output folder of your workflow. Select the workflow assembly and press OK.
Once the reference is added you will need to manually change the “Copy to Local” property of the reference to true. This is how VSeWSS identifies assemblies that will be included in the package.

Open up WSP View (View -> Other Windows -> WSP View) then click the Refresh tool bar button and open the manifest.xml.
You should see something very similar to this:

Add a new Feature
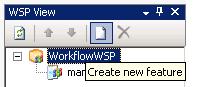
To deploy the WF you will also need to deploy the associated configuration files too. For this we will use another new feature within VSeWSS 1.3. The ability to add a new Site scoped feature with an elements.xml file directly from within WSP View.
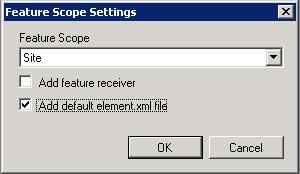
Open WSP View and click the Add New Feature button.
Within the Feature Scope Settings dialog change the Feature Scope to Site and check Add default element.xml file.
Rename the Feature
Rename the resulting Feature1 to your desired feature name. Highlight Feature1 and press F2. In this example the resulting feature will be named WFToDeploy. Note, if you do not want to keep the Feature1 naming convention on your file system you will need to rename this directory in Solution Explorer as well.
Expand the feature and open the Feature.xml that was created. Find the Title attribute on the feature element and change it to your feature name.

The next step is to incorporate the configuration in your existing workflow.xml into the feature.
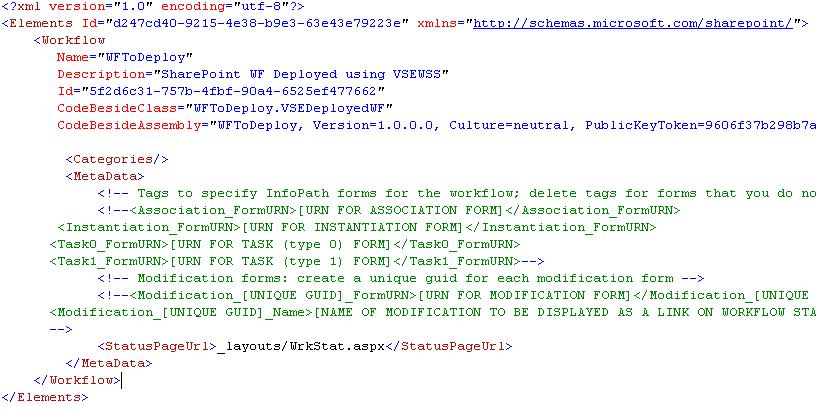
Combining the Workflow.xml into the Element1.xml
Open the created Element.xml you should have something like this:

Remove the closing slash / on the element and add a closing </Elements> below it. Be careful not to remove the Id attribute!

From Solution Explorer open the workflow.xml file within your existing workflow project. Copy the XML starting at <Workflow and ending at </Workflow> in between the <Elements element in the element1.xml file.
The result should be similar to this:
Custom Forms
If you are also deploying ASP.NET or InfoPath forms along with your workflow you will need to add them as Modules to your WSP project.
Deploying the project
Right click on your project and select Build to ensure everything compiles (fix any errors if present).
You now have the option of packaging or deploying. If you right click in select Package your .WSP will be built into the output directory but not deployed. Clicking Deploy will package the .WSP and also deploy it to the specified SharePoint site (specified under Project Settings -> Debug -> Start Browser with URL).
Testing the Workflow
Right click on your WSP project and click Deploy. Now browse to the SharePoint site you deployed to and go to a document library such as Shared Documents.
Click Settings -> Document Library Settings -> Workflow Settings -> Add a Workflow.
You should see your workflow in the Select a workflow template list.
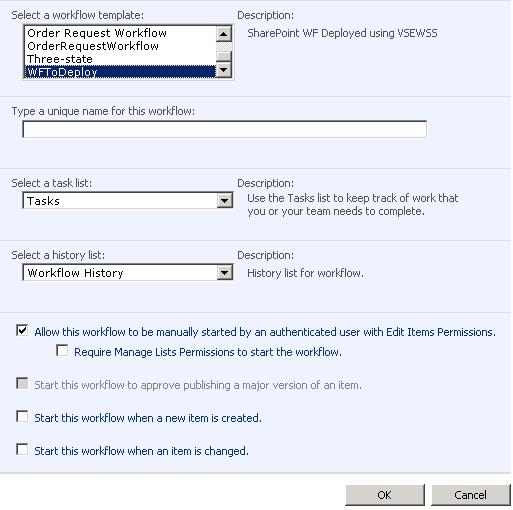
Give the workflow a unique name and press OK to associate it.
Back in Shared Documents bring up the actions menu for an existing document (create one if necessary) and click the Workflows item.

Start the Workflow
Select your workflow from the list to start.
You should see a new column added to your library with the same name as your workflow. If it successfully started it will have a value of In Progress or Completed (depending on what it actually does).
Done!