Embed an Excel workbook on a web page
Hola quiero compartirles este excelente feature de Office Web App que permite que un documento de Excel pueda ser manupulado directamente de una pagina web, aquí el detalle:
Embed an Excel workbook on a web page
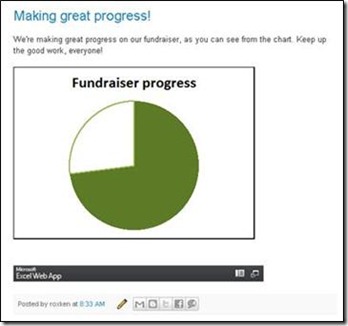
Display a Microsoft Excel workbook on your web page, such as your blog or SharePoint wiki page. The workbook is stored in a public location in Windows Live SkyDrive, where you copy an HTML tag that you paste into the HTML of your blog or wiki page. That way, people can see the workbook without having to go to the SkyDrive folder.
Updates to the workbook are automatically reflected on the page where the workbook is embedded.
Note The HTML tag for embedding the workbook displays the entire Excel workbook on your web page, but you can customize the display. You can also allow interactivity such as sorting, filtering, and typing in the embedded workbook. Changes made to the workbook on your web page are useful for what-if analysis and are not saved in the workbook that is stored in SkyDrive.
Step 1: Make your workbook public
Before you can embed a workbook on your web page the workbook must be available to view publically. If you are creating a new workbook, there are two ways to store it publically on Windows Live SkyDrive. One method is simplest if you are creating your workbook in the Excel desktop application; the other method is simple if you are creating a workbook in your web browser, in Excel Web App. If you have an existing workbook that you want to embed on a web page, you can upload it to a public folder in your SkyDrive. Or, if it’s already stored in a personal folder on your SkyDrive, you can move it to a public folder.
 Don’t have a public folder? Learn how to create one.
- Sign in to https://office.live.com.
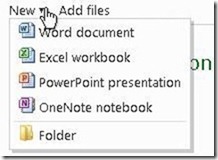
If you don’t yet have a Windows Live ID, click Sign up on the Windows Live page. - Click New and then click Folder.

- Type a name for the folder, and then next to Share with, click Change.
- Move the slider to Everyone, and then click Next.
In the Excel desktop application
Create the workbook in the Excel desktop application, and then save it in a public folder on SkyDrive.
- If you have Microsoft Excel 2010, save the workbook directly on SkyDrive by clicking Save & Send in the Backstage view (click File). Click Save to Web, and then double-click your public folder after you are signed in to Windows Live.
If you don’t yet have a Windows Live ID, click Sign up for Windows Live SkyDrive. - If you have an earlier version of Excel, save the workbook on your computer and then upload it to SkyDrive by signing in at https://office.live.com and going to your public folder.
If you don’t yet have a Windows Live ID, click Sign up on the Windows Live page.
For more information about saving Microsoft Office documents on SkyDrive see Store a file for Office Web Apps in Windows Live.
In Excel Web App
- Go to https://office.live.com, and sign in with your Windows Live ID.
Don’t have a Windows ID? Click Sign up on the Windows Live page. - Near the top of the page point to Office, and then click New Excel workbook.
- Type a name for the workbook, and then click Save.
The workbook opens for editing in Excel Web App, and your changes are saved automatically. - To make the workbook public, click File, click Share, and under Who can access this, move the slider to Everyone.
- When you are finished, click Close near the top of the web page.

Upload or move an existing workbook
If the workbook is stored on your computer, do the following to upload it:
- Sign in at https://office.live.com and go to your public folder.
If you don’t yet have a Windows Live ID, click Sign up on the Windows Live page. - Click Browse, locate the workbook on your computer, and then double-click it.
- Click Upload.
Note If you have a lot of files to upload, click Install the upload tool. When the Windows Live upload tool is installed you will be able to select multiple files to upload.
If the workbook is stored in a personal folder on your SkyDrive, do the following to move it to a public folder:
- Sign in at https://office.live.com and go to your personal folder.
- Point to the workbook, click More in the menu that appears, and then click Move.
- Click the name of the public folder.
Note If the folder already contains a workbook with the same file name as the workbook you are moving, that workbook will be replaced with the workbook you are moving. To prevent this from happening, rename the file. Click Cancel. Point to the workbook, click More, and click Rename. Then, type a new name, and click Save. Now you can proceed by repeating Step 2.
4. Click Move this file into YourFolderName.
Step 2: Copy the HTML tag from Excel Web App
- Sign in at https://office.live.com.
- Near the top of the page point to Office, and then click Your documents.
- In the list of Shared documents point to your Excel workbook. Or, open the public folder and point to the workbook there.
- In the menu that appears click More, click Share, and then click Embed.

- Click Copy.
If your browser prompts you to allow access to your Clipboard click Allow access.
Step 3: Paste the HTML tag into your web page’s HTML
The HTML you copied from the Excel Web App page is an iframe tag, which is supported in many web authoring environments and blog services. The steps provided here work in some of the most popular blogging services, such as WordPress, Blogger, and TypePad.
Note If you use a blogging service that does not support iframes in posts, consult your blogging service provider for assistance.
If you want to embed the workbook in a SharePoint wiki, you paste only the src portion of the tag into a Page Viewer Web Part. See the instructions below.
In a blog post
- In your blog editor, begin writing your post, and then switch to HTML editing. Note In TypePad don’t use the Quick Compose editor. Go to Blogs, click the name of your blog, and then click Compose, where you can switch from Rich Text to HTML editing.
- With the HTML tag you copied from the Excel Web App page as the most recent item in your Clipboard, press CTRL+V.
- Finish writing your post. Preview and publish as you normally would.
By default, the entire workbook is displayed in the frame on your page. You can customize the display so that only a specific item such as a worksheet or chart is visible. You can also allow interactivity and typing in the frame. You customize the display by editing the tag in the HTML editor. For details, see Customize how your Excel workbook is embedded
In a SharePoint wiki
- On the wiki page click Edit.
- With the HTML tag you copied from the Excel Web App page as the most recent item in your Clipboard, press CTRL+V to paste the tag on the wiki page. This is so that you can easily copy a portion of the tag into the Web Part. You’ll delete the tag from the wiki page before you’re done.
- Copy the portion of the tag between quotation marks that begins with http. Don’t include the quotation marks.
- On the Editing Tools tab click Insert, and then click Web Part.
- In the list of categories, click Media and Content.
- In the list of Web Parts, click Page Viewer, and then click Add.
- Click open the tool pane, click OK to save changes, and then in the Link box delete https:// and press CTRL+V to paste the address you copied in Step 3.
- Click Apply to preview the page.
- Make adjustments to the Web Part as desired. For example, in the Page Viewer editor expand Appearance and specify fixed dimensions for height and width.
- When you are finished click OK in the Page Viewer editor, and delete the iframe tag from the wiki page.
By default, the entire workbook is displayed in the Web Part. You can customize the display so that only a specific item such as a worksheet or chart is visible. You can also allow interactivity and typing in the frame. You customize
Saludos
Fernando García Loera (Community Program Manager – Latin America Region)


