Using Custom Environments in ASP.NET Core
Editor's note: The following post was written by Visual Studio and Development Technologies MVP Dave White as part of our Technical Tuesday series. Simon Timms of the MVP Award Blog Technical Committee served as the technical reviewer for this piece.
In many of my customers’ IT environments, there are multiple development environments that are not covered by the 3 default environments provided by Microsoft in the ASP.NET Core libraries. To recap, the current environments are:
- Development
- Staging
- Production
At my current client, we also have:
- Test
- DevelopmentExternal
- TestExternal
- ProductionExternal
One of the choices was to align with Microsoft terminology and functionality, but that wouldn’t work for our External environments designation. Even more, there are many companies that don’t want to change their internal IT processes/designations because ASP.NET Core didn’t implement them a helper natively.
In this post, I’m going to show you how to quickly and easily create your own environment definitions and use them throughout an ASP.NET Core Web Site or Application.
Building Standardized, Custom Environments
In order to provide a consistent approach to environments and environmental detection for my current client, we decided to do a couple things:
- Put all of our environment functionality into a package, which is easily consumed by any other ASP.NET Core application
- Describe all of our environments in a static class that contains properties and strings
- Extend the IHostingEnvironment implementation, to implement test methods for our environments
Solution Overview
I’ve built a small little solution that demonstrates most of these concepts in Visual Studio 2017. The solution (.zip) can be found here.
Our VS 2017 RC solution is called CustomEnvironments. It will have 2 projects in it: a .NET Core class library and an ASP.NET Core Website. We’ll simulate our package in the .NET Core project - creatively called Package - and we will demonstrate our approach in the ASP.NET Core Website, also creatively named EnvironmentalSample.
Creating a Package
Creating a package is easy. A package is a simple a container for an assembly with a bunch of metadata about the assembly. A package can hold multiple target framework versions of an assembly. I won’t go into the details of creating packages with .NET Core, but here is a link that will get you started.
https://docs.nuget.org/ndocs/guides/create-net-standard-packages-vs2015
In our sample, we will simply create a little project that will pretend is a package in our solution.
Create Static Class Describing Environments
In regards to the Package project, the first thing we do is review a static class containing a bunch of properties that will enumerate the known, supported environments in our organization. We do this for three reasons.
- String safety – since environmental detection uses a lot of string comparison, we’d rather do this in one place and let the C# compiler help us do it right everywhere else.
- Intellisense – StandardEnvironment.{{intellisense here}} is nice.
- Consistency across applications/projects. Our class is rather simple. It looks like this:
 namespace Package
{
    public static class StandardEnvironment
    {
        public const string Development = "Development";
        public const string Test = "Test";
        public const string Staging = "Staging";
        public const string Production = "Production";
        public const string DevExt = "DevExt";
        public const string TestExt = "TestExt";
        public const string StagingExt = "StagingExt";
    }
}
Creating Extension for Consistent Environmental Detection
The next thing we did was to give developers a little bit of help when doing environmental detection. We did this via extension methods on an IHostingEnvironment interface.
namespace Package
 namespace Package
{
    public static class EnvironmentExtensions
    {
        public static bool IsTest(this IHostingEnvironment env)
        {
            return env.IsEnvironment(StandardEnvironment.Test);
        }
        public static bool IsTestExt(this IHostingEnvironment env)
        {
            return env.IsEnvironment(StandardEnvironment.TestExt);
        }
        public static bool IsDevExt(this IHostingEnvironment env)
        {
            return env.IsEnvironment(StandardEnvironment.DevExt);
        }
        public static bool IsStagingExt(this IHostingEnvironment env)
        {
            return env.IsEnvironment(StandardEnvironment.StagingExt);
        }
    }
}
Using our Package
Now, we’re going to look at our custom environments in action. There are a number of things to point out in the EnvironmentSample website project.
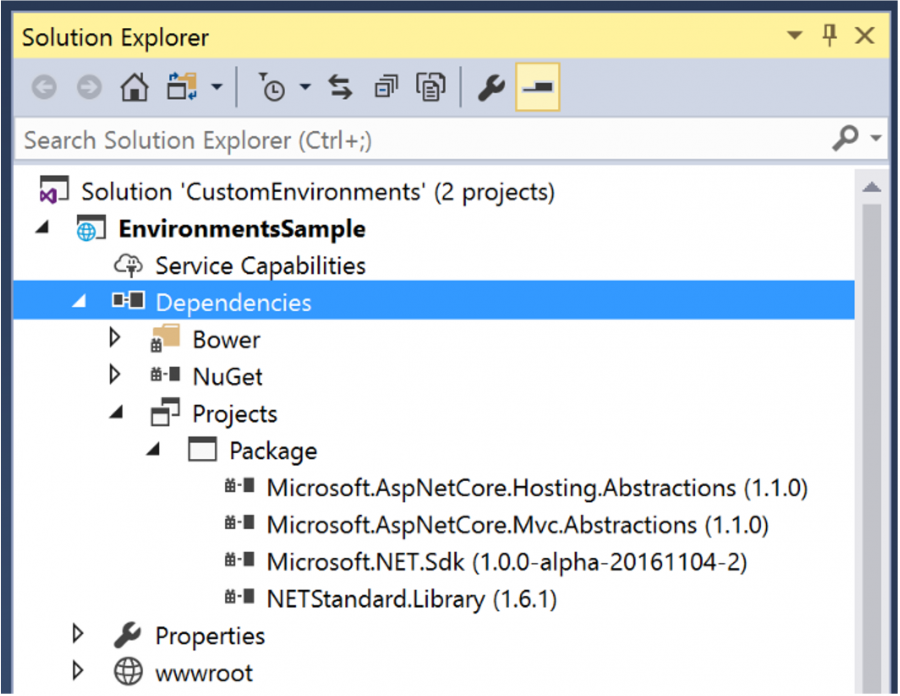
Dependencies
First, we’ll look at the dependencies our EnvironmentSample website has to our package, which contains the standard environments functionality.
LaunchSettings.json
In looking at the launchsettings.json file, we’ll see we can instruct VS 2017 RC to run different environments for us easily from the toolbar. In our example, we’ve added three entries to the defaults in order to allow us to check Development, Test and Staging functionality.
 "profiles": {

    "IIS Dev": {
      "commandName": "IISExpress",
      "launchBrowser": true,
      "environmentVariables": {
        "ASPNETCORE_ENVIRONMENT": "Development"
      }
    },
    "IIS Test": {
      "commandName": "IISExpress",
      "launchBrowser": true,
      "environmentVariables": {
        "ASPNETCORE_ENVIRONMENT": "Test"
      }
    },
    "IIS Staging": {
      "commandName": "IISExpress",
      "launchBrowser": true,
      "environmentVariables": {
        "ASPNETCORE_ENVIRONMENT": "Staging"
      }
    },

}
Startup.cs
In order to make this more realistic, we’re going to enhance some environmental logic in our Startup.cs. In this case, we’re going to allow the Developer Exception Page to work in a Test environment, as well as a development environment. There are two things that we need to do in order for this to work:
- Add a reference to our package namespace
using Package;
2. Add a condition testing for the Test environment in the public void Configure(…) method
 if (env.IsDevelopment() || env.IsTest())
       {
           app.UseDeveloperExceptionPage();
           app.UseBrowserLink();
       }
       else
       {
           app.UseExceptionHandler("/Home/Error");
}
This demonstrates how we can now use our custom environmental detection extension method.
Index.cshtml
We are going to replace the HTML in the default index.cshtml, which will demonstrate our environmentally different presentations. There will be some environment-specific text presented to the user, depending on which environment we are currently in.
 <environment names="Development">
    <h1> Development Environment Detected</h1>
</environment>
<environment names="Test">
    <h1> Test Environment Detected</h1>
</environment>
<environment names="StagingExt">
    <h1> StagingExt Environment Detected</h1>
</environment>
<pre>@ViewData["Env"]</pre>
The <environment> tag is a tag helper provided out of the box by ASP.NET Core. You can get a full rundown on tag helpers here: https://blogs.msdn.microsoft.com/cdndevs/2015/08/06/a-complete-guide-to-the-mvc-6-tag-helpers/
HomeController.cs
We are also going to demonstrate our extension methods in the home controller. This is going to be serving up the index page for us. First, we’ll ask the ASP.NET Core dependency injection container to give us a IHostingEnvironment implementation in the HomeController constructor.
  private readonly IHostingEnvironment _env;
       public HomeController(IHostingEnvironment env)
       {
           _env = env;
       }
We will now have an _env available in all of our controller methods.
Next, we will provide some information to the page that changes depending on which environment we are running as. Using our environmental detection extension methods, we’ll change the format and availability of the _env object serialized to JSON.
         public IActionResult Index()
        {
            if (_env.IsDevelopment())
            {
                ViewData["Env"] = JsonConvert.SerializeObject(_env, Formatting.Indented);
            }
            else if (_env.IsTest())
            {
                ViewData["Env"] = JsonConvert.SerializeObject(_env, Formatting.None);
            }
            else // staging or production
            {
                ViewData["Env"] = "Environmental information is only available in" +
                                  "Dev/Test environments.";
            }

            return View();
        }
Testing our Sample
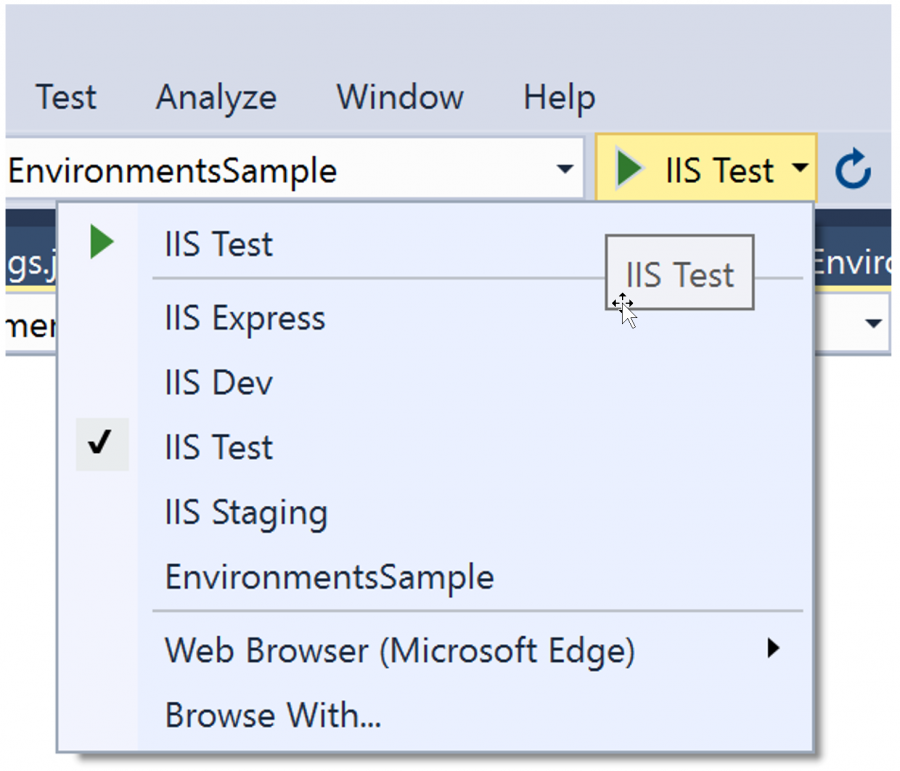
After making all of those changes, we can now start testing our custom environments implementation. Because of the changes we made in the launchsettings.json, we have options in our Run toolbar button. By pressing the small down chevron (triangle) on the right side of the Run button, we can see our options.
Now a web page with modified, environmentally specific ~/home/index page will come up.
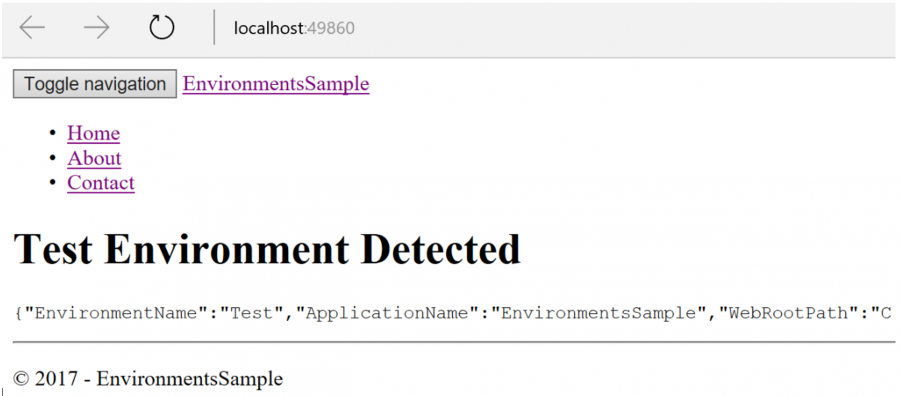
That doesn’t look right! We do see the environment-specific text, but what happened to our styles?
_Layout.cshtml
Remember, ASP.NET Core will use _layout.cshtml when rendering the index.cshtml and we need to look there for tags to enhance! In this case, we need to add Test to our environment names to get the non-minified version of the styles.
 <environment names="Development,Test">
     <link rel="stylesheet" href="~/lib/bootstrap/dist/css/bootstrap.css" />
     <link rel="stylesheet" href="~/css/site.css" />
</environment>
We will also find an environment section at the bottom of _layout.cshtml that we need to update so that javascript files will be provided as well.
 <environment names="Development,Test">
    <script src="~/lib/jquery/dist/jquery.js"></script>
    <script src="~/lib/bootstrap/dist/js/bootstrap.js"></script>
    <script src="~/js/site.js" asp-append-version="true"></script>
</environment>
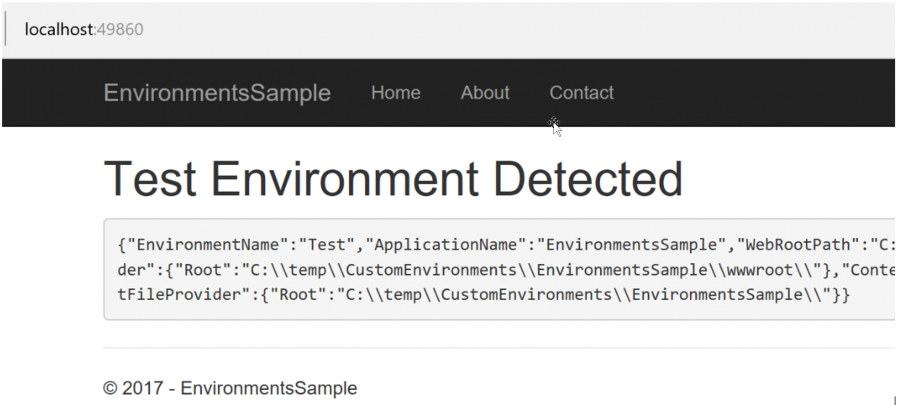
Now when we run our application, we will get the nicely rendered version of the site that we are expecting.
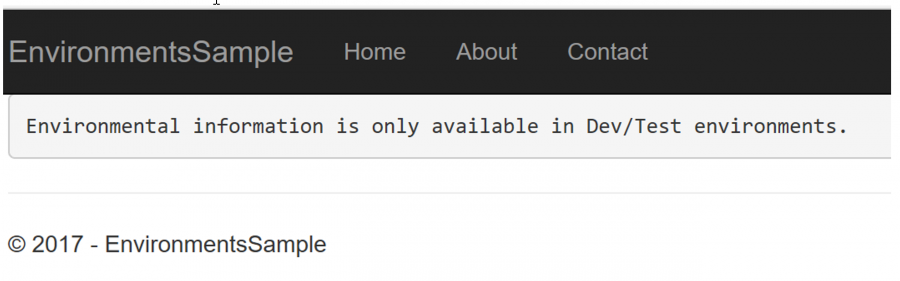
And if we change to IIS Staging, we will get a different message:
Conclusion
Hopefully you’ve discovered that the Environmental detection system in ASP.NET Core is very easy to use and very flexible, in that you can easily create and use environmental logic that matches your IT environment, even if it doesn’t match what the ASP.NET Core team has already built.
 Microsoft MVP - Application Lifecycle Management
Director - LeanKanban University KCP Program Principal Consultant - Depth Consulting
Dave White is an IT professional with over 19 years of experience in a variety of roles throughout the IT industry. Originally working as a developer, he's honed, evolved and expanded his technical capabilities in development and architecture and demonstrates these skills at a senior level. He has been primarily focused on web development (full stack) for the last 7 years, and has worked with ASP.NET Core for over 1 year.
He's also expanded his skills beyond technical areas into software development processes and methodologies, business analysis, project management, leadership, mentoring and training. He is a passionate Agile/Kanban practitioner and has deep experience with Microsoft technologies and platforms like Team Foundation Server and Visual Studio Team Services.
He loves helping organizations around the world realize their potential through maturing their software development technical and process practices. He is passionate about Application Lifecycle Management tooling, techniques, and mindsets and regularly coach, mentor and teach around North America on a variety of ALM topics.
Dave is involved with the Calgary .NET User Group in a leadership capacity, helping with topic selection, speaking, and generally enjoying the Calgary .NET technical community!