Release Management: feedback & lessons learns
Editor’s note: The following post was written by Visual Studio and Development Technologies MVP Pierre-Henri Gache as part of our Technical Tuesday series.
Introduction
Release Management, now integrated into Visual Studio Team Services, is the new generation of tools dedicated to continuous and automated deployments. It takes all the features of the previous version and adds to them a richer and more intuitive interface. I'll try to make you discover through this article the key points of this new release and give you the feedback I gained during the last month using it. You should then be able to control and accelerate your deployments.
Overview
This new version which is available only in the Web portal totally breaks with the previous versions. There is no more desktop client and workflows in XAML, but tasks like the change already made in the Build part. Available in Visual Studio Team Services, this tool is also running with Update 2 of TFS 2015.
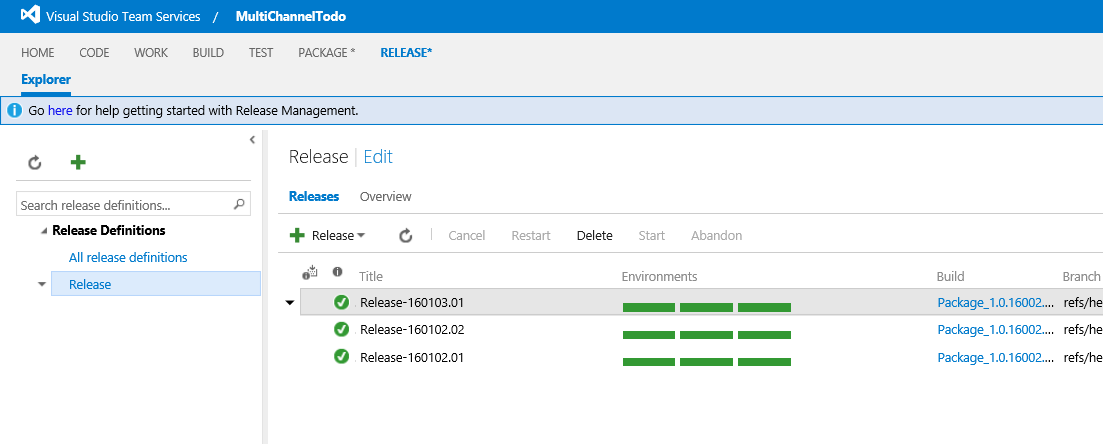
One of the key points is the simplification of its interface. Far too complicated before, it is now much clearer and more intuitive as shown in the shot below. On this first home screen, you can create a new release definition and review the status of those already done. The button "+" gives you the ability to create a new one.
The creation of release definition is the first step. It allows to setup the deployment of an application on the different target environments.
The "Overview" tab gives you a status of each environment states. An environment is a logical container which represents a set of resources where applications will be deployed. Classically, we find an environment for development, testing and production. The deployment is done sequentially, one environment by one.
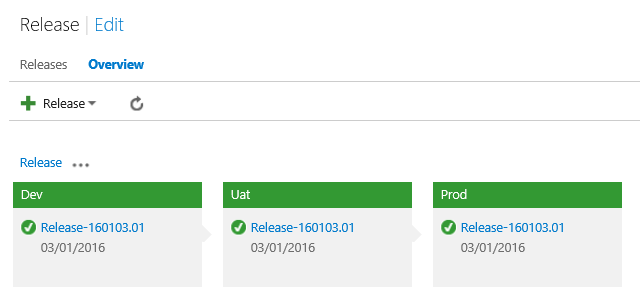
The release button allows to instantiate a new release. Then all the defined scripts will be applied on all environments. The release will be considered as successful only if all deployments are green.
The 'Edit' button that is next to the name of the release allows you to update the release definition. Each release consists of an environment set itself composed by a list of tasks. Tasks are designed to deploy various software components. Each one is specialized and should be responsible to realizing only one operation. Doing so you will be able to have good control on how things are going during the deployment.
Setup
Release Management is as easy as all other modules through the main tab on the top of the interface. However, to be able to deploy your applications, it must be connected with your infrastructure.
Agent or Agent-less?
There are two different ways to automate applications deployment in general. You can use agents installed directly on the target servers or remotely deploy on those servers using remoting technologies.
The current version of Release Management does not currently allow to deploy agents on target servers. You have no other choice than using remote commands to enable you deploy artifacts. But the RM product group has already announced the availability of agent base deployment later this year (https://blogs.msdn.microsoft.com/visualstudioalm/2016/04/13/release-management-planning-update-2016-h2/). Once this feature is available, both modes will coexist.
Hosted or Private agent?
RM uses the same agents as the one used by the build system. It is therefore possible to use agents provisioned automatically or install and configure your own. Usually by default anybody will choose the hosted agents because it’s simpler and easier to use. But depending on your project and infrastructure constraints, the choice of installing a private agent can be done. The major reasons which for this choice are the following:
- The agent needs a tool not available in hosted version
- The agent deploys applications in a data center on premise
- Resources are in a network with only outbound access to the Internet
It is necessary before launching a continuous integration project to well understand all the constraints of the target infrastructure. This knowledge will let you position agents at the best place in order to be able to access all resources.
Deploying to Azure PaaS
To be able to deploy to Azure PaaS services, you have to start by creating one or more "endpoint." To be able to handle Azure resources, it is necessary to use identifiers authorized to carry out these manipulations. This is what endpoints are designed for: encapsulate credentials to handle Azure.
There are three different kinds of endpoints. The choice will be based on the resources used in Azure and tasks used. In fact, some of these tasks are compatible with all types while the other requires a very specific type of endpoint. You have to do a case by case review and choose the for need the right endpoint.
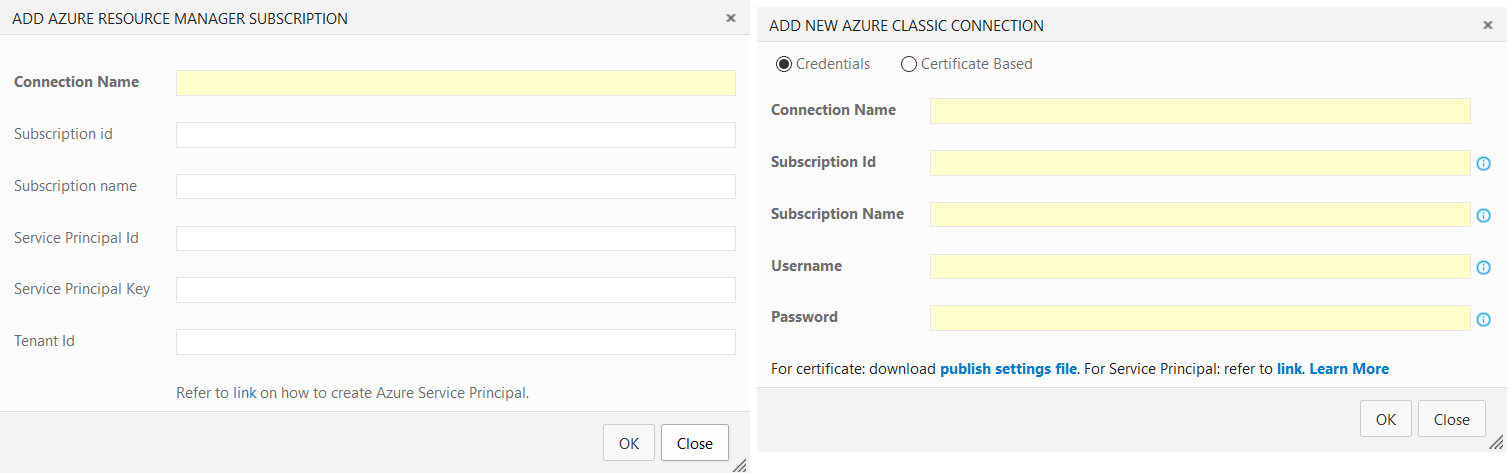
Today "Azure Resource Manager" resource type is the future of Azure. Creating an endpoint able to manage these resources have to be privileged. To do so you need to create a "Service Principal" in the Active Directory tab associated with your VSTS account. Once all the information from that “Service Principal” is filled into the endpoint configuration, you will be able to leverage all the capabilities of the Azure RBAC model.
IaaS deployment / On Premise
Deployments on IaaS and on premise resources are totally different from what we have seen above because they rely on different technologies from the ones used for PaaS. WebDeploy can be used in both cases but you will probably have to use the following solutions to achieve your deployments:
- File Copy: This step is important because it moves the binary from the agent to the target server.
- Remote script execution: since the binaries and installation scripts are available on the destination server, you have to execute them remotely.To do this in the Windows world, WinRM is a technology of choice.
- SQL script execution: nothing fancy here, it is used to deploy SQL scripts on a target database.
The three examples above are the most common, but they are not restrictive.
Creating and Managing a release pipeline
Artifacts
The goal of a release is to deploy binaries of an application, so you have to provide them. To do this you have use the "Artifacts" tab. The first artifact must contain binaries and will in most cases be a build output (VSTS or Jenkins).
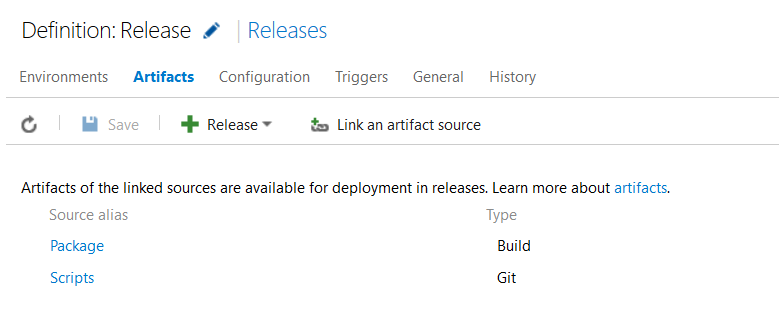
If your release uses customs scripts, it will also have to provide an input for them. It is possible to include them in the build output but the best solution is to include them in an additional source.
This method has several advantages. First, you can provide scripts directly from a code repository without having to go through a build. Once they are available in a code repository, you can share them across all projects in the VSTS account. This point will help you because you will probably use the same script across projects. Finally, the last but not least interest is to provide a common workspace for Ops in a separate project. Doing so they can build with Dev all the modules needed by the deployment factory.
Creating a new release definition
The two key elements of a release definition are environment (1) and configuration (2). Each environment is a portion of your infrastructure on which the deployment will take place. They are composed of a series of tasks which will be executed sequentially. There are numerous predefined tasks in RM that you can use to speed up the implementation of the workflow. The configuration tab contains elements specific to each environment and global ones. The information related to machines and services will find their place in the environment configuration while global information will go into the main release configuration.

To accelerate the release definitions creation, it is possible to clone an environment or generate a template from an existing one. The clone can reproduce the same environment in the same definition. The template for his part has the project as scope. You can choose between both depending on your needs.
Creating a new release
Once the release definition is completed, it is possible to trigger a deployment. This trigger can be done manually or in an automated manner after the end of a build. During manual deployments the user can choose which version of the build will be deployed.
Concerning the branches management, it should be done inside the build. It is of course possible to create a build for each branch and then edit the template on each new version but this method is not recommended. Because it requires to change the definition of the release, this solution can easily introduce some typo. Instead I recommend that you select the branch at the build time. Then the deployment will occur naturally with binary from the previously selected branch.
Migrating an existing RM template
For users of Release Management version 2013 and 2015, the ALM Rangers team offer a migration tool for the old XAML based workflow (https://github.com/ALM-Rangers/Migrate-assets-from-RM-server-to- VSTS). This tool can extract all stages of your current release pipeline and convert them to PowerShell script.
The strategy I recommend is to first to use the scripts generated by the tool and keep the settings (except passwords) extracted from the previous configuration inside the scripts. You will then have the ability to validate that your deployment still works and performs the same steps as what you can expect today.
As I mentioned before, the passwords will be extracted and by default you will have the encrypted value from the database. Replacing them and having them in clear text in a PowerShell file is not a good practice. To avoid that, you will have to create variables in the configuration environments and then provide them as an input to the scripts.
Once this first step is achieved and your deployments are working has they do before, you can start the second phase. It consists to split your scripts and integrate the configuration into the RM configuration screens. You will also be able to create elementary task that focus on separate part of the deployment process.
The last phase will be to transform each elementary script in RM task. Doing so you will be able to share them and build a common deployment task library.
Permissions & Security
Permission management and security is a major element when using a release management tool. Today teams tend to be multidisciplinary (DevOps) and consolidate all the skills across a team (Feature Team). Based on this assumption, you will probably have to manage rights and manage deployments access rights.
The key is to ensure that the right person at the right time deploy to the right environment. Control occurs in several places in VSTS and we'll see where.
Endpoints
As seen above, to deploy Azure it is necessary to create "endpoints". This system carries the authentication and access to them should be restricted. For example, if one of them is able to manipulate production resources, you must ensure that only persons authorized to handle production can use it. And if all the deployment workflows are locked with approvers but endpoints are available for everyone, nothing prevents a malicious person to create a new release and use this endpoint to remove all production resources.
To secure an endpoint, each one has two security groups:
- Endpoint Administrators
- Endpoint Readers
The first defines who has the right to update and administer the endpoint. For sensitive environments, only a limited number of people should be granted access to it. The second group defines who has the right to use the endpoint when creating an environment. If some part of the second group attempts to modify the endpoint, the following error message will appear:
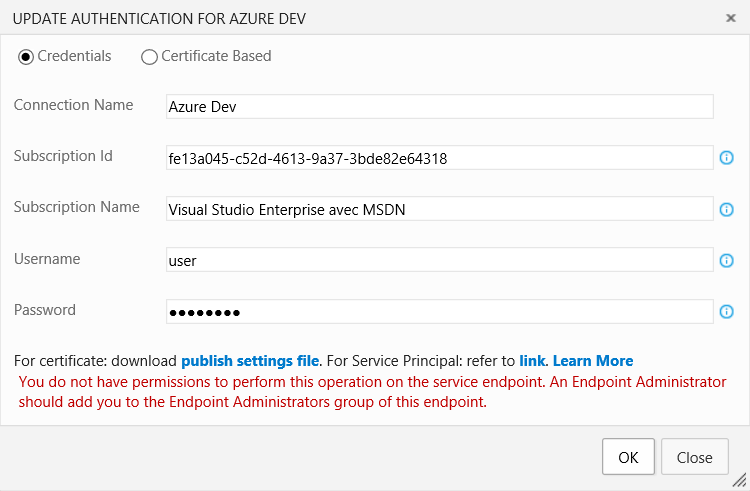
It is also important to note that even if a person does not belong to any of the above groups, it can still initiate a release that uses the endpoint. To secure this aspect, it is necessary to setup approvers, what we will see now.
Approvers
This is essential for release pipeline. Except teams who have a fully automated process of testing and verification, you'll need to include in your pipeline a validation process. Approvers will ensure that everything is doing well, in the right order, at the right moment.
It exists tow kind of approvals: those made before the deployment of an environment and those performed just after.
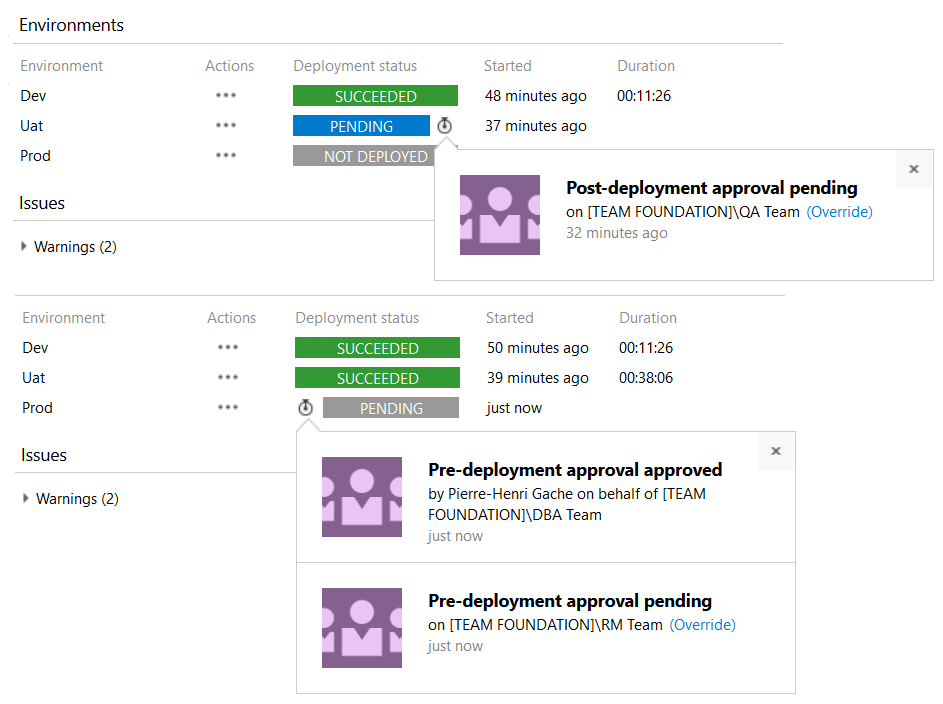
Taking as an example the screenshot above, you can see that the team in responsible of business tests are in charge of validate the UAT environment. Then the OPS are responsible to trigger delivery in production. Note that if multiple users or groups must validate, you need the validation of a person from each group to pass through. As part of the above example, a DBA and a Release Manager will have to confirm this step before the release can go ahead.
On premise & IaaS resources
Securing these resources will mostly be done by the use of user / password. WinRM or copy files are based on Windows default right management. To use them you will have to provide an account which is able to perform those tasks.
Creating a service account is recommended in this case and it will probably be a local administrator of the server to prevent access problem. I recommend to create an account by application or group of applications. So if one account is compromised, it does not put your entire infrastructure at risk.
Conclusion
Peoples who have already used previous versions of Release Management will understand that beyond a major interface change, the tool has been completely redesigned. Release Management is becoming an essential component of the Visual Studio Team Service suite. And its rapid development will promote it as a leader in the Continuous Delivery industry.

About the author
Pierre-Henri is a senior ALM consultant and Visual Studio ALM MVP. He has over 10 years of professional experience in software development, Agile project management and architecture design. He specializes in working with development and ops teams to help them improve the way they build and deliver software. As a convinced DevOps practitioner, he also helps to break walls between them. You can follow him on Twitter at @phgache.