How to Try Web Apps and Mobile Apps for Free
Editor’s note: The following post was written by .NET MVP Sara Silva as part of our Technical Tuesday series
To use Microsoft Azure it is necessary to link a credit card to the account, otherwise it is not possible to create a new account, which in some cases blocks new clients to try Azure. To help on it Microsoft released the tryappservice.azure.com with the goal to provide a simple way to learn and test Azure App Services without an account, for free. In this article I will show you how to create and test Web Apps and Mobile Apps using this reference.
Introduction
Microsoft Azure is a cloud computing platform and infrastructure, created by Microsoft, for building, deploying and managing applications and services through a global network of Microsoft-managed datacenters. One of the services provided by Microsoft Azure is the Azure App Services that is a fully managed platform as a service (PaaS) that integrates the Microsoft Azure Websites, Mobile Services, and BizTalk Services into a single service, and it adds new capabilities enabling integration with on-premises or cloud systems.
***saramgsilva2-figure1.jpg
Figure 1 Different applications available from Azure App Service
Note: To learn more about Azure App Services, check my previous article Introduction to Azure App Services.
For those who do not have an Azure Account, it is possible to try the Azure App Service in the following reference tryappservice.azure.com, which allows you to create Web Apps, Mobile Apps, Logical Apps and API Apps without cost and does not require a credit card. This service has some limitations because the main goal is to test Azure App Services and for that reason, it is only available for an hour.
Creating a new Web App
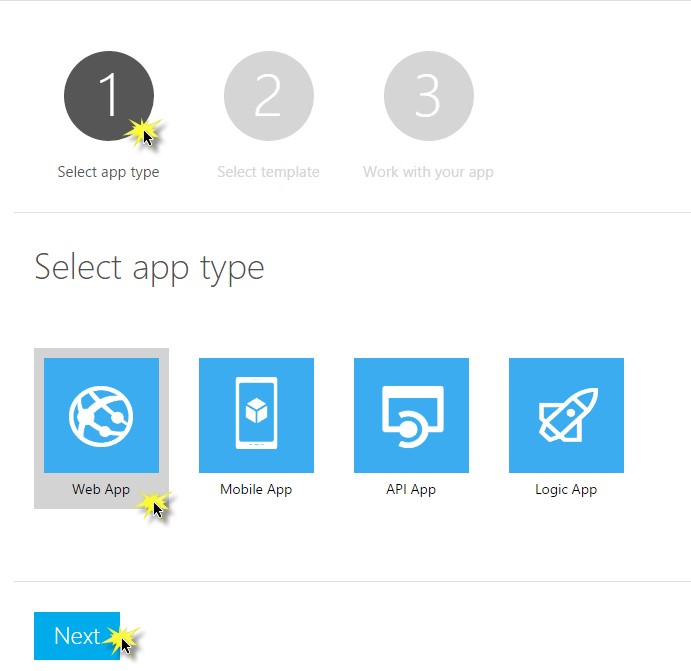
To create a new Web App, go to tryappservice.azure.com, and select the application type “Web App” as described in figure 2:
***saramgsilva2-figure2.png
Figure 2 Creating Web App from Azure App Services without an Azure Account
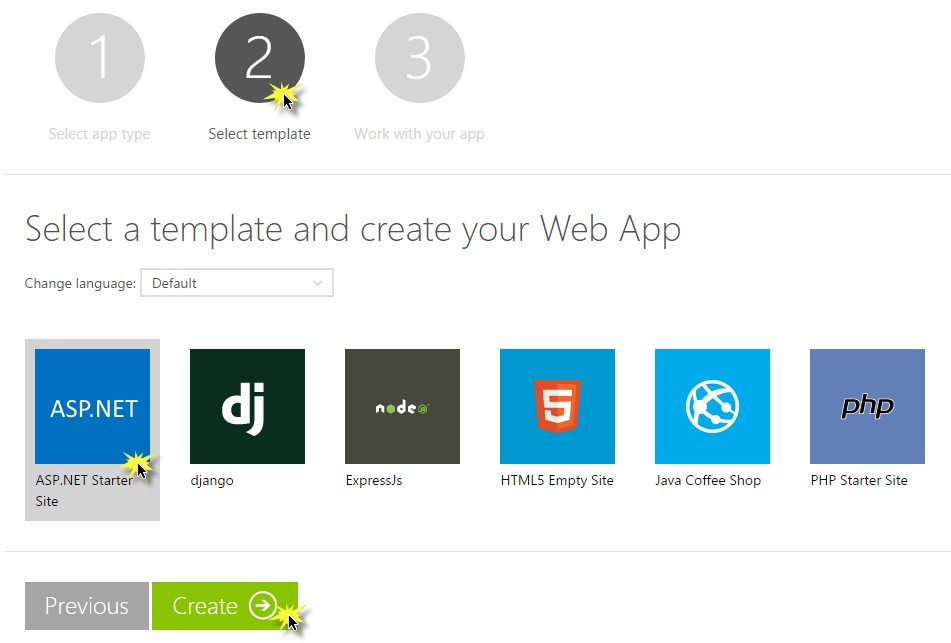
After this, it is required to select the language and the template. This way, it is possible to choose if it will be an ASP.Net (using C#), Node.js, HTML5, Java or PHP website.
***saramgsilva2-figure3.png
Figure 3 Choosing the language and the template used by the Web App
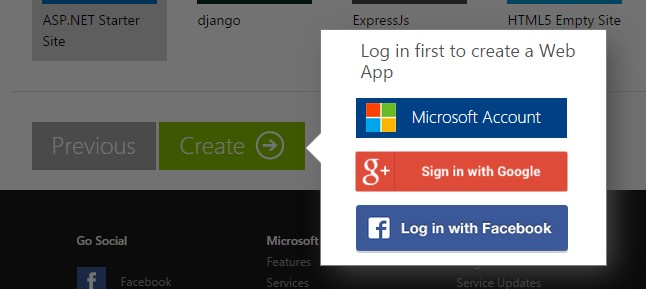
To finalize the process, an authentication is required using one of the social networks provided, as described in figure 4:
***saramgsilva2-figure4.png
Figure 4 Authenticating using social network
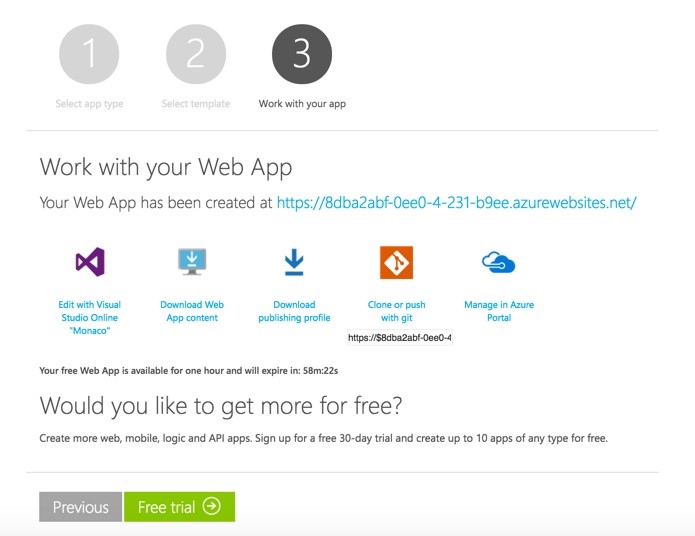
Then, the Web App will be created and it will provide all resources required for developing, deploying and testing the Web App. As mentioned earlier, this Web App will expires within an hour, as described in figure 5:
***saramgsilva2-figure5.png
Figure 5 Details provided to work with Web Apps
Note: With an Azure Trial Account, it is possible to create 10 free apps of any type for 30 days. To get more information have a look at this reference.
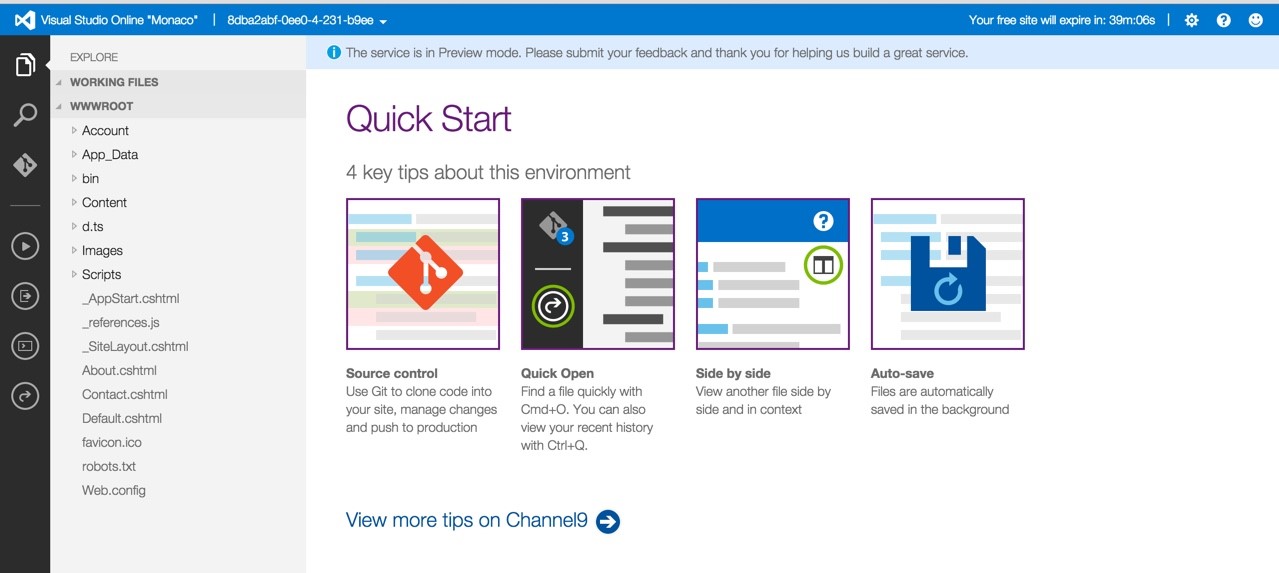
Now it is possible to edit the source code provided by the template in Visual Studio Online “Monaco,” as described in figure 6:
***saramgsilva2-figure6.png
Figure 6 Editing the source code in Visual Studio Online “Monaco”
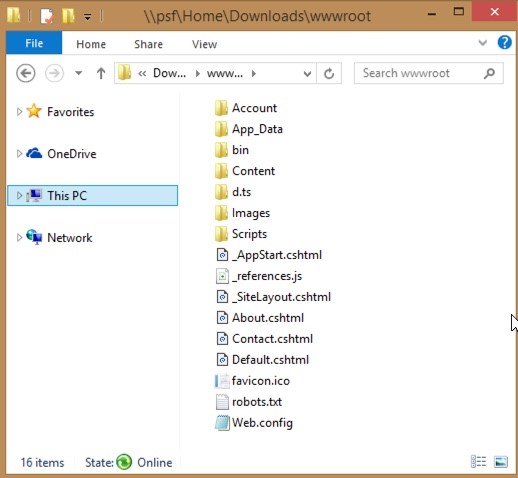
And it provides the Web App content based in the template selected, as described in figure 7:
***saramgsilva2-figure7.png
Figure 7 The source code provided
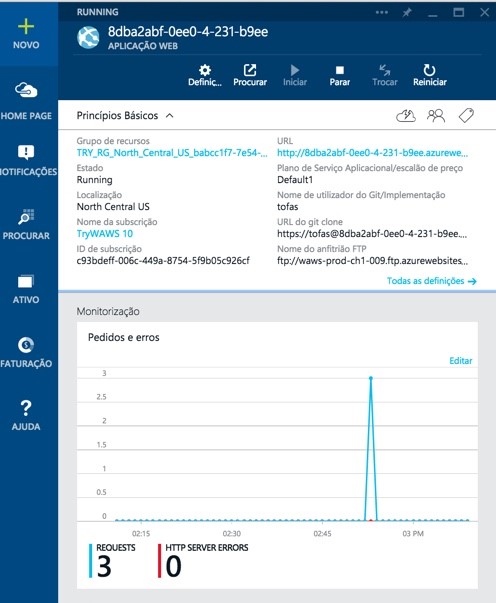
The publishing profile and the git reference are provided when a Web App is created through tryappservice.azure.com, which allows pushing the Web App to the server using Visual Studio or git, respectively. Lastly, it is possible to manage the service in the Azure Portal, as describe in figure 8:
***saramgsilva2-figure8.png
Figure 8 Managing the service in the Azure Portal
Using the publishing profile
In the scenario described above there is not any Azure Account which in general is used to deploy the application to the server. Another alternative is to use the publishing profile, which is safer, and it defines all data required to execute a deploy using Visual Studio.
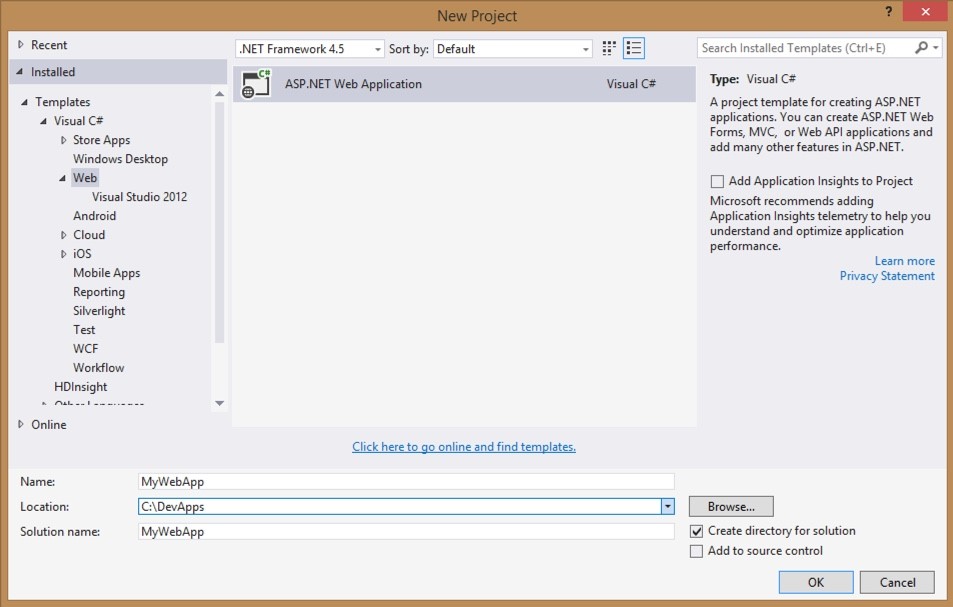
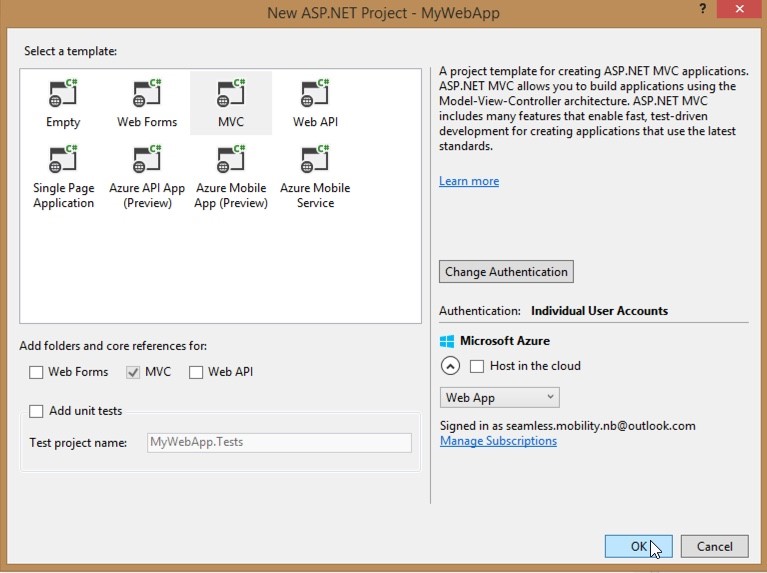
After creating a new Web App using Visual Studio 2015, as described in figures 9, 10 and 11:
***saramgsilva2-figure9.png
Figure 9 Creating a new ASP.Net Web Application
***saramgsilva2-figure10.png
Figure 10 Selecting the MVC Template
***saramgsilva2-figure11.png
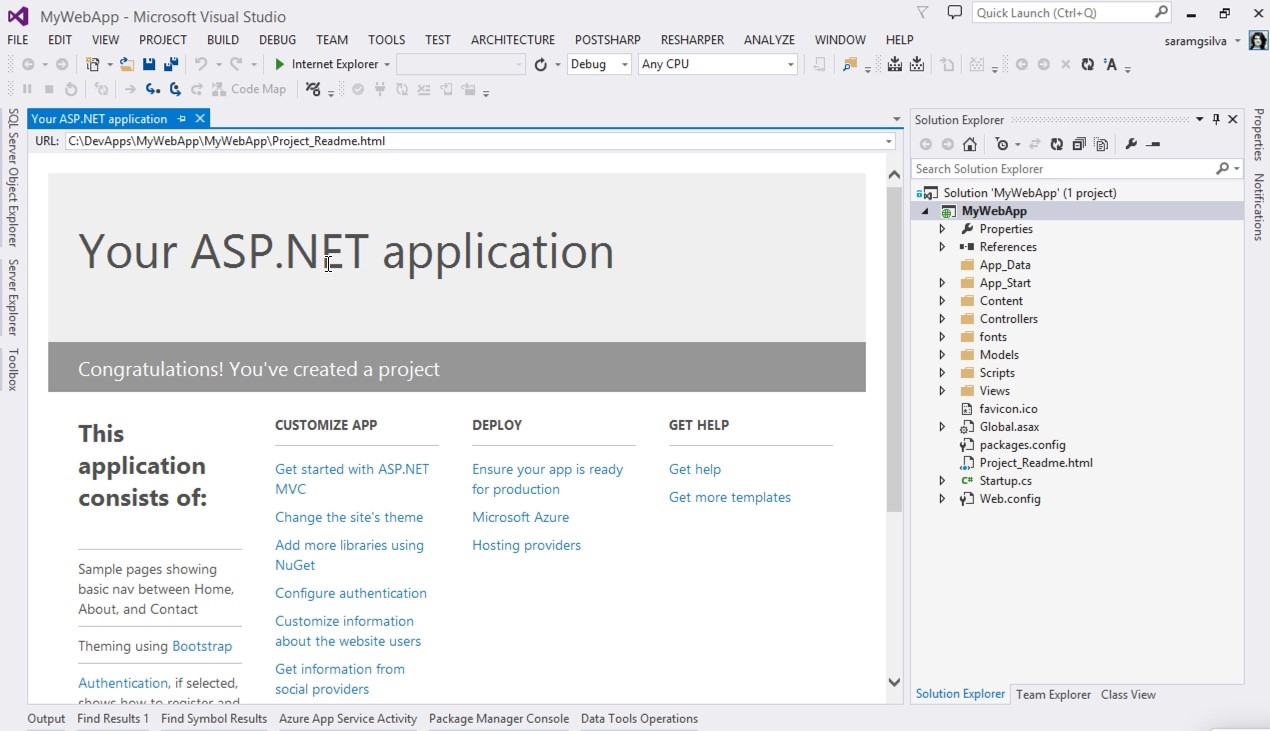
Figure 11 The ASP.Net Web Application
It is possible to publish it to the server. This way, selecting the project and in the context menu it is possible to choose “Publish,” as described in figure 12:

***saramgsilva2-figure12.png
Figure 12 Publishing the Web App
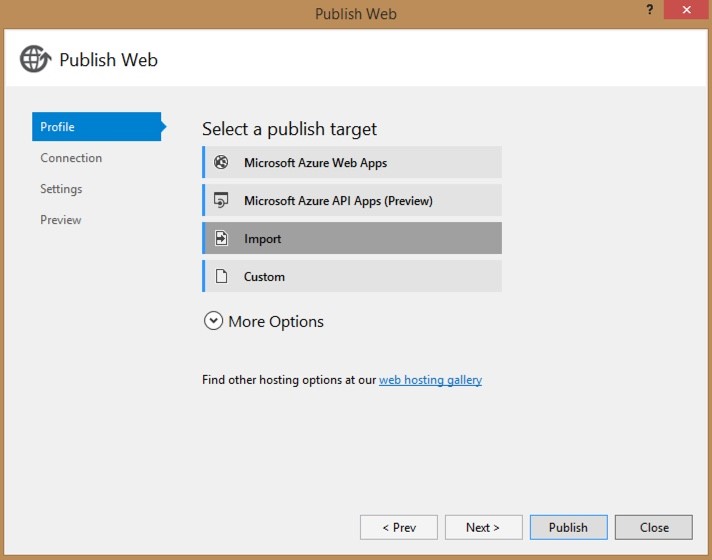
In which the result will be a new window that allows importing the publishing profile, as following:
***saramgsilva2-figure13.png
Figure 13 Selecting “Import”
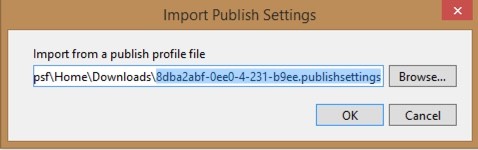
***saramgsilva2-figure14.png
Figure 14 Importing the profile
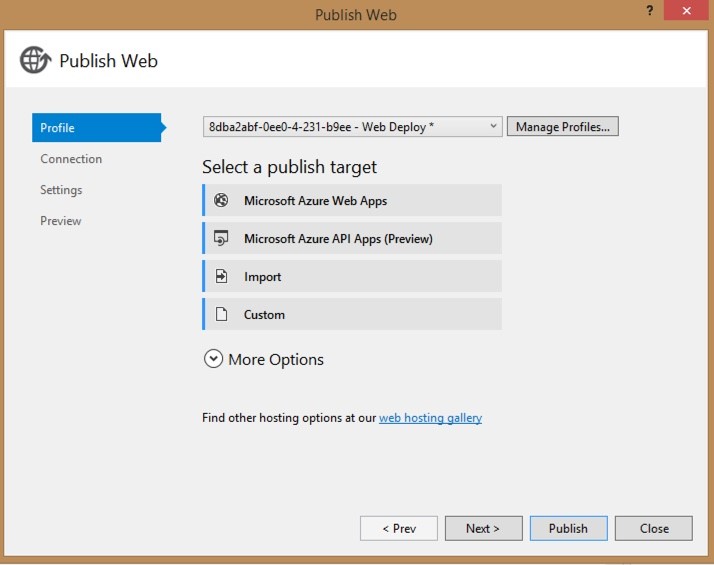
After loading the profile, the “Publish Web” window will be displayed, as described in figure 15:
***saramgsilva2-figure15.png
Figure 15 Publish Web
In such window, it is possible to verify the connection, with the server, before publish it (this profile expires in an hour after it is created).
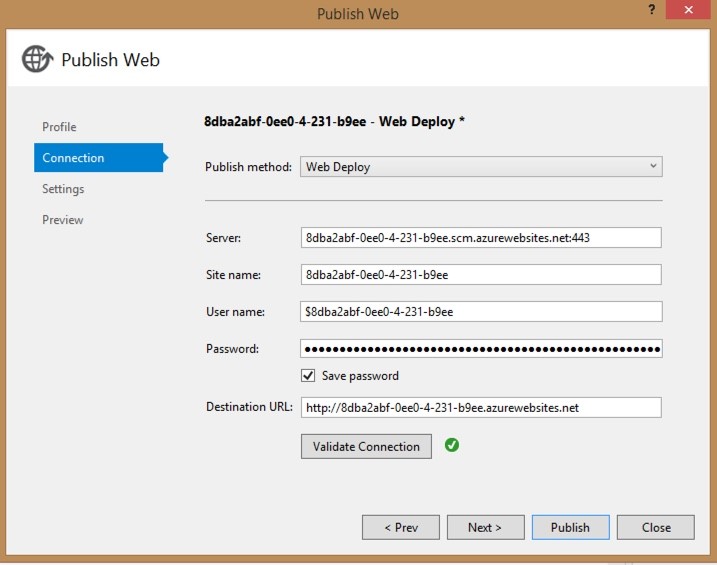
***saramgsilva2-figure16.png
Figure 16 Publish Web
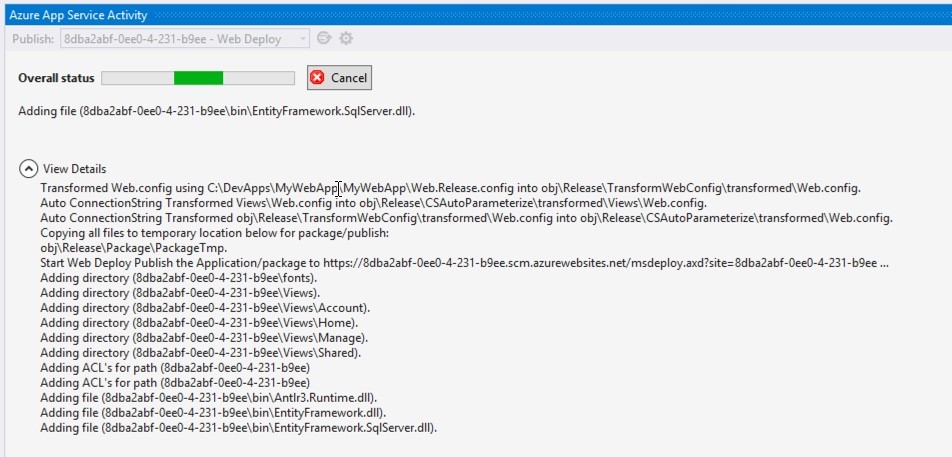
During the publishing process, it is possible to follow the deploy and the “Azure App Service Activity” allows you to see the output and the details of this process, as described in figure 17:
***saramgsilva2-figure17.png
Figure 17 The Azure App Service Activity
When the deploy is finished, the default browser will be opened showing the Web App published, as described in figure 18:

***saramgsilva2-figure18.png
Figure 18 The Web App published
Creating a new Mobile App
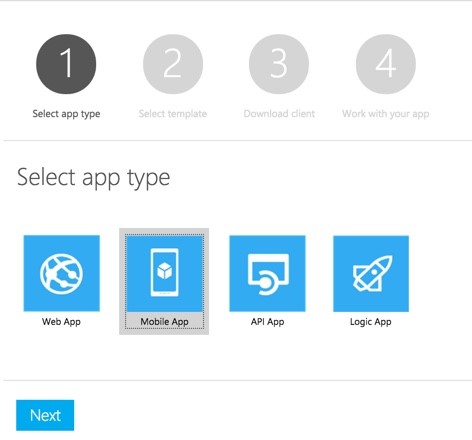
To create a Mobile App, go to tryappservice.azure.com, and select the application type “Mobile App” as described in figure 19:
***saramgsilva2-figure19.png
Figure 19 Creating Mobile App from Azure App Services without an Azure Account
Then, select the template for the Mobile App, in this case the selected template is a .NET Backend template, as described in figure 19:
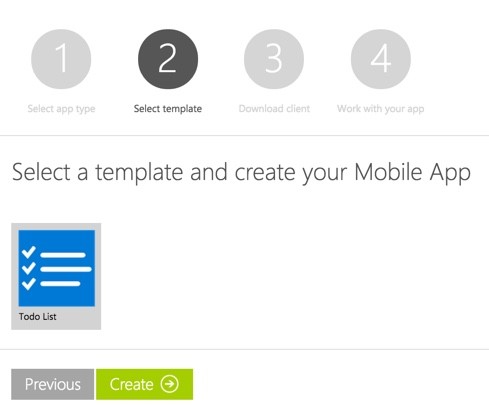
***saramgsilva2-figure20.png
Figure 20 Choosing the template for the Mobile App
Note: Mobile Apps and Web Apps based on ASP.Net Web Applications are the same; the main difference is the fact the Mobile Apps provides an SDK with features focused on Mobile Applications. This way, it is possible to see the Mobile Apps as an extension of Web Apps.
For the client application it is possible to select a Windows, Native iOS, Xamarin or Web client app, as described in figure 21:
***saramgsilva2-figure21.png
Figure 21 Choosing the mobile client app
And in the end it will provide all resources as shown in Web Apps, because both uses ASP.NET and the publishing process at the same.
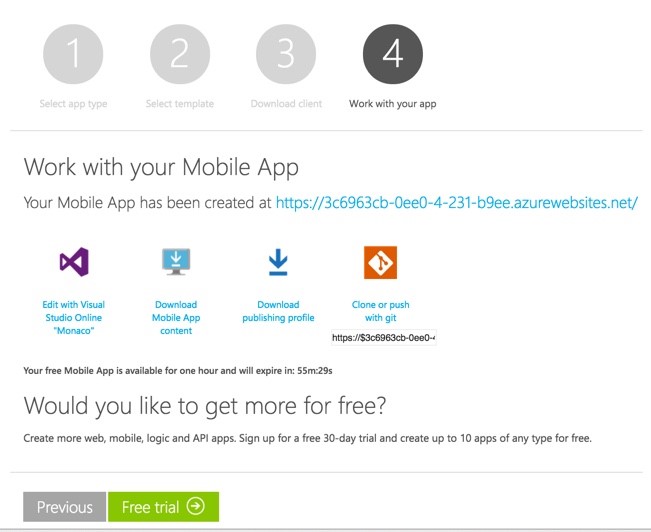
***saramgsilva2-figure22.png
Figure 22 Details provided to work with Mobile Apps
Note: When we open the https://3c6963cb-0ee0-4-231-b9ee.azurewebsites.net/ in the browser a default page will be shown, in which it is possible to select to try it out. Instead of Mobile Apps created using an Azure Account, in this case the service does not require the key to see the help page.
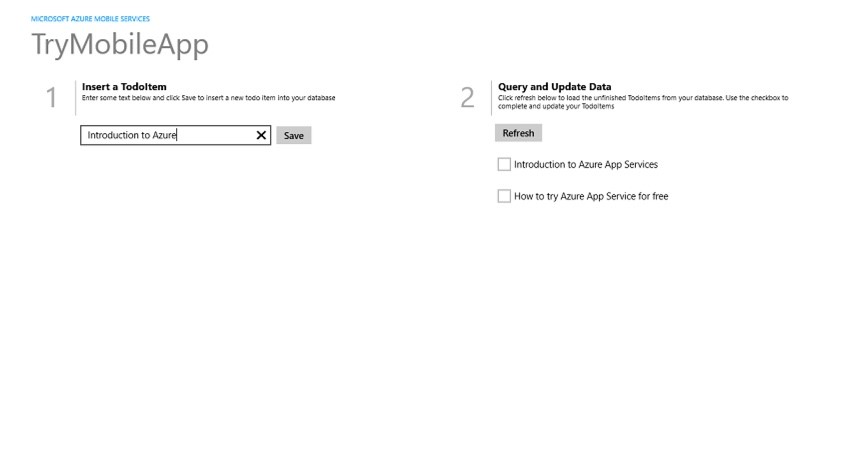
Running the Windows client app
The Windows client application provided is a Universal App (figure 23), in which it is possible to see the implementation of the Mobile App: to insert, update and refresh the data.

***saramgsilva2-figure23.png
Figure 23 The Universal App provided
For more information on which endpoint it used, have a look at the App.xaml.cs file, in which the code snippet is:
// This MobileServiceClient has been configured to communicate with the Azure Mobile Service and
// Azure Gateway using the application key. You're all set to start working with your Mobile Service!
public static MobileServiceClient MobileService = new MobileServiceClient(
"https://3c6963cb-0ee0-4-231-b9ee.azurewebsites.net/",
"https://3c6963cb-0ee0-4-231-b9ee.azurewebsites.net/",
"ZUMOAPPKEY"
);
This means the client app provided has the correct endpoint and it is not required to define it. Running the application it is possible to execute the actions provided: insert, update and refresh.
When the Mobile App was created, it was published in the “Todo Item services,” in which the content is provided in the last step. For those who want to create a Mobile App using Visual Studio it is possible to publish it using the publishing profile as it was done in the Web App.
Conclusion
In conclusion, tryappservice.azure.com allows any developer to try the Mobile Apps and Web Apps without an Azure account and this way it is very easy to learn and then to test it.
About the author
Sara lives in Portugal and studied mathematics at the University of Coimbra. She now focuses on Windows 8 Store, Windows Phone, Xamarin and Azure development for projects within the operational planning of public transport, logistics, payments and multimedia.