Side Loading Deployment of Windows Store Apps in Enterprises – Step by Step
Editor’s note: The following post was written by Microsoft Integration MVP Damir Dobric
Side Loading Deployment of Windows Store Apps in Enterprises – Step by Step
If you want to deploy Windows Store Apps in enterprises, Windows 8 provides a concept called “Side Loading”, which is described in this article, at least.
Basically, when preparing side loading, you will have to build the package, sign it and deploy it. Please note, there are several ways do side-load the app.
Right now, deployment can be done by executing power shell scripts, by using of SCOM or it can be distributed on the Windows image itself.
There are many articles which describe all of these procedures, but surprisingly all of them targets deployment with developer license key. That means, you will commonly run Visual Studio, create the package and finally run the auto-generated power shell script.
All this looks intuitive and very easy. Basically, you don’t have to do anything. Visual Studio will take care about everything. Period.
Unfortunately, described deployment helps to try side-loading. For this purpose the key called code signing key will be generated, which unfortunately cannot be used in the real production environment? This key will run under developer license. Developer license is usually valid 30 days if created by Visual Studio. However if it is created by using the store directly, it is valid 90 days.
In this article I will try to describe all required steps which are required for production environment.
To deploy your application in enterprise, you need to do following steps:
1. Prepare your machine
2. Create enterprise signing certificate
3. Enroll Certificate
3. Deploy the app
1. Prepare your machine
Before you deploy the app, you need to do some preparation of the machine where the app has to be installed. This procedure is exactly the same one as when deploying with self-signed key for testing purpose.
Side loading works in general on Windows Server 2012 and Windows 8 Enterprise editions if following is satisfied:
a) The machine is domain joined.
b) The group policy is set to Allow trusted apps to install.
To setup group policy open Group Policy editor setting located at
Local Computer Policy | Computer Configuration | Administrative Templates | Windows Components | App Package Deployment.
Navigate to Allow all trusted apps to install and enable it.
This can also be done by setting following registry key:
HKEY_LOCAL_MACHINE\Software\Policies\Microsoft\Windows\Appx\AllowAllTrustedApps = 1
For side loading to Windows 8 Pro, Windows RT, or Windows 8 Enterprise, you need to
a) Activate the product key.
b) Set the group policy to Allow trusted apps to install.
As you see side loading on Windows 8 Pro and Windows RT works only if the product key is activated.
Don’t be surprised, side loading on Windows 8 is supported either by Domain Joining or Key activation.
2. Create Enterprise Code Signing Key
One of most important steps which is in fact major prerequisites for side loading is creating of the code signing key. Unfortunately this step is most difficult one and it is not documented well (almost at all).
One possible solution would be to buy code signing key. Unfortunately the certificate with signing key for Windows Store Apps is slightly different than common code-signing certificate. More about this latter in this article.
Most articles which reference to side loading describe how to create Self Signing Key. In fact this key is automatically created by Visual Studio.
After lot of trying I found a way to make all this happen. It is not very easy and it includes multiple steps. I’m sorry for this. Please forgive me, it was not my idea to design it this way :)
To make code signing key (certificate which will envelope the key) you have to have installed corporate Certificate Authority (CA). This article does not cover installation of CA.
Once it is installed there is an old, very old ASP Web application, which is used to request certificates. Following three pictures show several steps in the certificate enrollment process.
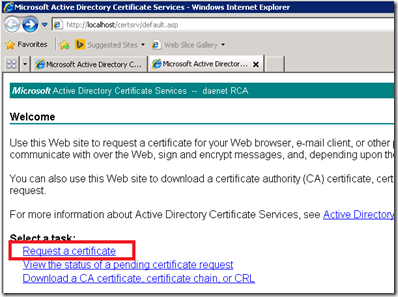
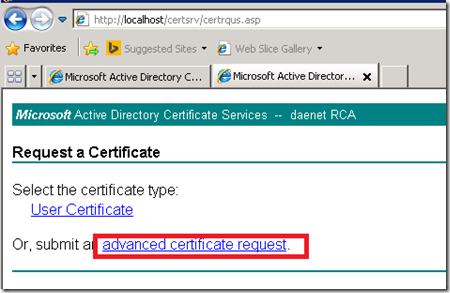
Go to Create and Submit certificate:
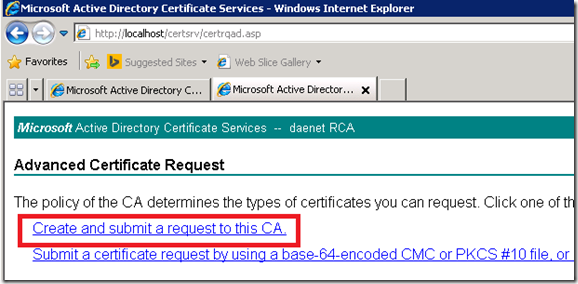
Unfortunately this application has few issues. First, it does not provide by default code signing template, which you will need to deploy the app. Second, it does not support Windows Server 2008 Enterprise certificate templates.
It can only deal with Windows Server 2003 Enterprise certificate templates.
Bu never mind. I decided to try 2003 certificate templates. Enrollment process worked fine, but unfortunately the app verification process during side load has failed over and over again.
For this reason I decided for me, “This application is not useful for issuing of code signing certificates for Windows Store Apps ”. If somebody knows how to make this working with this application, I would love to see comments here.
But, don’t wary, there is a better way to complete this story successfully.
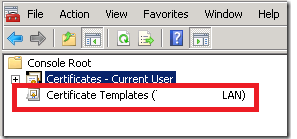
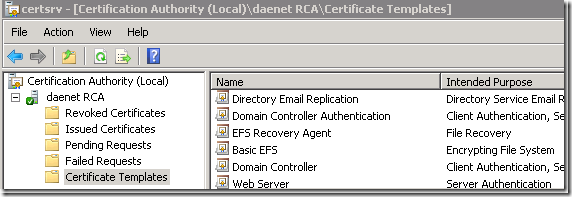
Open the MMC and add-in called “Certificate Templates” as shown on the picture below.
Click on the node on the picture on the right side and the list of installed templates will appear.
|
 |
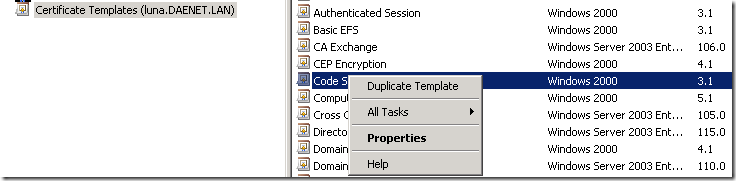
As next, find Code Signing certificate template in the list of templates.
Unfortunately the Code Signing certificate template, which you see in the list in the picture below is not useful for Windows Store Apps. This template is probably used by other certificate authorities when you decide to purchase the certificate by third-party.
In other words, if you use default code signing template side loading will fail.
The reason for this is that certificate for Windows Store Apps requires few more attributes than default template used for code-signing.
To fix this issue, please select the template (right mouse click) and choose “Duplicate”, to create the copy of existing template. You guess, we will extend existing template.
 m
m
In dialog on right, you need to select Windows Server 2008 enterprise as shown. This is exactly the step which is not supported by the Web Application shown above. Remember, in the web application we had to select Win2003 template. In the next step, you have to make few changes in the template, which you have created from default one. Please be careful. Perform exactly described steps. |
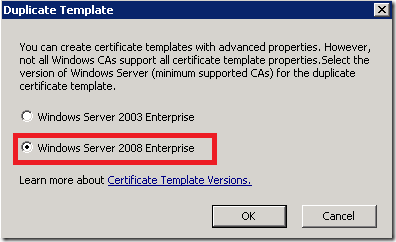 |
If you make some mistake during making changes, it will be almost impossible (difficult) to figure out why side loading will not work. But, don’t wary. You cannot damage anything in the CA, because you are working with copy of the default template.
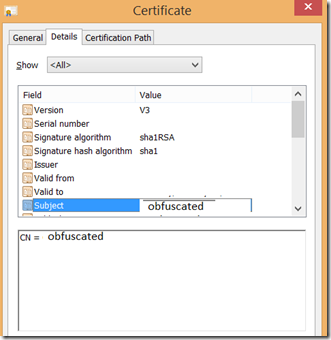
As next select Subject Name tab and click “Supply in Request”. This will enforce developer to provide the subject name of the certificate, when certificate is added in the Visual Studio solution.
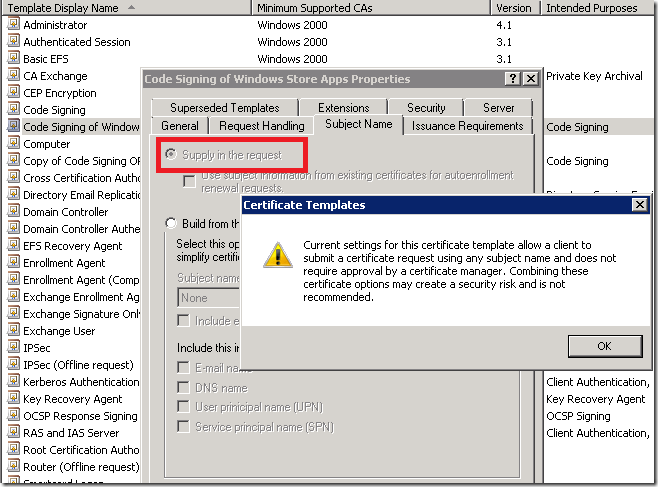
The subject which is enforced in the last step will became Common Name attribute known also known CN, which should match to the publisher of the app.
As you might know, publisher can/should be associated with the store, where usually the app will be uploaded. This is shown at the picture on right side. The Common Name (Subject) must equal Publisher Name shown in package manifest. To make them same, you will have to enter publisher name in the subject in Certificate Request (explained below). |
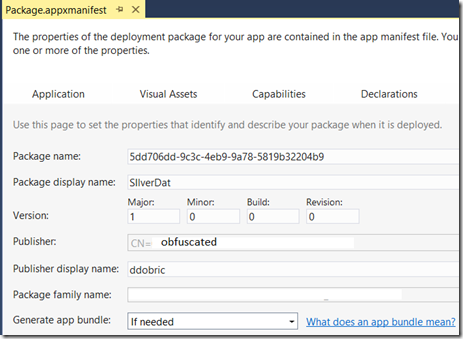 |
Next picture shows where in certificate will publisher name appear.
Note, you don’t have to associate your app with the store account, to make side loading happen. But it is good practice to do this even if you don’t want to publish application
through the store.
It is good to do it, because Publisher will be set on your publicly known organization name, if the app is associated with your public account.
If you do not associate it with the store account the package will contain your user name as a publisher like shown at the next picture.
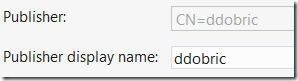
Such kind of certificate would not look very professionally when doing roll-outs in big enterprises. This is why it is better to setup organizational account. Even if you use store account
and associate your app with organizational store account, side loading process will remain as it is. No any additional step or tweaks have to be done.
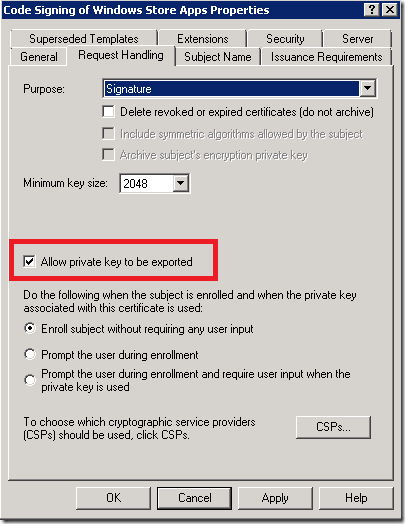
As next you need to enable private key to be exported. If you don’t do this you will not be able to move PFX (code signing certificate) with private key. That means you will not be able to sign the package.
|
 |
In the next step you should give some descriptive name of the template.

Later, after certificate is created the template name will appear in the certificate as shown at the picture below on right.
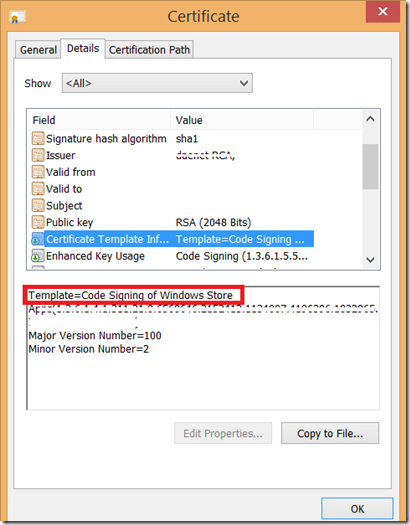
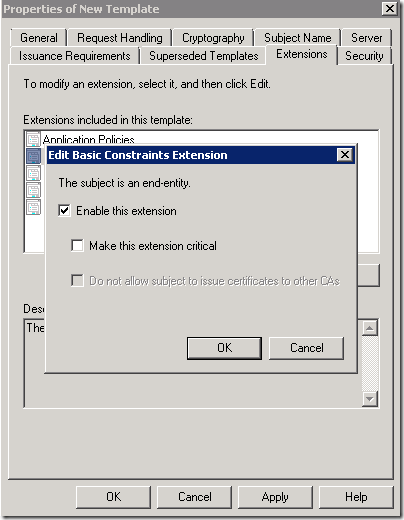
Optionally you can set expiration date. Default is one year. Now, you have to enable Basic Constraints Extension. This is what most code signing certificates do not include (at least at time of writing of this article). When you purchase this certificate by some third party, be sure that this extension is included. To add this extension, just click the check-box. |
 |
After applying of this template will appear in the list of all templates.
As next, refresh the list and select your new template.
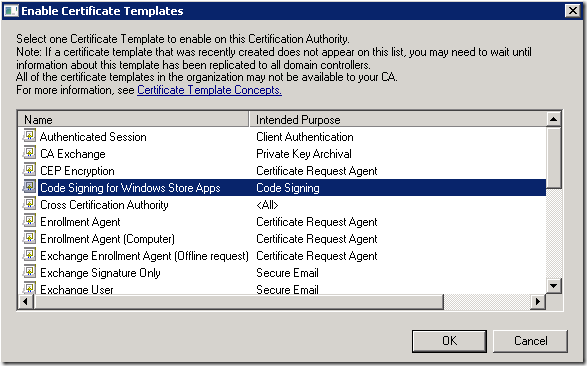
Finally select it an choose “enable”

This is all what you need to do to create the certificate template. Now, we can finally start with enrollment.
3. Certificate Enrollment
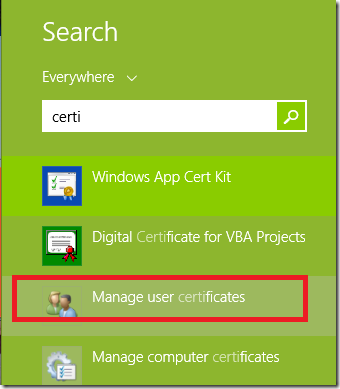
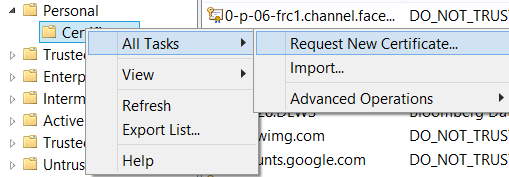
As next, you have to enroll certificate for you app. To do that open certificate management tool on any machine joined to domain. (MMC with user certificate management)
In the MMC you have to select the “Request New Certificate”
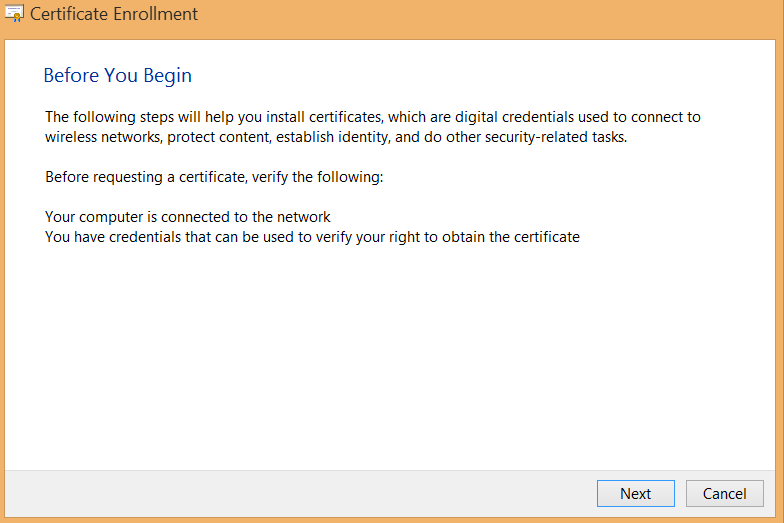
On the following dialog click “Next”.
As next, expand the list of available templates:
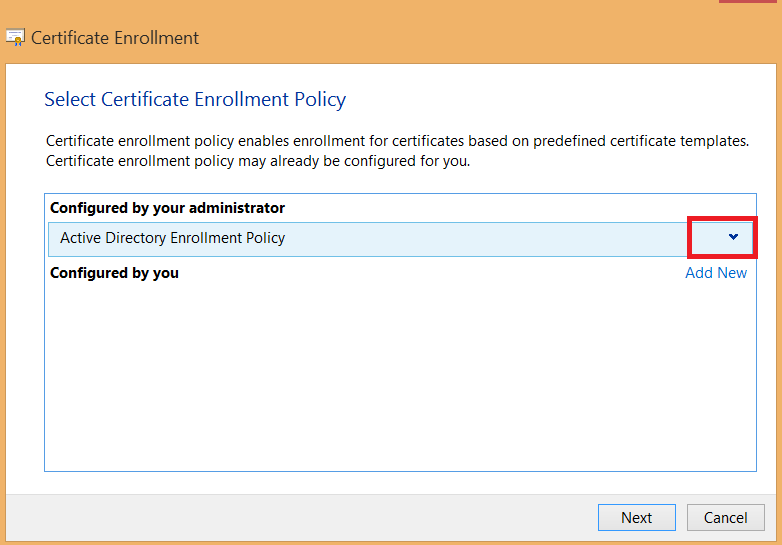
Select the certificate template to be used for your new certificate.
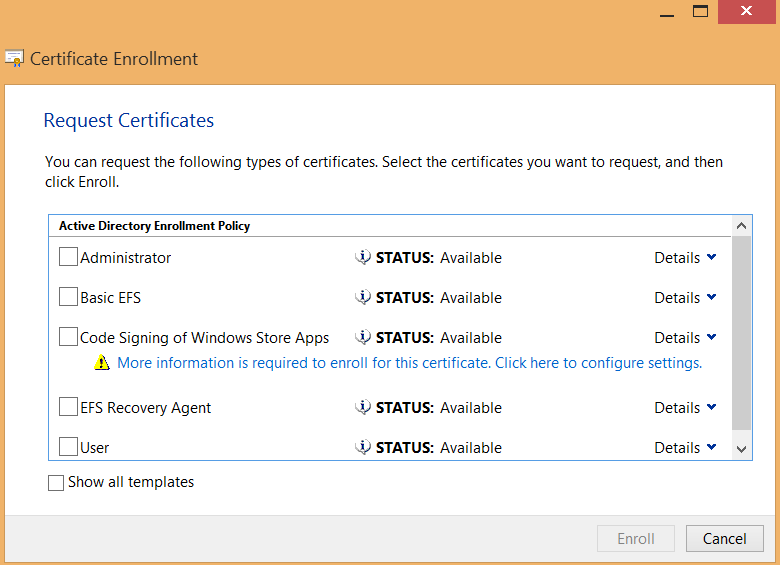
The yellow warning is not an issue. Remember we have chosen for Subject Name “Supply in the Request”. This is what the message above is trying to explain. Ignore this and proceed with “Enroll”.
As next, you can select a friendly name for your certificate.
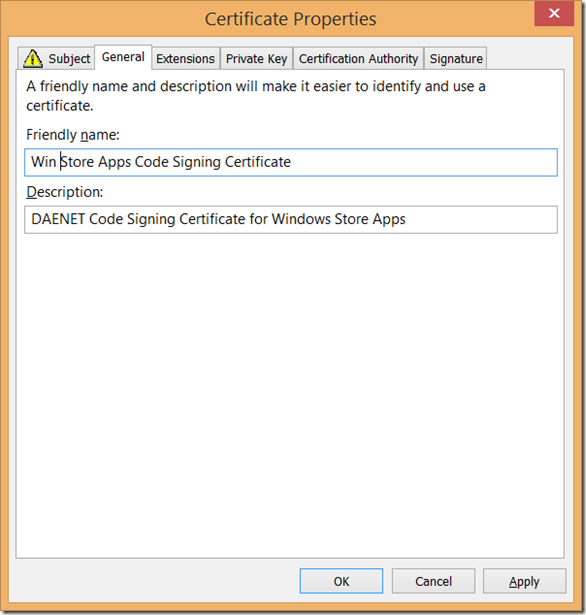
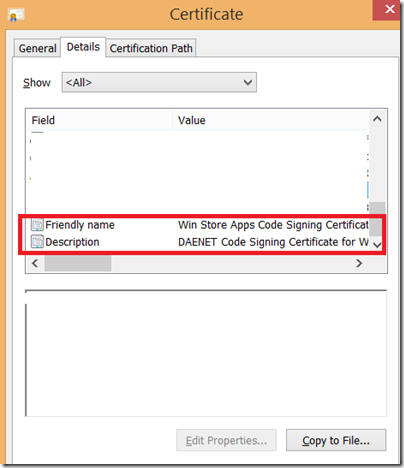
The certificate Friendly Name and Description are attribute which will become consisted part of your certificate after it is enrolled:
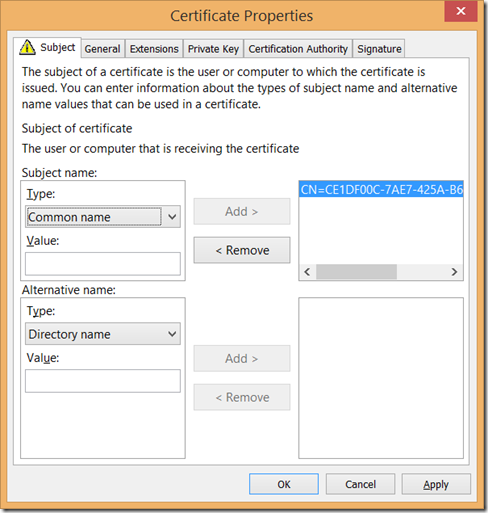
As almost last step, you have to enter the Subject Name of the certificate. This name should be the name copied from the App-Package as
I already described above.
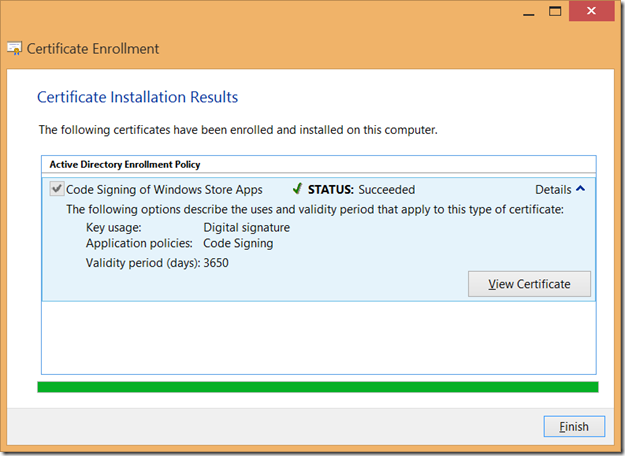
You will probably not believe me, but this is almost all you need to do for enrollment. Sorry :(
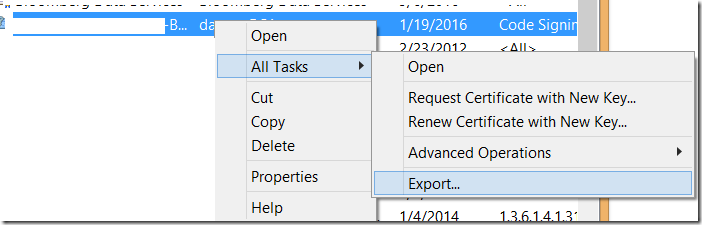
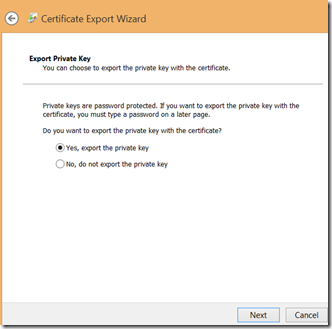
The last step is to export certificate with private key. Select your certificate and click “Export”. Then select YES Export Private Key.
This is important, because without private key, certificate can only be used for verification of signature, but not for creating of signature.
 |
 |
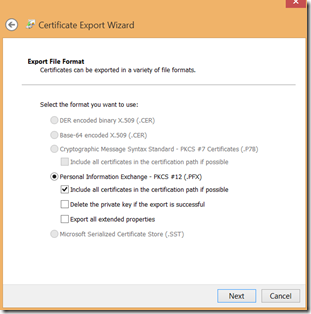
Then select PFX format and enter protection password. This should not be a weak password.
 |
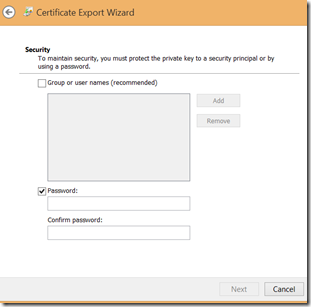 |
When you later select certificate in the app, you will have to enter the password.
Huuhhh. That’s all for enrollment.
3. Deploy the App
The last required step is to deploy the app. This step is exactly as it should be: “simple”. Visual Studio will do all magic.
Open Package Manifest (Package.appmanifest), click on button “Choose Certificate”, browse for certificate file which you have exported in last enrollment step.
Note that after you select certificate, the password has to be entered, which will unlock the key.

Once you have entered the password, you will not be asked anymore to do that.
You can simply continue with development and deployment. Right mouse click on App-project,
select store and then “Create App Packages”.
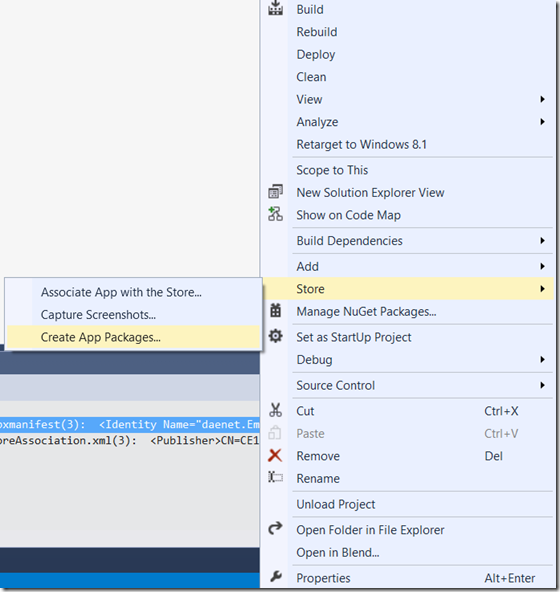
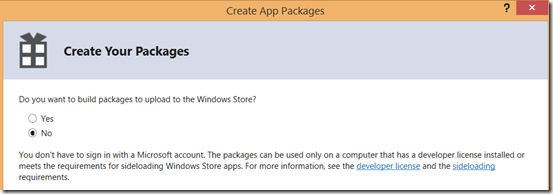
In the next dialog choose “NO”, which means you are not going to publish the App in the store.
You just want to create the signed package.
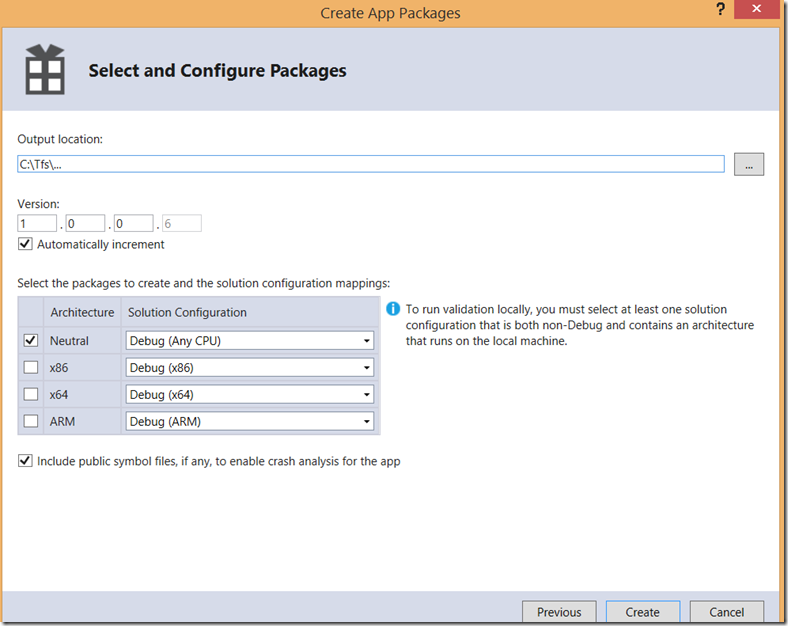
Now, select the destination folder of the package and architecture. If you don’t know how to choose proper architecture select “Neutral”. It will work on all architectures.
The package is now created in previously specified folder.
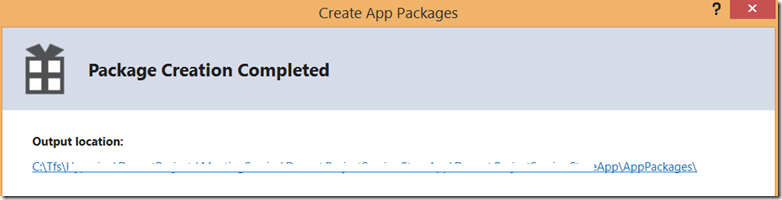
Click on URL and notice following files:
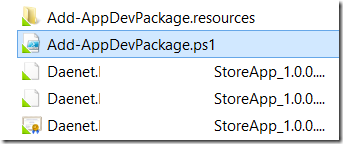
If you execute (open) Add-AppDevPackage.ps1 the app will be installed.
Recap
That’s it. I hope this article will help to understand side-load deployment process, which is obviously not easy. In my opinion this process can and must be improved and simplified.
Deploying of an app must not be more complex than development of the app. Right now, I can imagine lot of simple apps made with App-Studio or similar, which are easier to build than to deploy. Of course you don’t have to perform all described steps every time. Deployment itself is easy process.
On the other hand, Store-Concept is great example of simplicity. Unfortunately, deploying an app through store requires integrating of your enterprise concept in the deployment process of Microsoft Store Apps via store. In the real world this does not work, because every enterprise must be process owner of its own deployment process without dependency to any other organization.
Finally, many steps described in this article do not have to be done by every developer or developer at all. Once you have certificate template and certificate deployment is very easy.
About the author

Damir Dobric is co-founder, managing director and lead architect of DAENET Corporation, which is Microsoft long term Gold Certified Partner and leading technology integrator specialized in Microsoft technologies with strong focus on Windows, .NET and Web. He is with DAENET winner of worldwide Technology Innovation Award for year 2005, German innovation award for SOA in 2008 and Microsoft Partner of the year 2010.
Working with Microsoft on helping customers to adopt new technologies, he has well over 25 years of experience as a developer, architect, speaker and author. His focus is on practical implementation of custom solutions, which target integration of devices and services. Damir is Windows Azure VTSP, Docent for Software Engineering on University of applied sciences in Frankfurt am Main with focus on Distributed and Cloud Computing and member of Connected Technology Advisory and Windows Azure Insiders Groups. Visit his blog or follow him on Twitter.
About MVP Monday
The MVP Monday Series is created by Melissa Travers. In this series we work to provide readers with a guest post from an MVP every Monday. Melissa is a Community Program Manager, formerly known as MVP Lead, for Messaging and Collaboration (Exchange, Lync, Office 365 and SharePoint) and Microsoft Dynamics in the US. She began her career at Microsoft as an Exchange Support Engineer and has been working with the technical community in some capacity for almost a decade. In her spare time she enjoys going to the gym, shopping for handbags, watching period and fantasy dramas, and spending time with her children and miniature Dachshund. Melissa lives in North Carolina and works out of the Microsoft Charlotte office.