Virtual Directories: Exchange 2013
Editor’s note: The following post was written by Exchange Server MVP Manu Philip
Virtual Directories: Exchange 2013
A virtual directory is used by Internet Information Services (IIS) to allow access to a web applications in Exchange 2013
Autodiscover Service, ECP, EWS, ActiveSync, OWA, OAB, Powershellare the available virtual directories through EAC.
You can manage a variety of virtual directory settings on Exchange 2013 including authentication, security, and reporting settings. I am explaining here, how you can manage the Virtual Directories through Exchange Admin Center. I have also included some example PowerShell cmdltes to show how to manage those resources:
How to invoke Virtual Directories in Exchange 2013:
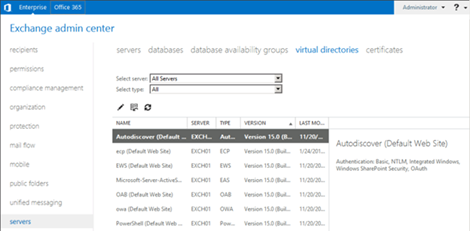
Go to Exchange Admin Center->servers->virtual directoriesto open virtual directories structure as shown in the following screen shot:
In the following sections, I will show you how you can see/edit each al directory settings:
1. Autodiscover (Default Website)
Select Autodiscover (Default Website) and click Edit to go through the following windows:
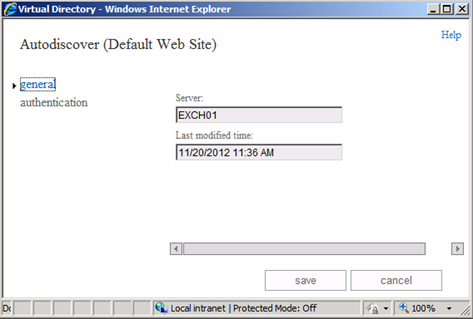
General Settings:
There is no editable fields here. If you need to set the internal/external url value of Autodiscover service you have to set it through Exchange Management Shell. An example shown below can be used to set the external url of Autodiscover service:
Set-AutodiscoverVirtualDirectory -Identity 'autodiscover (default Web Site)' -ExternalUrl 'https://www.exchangeonline.in'
Note: Please remember to set the corresponding changes in IIS virtual Directory for autodiscover also
Authentication:
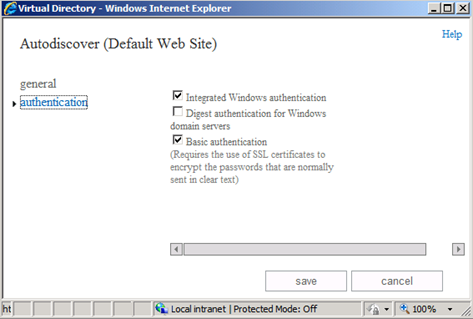
The authentication settings can be viewed by clicking authentication as shown below:
Here you can change the various authentication methods of Autodiscover service of Exchange 2013: Integrated, Digest, Basic (requires SSL certificate to encrypt the password)
The following cmdlet can be used to set 'Integrated Windows Authentication' for Autodiscover Service of Exchange 2013
Set-AutodiscoverVirtualDirectory -Identity 'autodiscover (default Web Site)' -WindowsAuthentication $true
2. ecp (Default Website)
Select ecp (Default Website) and click Edit to go through the following windows:
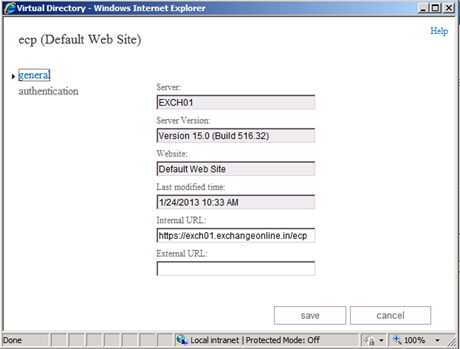
General Settings:
You may set 'Internal URL' or 'External URL' corresponding to ecp from this window.
The following PowerShell cmdlet can also be used to set the ecp External URL:
Set-ecpVirtualDirectory -Identity 'ecp (default Web Site)' -ExternalUrl 'https://www.exchangeonline.in'
Note: Please remember to set the corresponding changes in IIS virtual Directory for ecp also
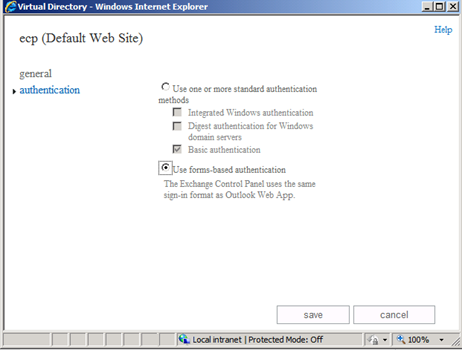
Authentication:
You can select Standard Authentications (Basic, Integrated, Digest) and also Forms-Based Authentication
Note: Please remember to set the corresponding authentication changes in IIS virtual Directory for ecp also if you plan to change the authentication settings for ecp.
3. EWS (Default Website)
Select ews (Default Website) and click Edit to go through the following windows:
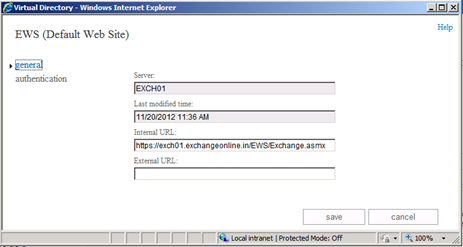
General Settings
You may have a chance here to edit the External/Internal url associated with EWS.
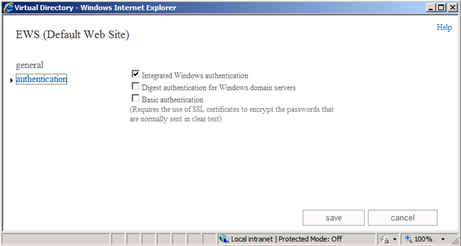
Authentication
Integrated, Digest, Basic authentications are available to set with EWS.
Use the Set-WebServicesVirtualDirectorycmdlet to modify an existing Exchange Web Services virtual directory on a server running Microsoft Exchange Server 2013. For example, the following cmdlet can set the EWS authentication method as DigestAuthenticationand also it sets the external and internal EWS virtual directories of EWS
Set-WebServicesVirtualDirectory -Identity exchangeonline.in\EWS(Default Web Site)-ExternalUrl https://www.exchangeonline.in/EWS/exchange.asmx -BasicAuthentication $true -InternalUrl https://exchangeonline.internal.in/EWS/exchange.asmx
Note: Please remember to set the corresponding changes in IIS virtual Directory for ews also.
4. EAS (Default WebSite)
Select eas (Default Website) and click Edit to go through the following windows:
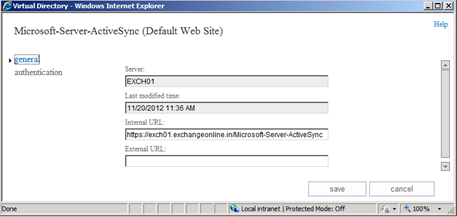
General Settings
ActiveSync associated External and Internal URL values can be set through this window.
Authentication
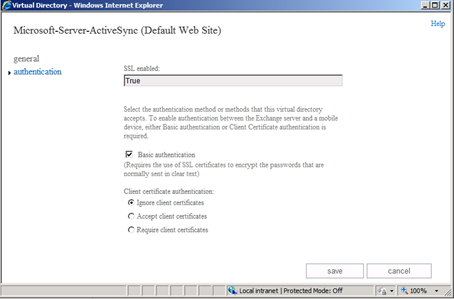
The authentication available is 'Basic Authentication' and which uses an SSL certificate for password authentication. The client certificate can be have any one of the value from: Ignore/Accept/Require
Use the Set-ActiveSyncVirtualDirectory cmdlet to configure the Microsoft Exchange ActiveSync settings on a specified virtual directory. The following cmdlet set the ActiveSync external URL value.
Set-ActiveSyncVirtualDirectory -Identity "ExchangeOnline.in\Microsoft-Server-ActiveSync" -ExternalUrl https://exchangeonline.in/mail
5. oab (Default WebSite)
Select oab (Default Website) and click Edit to go through the following windows:
General Settings
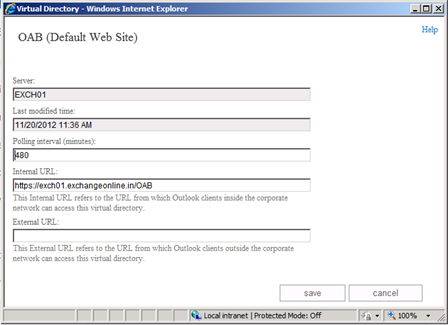
You may set a new value for 'Poliing interval' of Offline Address Book fetch in this window. Thus the new oab will be checked in this interval set here. You may also set the Internal, External URL values here.
6. powershell (Default WebSite)
Powershell virtual directory is the connecting point when we connect the Exchange system through remote PowerShell.
Select powershell (Default Website) and click Edit to go through the following windows:
General Settings
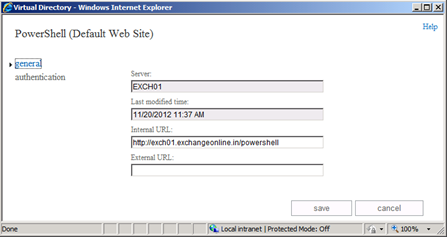
Here, you shall be able to set the internal, external URL values associated with the PowerShell.
Use the Set-PowerShellVirtualDirectory cmdlet to change an existing Windows PowerShell virtual directory in Internet Information Services (IIS).
Authentication
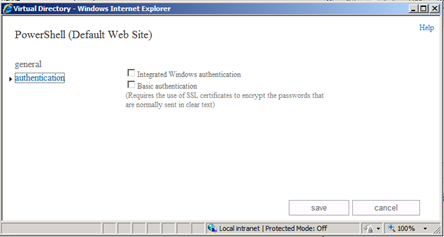
Integrated and/or Basic Authentication can be set using this window.
7. owa (Default WebSite)
Various owa settings can be managed through this window.
Select owa (Default Website) and click Edit to go through the following windows:
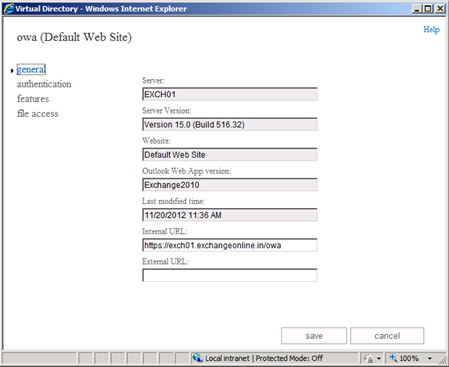
General Settings
The window allows to change/add the internal, External URL values associated with owa.
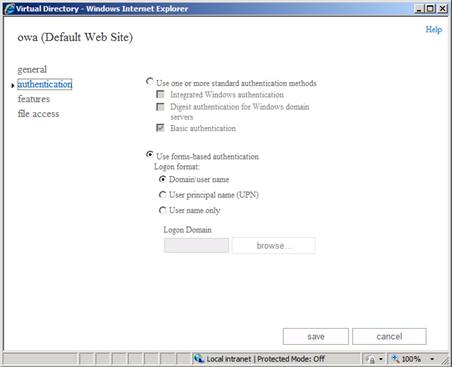
Authentication
The available authentication methods are Standard authentication methods (such as Integrated, Digest, Basic) and Forms Based Authentication (Domain/User, UPN, UserName only are the supported values here). We can also set the Login Domain Name as a permenant value here in this window.
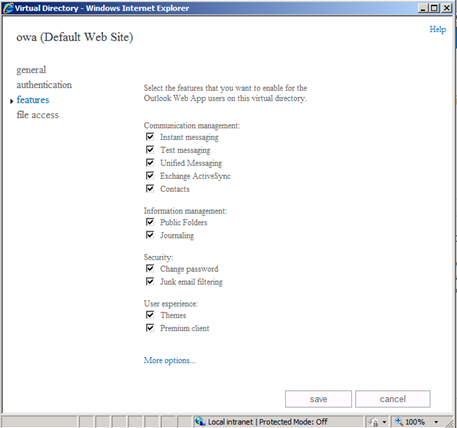
Features
We are able to set various features for users through this window as shows following. For example, we may allow or disallow instant messaging (Lync) via owa or disable the theme selection on owa etc.
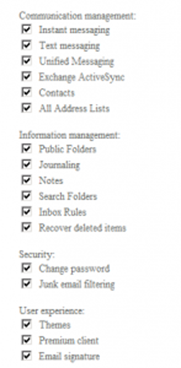
When you click 'More Options' you will be able to see more features on each items as displayed below:
File Access
Various file access methods through owa can be controlled through this window as shown below:
We may set various file access restrictions selectively when accessing owa from Public/Private computers.
By running the Set-OwaVirtualDirectory cmdlet, you can enable or disable features and manage security of various owa items.
About the author
Microsoft Most Valuable Professional (MVP) for Exchange Server for the past 4 years. Working with Microsoft Infrastructure Technologies with Exchange server, Active Directory as the major technologies. Enterprise level Microsoft Messaging Infrastructure Projects handled as Consultant / Technical Specialist /Support Engineer in large user basis. Excellent experience in configuration, migration, upgradation of Microsoft Exchange as well as Active Directory, Office 365, Blackberry Enterprises Servers, Lync etc. Manu actively participates at various Exchange Server Technical forums including Microsoft Technet forums (Profile: ManU PhiliP) along with maintaining his own Exchange Server Blog: https://www.exchangeonline.in and Microsoft Infrastructure Administrator's Area hosted at https://www.windowsadmin.in
About MVP Monday
The MVP Monday Series is created by Melissa Travers. In this series we work to provide readers with a guest post from an MVP every Monday. Melissa is a Community Program Manager, formerly known as MVP Lead, for Messaging and Collaboration (Exchange, Lync, Office 365 and SharePoint) and Microsoft Dynamics in the US. She began her career at Microsoft as an Exchange Support Engineer and has been working with the technical community in some capacity for almost a decade. In her spare time she enjoys going to the gym, shopping for handbags, watching period and fantasy dramas, and spending time with her children and miniature Dachshund. Melissa lives in North Carolina and works out of the Microsoft Charlotte office.
