Configuring Online Backup for Windows Server 2012
Editor's note: The following post was written by Virtual Machine MVP Tomica Kaniski
As Windows Server 2012 includes many new and improved features, some of them often go unnoticed. The objective of this article is to explain how to set up and use one of them – Online Backup.
Online Backup feature in Windows Server 2012 provides you with option to store some of your backups into the cloud (Windows Azure). Current offering includes free preview of this service for customers of Windows Server 2012, Windows Server 2012 Essentials and System Center 2012 during a period of 6 months and allowing you to store up to 300 GB of backups per account.
This feature is available as additional download – software agent which needs to be installed on any server that will be using the Online Backup feature. This piece of software is providing you the connection to Windows Azure Online Backup service.
Installing, configuring and using the Online Backup feature is not very complicated. Basically, what you need to do is to install the Online Backup agent on the server you want to use Online Backup feature for, register the server in online service, create schedule with selecting what will be backed up (and when), and then wait for the backup to occur.
In more detail, here are the steps you need to take to make the Windows Online Backup work on a plain Windows Server 2012 installation:
1. Enable the Windows Server Backup feature
Windows Server Backup feature is part of Windows Server installation, but disabled by default. So, the first step is to enable it. You can enable it using the new Server Manager interface - select Manage, Add Roles and Features and, finally, select the Windows Server Backup feature and finish the wizard.
You can also install this feature by using the DISM command-line tool – you need to run Command Prompt (As Admin) and then the command dism /online /Enable-Feature:WindowsServerBackup.

2. Register for Windows Azure Online Backup
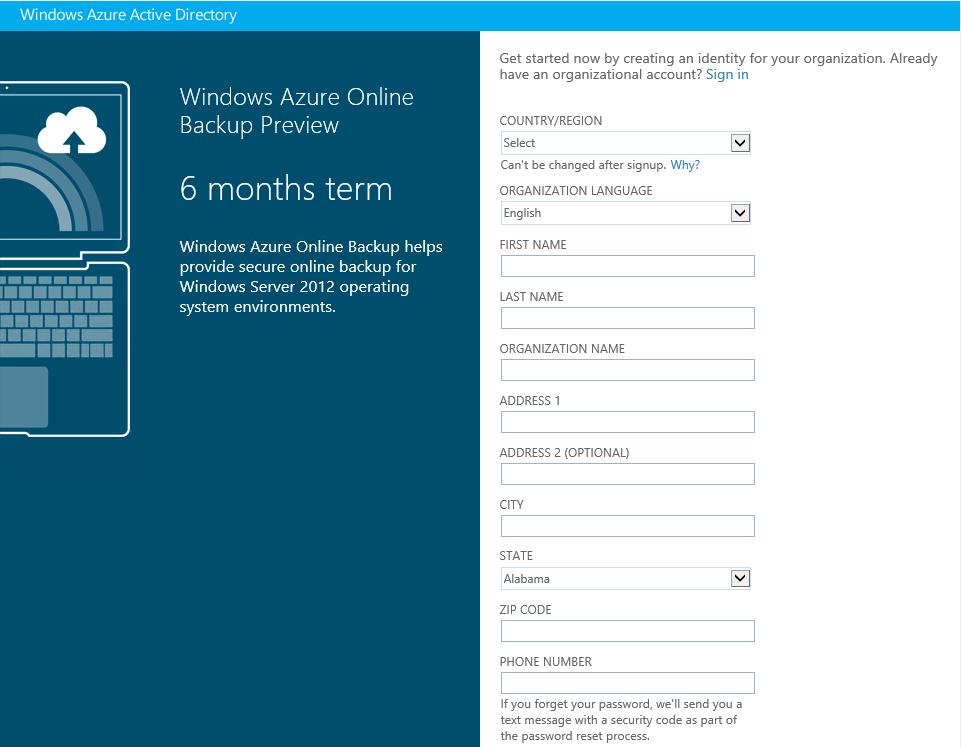
Next step is to set up an account for the Azure Online Backup at https://www.windowsazure.com/en-us/home/features/online-backup/ . The registration process is simple, and at the end of it, you will get account info that will be used in steps that follow.
3. Download the backup agent from Management Portal (Dashboard)
Sign in to the Windows Azure Online Backup dashboard https://portal.onlinebackup.microsoft.com/en-US/Dashboard using the account information from the previous step. In the Overview section of your dashboard, just click on Download and Install button to get the backup agent setup file (download size is about 14 MB).
4. Install the agent
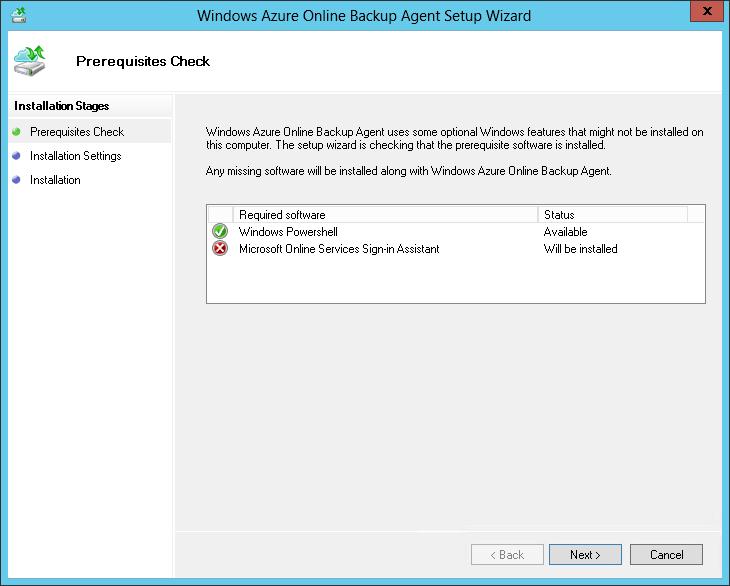
Installation of the downloaded agent software is pretty straightforward – prerequisites are the Windows PowerShell (which is installed by default on Windows Server 2012) and Microsoft Online Services Sign-in Assistant which will be automatically installed during setup. After finishing the installation wizard, you need to open the Windows Server Backup console and verify if Online Backup entry is visible on the left-hand side. If it is visible, the agent installation was successful, and you can proceed to the next step. Leave the console open.
5. Register the server in Windows Azure Online Backup service
If you select Online Backup entry in the Windows Server Backup console, you will get additional options on the right-hand side. Select Register Server option to start a wizard for configuring the online backup.
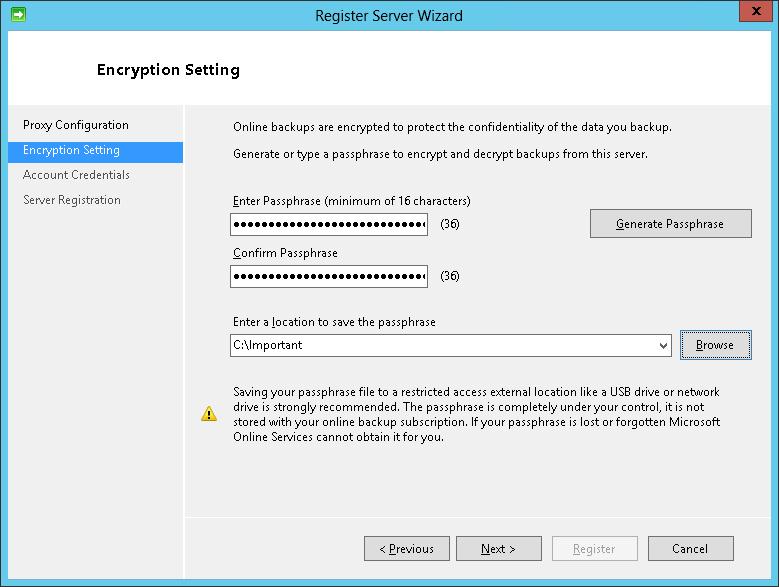
If you are using proxy to connect to the Internet, insert the required info about it. Next you will configure a passphrase for encrypting the backups in online service. Passphrase can be generated automatically if you click the Generate Passphrase button, or you can enter one by yourself (keep in mind that it needs to be a minimum of 16 characters long).
After that, you just need to enter your credentials to access Windows Azure Online Backup (from step 2), and the server will be added to your online account.
6. Create backup schedule
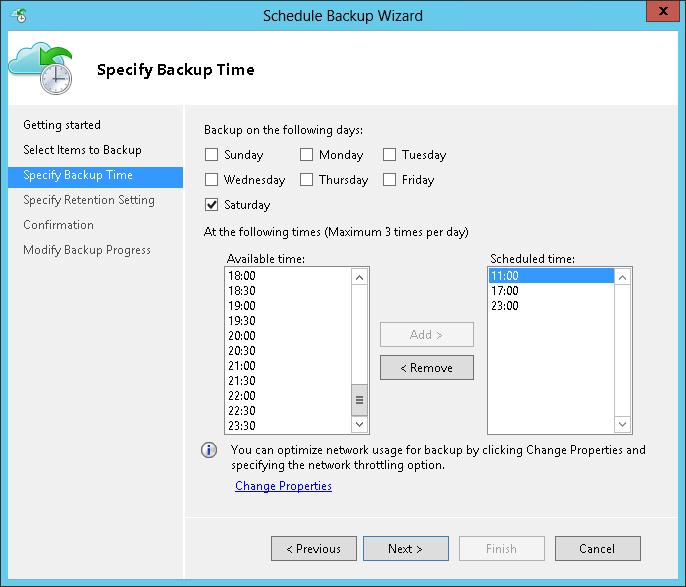
Now you can create the backup schedule by using the option Schedule Backup on the right-hand side of the Windows Server Backup console. Wizard for creating the backup schedule is similar to the wizard that is used to create the schedule locally. Basically, you need to select what will be backed up (you cannot select System State Backup, only files and folders – for System State Backup you still need to use the Local Backup option), when do you want the backup to occur (you can select one or more days of the week and up to 3 times per day) and retention period (available options are 7, 15, and 30 days).
7. Run backup now (or wait for scheduled backup to occur)

Final step is to select the option Backup Up Now or wait for scheduled backup to occur. Keep in mind that the backup will require some amount of your network (and Internet) bandwidth, so run the backup outside of business hours, if possible...
After this final step, your Windows Server 2012 will be backing up “to the cloud”. Restoring the files and folders is also made simple by using the Recover Data wizard in the same (Windows Server Backup) console.
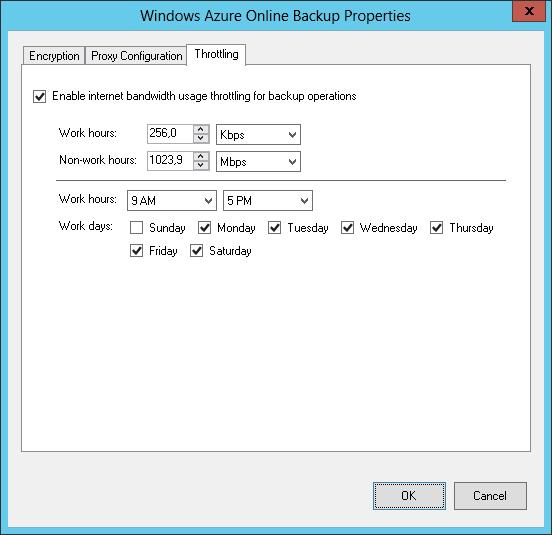
Just to mention – one of the “cool” settings regarding the Online Backup feature is bandwidth throttling which allows you to control the amount of bandwidth that backup is using during work or non-work hours. This is the setting that provides you with the flexibility of doing the backups also during the work hours, which is really nice. The throttling settings are located under the Change Properties option which is visible once you register your server and set up the backup schedule…
About the author

Tomica Kaniski is currently Microsoft MVP for Virtual Machine from Croatia. He was also MVP for Management Infrastructure for the last two years. You can find him presenting at various local and regional conferences, user group meetings or other events. Currently holds several Microsoft certificates and is also Microsoft Certified Trainer and IT Pro community lead. He is fully engaged with Microsoft products and technologies, and mostly interested in products that are yet to be released...
About MVP Mondays
The MVP Monday Series is created by Melissa Travers. In this series we work to provide readers with a guest post from an MVP every Monday. Melissa is a Community Program Manager, formerly known as MVP Lead, for Messaging and Collaboration (Exchange, Lync, Office 365 and SharePoint) and Microsoft Dynamics in the US. She began her career at Microsoft as an Exchange Support Engineer and has been working with the technical community in some capacity for almost a decade. In her spare time she enjoys going to the gym, shopping for handbags, watching period and fantasy dramas, and spending time with her children and miniature Dachshund. Melissa lives in North Carolina and works out of the Microsoft Charlotte office.