10 Days for Office 2010: 10 Visio 2010 Tips and Tricks
Editor's Note: The following is guest post by MVP Dave J Parker as part of the MVP Award Program Blog's "10 Days for Office 2010" series. David J Parker has been using and developing with Visio since
1996, and has been a Visio MVP for a few years. He started bVisual
ltd (https://www.bvisual.net ) in 1998,
and writes a Visio blog at https://bvisual.spaces.live.com
. He wrote Visualizing Information with Microsoft Office Visio 2007
(https://www.visualizinginformation.com)
and Microsoft Visio 2010 Business Process Diagramming ( https://www.visiorules.com
).
MVPs come from a variety of backgrounds. Some are developers, some are trainers, and some are users of their specialty product. I’m fortunate in that I’m a bit of all three, so I get excited about the new features, keen to tell others about them, and endeavor to exploit the new programming opportunities. So, here are my top 10 new features Visio 2010.
Top 10 New Features in Visio 2010
The first eight features are in all editions of Visio 2010, number 9 is in Visio Professional and Premium, and number 10 is in Visio Premium only.
1. Maximizing the drawing canvas
You cannot fail to notice that Visio 2010 now has the Office Fluent UI. Despite my reservations when I first saw it in Office 2007, I like it. I like the 2010 version more because of the Minimize the Ribbon arrow button (A) to the left of the little blue help button in the top right corner. This gives you a lot more space for your diagram canvas. Even better, the Shapes window can also be minimized with its own arrow button (B).
Normal appearance |
After clicking the Minimize buttons |
2. Quick Shapes and Quick Connect
The new Quick Shapes menu, that appears when you hover over one of the blue arrows around a 2D shape, provides easy selection of the next connected shape. If the shape you want is not on the Quick Shapes menu then simply select it on the active stencil before hovering over a blue arrow. The shape from the stencil will be automatically dropped and connected in the chosen direction.
Favourites on the Quick Shapes menu |
Selecting other shapes for Quick Connect |
TIP : If you want to Quick Connect to an existing shape on the page, just hove then click and drag one of the blue arrows to that shape.
3. Automatic updating of Function shape data
When you add flowchart shape into a swimlane on a cross functional flowchart, the Function Shape Data value is automatically synchronized with the text typed into the swimlane header itself.
Function before changing swimlane text |
Function after changing swimlane text |
4. Creating a new linked page for a subprocess
You can create a linked subprocess page from an existing process shape easily by selecting the process shape, then clicking Create New on the Subprocess group in the Process tab.
TIP : Enter the process shape text first, then your new page will be given that name.
Select a single shape to create a subprocess page |
A new hyperlinked named page is created |
If you select several shapes, and you click Create From Selection, then a new page is created, the selected shapes are moved to the new page, and a new subprocess shape is left in their place on the original page.
Select shapes to change to Subprocess |
Shapes moved to new page, and replaced with Subprocess shape on the source page |
TIP : When you have finished your subprocess flowchart, you can use Link To Existing on the last shape to create an hyperlink back to the original page.
5. Live preview of layouts
There are many new live previews in Visio, but perhaps the most useful is the preview of the Re-Layout Page options.
Before selecting a Re-Layout Page preview |
Live Preview of a Layout option |
You can use the Live Preview to see the effect of selecting an option before actually committing to it, and there is always the undo if you still get it wrong.
6. Visually relate shapes in a container
You can visually relate shapes by selecting them, and then selecting a suitable container type from the Diagram Parts group on the Insert tab.
Select the shapes |
Then a container type |
When you move the container, then each of the contained shapes move with it, keeping their relative positions, and when you re-size the container, the contained shapes do not become distorted.
TIP : Using a container to group data linked shapes is far better than actually creating an actual group because it does not turn the shapes into sub-shapes.
7. Annotate with callout shapes
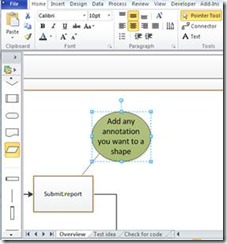
There are times when you need to add annotation to a shape to explain it further, and you want them to stay in the same relative position when you move the source shape. The new callout shapes can be easily added to shapes by first selecting a shape, then choosing a callout type from the drop down list in the Diagram Parts group on the Insert tab.
Select a shape |
Then a callout type |
8. IntelliSense
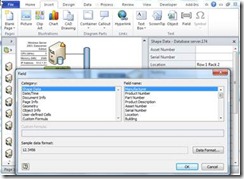
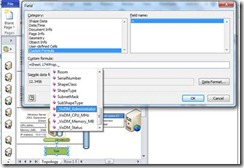
You can use Insert \ Field to add data linked text to a shape or a callout, without using Data Graphics. You could always see the list of Shape Data rows (and other selected categories ), but now you can get IntelliSense in the Custom Formula category. This enables you to select from a list of available rows, and you get visual confirmation of their presence.
Shape Data rows of selected shape |
Use Sheet.n! prefix to access Shape Data of other shapes |
In the above example, I noted the name of the server shape, Database server.174, by reading the caption of the Shape Data window. I then selected its associated callout shape, and then selected Insert \ Field on it. Then I entered =Sheet.174! in the custom formula edit box, and then IntelliSense sprung into life and presented all of the ShapeSheet sections for me to choose from. Note that Shape Data rows are named as Prop rows internally. IntelliSense works with ShapeSheet functions too.
TIP : The Prop.<Name> of Shape Data rows that have been automatically added using Link Data to Shapes will appear prefixed with _VisDM_ .
9. Visio Services
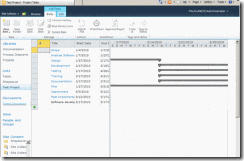
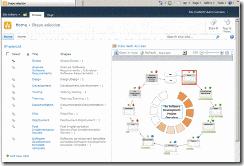
If you have Visio 2010 Professional or Premium edition, you can link data to Visio shapes and you can use Data Graphics, that was added in Visio 2007 Professional, to automatically display data as text, icons, data bars, or colour by value, and now in Visio 2010, you can insert a legend for these. What is really neat now is that these data linked diagrams can automatically refresh periodically, when saved to Visio Services on SharePoint 2010, thus always showing the latest information in the diagram.
Project data in SharePoint 2010 |
Visio Services displays latest data |
TIP : The Visio web part for SharePoint can be linked to SharePoint list data easily, but there is also a JavaScript API for more custom integration.
10. Automatic validation of diagram structure
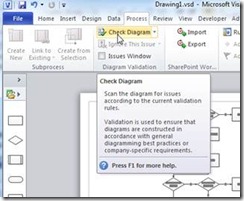
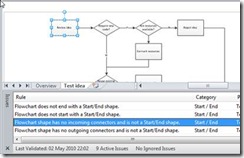
There are many different diagram types in Visio, and I would doubt if anyone knows how to use them all properly. Well, Visio 2010 Premium edition has a whole new Diagram Validation feature, which means that you can check that you have constructed the diagram correctly. This gives you feedback about any issues, thus prompting you with the actions to take to fix them.
Validate a structured diagram |
Review issues to fix or ignore |
TIP : Although Visio 2010 Premium only comes with rules for flowcharts, Business Process Modelling Notation (BPMN) and SharePoint Workflow Designer, you can write rules for any type of structured diagram – not just flowcharts.
--------------------------------------
Cross Posted at The Office Blog


