Utilizing Web Apps 2010 to get PowerPoint search document previews of SharePoint 2010 content in SharePoint 2013 search
With the new SharePoint 2013 (preview) and Office Web Apps (OWA) there are beautiful previews of PowerPoint (and Word) documents. The requirement is that the documents are stored in SharePoint 2013 as well. There are rumors that you should get previews of content stored in SharePoint 2010, but until now I haven’t seen this happen. The reason has to do with oauth and the fact that SharePoint 2010 doesn’t support that. Someone will probably solve it at some point, but until then I’ll show you how to use the SP2010 OWA to show previews for SP2010 powerpoints.
To do this you need to familiar with the Display Templates in SP2013. Steve Peschka has written some good articles about this in his blog.
I’ll start by explaining how SP2010 implements previews:
- During crawling, the crawler detects if a document has a preview available, and populates the managed property ServerRedirectedURL. Fortunately, it does exactly the same in SP2013.
- If the ServerRedirectedURL managed property is available during result rendering, a JSONP call against a the wacproxy.ashx will be performed. The wacproxy.ash returns a list of thumbnails which can be showed to the user.
So, now we can simply do the same with SP2013. I’ll do this in the existing PowerPoint display templates.
Item thumbnail
The Item_PowerPoint.html (you find all the Display Templates under Site Settings –> Master pages and page layouts) is used by all ppt’s, regardless of where they are stored. As it turns out, SP2013 content has a couple of more managed properties called ServerRedirectedPreviewURL and ServerRedirectedEmbedURL which means we can differentiate the content types without creating another Result type for SP2010 content.
In the file I add the following to detect SP2010 ppts:
  1: if(!$isNull(ctx.CurrentItem.ServerRedirectedPreviewURL))
  2: {
  3:     // SP2013
  4:     ctx.CurrentItem.csr_PreviewImage = ctx.CurrentItem.ServerRedirectedPreviewURL;
  5:     ctx.CurrentItem.csr_PathLength = Srch.U.pathTruncationLengthWithPreview;
  6: } else if(!Srch.U.n(ctx.CurrentItem.ServerRedirectedURL) && Srch.U.n(ctx.CurrentItem.ServerRedirectedEmbedURL)) {
  7:     // SP2010
For the item view in the main result set we only show a small thumbnail. To make sure the rest of the page has finished rendered prior to we start our work, we utilize a function to add a callback that is run post rendering of the page. The method called “AddPostRenderCallback”. The post render function is run after all results has been rendered, so we don’t have access to the current result unless we store it:
1: var currentItem = ctx.CurrentItem;
Then we add the post render function:
  1: AddPostRenderCallback(ctx, function() {
  2:     // wac proxy url
  3:     var MobilePresentation = currentItem.SiteName + '/_vti_bin/wacproxy.ashx?redirect=' + encodeURIComponent(currentItem.ServerRedirectedURL) + '&spsite=' + encodeURIComponent(currentItem.SiteName) + '&docType=pptx&callbackFunctionName=?';
  4:     var func = "parent.window.ThumbnailCallbackFn_" + id + "= function(images) { processImageThumbnail('"+id+"', images); }";
  5:     eval(func);
  6:
  7:     jq.ajax({
  8:           dataType: 'jsonp',
  9:           url: MobilePresentation,
  10:           jsonpCallback: 'ThumbnailCallbackFn_' + id,
  11:           success: function (data) {
  12:           },
  13:         error: function(data) {
  14:         }
  15:     });
  16:  });
In the code we create the wacproxy URL based on ServerRedirectedURL. We create a delegate function will be called by the JSONP callback. The delegate function call the processImageThumbnail which does actual rendering of the thumbnail into the page:
  1: function processImageThumbnail(id, images) {
  2: ¨    // the default width is 320px, we want' 100px
  3:     var tmp=images.replace(/width\=320/g,'width=100');
  4:     tmp=tmp.replace(/height\=240/g,"height=56");
  5:     var a = eval('('+tmp+')')['images'];
  6:     var thumbnail=a[0];
  7:
  8:     var previewHtml = String.format('<div id="{0}_item_itemPreview" class="custom-srch-item-previewContainer"><a href="{1}" class="ms-srch-item-previewLink" target="_blank"><img class="ms-srch-item-preview" src="{2}" alt="{3}"/></a></div>',
  9:                     id, currentItem.ServerRedirectedURL, thumbnail, "Open in New Window");
  10:
  11:     // Current description needs to be narrow
  12:     jq('#'+id+'_item_itemBody').addClass("ms-srch-item-summaryPreview");
  13:     // Add thumbnail
  14:     jq('#'+id+'_item_itemBody').after(previewHtml);
  15: }
The html is very similar to how it looks when a SP2013 thumbnail is shown, by reusing most of the CSS classes.
Hover Panel
When it comes to the hover panel is very similar. We change the Item_PowerPoint_HoverPanel.html by adding a section that handles SP2010.
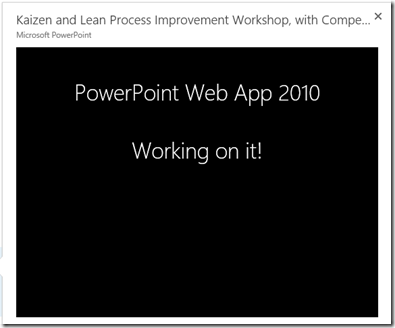
First some code to display the black loading box:
  1: <div class="ms-srch-hover-viewerContainer" style="height:400px;" id="sp2010viewer__#= id =#_">
  2:     <div class="sp2010" style="height:400px;background-color:black;color:white;font-family: Segoe UI Light, Segoe UI,Segoe,Tahoma,Helvetica,Arial,sans-serif;font-size:2.5em;"><br/>PowerPoint Web App 2010<br/><br/>Working on it!<br/><br/></div>
  3: </div>
It looks like this:
The rest of the code is very similar to the normal item, expect for the HTML generated.
I’m not explaining it here, this is an exercise for the reader. Or download the attached code.
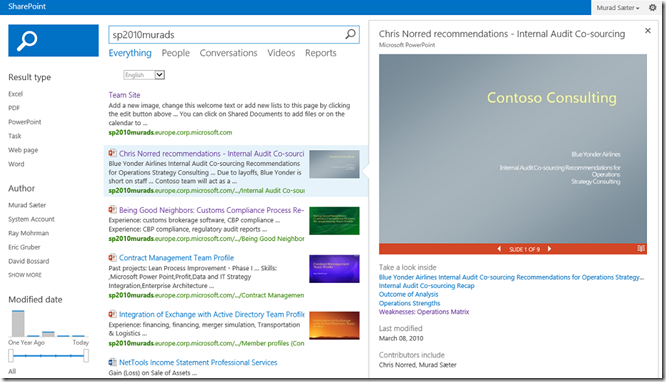
The full result looks like this:
Installing the sample code
The zip file contains
- Code fragments which should be inserted into Item_PowerPoint.html and Item_PowerPoint_HoverPanel.html
- screen.css (modifed from the ootb easyslider css)
The zip does NOT contain the follow required files.
- Jquery
- EasySlider1.7.js
- prt.png from Office Web Apps 2013
Install it:
- Edit Item_PowerPoint.html, and insert the contents of Item_PowerPoint_code.txt at line 36 (delete the })
- Edit Item_PowerPoint_HovelPanel.html, and insert the contents of Item_PowerPoint_HoverPanel_code.txt at line 49 (delete the })
- Upload screen.css to Pages folder of your search site (same folder as results.aspx)
- Download easyslider1.7.js and place in the same folder.
- Download jquery.1.7.2.js and place in the same folder (or use a CDN)
- Get prt.png from your Office Web Apps 2013 server and place in the same folder. On your OWA you can get file from /p/PptResources/1033/prt.png">https://<server>/p/PptResources/1033/prt.png
- Make sure all files are commited and published.
- Add a Script Editor webpart on your search page, and add the following code:
  1: <script type="text/javascript" src="https://code.jquery.com/jquery-1.7.2.js"></script>
  1:
  2: <script type="text/javascript">
  3: var jq = jQuery.noConflict();
 </script>
  1:
  2: <script type="text/javascript" src="easySlider1.7.js">
 </script>
  2: <link href="screen.css" rel="stylesheet" type="text/css" media="screen" />
This will load jquery and the easyslider javascript. Jquery cannot be used with the dollar ($), since this already is used internally in the display templates. In this sample jquery is therefore defined as jq.
That should be it. Enjoy!

