Using application permissions in Visual Studio LightSwitch
Securing your Visual Studio LightSwitch application begins with defining permissions. In the first version of LightSwitch, developers are responsible for defining and consuming their own permissions. Once permissions have been defined, you can write the business logic to consume them where appropriate. As part of the development process, only permissions and their associated logic need to be defined. Once the application has been published, it can be administered to add users and roles and assign permissions.
The following is a walkthrough showing what is involved in this process:
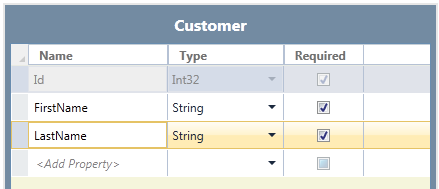
To start with, I’ve created a simple Customer table:
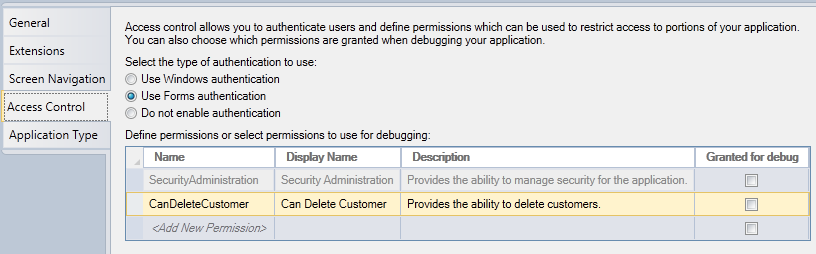
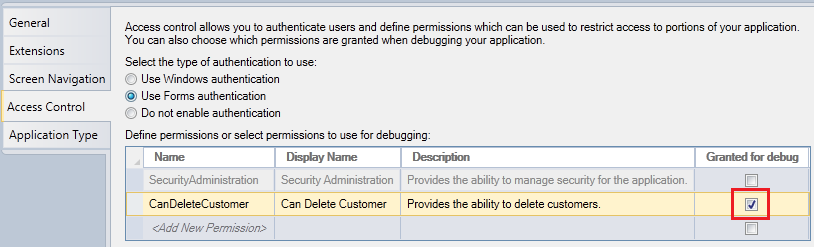
In this application, I want to secure the ability to delete customers. To do this, I need to create a new permission. Permissions can be defined in the Access Control tab of the application properties. To get to the application properties you can double-click the Properties node in Solution Explorer or right-click the Application node and select Properties. Before permissions can be added, you need to enable authentication by choosing whether to use Windows or Forms authentication (see my previous blog post for more info on this). For my purpose, I’ve chosen to use Forms authentication. Now that authentication is enabled, I can add permissions. I’ve defined a permission named CanDeleteCustomer that provides the ability for users to delete customers:
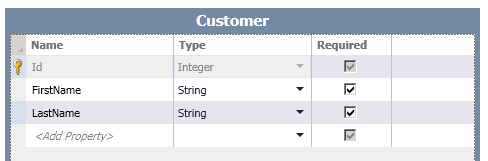
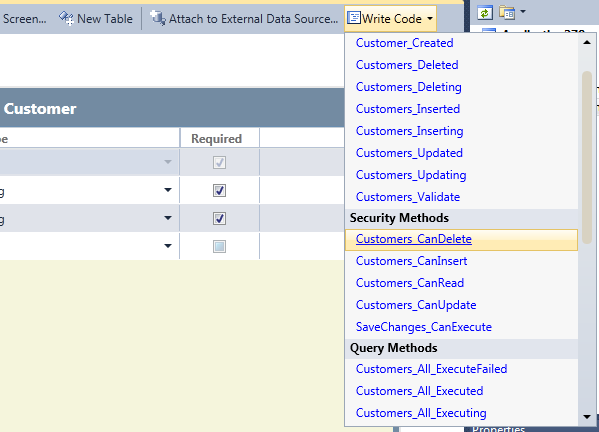
With the permission defined, I can now write some code to secure the customer table. To do this, I navigate back to the Customer table and select “Customers_CanDelete” from the Write Code drop-down button:
This opens up the code file for the customer table and generates the method stub where I can write my logic.
 partial void Customers_CanDelete(ref bool result)
{
    result = this.Application.User.HasPermission(
        Permissions.CanDeleteCustomer);
}
A few things to note about this code:
- The result parameter is assigned a value that indicates whether the user can delete the customer.
- The User object is accessible from the Application class. The User object provides all sorts of information about the current user, most notably whether they have a specific permission.
- The Permissions class is a generated class that contains the permissions that were defined in the Access Control tab.
- This code runs on the server not the client. This ensures that the customer table will always be protected from a client that may not enforce this permission.
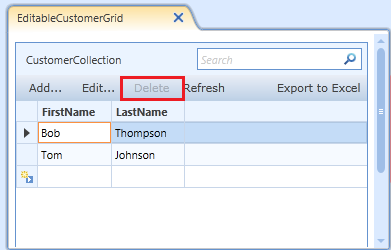
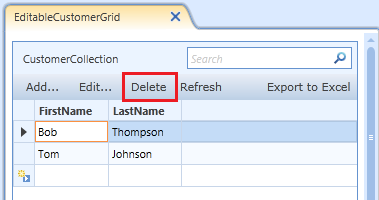
Ok, let’s test this to ensure it’s behaving as expected. First, I create an editable grid screen for the customer table. Now I’ll run the app and see how it looks.
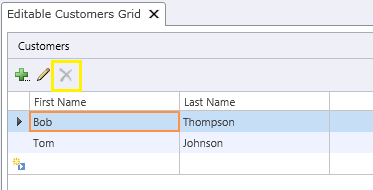
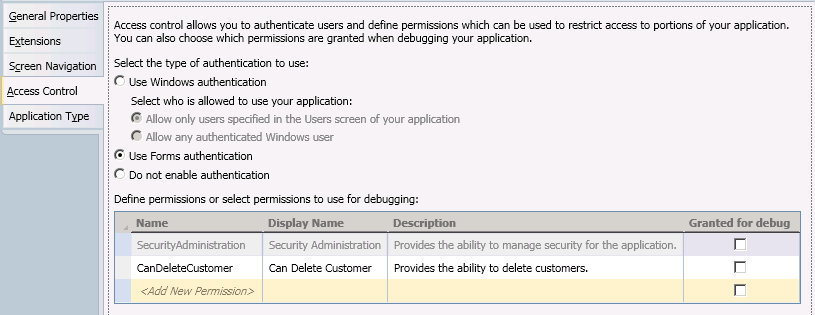
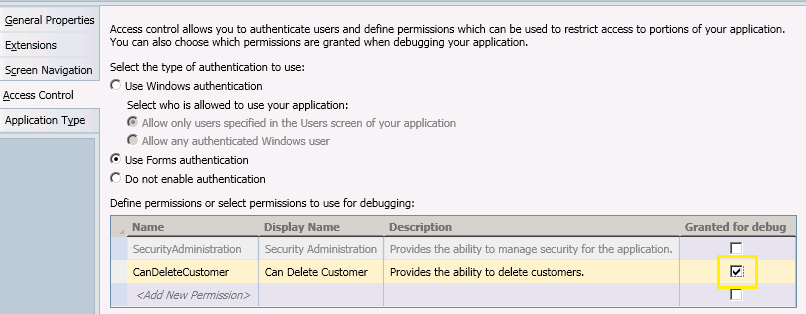
Here you’ll see that the Delete button is disabled. By default, the currently running user doesn’t have the CanDeleteCustomer permission and the UI for the grid is reflecting this. So now you may be wondering how we can run as a user that does have that permission. To do that, I can just go back to the Access Control tab and check the “Granted for debug” checkbox for the CanDeleteCustomer permission.
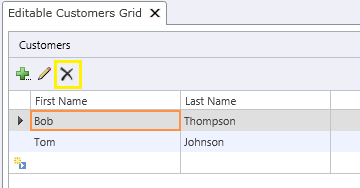
Now when I run the app, the Delete button is enabled.
In a subsequent blog post, I’ll describe how you assign permissions in a published application.