How to: designing one LightSwitch screen to create or edit an entity
Visual Studio LightSwitch provides screen templates for defining a details screen or a new data screen for an entity. But you may want to use the same screen for doing both tasks. This allows you to have a consistent experience no matter whether you are creating an entity or simply editing an existing one. Here’s how you can do this.
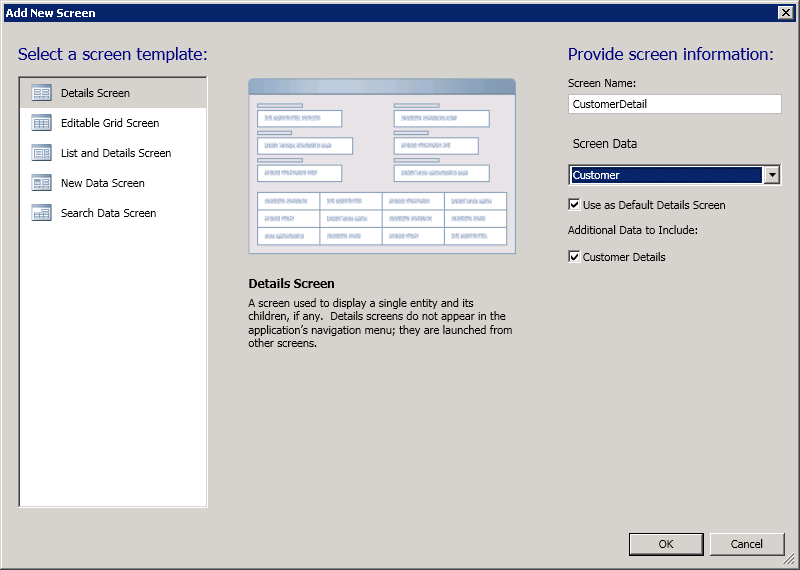
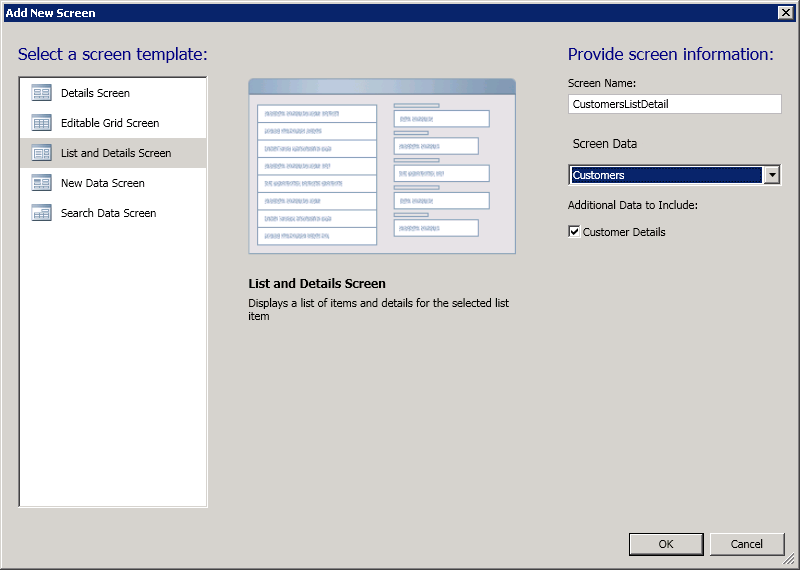
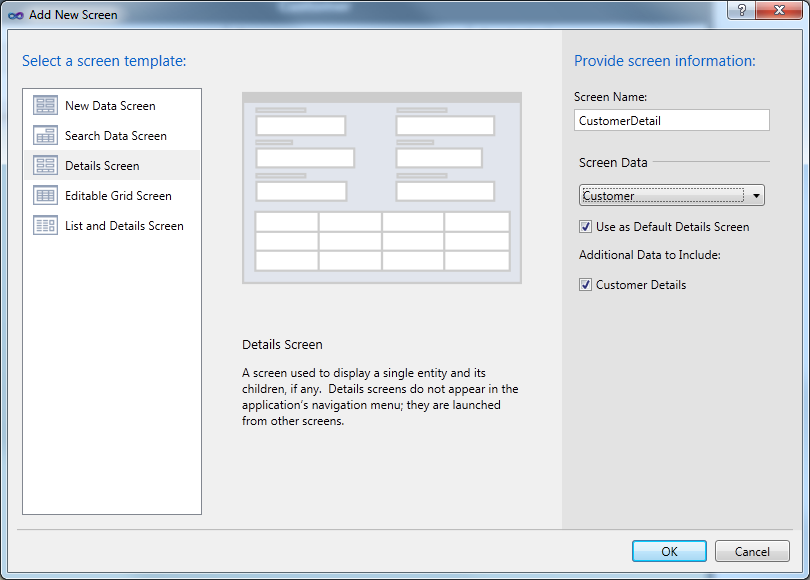
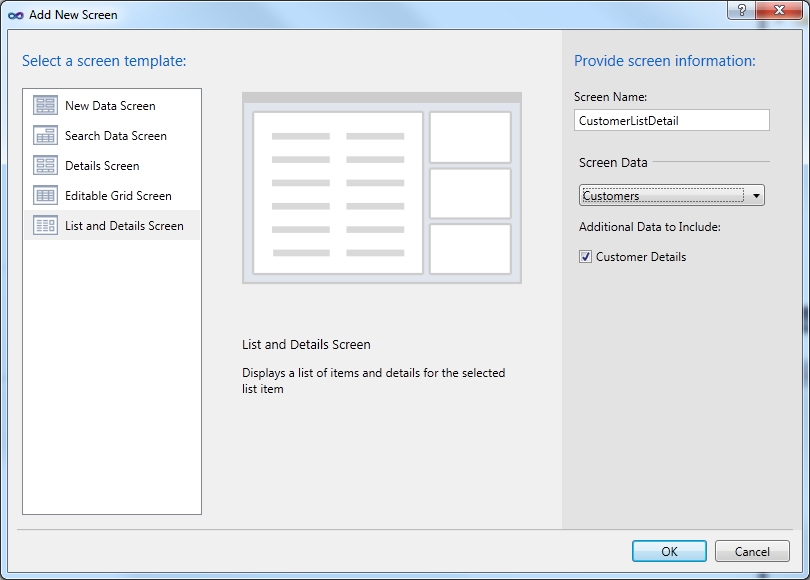
Create an entity to work with. For the purposes of this tutorial, I’ve created a Customers table.
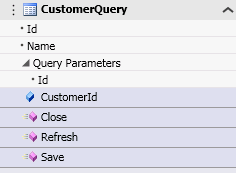
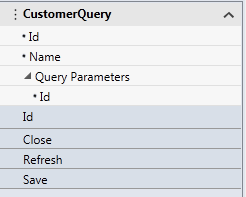
Rename the Customer property on the screen to CustomerQuery:
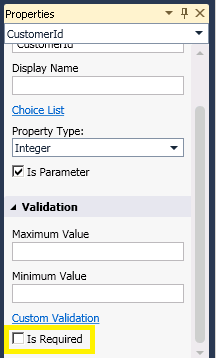
Select the CustomerID property and make it optional by unchecking its "Is Required" property in the property sheet:
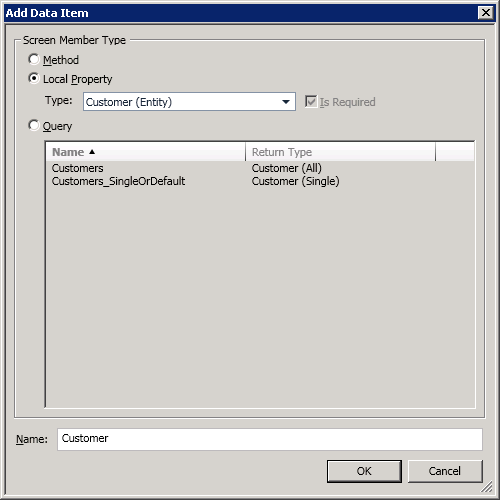
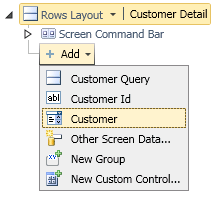
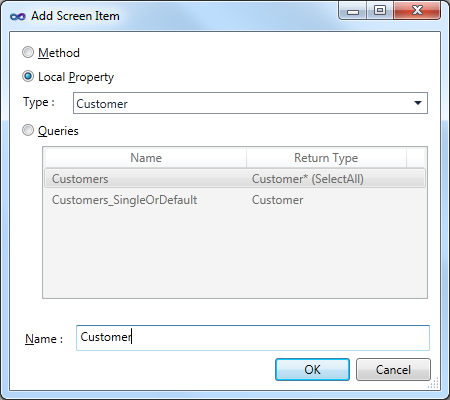
Click the “Add Data Item…” button in the command bar and create a local Customer property:
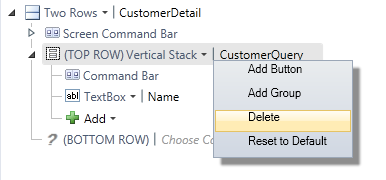
Delete the current content on the screen bound to the CustomerQuery. We want to replace the content in the screen to be bound to the Customer property, not the CustomerQuery.

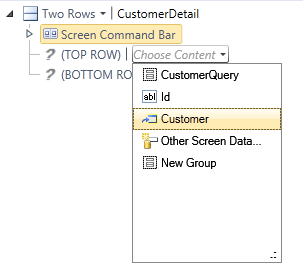
In its place, we want to bind the Customer property onto the screen:
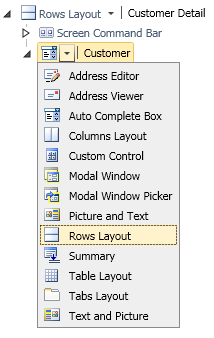
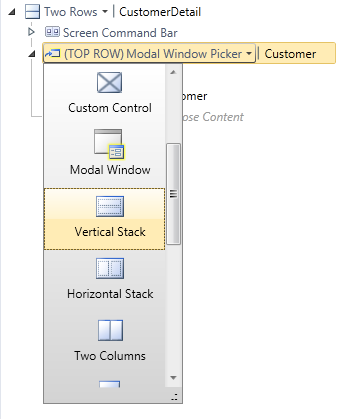
Change the control type of the Customer to be a Rows Layout. By default, this will add controls for each of the fields defined in Customer which is exactly what we want.
Now we need to write some code to hook everything up. Click the Write Code button on the command bar at the top of the screen designer. Paste the following code into the generated class, replacing the pre-existing implementations of the Loaded, Changed, and Saved methods:
partial void CustomerQuery_Loaded(bool succeeded)
{
if (!this.CustomerId.HasValue)
{
this.Customer = new Customer();
}
else
{
this.Customer = this.CustomerQuery;
}this.SetDisplayNameFromEntity(this.Customer);
}partial void CustomerQuery_Changed()
{
this.SetDisplayNameFromEntity(this.Customer);
}partial void CustomerDetail_Saved()
{
this.SetDisplayNameFromEntity(this.Customer);
}So what happens here is that the screen has a parameter called CustomerId which represents the ID of the Customer. If that property is not set, we assume the screen should create and display a new customer. If that property is set, we simply set the Customer property to the return value of the CustomerQuery query which is actually bound to the CustomerId property (the screen template did that work for us). Notice that we’re setting the Customer property here because that is what all of the screen content is bound to. So by setting this property, it updates the controls on the screen with the state from that entity.
Ok, how do we use this screen? Well, by default any customer displayed as Summary control defined as a link will automatically navigate to this screen. If you want to navigate to this screen through the use of a List, for example, just following the next set of steps.
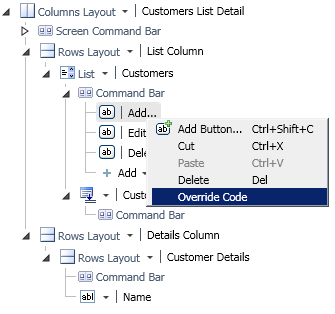
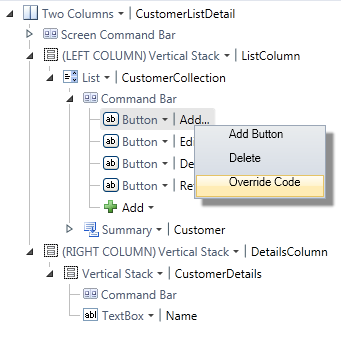
Expand the Command Bar of the Customer List and override the code for the Add button:
Paste the following code into the CustomerListAddAndEditNew_Execute method:
this.Application.ShowCustomerDetail(null);
This code passes null as the customer ID parameter to the screen which will cause the screen to create a new entity.
Go back to the screen designer and override the code for the Edit button in the same way you did for the Add button. Paste the following code into the CustomerListEditSelected_Execute method:
this.Application.ShowCustomerDetail(this.Customers.SelectedItem.Id);
This code passes the ID of the currently selected customer which will cause that customer to be loaded into the CustomerDetail screen.
With these changes, you can now edit the CustomerDetail to behave however you want and you will have a consistent experience when creating a new customer or editing an existing customer.