Bringing ASP.NET website to run as a Windows 10 app and access Camera using UWP API
In this post we will see how quickly and easily we can transform any web application into Windows 10 app using Hosted Web Apps concept.
Hosted Web App is the new concept to convert any website into a fully functional windows 10 app and allow developers to access features like Camera, sending toast notifications, updating live tiles etc. through Universal Windows Platform APIs.
I will first go through some steps by converting an ASP.NET MVC application hosted on Azure to Windows 10 app and then access camera to capture snapshot and display it on the webpage.
To start, first of all you have to install Visual Studio 2015 and Windows 10 standalone SDK
Steps:
- Develop a simple ASP.NET MVC application and host it on Azure
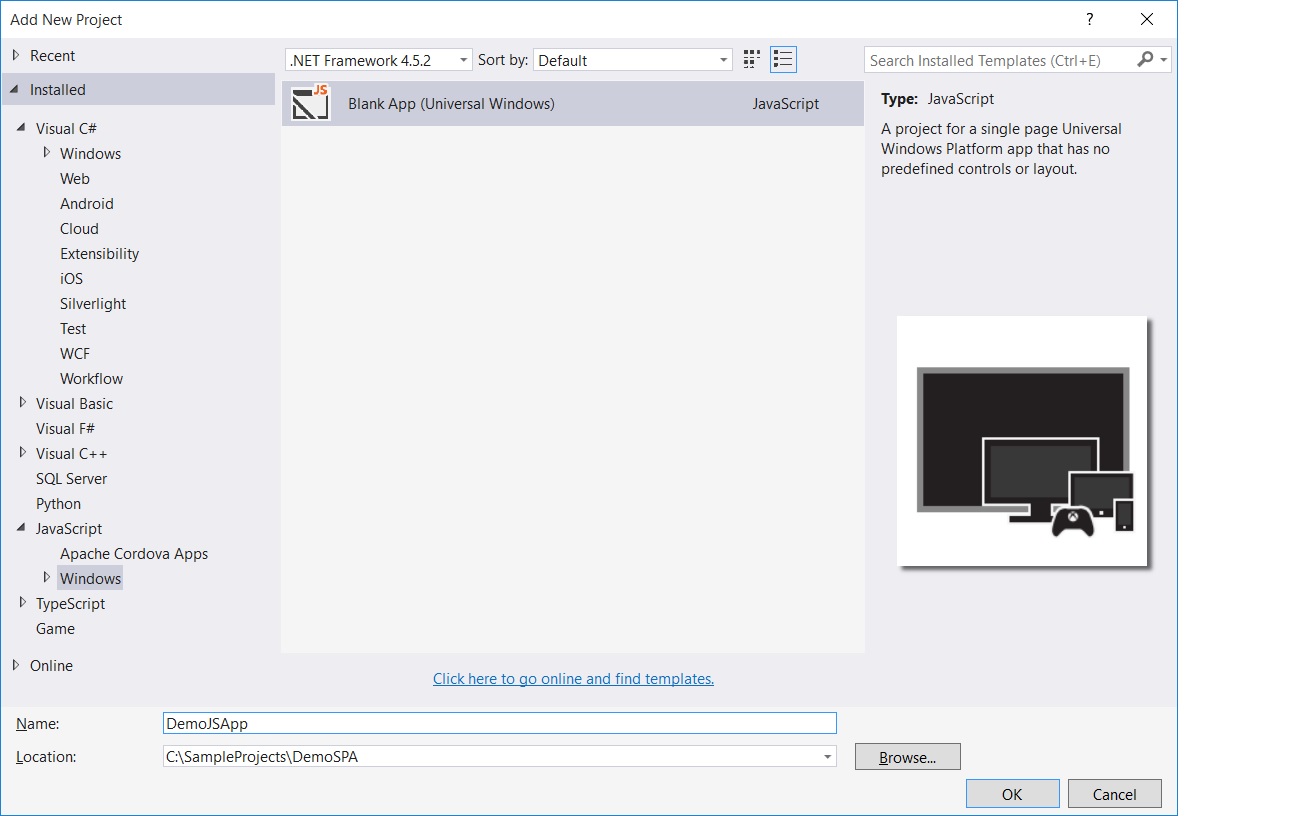
- Create a new Blank App (Universal Windows) project provided under JavaScript section
- Delete css, js, WinJS and default.html because we will be configuring our website URL as the starting point in the hosted web app configuration.
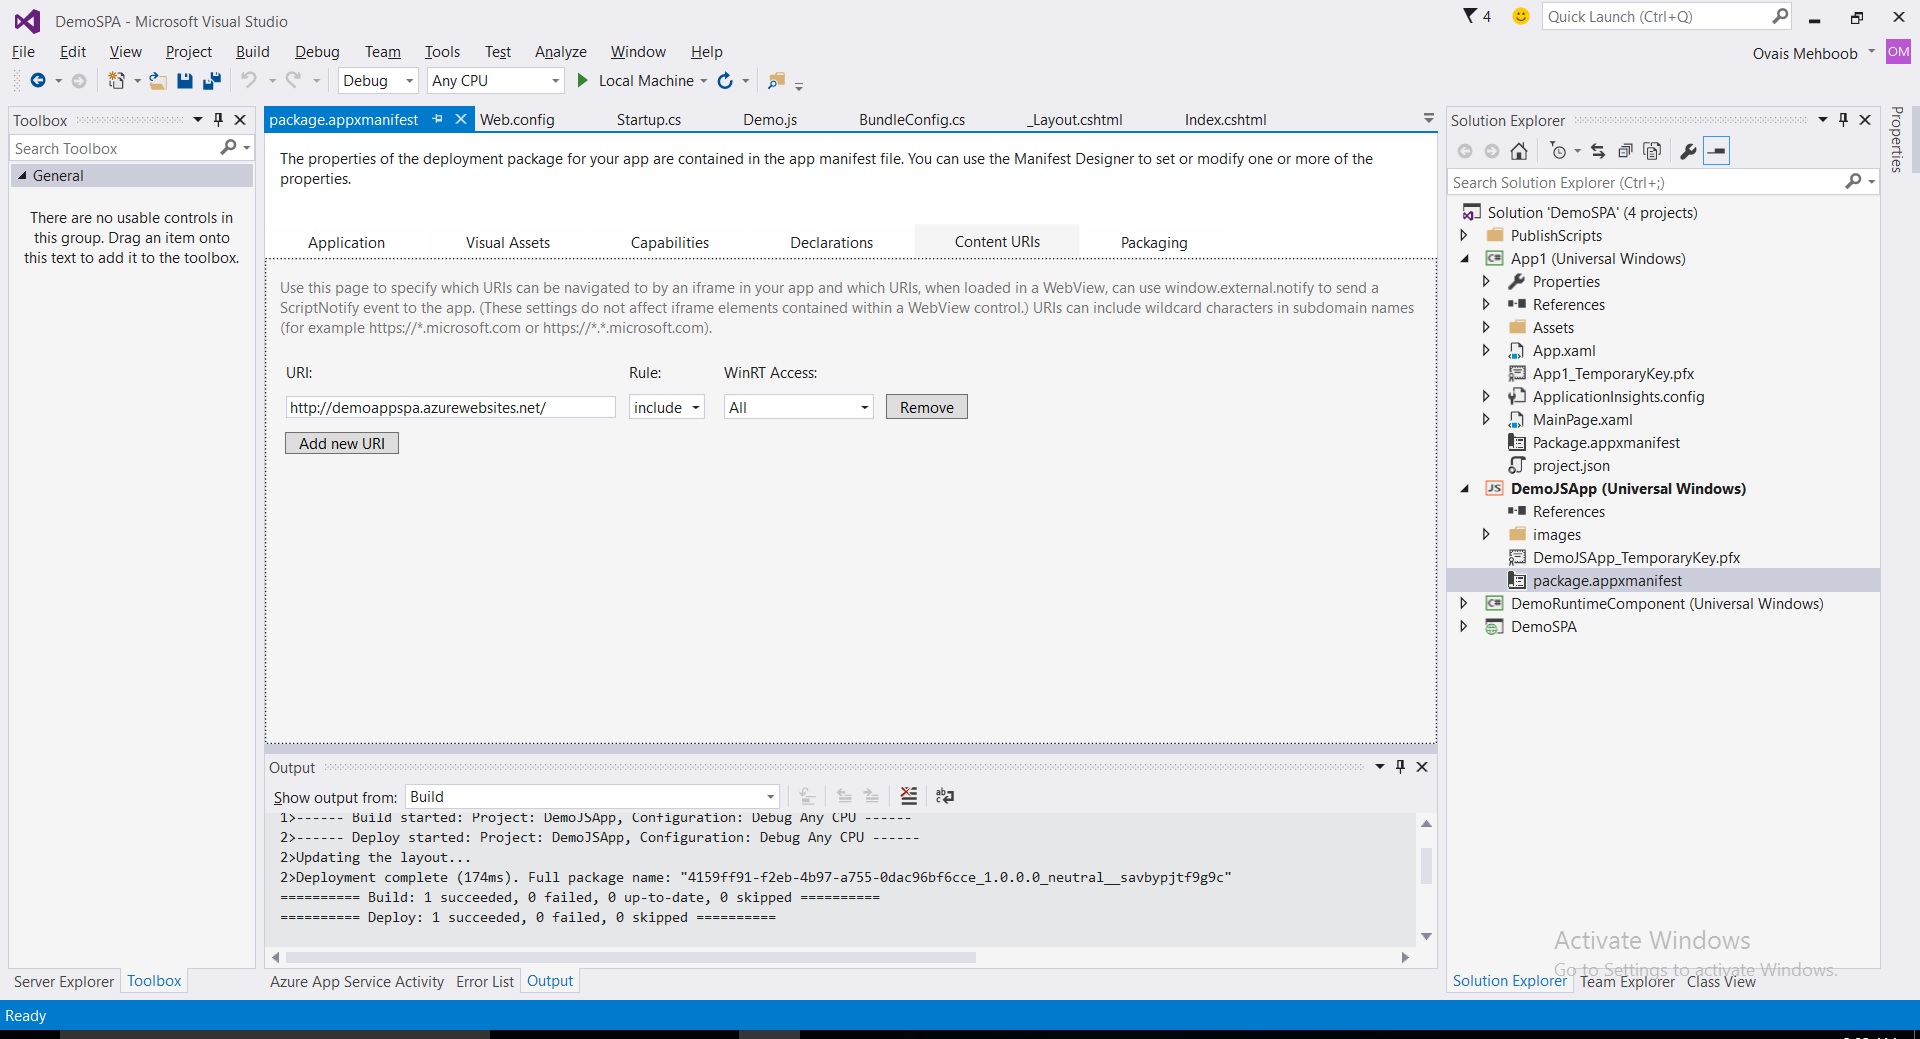
- Specify the Content URI to allow access to our website main page
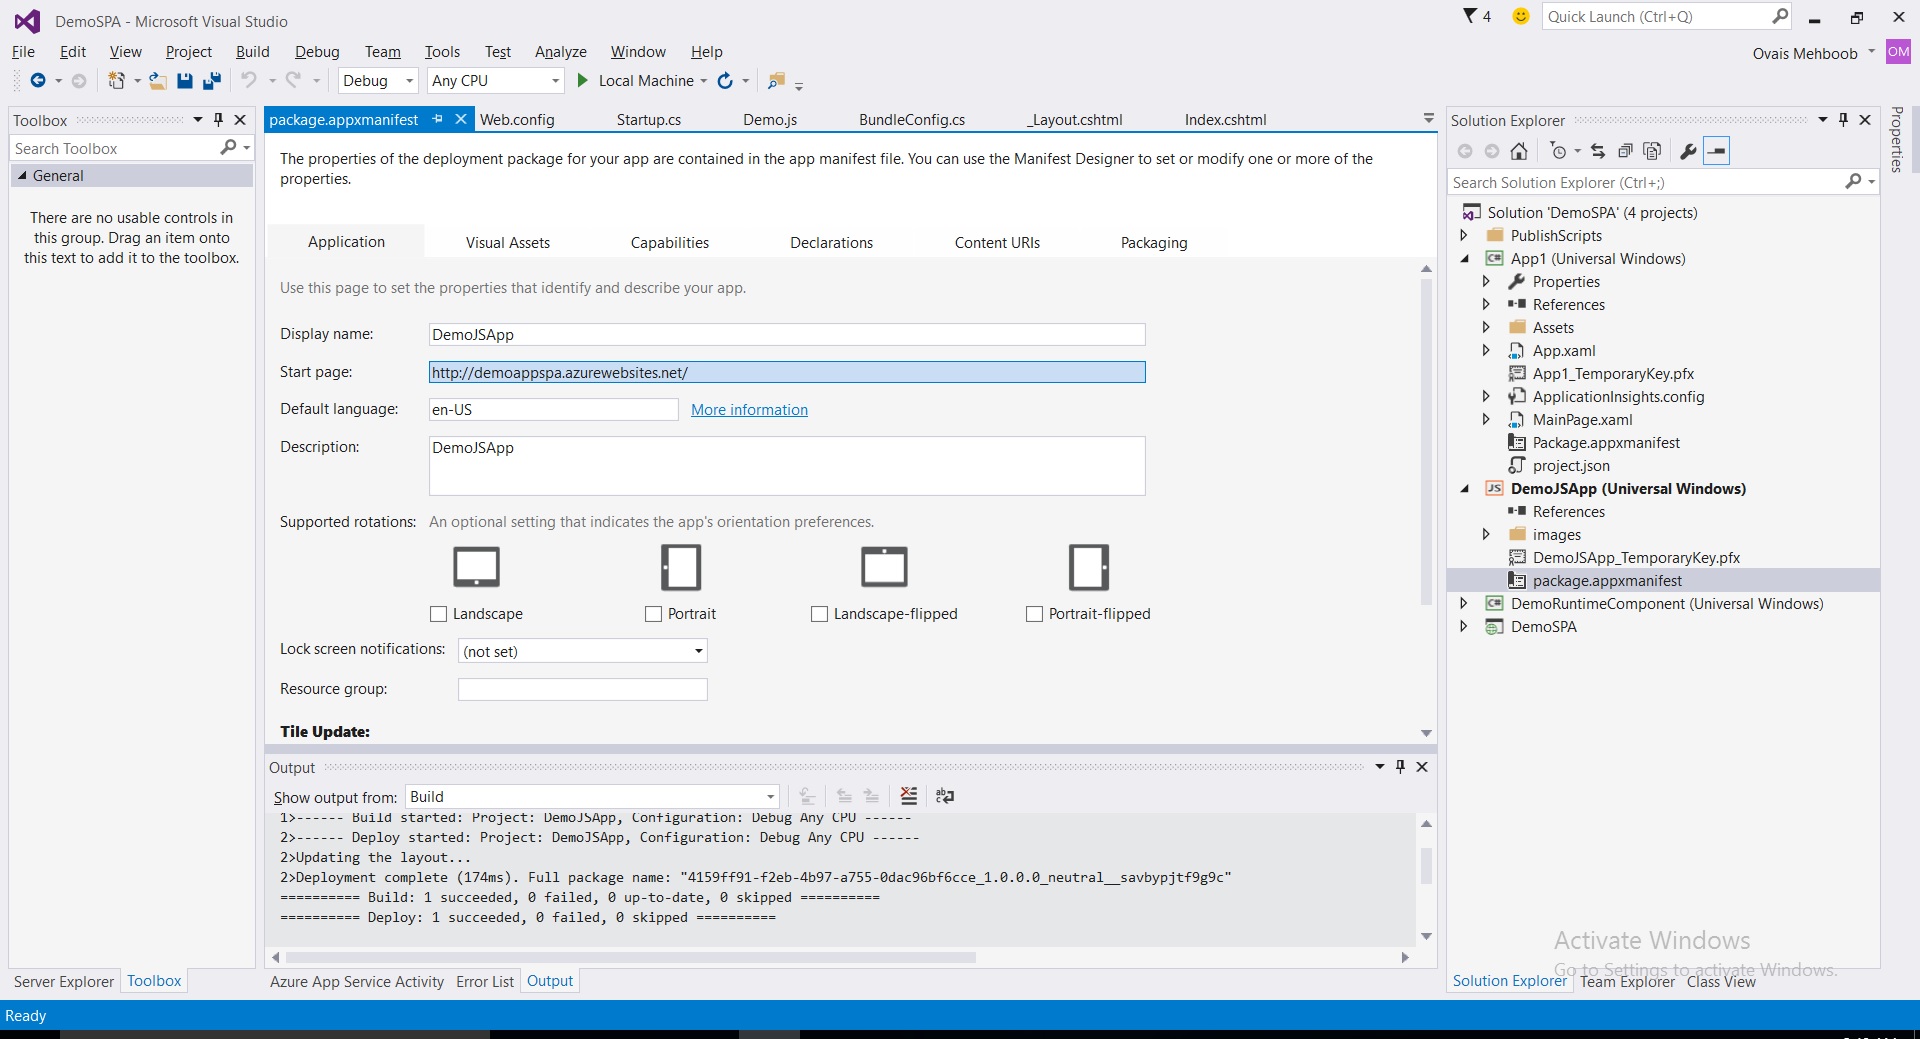
- Open the package.appmanifest file
- Go to the Application tab and specify the Display Name and Start page.
- Specify your website address in the Start page.
- In the Visual Assets you can specify the logos for different sizes.
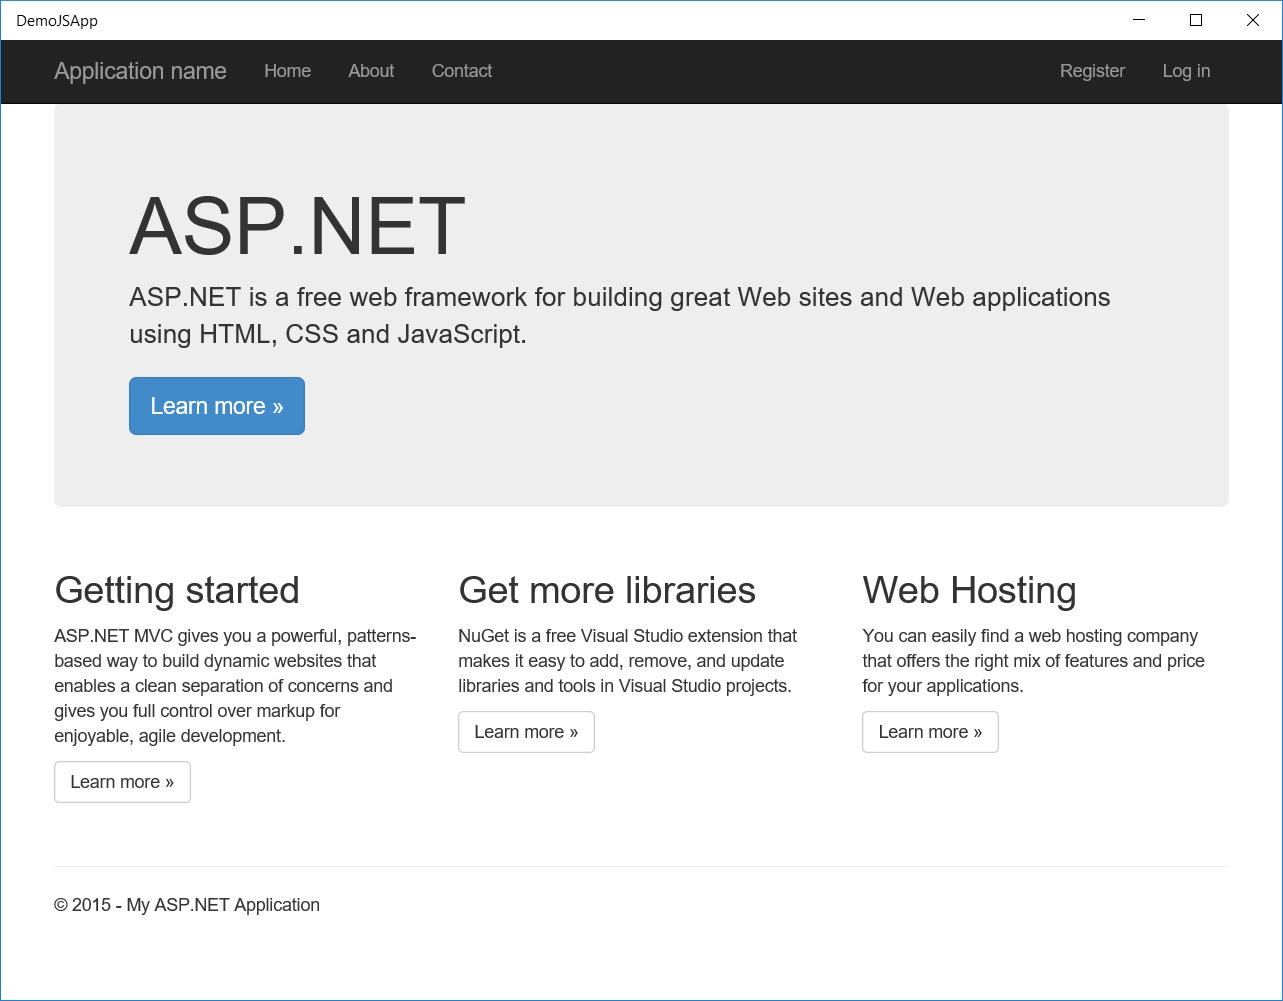
- Build and run hosted app project and your website will be shown.
Now, lets access the camera using Windows Platform API directly from JavaScript. We can access the camera using CameraCaptureUI JavaScript object available in Windows.Media.Capture namespace.
- In your ASP.NET MVC project, add Demo.js inside Scripts folder and write CaptureCamera function as below
if (window.Windows) {
function CaptureCamera() {
var notifications = Windows.UI.Notifications;
var dialog = new Windows.Media.Capture.CameraCaptureUI();
var aspectRatio = { width: 1, height: 1 };
dialog.photoSettings.croppedAspectRatio = aspectRatio;
dialog.captureFileAsync(Windows.Media.Capture.CameraCaptureUIMode.photo).done(function (file) {
if (file) {
var photoBlobUrl = URL.createObjectURL(file, { oneTimeOnly: true });
//Do whatever when the photo captured
}
else {
WinJS.log && WinJS.log("No photo captured", "sample", "status");
}
}, function (err) {
WinJS.log && WinJS.log(err, "sample", "error");
});
}
} else{
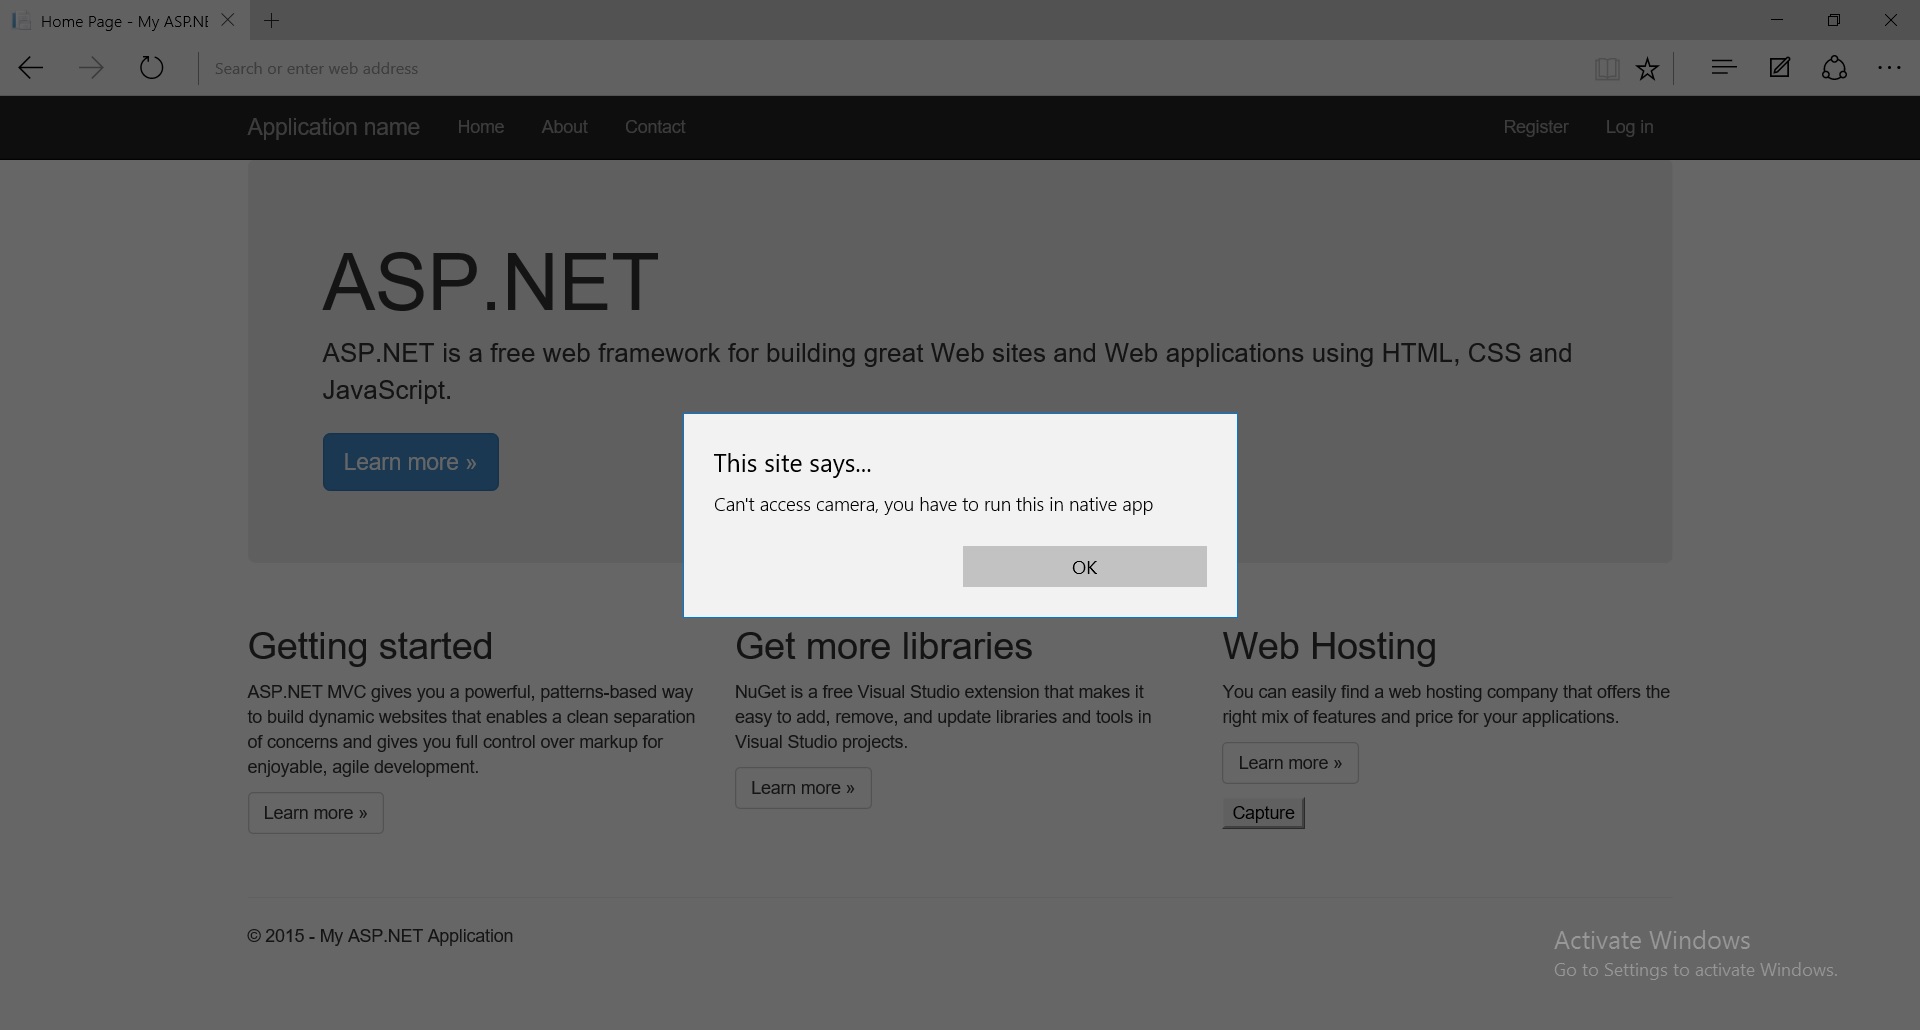
function CaptureCamera() {
alert("Can't access camera, you have to run this in native app");
}
}
This function checks if the website is running as native Windows app and opens up the camera otherwise, display an alert if running from browser..
- Next, add Demo.js in BundleConfig.cs class and specify this new bundle in _Layout.cshtml page in your ASP.NET MVC web application project.
  bundles.Add(new ScriptBundle("~/bundles/UWPScripts")
 .Include("~/Scripts/demo.js")
 );
- Add a button in Index.cshtml page of Home controller that calls the CameraCapture function as below
  <div class="col-md-4">
 <input type="button" value="Capture" onclick="return CaptureCamera();" />
 </div>
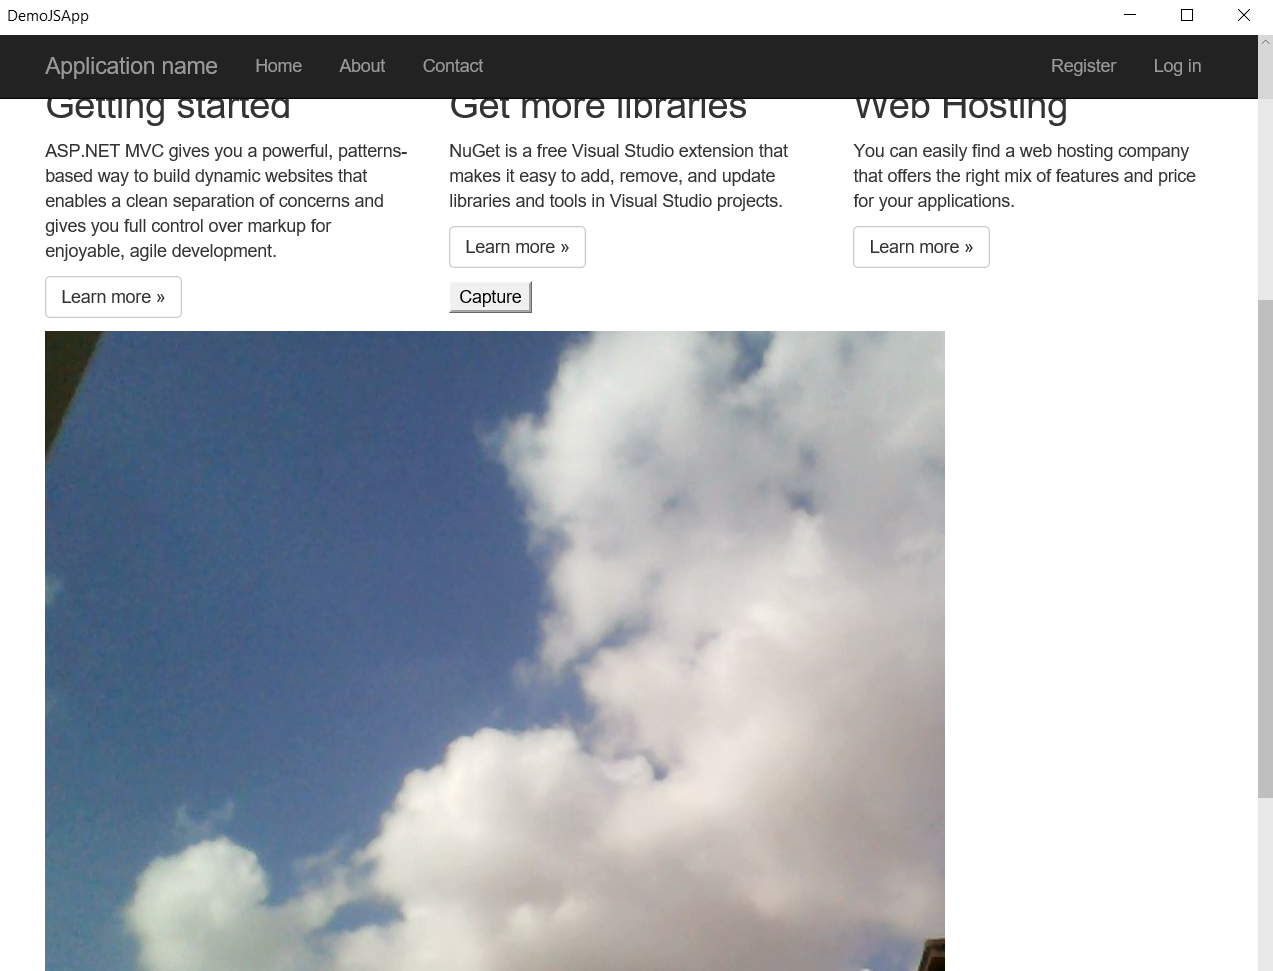
- Add HTML image control to display the photo captured by Camera.
<img id="imgPhoto" />
- Go to your Demo.js file and add following code to populate the captured photo in HTML image control
 //Do whatever when the photo captured
 document.getElementById("imgPhoto").src = photoBlobUrl;
- Re-publish your ASP.NET website and open in browser. When you click on the capture button it will show an alert.
- Now let's run Windows 10 Hosted Web App project and click on the Capture button. Camera control will be shown and allow you to take snapshot.
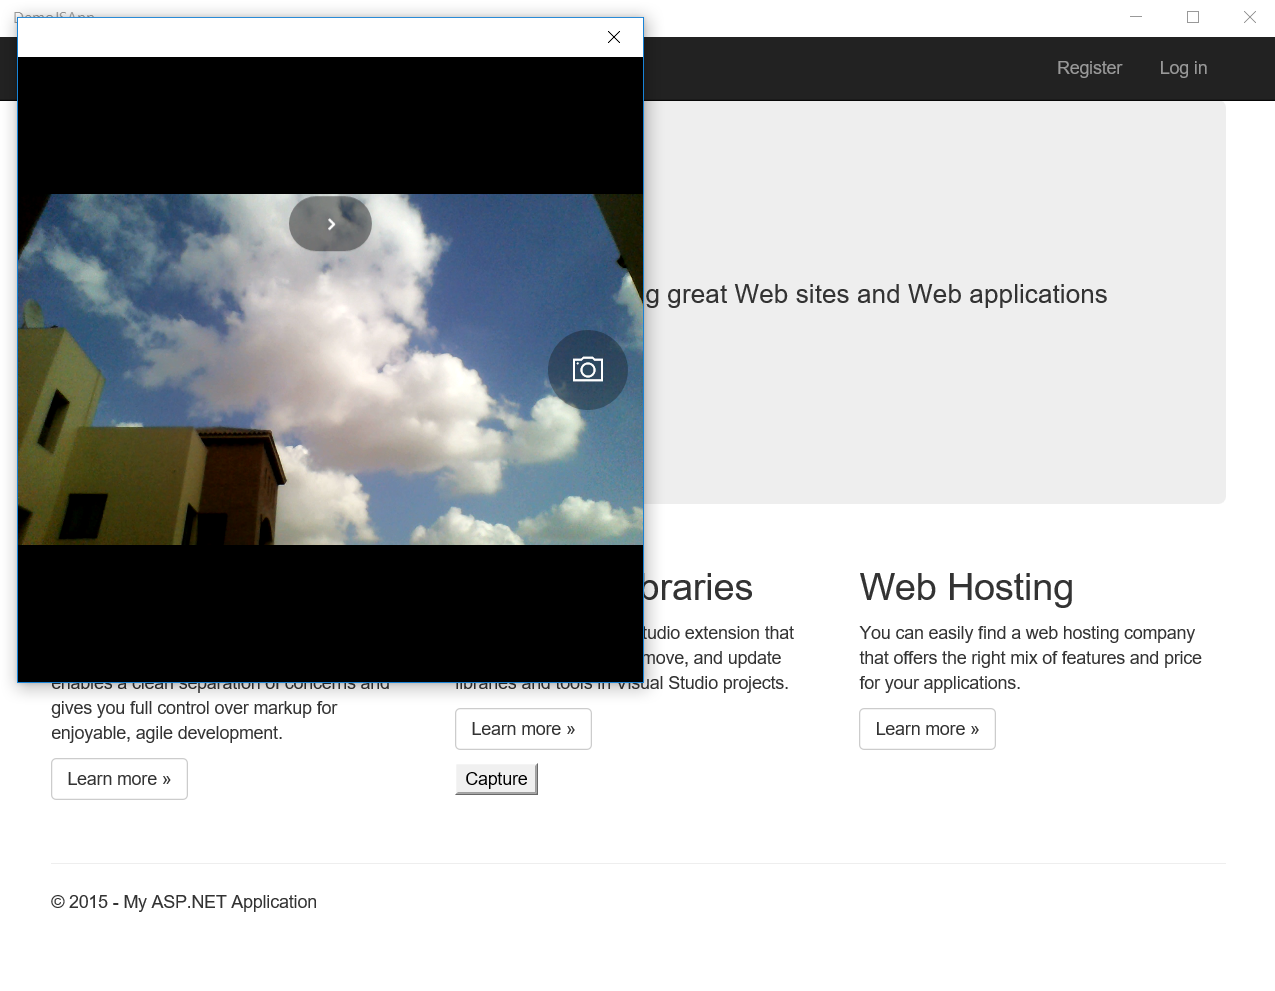
- Once you take the snapshot, captured image will be rendered on the page

Hope this helps!