Usage of shared resources on Azure (WAP)
Here we are going to discuss regarding the usage of shared resources which are available on premise, to be accessed on Azure.
What is shared resource?
The resource (hardware, software etc.) which is created once and can be accessed by other systems / processes remotely multiple times.
Here we are discussing about printer, shared physical directory. Since the environment is Windows AzurePack (WAP), where we dont have flexibility to use azure storage as of now. The below mention approach can be extended for usage of other third party services like (SSIS package, on demand services etc).
By using Azure storage, it is easy to store the objects for further processing by on-prem services. This is out of scope for the discussion.
Printer -
Here is the scenario. Consider an organisation where it is not allowed to installed printer driver at each end user's machine. The printing is allowed based on user level security. This can be termed as printer as service. The user can get access to the printer based on authorization.
The end user can view a report and chooses to print the same. The application verifies the user permission and queue the printing request.
In this way, all the user's print request will be maintained by a queue and print operation will be performed by a central printing device.
In our example of Customer Transaction system, we have a common utility assembly which has the logic for the analysis, reporting of customer transactions. For a particular type of report there is a method which accepts 3 parameters like FromDt, ToDt and TranasactionType.
When user fetches report on UI this assembly gets the data and the report is rendered on UI and user can request print option (not the one available as part of browser) provided by the application.
To achieve this, we are discussing 2 approaches.
1. Use of Database - (will not include here any sample code to process)
a. Since in WAP environment we can access on-prem database, we can store the report parameters in the table.
b. We can reuse the common assembly to separate the report rendering and printing process.
c. When the user selects print option on UI, the parameters which are chosen by the user need to be stored on database table.
d. A windows service which runs on on-prem environment, will refer the database table and start the printing operation based on the parameters saved.
e. In this way we can have good audit of the printing operation like which user uses the service, how many times, what prints etc.
f. We will be having good control over all the operations even in case of any hardware failure like printer, on-prem service etc.
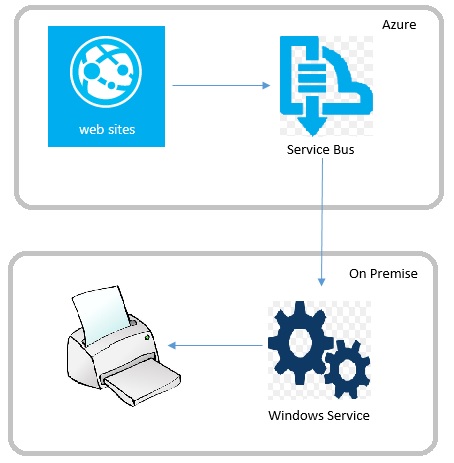
2. Use of Azure service bus
a. We can use either Topic or Queue to pass the message from Azure to on-prem services.
b. We need to configure the message validity.
Sample code by using the Azure service bus (Topic in our case).
1. Create a service bus on Azure portal.
2. Get the connection information from the azure portal for the service bus.
3. In the web site add nuget package for service bus and add the connection information as part of the config.

Use below namespaces to refer service bus
using Microsoft.ServiceBus;
using Microsoft.ServiceBus.Messaging;
using Microsoft.Azure;
4. Sender code.
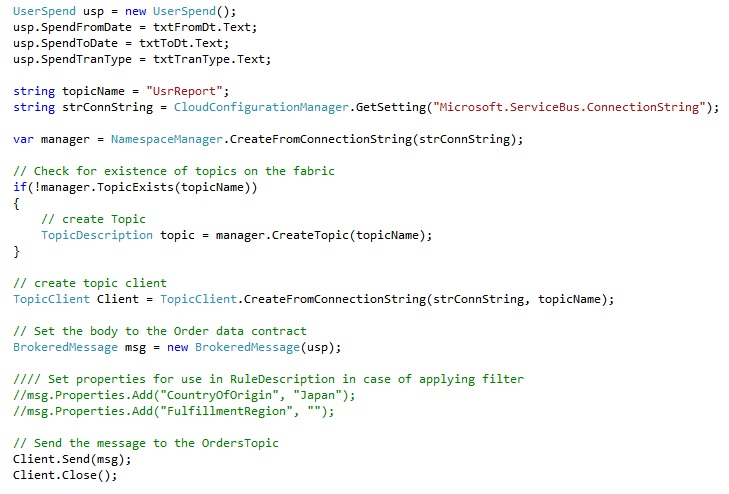
Here Setting the properties and pass the object as message to the subscriber.

5. We are using a windows service to receive the message from azure and do further data processing.
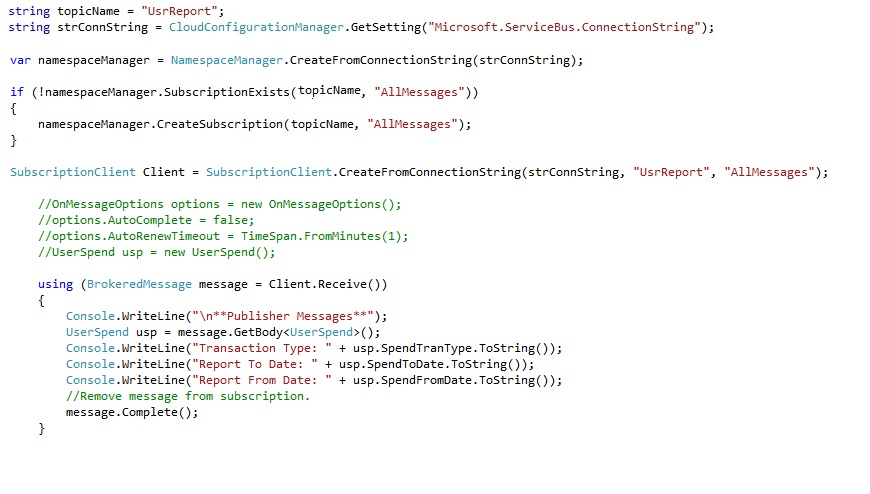
6. When we run the windows service, each time we get one message and we can process that.
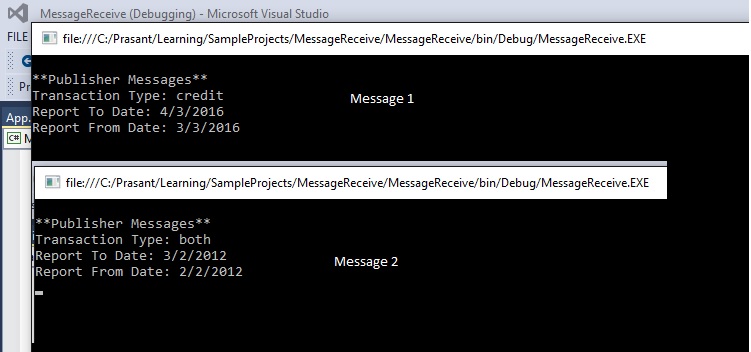
7. Once we get the object at on-prem environment, we can use them based on our need.
8. The printing logic is out of scope of this blog.
Physical Directory
By adopting any of the approach mentioned above, we can use on-prem physical directory to save any file uploaded by end user by using azure web site.
- We need to convert the file to binary stream and either store in database table or pass as an object by the service bus to the local service.
- We need various properties like name of the file, type of file, destination location (optional) and the binary of the file.
- The local service will create the file at remote server with the properties.
- We can do further processing once it is available at local service.