SQL Azure Database Deployment
SQL Azure Database Updates and Deployment
Before going for the deployment plan, we assume the database is created in SQL Azure database server. In case of hybrid model where we have both on-premise and azure databases, we can create a data-sync agent and group to sync the databases. The syncAgent need to be created to define the on-premise database where as the sync group will define the Azure database details (the tables and columns to be synced, the frequency, whether source or target updates be considered as final etc).
A table must have clustered index to store data in Azure, but to sync data the table must have Primary key column defined. If a table is having a clustered index while creating and later Primary key is defined on same clustered key column, a unique, non clustered index will be created.
Please install the below executables for SQL Server 2012 in order to do setup for data-sync agent.
SharedManagementObjects, SQLSysClrTypes - x86 and SQLDataSyncAgent-Preview-ENU.
Data-Sync installation Links
https://msdn.microsoft.com/en-us/library/jj823137.aspx
https://msdn.microsoft.com/en-us/library/windowsazure/jj823138.aspx (Select Install Instruction collapsible button and choose X86 options for the miss)
The sync agent can be scheduled to do updates based on desired interval.
We can run SSIS package in on-premise database server to do data sync with azure database. Based on the number and size of tables we can decide whether to go for data sync or run SSIS package (any other Azure supported ETL tool can also be considered). Since it depends on the data transfer over network (separate charge for data transfer on azure), we need to plan accordingly.
When we need to delete the sync agent, it will not allow us to do that i.e. an exception will be raised as the agent is referenced with other object. In order to delete the agent, we need to stop the on-premise database service and unregister the key reference in data sync tool and delete the agent in Azure portal.
Database deployment
The scripts can be deployed to Azure by the help of data tier application file (.dacpac). There are various ways to create .dacpac files. Refer the link https://pietervanhove.azurewebsites.net/?p=1011 to create file.
Here we will discuss the deployment in two ways.
Through SSMS
Open the SSMS and right click on the database which needs to be deployed to azure. Select appropriate menu options from tasks. The Export option will generate the schema along with data of the tables. The Extract option will generate the schema only. The Deploy option will do the deployment on Azure.
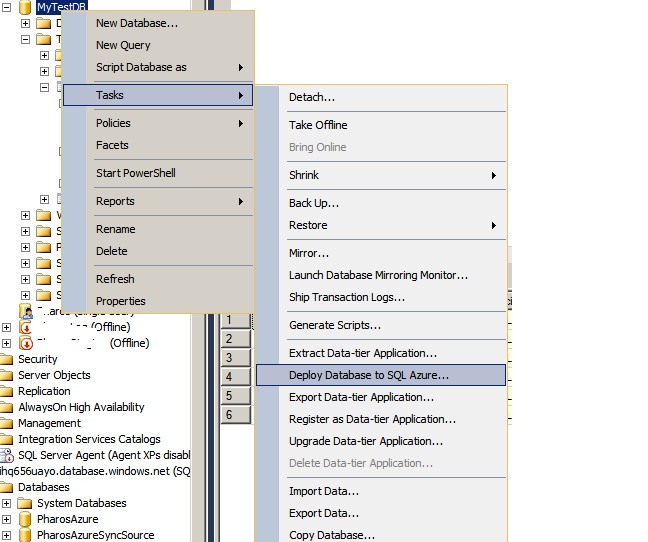
Select appropriate files and do the deployment.

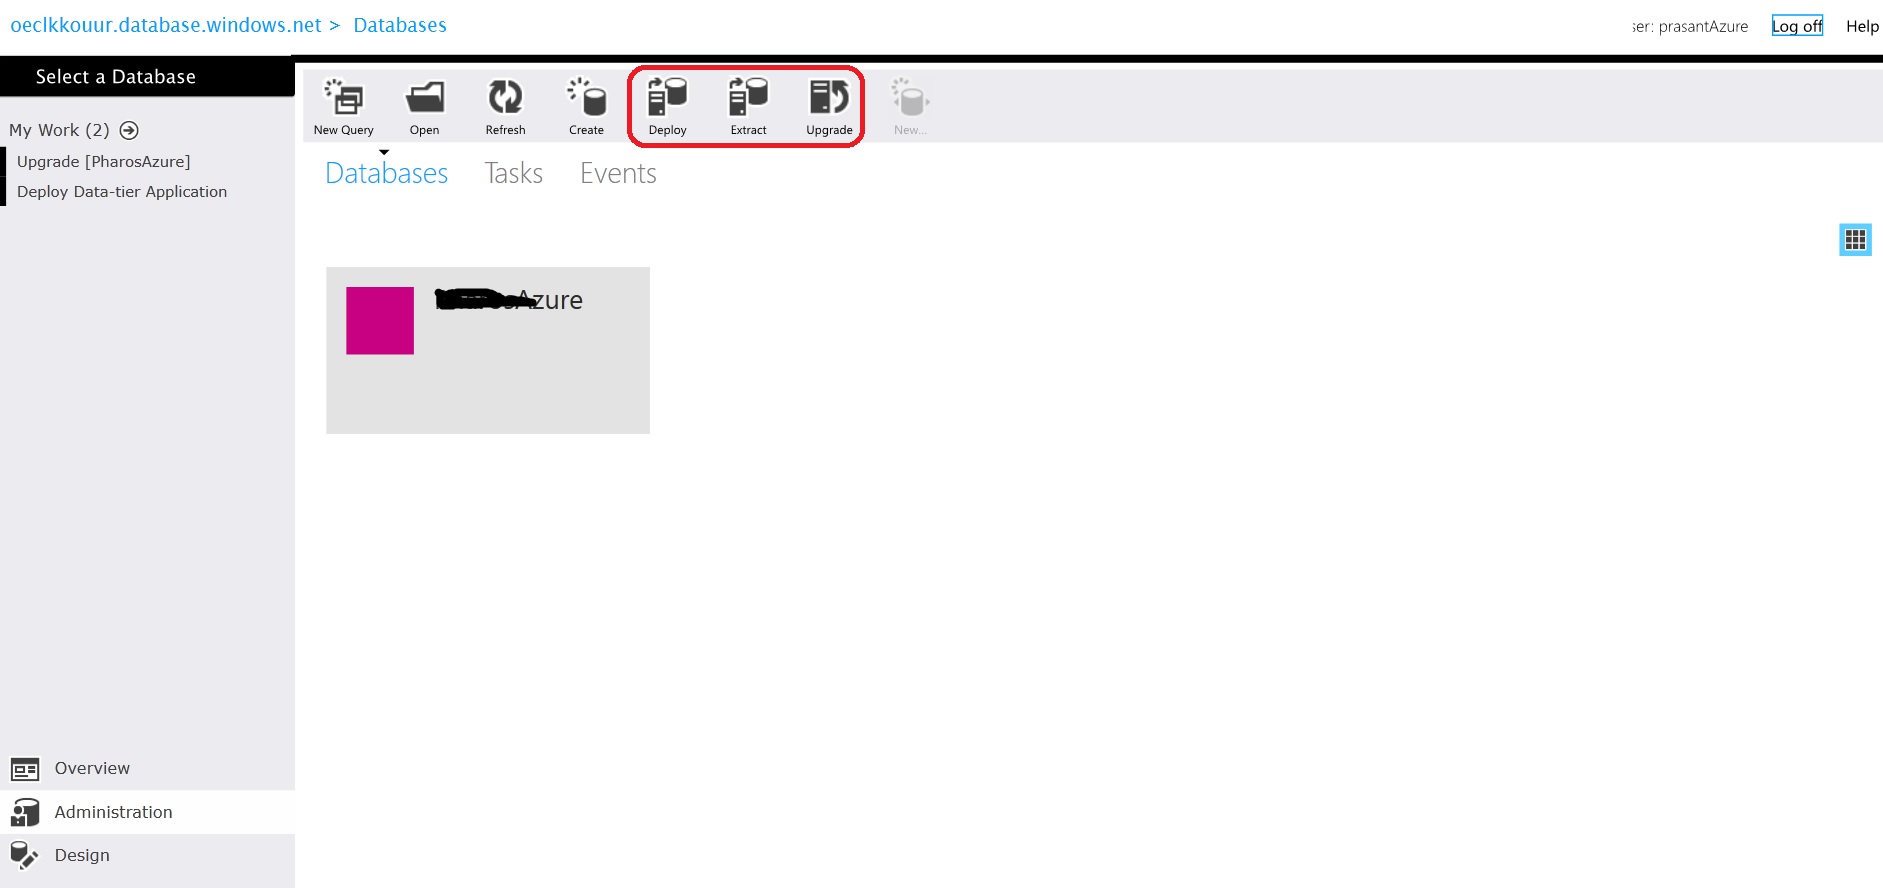
In Azure portal also we can generate the scripts for deployment. It will prompt for the location to save the dacpac file when user selects the Extract option. The user can slect the on-premise dacpac file to do deployment by selecting Deploy option.
By the command prompt window
We can use the SQLPackage (https://msdn.microsoft.com/en-us/library/hh550080(v=vs.103).aspx) to do the deployment.
Export from the source database - bacpac file creation (to Export schema and data) - The operation will fail if any table exists without Clustered index.
C:\Program Files (x86)\Microsoft SQL Server\110\DAC\bin>SqlPackage.exe /a:Export /ssn:prasantnanda-2k /sdn:MyTestDB /tf:c:/prasant/MyTestDBBP.bacpac
Import on target server (Azure)
C:\Program Files (x86)\Microsoft SQL Server\110\DAC\bin>SqlPackage.exe /a:Import /SourceFile:c:/prasant/MyTestDBBP.bacpac /tsn:ihq656uayo.database.windows.net,1433
/tdn:SampleSchoo /tu:prasant.nanda /tp:msxxxxxx45
In this way we can migrate a brand new database on Azure.
dacpac file creation (to Extract schema)
C:\Program Files (x86)\Microsoft SQL Server\110\DAC\bin>SqlPackage.exe /a:Extract /ssn:prasantnanda-2k /sdn:MyTestDB /tf:c:/prasant/MyTestDBDP.dacpac

dacpac deployment (to Publish diff schema)
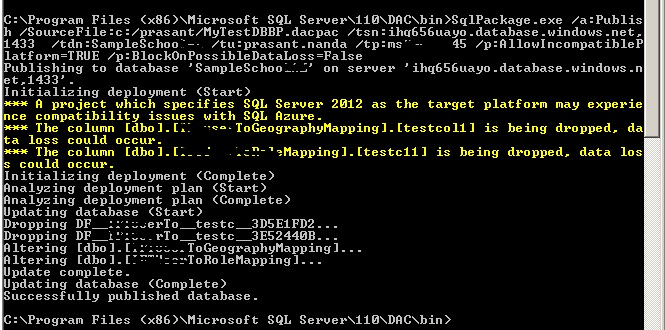
C:\Program Files (x86)\Microsoft SQL Server\110\DAC\bin>SqlPackage.exe /a:Publish /SourceFile:c:/prasant/MyTestDBBP.dacpac /tsn:ihq656uayo.database.windows.net,1433
/tdn:SampleSchoo /tu:prasant.nanda /tp:msxxxxxx45 /p:AllowIncompatiblePlatform=TRUE
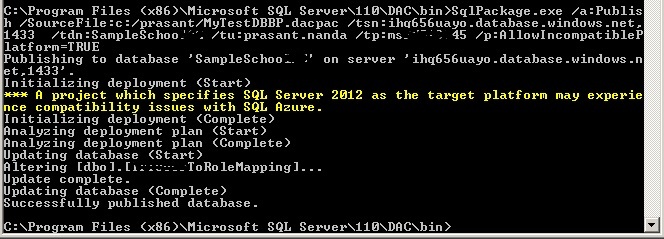
If we don't provide parameter /p:AllowIncompatiblePlatform=TRUE, it will throw error for platform incompatibility. The target platform as Azure can be provided while creating dacpac (option is available in SSDT i.e. project target platform).
We will be notified with errors while deploying a dacpac if there are any scripts available with SQL Azure unsupported features.
If there is a column dropped in the schema, while deploying it will throw error as it suspects some data loss.
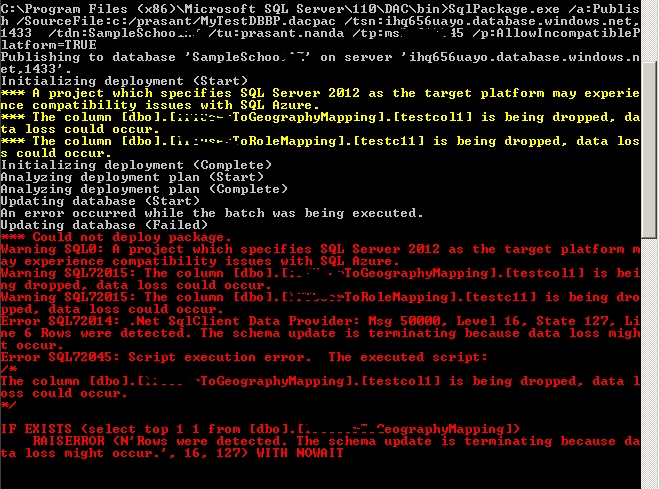
In order to go ahead with column dropped as schema change we need to provide the parameter /p:BlockOnPossibleDataLoss=False
If there is an object got deleted from in the source database, the same will not be deleted even after deployment. If we need to delete that we have to use the parameter /p:DropObjectsNotInSource=True.
There are many parameters available in SQLPackage (https://msdn.microsoft.com/en-us/library/hh550080(v=vs.103).aspx )documentation. Please use appropriate parameters for the required action.
The advantage of using the command line way of deployment is, we can create a batch file (to extract and publish database changes) and schedule the batch file run for deployment.
Links for automated database deployment.
https://support.ready-roll.com/customer/portal/articles/759692-setting-up-automated-sql-server-database-deployment
https://www.anujchaudhary.com/2012/08/sqlpackageexe-automating-ssdt-deployment.html