SharePoint Provider Hosted App Walkthrough: Part 2 Dig deep
Introduction
In the previous post here I showed how to write a new provider hosted App using a step by step process. In this post I will build up on that knowledge and show you the following:
- How to customize your provider hosted app so that you get information from the SharePoint site. (Such as user email).
- How to customize the look and feel of your provider hosted App so that it reflects the SharePoint theme so that the user does not feel a completely disconnected experience. Also how that can be selective so that if the same web site was viewed outside of SharePoint it is displayed as a normal web site.
- How to link back to SharePoint and publish information back to the site including posting to the personal feeds.
- How to host the provider hosted App on Azure web site and how to register this on your private tenant.
So let’s get started, shall we.
Getting Information from SharePoint
To allow the application developers to connect to the source SharePoint site, the request coming from the SharePoint site has a query parameter called “SPHostURl” this contains the source URL of the SharePoint site. So to retrieve information you need to use the client object model to connect to the SharePoint site. Now another problem is how to establish authorization and get the current user identity to be able to perform actions using the currently logged on user identity. To establish this you will already find in any new SharePoint provider hosted App a class called “TokenHelper” this will specifically help you to create the client context using the token. Now once you got the token you do not want to re-connect with the SharePoint site to retrieve the token with every request and hence the need of a token cache. I have included with this article a “TokenDictionary” class that would allow you specifically to cache your tokens.
Note: One thing extra to note while working with provider hosted apps is that you need to make sure you pass the “Request.QueryString” from every page to the next so that you do not lose your SharePoint context.
Now let’s see the code to get the user email address:
// Retrieve Email address from SharePoint
//
// Set up SharePoint Context
Uri sharePointUrl = MyApp.UrlHelper.GetSharePointUrl(Request.QueryString);
MyApp.OAuthTokenPair tokenPair = MyApp.TokenDictionary.GetOAuthTokenPairFromContextToken(null, sharePointUrl.Authority, Request.Url.Authority, Request.Cookies, Response.Cookies);
string accessToken = (tokenPair != null ? tokenPair.AccessToken : "");
// Get SharePoint client context
Microsoft.SharePoint.Client.ClientContext clientContext = MyApp.TokenHelper.GetClientContextWithAccessToken(sharePointUrl.ToString(), accessToken);
// Load Query
Microsoft.SharePoint.Client.Web web = clientContext.Web;
clientContext.Load(web.CurrentUser);
clientContext.ExecuteQuery();
// Work with the result
string userEmail = clientContext.Web.CurrentUser.Email;
Of course for this to work you will need to add a reference to the SharePoint client object model DLL “Microsoft.SharePoint.Client” and “Microsoft.SharePoint.Client.Runtime”, one good thing is that this is already done for you as part of a new SharePoint App project. J
Customizing the look and feel
Once you click on a provider hosted App you are routed to that app and hence you lose the look and feel of the original SharePoint site and the user really feels disconnected. So how to resolve this issue. You simply need to customize your app to look the same like the SharePoint site instead of looking something like this.
The code required to do this is placed in your site theme. If you are using HTML5 then it would be the “_SiteLayout.cshtml” file. You need to add the following line to the header section:
<script src="@Request.QueryString["SPHostUrl"]/_layouts/15/sp.ui.controls.js" type="text/javascript"></script>
This line will allow the site to get the SP script file from your original farm.
Now on the page DIV you need to add the SP chrome as below:
@*Configure the SharePoint Chrome Control*@
<div id="chrome_ctrl_container" data-ms-control="SP.UI.Controls.Navigation" data-ms-options='{
"appHelpPageUrl" : "/?@Request.QueryString",
"appIconUrl" : "/Content/Images/AppIcon_white_96x96.jpg",
"appTitle" : "My Provider Hosted App",
"settingsLinks" : [
{
"linkUrl" : "../?@Request.QueryString",
"displayName" : "Settings"
},
{
"linkUrl" : "../about.cshtml?@Request.QueryString",
"displayName" : "Support"
}
]
}'>
</div>
This will allow the page to look as below:
Also we do not need to show this on site if you open the site from an external user. So simply we add the following code to our default.chtml file:
if (string.IsNullOrEmpty(Request.QueryString["SPHostURl"]))
{
Response.Redirect("~/Default.Public.cshtml");
}
Also on the public default file we add the following to change the layout file to use the public file that does not contain the SharePoint chrome.
@{
Layout = "~/_SiteLayout.Public.cshtml";
Page.Title = "Home";
}
Publishing to the SharePoint User Feeds
Now we need to write information back to the SharEPoint site and usually this is simply done using the Client Object Model in the same way we have read. As an example here I will show you how to write to the user feed.
The first thing you need to do is to add a reference to the DLL “Microsoft.SharePoint.Client.UserProfiles”. Now you need to do the following:
// Get SharePoint client context
Microsoft.SharePoint.Client.ClientContext clientContext = Bakery.TokenHelper.GetClientContextWithAccessToken(sharePointUrl.ToString(), accessToken);
// Set up content for Newsfeed post
string filename = "/Images/Products/" + product.ImageName;
string linkTitle = product.Name;
string linkHref = Request.Url.AbsoluteUri;
string linkComments = "Join as for some " + product.Name + " at " + orderShipping + " %23MyApp";
// Post to feed using the client context established at page load.
MyApp.FeedHelper.PostLinkToFeed(Request.Url.GetLeftPart(UriPartial.Authority),
filename, linkTitle, linkHref, linkComments,
clientContext);
clientContext.Dispose();
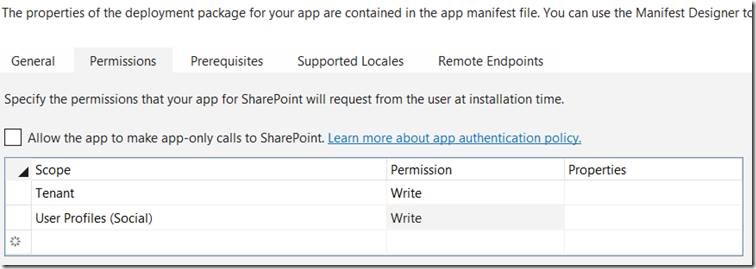
Also please note that you need to add proper access for your app to be able to do this as follows.
Hosting the App on Azure Websites
Now for the last piece of the puzzle how to host your site on Azure Websites. So here are the steps.
1- First you need to create a new Azure WebSite. So logon to https://manage.windowsazure.com and go to the websites and click create.

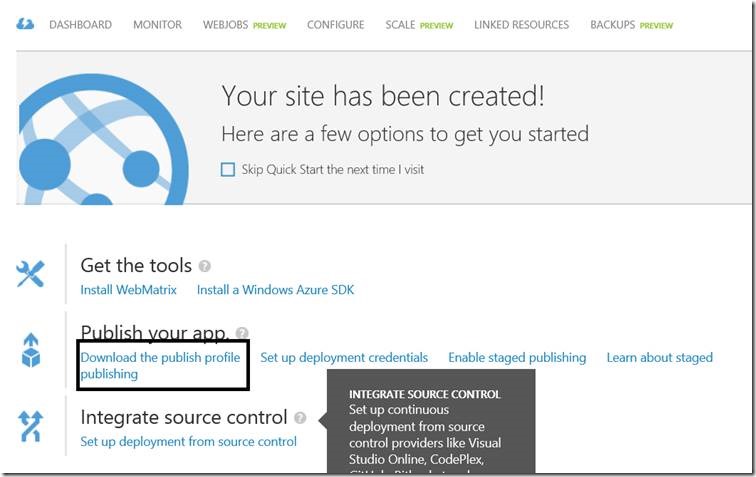
2- Once the web site is created now download the publishing profile.
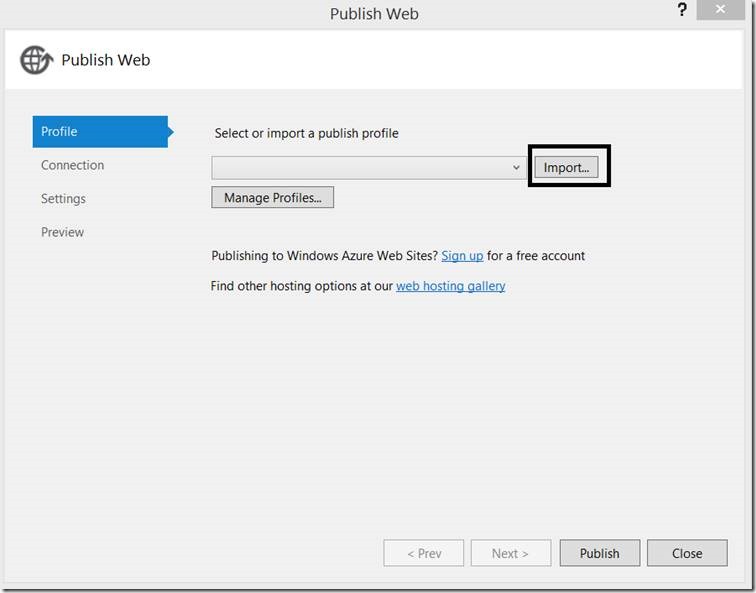
3- Now go to your app and import this publishing profile and publish your app to azure.
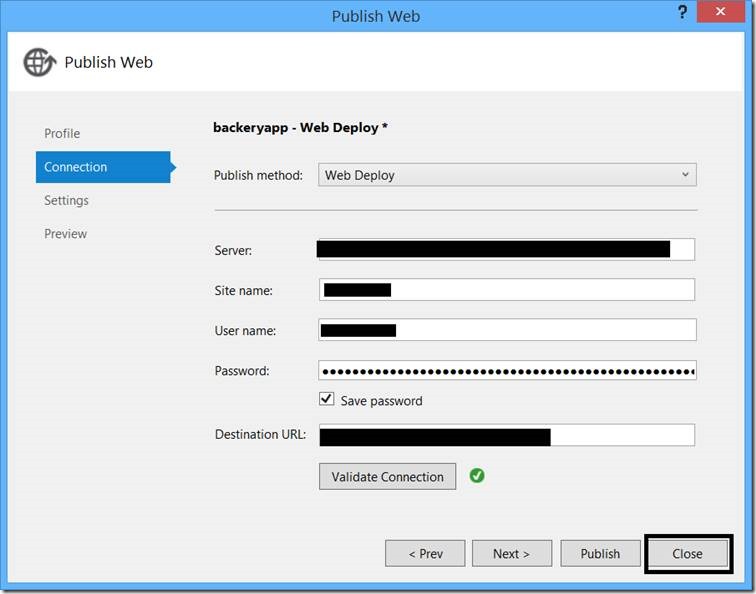
4- Click save to save the created profiles but do not publish yet as it will fail. Now open the file “backeryapp - Web Deploy.pubxml” using VS and edit it to insert the following lines
<PropertyGroup>
<_Enable45Check>false</_Enable45Check>
</PropertyGroup>
5- Now publish your site to azure and it should succeed
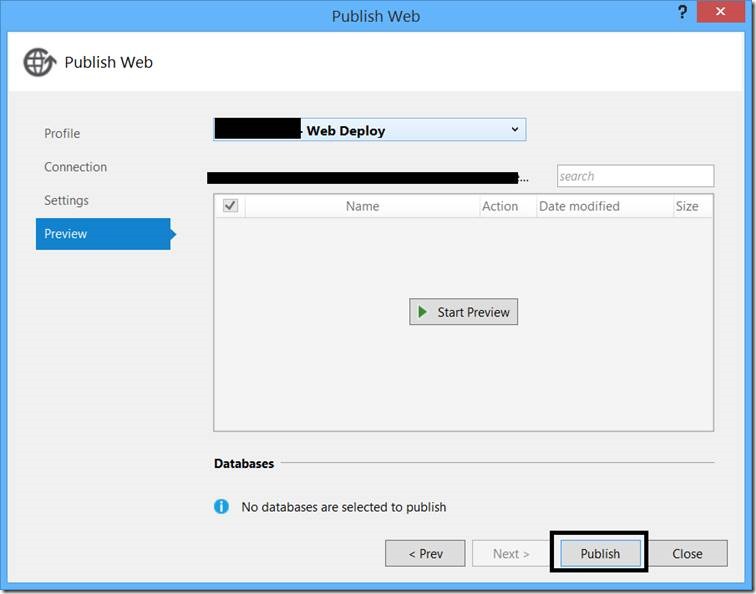
6- Now you should be able to open your site and see the normal public page (not linked to SharePoint).
7- Now open your “AppManifest.xml” file and make sure you change the URL or your app to the Azure URL (Note that the URL must be HTTPS based)
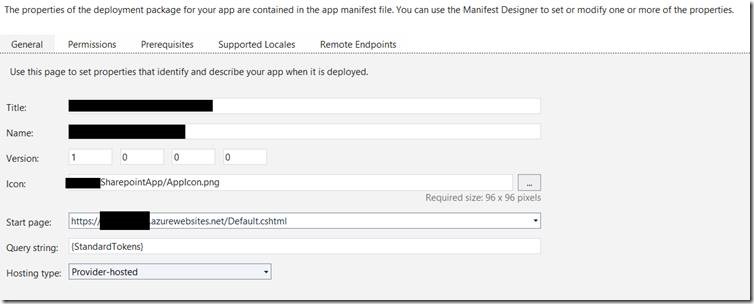
8- Now do not deploy it to SharePoint yet as it will fail, you need to register your app to SharePoint (same as what VS is doing automatically for you) so go to your tenant and open the page https://<tenant>.sharepoint.com/_layouts/15/appregnew.aspx and click on the two generate buttons and fill the information as required:
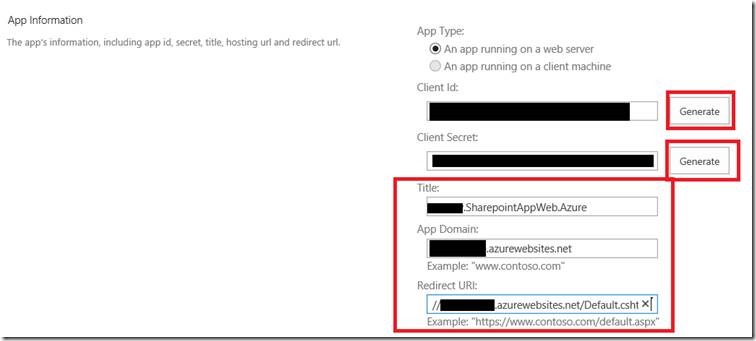
9- Now copy both the Client Id and the Client Secret and put them in your site web.config file replacing the values there. Republish your site to azure.
10- Now click on Create on the application registration page
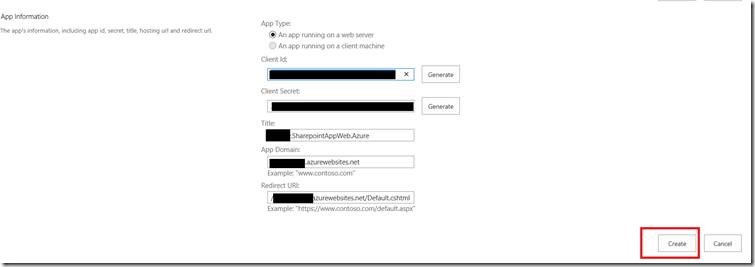
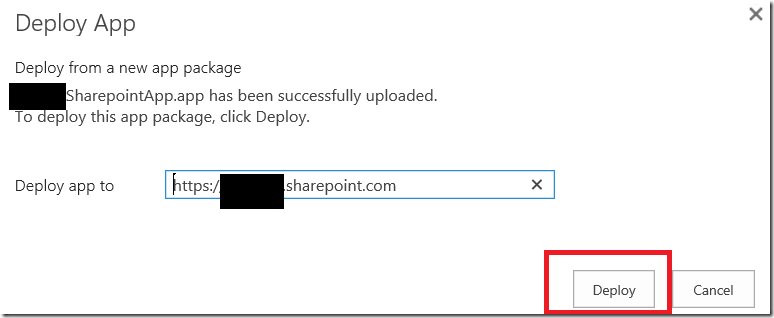
11- Now publish the SharePoint App.
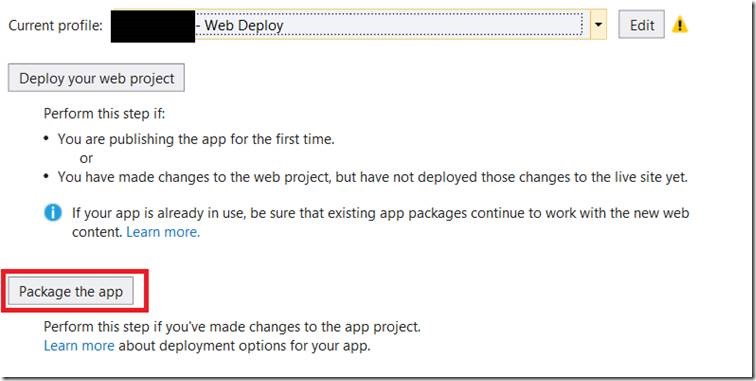
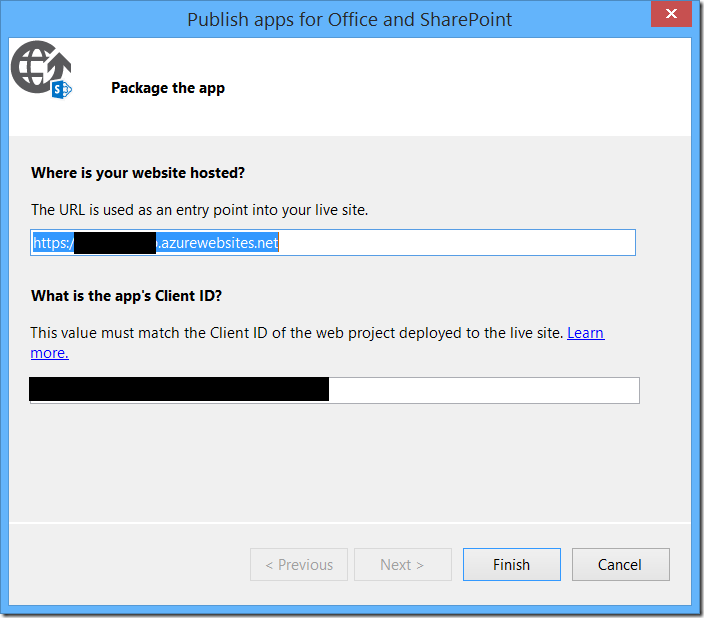
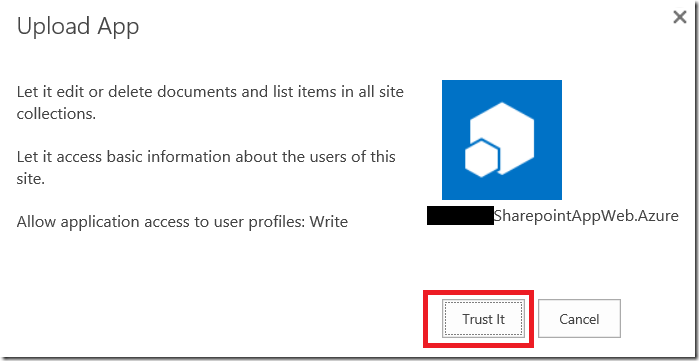
12- Now go to your SharePoint tenant and upload the App package.
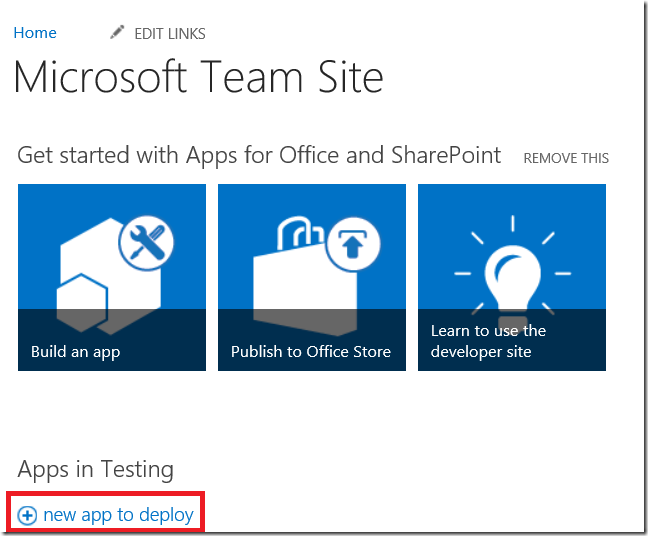
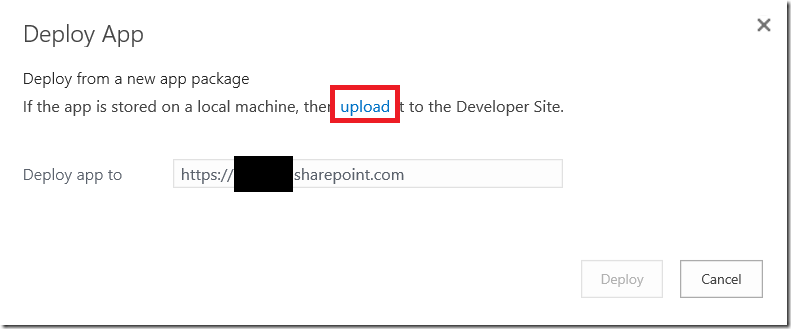
13- Now test your app from the link below
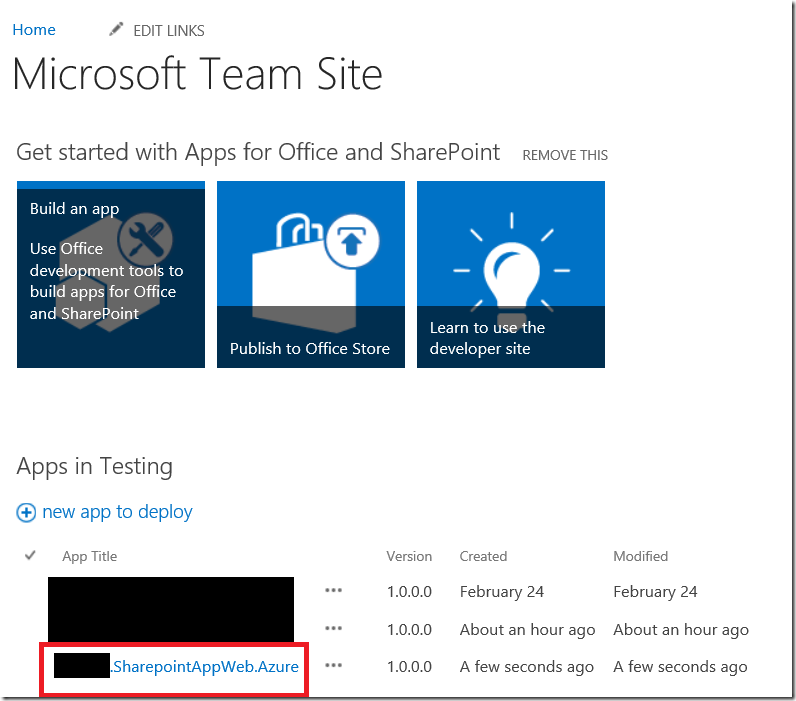
You should now be routed to the Azure web site and your app would be able to work as expected and link back to your SharePoint tenant.
You can find the solution helper files here.


