Solved: How to move a Hyper-V virtual machine without Exporting it first
So you have created many virtual machines in Hyper-V manager and suddenly you want to move one of them in a new HDD or just rename the folder holding it, you will find that this is not a trivial task! Hyper-V management service holds an open handle to the XML file describing the virtual machine settings so you cannot change it in any way. The out of the box method is to export the VM to another folder and then re-import it from that folder to a new one, while this works great sometimes it is not applicable specially if the VM size is huge and you have no disk space to replicate it (since the export would replicate the VHD of the VM) so how to do it, well here you go follow these steps:
1. Stop or shut down your VM (you cannot save its state!)
2. Stop the Hyper-V management service from the management console

3. Once it is stopped browse to the folder “C:\ProgramData\Microsoft\Windows\Hyper-V\Virtual Machines”
4. You will find a symbolic link file to the XML settings file of the VM with the same name just rename it to any other name:

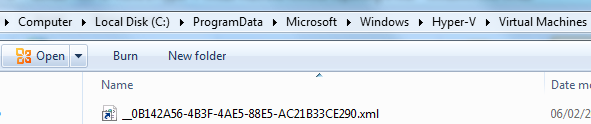
5. Then move the VM to the new folder or rename the folder (do your thing).
6. Once the VM is moved then open a new command prompt as an administrator and then type the command
C:\ProgramData\Microsoft\Windows\Hyper-V\Virtual Machines>mklink 0B142A56-4B3F-4AE5-88E5-AC21B33CE290.xml "<VM new path>\0B142A56-4B3F-4AE5-88E5-AC21B33CE290.xml"
7. Then right click on the newly created symbolic link file and then click security tab and edit. You need to give the local users full control over this created file as shown below:

8. Now go back to the computer management and start the service again

9. Now you will find your VM moved and ready to start.
The only limitation here is that you lose any saved states (I still do not know why but I am planning to look it over).