Tutorial Part 4 : Enabling synchronization and filters within a Windows 8.1 application, SQLite and the Sync Toolkit
(This tutorial is a rewriting of the Codeplex documentation tutorial part 4)
In this sample, we will modify the application we made in the last tutorial, to be able to filter the rows from the server. The idea is to synchronize ONLY the service tickets for one particular Customer Id.
Here is the sample source code : Sample02.zip
For reminder, you will find all the tutorials parts here :
- Download and install Sync Framework and Sync Toolkit for WinRT
- Generate the code for your database, your server and your client application
- Create a fully functional application
- Create a filtered application based on a template scope
- Handle conflicts
The Server Side
If you have read the last tutorial, you have already a server application which deliver all the rows in a scope named DefaultScope. This scope is not filtered and sync the complete database. We will see that we can create an other scope which won’t be in conflict with this existing scope.
Here is a screenshot of the application server, before adding the filter part scope :
The idea here is to add a new scope supporting filters. To enable this feature, we will :
- Adding a new scope in the Fabrikam.config file
- Provisioning the database with this new scope
- Adding the generated code files in the server
Quick Tip : You can use the same database and the same config files for mulitple scopes !
At the end of this sample, we will have two scopes : DefaultScope (sync all the rows) and TemplateScope (sync all rows for one particular customer Id)
Adding a new scope called TemplateScope
As we have seen in the 2nd tutorial, you need to complete the config file. To do it, you can use the application wizard, located in the nuget package Tools folder :
Here is the screenshots of Step 1 and Step 2 where we modify the config file:
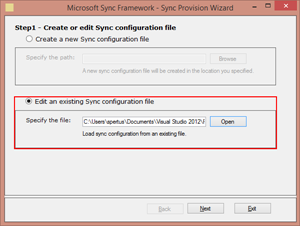 |
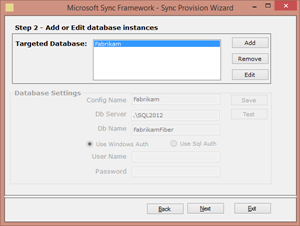 |
In the Step 3, we have to create a new Template (TemplateScope) and checked the Is Template Scope checkbox (and by the way Enable Bulk Apply Procedures if you have SQL Server :) )
The Is Template Scope is the important part of the wizard. This parameter will enable the filter scope. If you don’t enable the Template scope, you won’t be able to synchronize filtered rows.
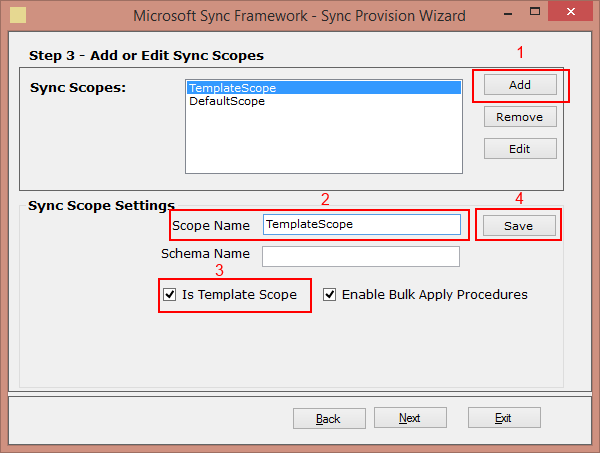
In Step 4, we just add all the tables we need in the correct order (Images if in first position, because we need references on the images table in the Customers table, and Customers table is before ServiceTickets because we need references of customers in the ServiceTicket table)
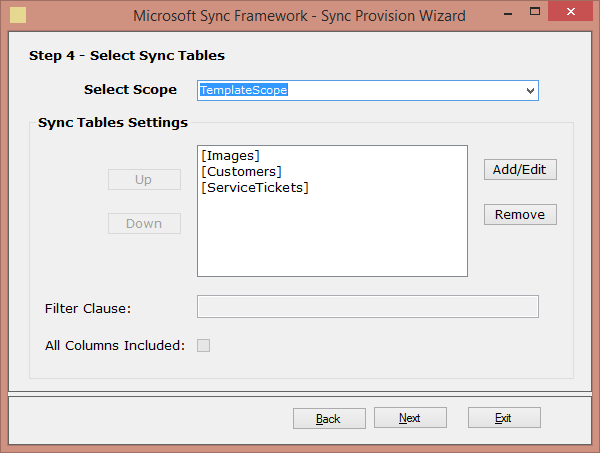
For each table, we need to edit the filter column used to filter the rows :
Here is the screenshots of the Customers and ServiceTickets filter configuration :
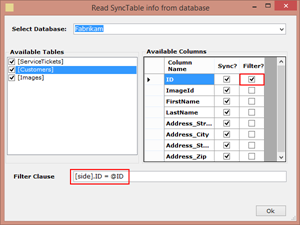 |
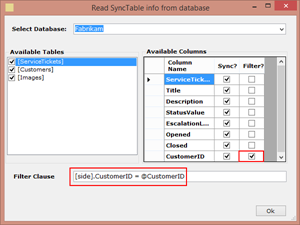 |
- Customers : Filter column : ID. Parameter name : @ID
- ServiceTickets : Filter column : CustomerId. Parameter name : @CustomerId
In the last step, the config file is generated. Here is a screenshot of my new Fabrikam.config file :
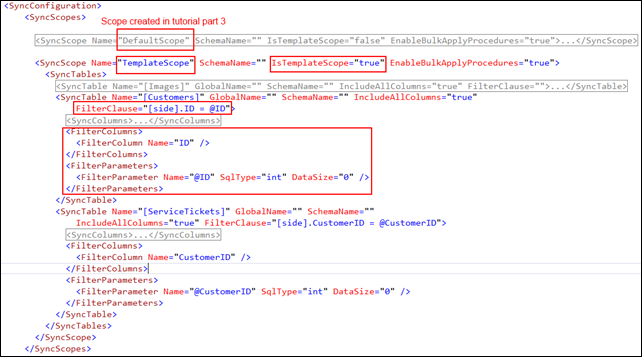
As you can see, the config file have two scopes defined.
- The TemplateScope scope section has the IsTemplateScope attribute set to true, the Customers table has its filter ID named @ID.
The ServiceTicket scope section is collapsed, but you will see that ServiceTicket table is filtered too on the CustomerId column. - The DefaultScope scope section is collapsed, and has its IsTemplateScope attribute set to false (this scope was defined in the last tutorial)
Provisioning the database
The next step is to provisioning the database with this new scope. Again, with the wizard, just go to the Provisioning section and generate the TSQL :
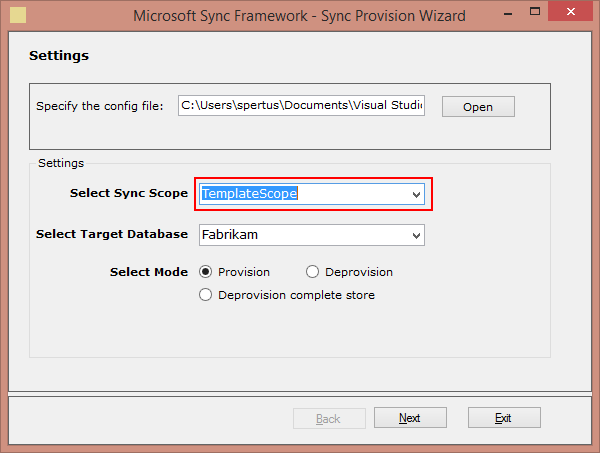
You can verify the database to check if the scope is correctly added. As we created a Template Scope, you will find a new sync table, called scope_templates, which contains our new scope :
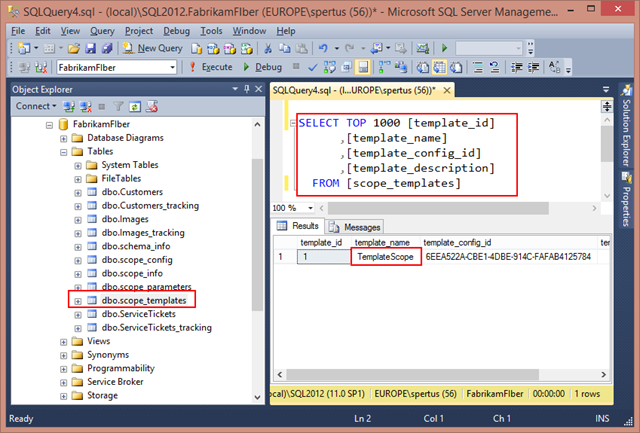
As we have two scopes, the Sync Framework will generate two different selectchanges stored procedure. One for the DefaultScope and one for the TemplateScope (which avec a GUID name convention)
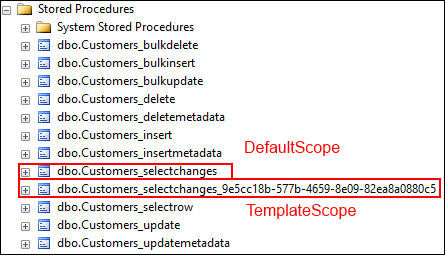
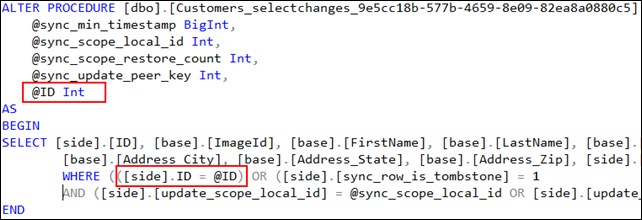
Why two selectchanges stored procedure ? Because the TemplateScope procedure has the filter parameter we defined below :)
Code generation
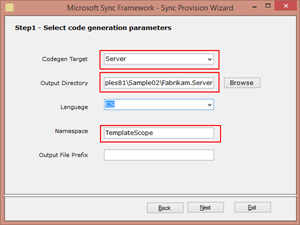
The code generation is very similar to what we have already seen in last chapter :
 |
 |
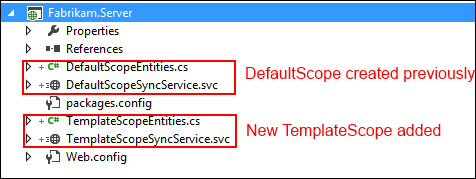
After adding the new files in your web server, we have a new project, with 2 scopes enabled :
Now, we can edit the TemplateScopeSyncService.svc file, to enable behaviors and configurations options :
 public static void InitializeService(Microsoft.Synchronization.Services.ISyncServiceConfiguration config)
{

    config.ServerConnectionString = ConfigurationManager.ConnectionStrings["Fabrikam"].ConnectionString;
    // Enable my scope
    config.SetEnableScope("TemplateScope");

    // make the relationship beetween my database filters and the arg sended by the clients
    config.AddFilterParameterConfiguration("custId", "Customers", "@ID", typeof(System.Int32));
    config.AddFilterParameterConfiguration("custId", "ServiceTickets", "@CustomerID", typeof(System.Int32));

    config.SetDefaultSyncSerializationFormat(SyncSerializationFormat.ODataJson);
    config.SetConflictResolutionPolicy(ConflictResolutionPolicy.ServerWins);

    // for debug purpose, I need the whole error details
    config.UseVerboseErrors = true;

    // Because my json may be huge, i enable the batch mode
    config.SetDownloadBatchSize(2 * 1024);
}
The important part is :
 config.SetEnableScope("TemplateScope");

config.AddFilterParameterConfiguration("custId", "Customers", "@ID", typeof(System.Int32));
config.AddFilterParameterConfiguration("custId", "ServiceTickets", "@CustomerID", typeof(System.Int32));
- Enabling the correct scope for this particular svc.
- Making a relation between the server parameters we defined previously ( @ID and @CustomerId) and the parameter that we will send from our client application (custdId)
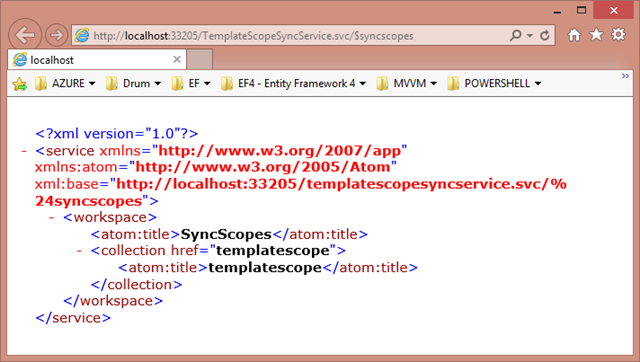
The server side is configured. You can browse your service to check it :
The Windows 8.1 client application
The client side, with filter, is pretty similar to the version we have seen in the last chapter. We need to :
- Generate the client code for Windows 8.1 and SQLite
- Call the Sync server (on the TemplateScope url) with the correct parameter
Generate the client code
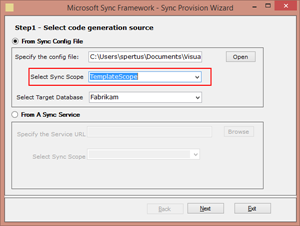
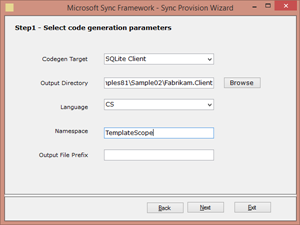
As usual, we generate the code with the Wizard :
 |
 |
You can then add the generated files to your client project. Here is a screenshot of my solution :
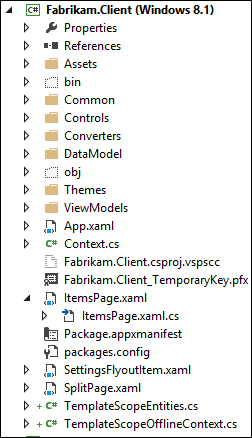
As you can see, 2 files have been generated : TemplateScopeEntities.cs and TemplateScopeOfflineContext.cs
Theses two files contains the entities and the context to synchronize your local SQLite database.
Call the Sync method with the good parameters
In the directory DataModel, you will find a DataService class, where you will find all the synchronization and sqlite code involved in the synchronization process.
The code is totally similar to the first sample. You just need to provide the parameter. Remember the server side, we have create a relationship between our server parameters (@ID and @CustomerId) with a client parameter, called custId.
Here is the code of my DataService constructor, where we defined the parameter name and value :
 public DataService()
{
    // SQLite Path
    this.DatabaseName = "fabrikamfiber_sqlite.db";
    this.DatabaseStorageFolder = ApplicationData.Current.LocalFolder;

    // Context
    this.SyncContext = new TemplateScope.TemplateScopeOfflineContext(this.DatabaseName,
                                                              new Uri(SyncUri, UriKind.Absolute));
    // Definition of the cache controller serialization format:
    this.SyncContext.CacheController.ControllerBehavior.SerializationFormat = SerializationFormat.ODataJSON;

    // Need to specify the filter paramters.
    this.SyncContext.AddScopeParameters("custId", "6");

}
Don’t forget to edit the server url to point on the new scope :
public static string SyncUri = "https://localhost:33205/TemplateScopeSyncService.svc"
The sync call is pretty straightforward :
 public async Task<CacheRefreshStatistics> Sync()
{
    try
    {
        var result = await this.SyncContext.SynchronizeAsync();

        // For debug time
        if (result.Error != null)
            Debug.WriteLine(result.Error.Message);

        return result;
    }
    catch (Exception e)
    {
        Debug.WriteLine(e.Message);
        throw;
    }
}
Here is the final Screenshot of the client side, where we have ONLY the service tickets of the client “6” :)
