Sync Framework With SQLite for Windows Store Apps (WinRT) and Windows Phone 8
Hi All
For French people, here is a French PDF version : Synchroniser votre Windows Phone 8 et votre application Windows store avec SQLite
Today, I publish a new version of my adaptation of the Sync Framework Toolkit, that I realized at the beginning for WinRT.
This new version adds support for synchronization with WinRT and Windows Phone 8 :
![image[57] image[57]](https://msdntnarchive.blob.core.windows.net/media/MSDNBlogsFS/prod.evol.blogs.msdn.com/CommunityServer.Blogs.Components.WeblogFiles/00/00/01/58/09/metablogapi/6406.image57_36F09793.png)
As usual, you can grab the new version on the Codeplex website : https://syncwinrt.codeplex.com
The first version was based on the excellent Framework SQLite-net
But I think this framework is a “user framework” and if you used it in your framework, you can’t use it in your project.
It will make conflicts and the method to bypass theses conflicts is not acceptable (at least, for me)
So I have decided to remove it from the Sync WinRT Framework.
For now, the fx works with a modified version of SQLite-winrt (https://sqlwinrt.codeplex.com/ )
I have modified the library to make it work without async. operations (because I ran into some bugs with it), and I’ve added some new methods to support byte[] and null values.
You can check some details on the usage of this Framework here : https://blogs.windows.com/windows_phone/b/wpdev/archive/2013/05/30/sqlite-winrt-wrapper-for-windows-phone.aspx
In the sources provided on the Codeplex website, you will find 2 samples including a simple HelloWorldSync and a complete sample Fabrikam, with CRUD operations and synchronization
Fabrikam sample
In the following sections, you will learn how to create a very simple application which can synchronize a database within WinRT and WP8 devices
If you want a complete sample, you can check the Fabrikam sample provided within the zip package.
Before
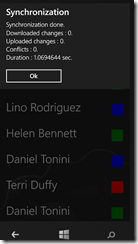
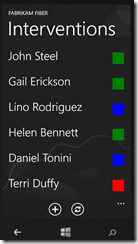
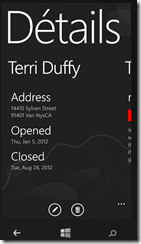
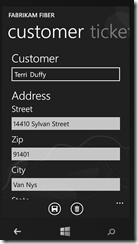
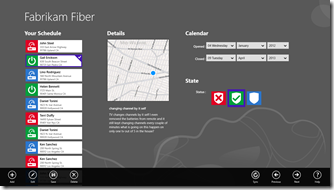
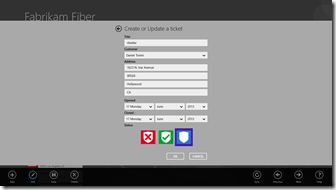
Here is some screenshots of the complete sample :
Windows Phone 8
Windows Store application
Requirements
To create a “synchonizable application” that will work on Windows Store apps and Windows Phone 8, you need to create:
- A web server, which will expose all your entities, and capable of querying and updating a database (SQL SERVER in our example)
- Your datas come from a SQL SERVER database, which will be configured to allow synchronization with the Sync Framework
- A Windows store apps developed in XAML / C#, which will be capable to query your web server and by the way, store all the datas locally in a SQLite database
- A Windows Phone 8 application developed in XAML / C#, which will be capable to query your web server and by the way, store all the datas locally in a SQLite database
Before starting to develop your projects, be sure to meet those requirements. I know this part is boring, sometimes, but you need to read it carefuly ![]()
Server
![image31_thumb[4] image31_thumb[4]](https://msdntnarchive.blob.core.windows.net/media/MSDNBlogsFS/prod.evol.blogs.msdn.com/CommunityServer.Blogs.Components.WeblogFiles/00/00/01/58/09/metablogapi/7367.image31_thumb4_4DEBA0AA.png)
Before starting, you must install on your server, the latest version of Sync Framework 2.1 for .NET:
You have to choose between the x64 version and x86 version : https://www.microsoft.com/en-us/download/details.aspx?id=23217
Visual Studio and Sync Framework
If you install it on a x64 developer machine, you must install both of them, BUT you can’t install both of the x64 and x86 version of the SDK.
The solution is to install :
- the x64 version (https://www.microsoft.com/en-us/download/details.aspx?id=23217)
- the redistributables of the x86 version (https://www.microsoft.com/en-us/download/details.aspx?id=19502: Install the 3 msi)
Once everything installed, you can get the toolkit from Codeplex : https://syncwinrt.codeplex.com
The server side is located in the folder : \Sync Framework 4.0 Toolkit\Server\Release
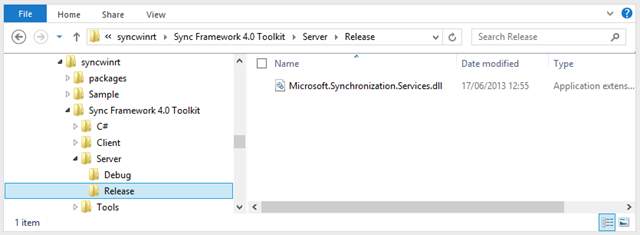
During the preparation of your web server solution, you will have thoses assemblies :

- The first three are part of the Sync Framework 2.1
- Microsoft.Synchronization
- Microsoft.Synchronization.Data.Server
- Microsoft.Synchronization.Data.SqlServer
- The last one come from the Sync ToolKit :
- Microsoft.Synchronization.Services
Note: I strongly suggest to you to install a local IIS on your development machine. Working with Windows Phone 8 and a locally IIS server is usually more simple and confortable.
![image[10] image[10]](https://msdntnarchive.blob.core.windows.net/media/MSDNBlogsFS/prod.evol.blogs.msdn.com/CommunityServer.Blogs.Components.WeblogFiles/00/00/01/58/09/metablogapi/2772.image10_11DF5EF5.png)
However, if you don’t have a locally IIS web server installed, you have two solutions :
- Install IIS on your local machine (It’s a good thing, don’t be afraid
 )
) - Try to connect your emulator on IIS Express. You can check this todo article : How To Connect a local web service from Windows Phone 8
- No third option, but you can also … install IIS on your local machine !
Windows Store Apps
Regarding the Windows store apps development, the first thing to do is to install SQLite on your machine.
Thanks to Extensions and Update, you just have to search SQLite for Windows Runtime and install it. We will see that you will have to repeat this operation for Windows Phone 8
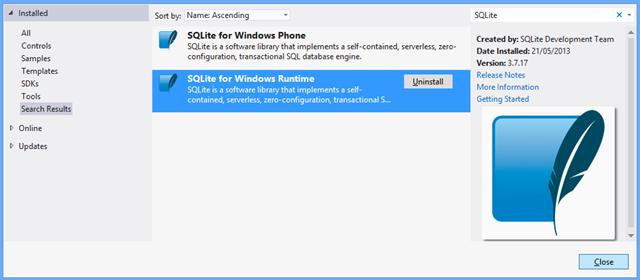
You can now download the toolkit from codeplex: : https://syncwinrt.codeplex.com
The mandatories files for WinRT client model are located here : \Sync Framework 4.0 Toolkit\Client\WinRT\Release\
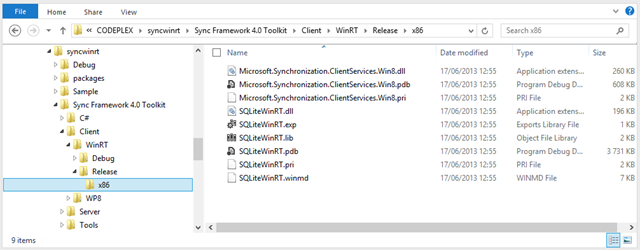
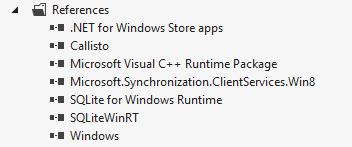
Here is a screenshot of my WinRT client project references:
- SQLite for Windows Runtime : Because you will probably use SQLite-net

- Microsoft.Synchronization.ClientServices.Win8 : WinRT Toolkit C# assembly
- SQLiteWinRT : Toolkit Wrapper: C++/CX for SQLite used by the Toolkit
Widows Phone 8
As we have seen previously, you have to install SQLite for Windows Phone with Extensions and Updates
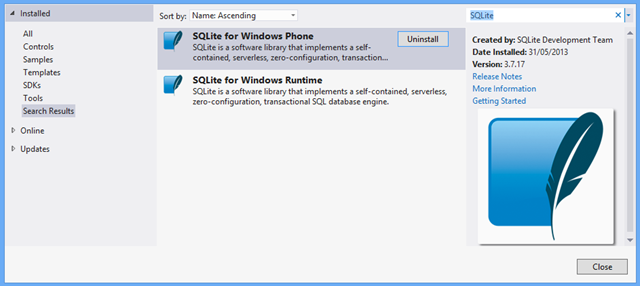
And once again, if you don’t have already made it, you need to download the toolkit from codeplex : https://syncwinrt.codeplex.com
Here is the directory for the Windows Phone 8 assemblies: 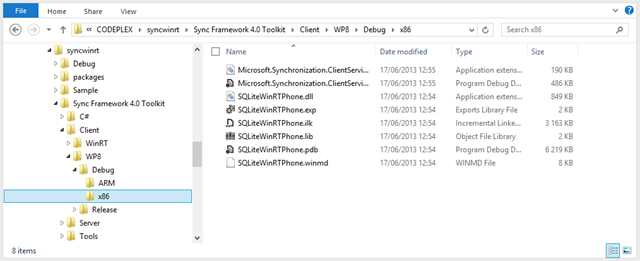
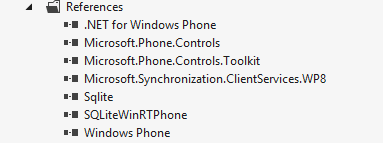
Here is a screenshot of my Windows Phone 8 project references :
- Microsoft.Synchronization.ClientServices.WP8 : Toolkit Windows Phone 8
- SQLiteWinRTPhone : Wrapper C++/CX SQLite used by the toolkit
Here we go, you can synchronize your application right now !
But .. you will surely need to manipulate your datas locally, save them, query them and all kind of stuff…
So, you need to add SQLite-net.
It’s a little be more complicated than WinRT, and you can check this post on the how to work with SQLite-net and Windows Phone 8:
https://blogs.windows.com/windows_phone/b/wpdev/archive/2013/03/12/using-the-sqlite-database-engine-with-windows-phone-8-apps.aspx
(You will find the sqlite-net-wp8-master in the source code sample)
Finally here is a screenshot of all the required references :
Tutorial
This tutorial is about create a very simple application, which will be capable of synchronized items. If you want a more complete sample, check the Fabrikam sample.
I assume you have read carefuly the requirements, and have created a simple solution with all required assemblies.
Starter solution
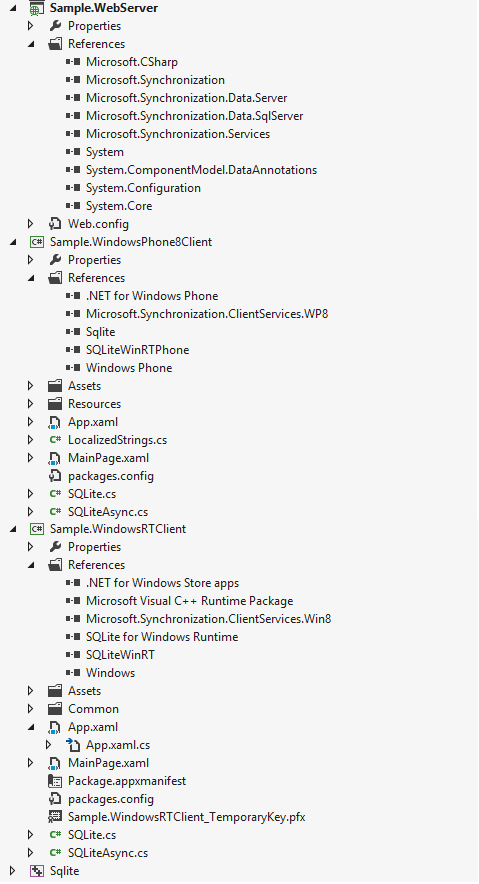
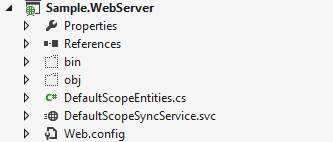
Here is a screenshot of my solution:
- Sync Framework 2.1 is installed on my local machine
- All required asemblies are referenced
- I have added SQLit-net on both WP8 and WinRT project, thanks to nuget

Server configuration
You will find a sql script in the sample to create a simple database. the first script is the database only, the second is the same database but already configured with metadatas, triggers etc …
If you start from scratch, with the database not configured, here is what you need to do:
- Adding metadatas
- Adding triggers
- Adding tables
The SyncSvcUtil.exe works with an xml file configuration.
We can choose to synchronize all columns from a table or we can choose particular columns.
Here is the xml file for Fabrikam database. You will find it in the sample directory:
 <?xml version="1.0" encoding="utf-8" ?>
<configuration>
  <configSections>
    <section name="SyncConfiguration" type="Microsoft.Synchronization.ClientServices.Configuration.SyncConfigurationSection, SyncSvcUtil, Version=1.0.0.0, Culture=neutral"
             allowDefinition="Everywhere" allowExeDefinition="MachineToApplication" restartOnExternalChanges="true" />
  </configSections>

  <SyncConfiguration>
    <SyncScopes>
      <SyncScope Name="DefaultScope" IsTemplateScope="true">
        <SyncTables>
          <SyncTable Name="dbo.Customers" GlobalName="Customers" IncludeAllColumns="true" />
          <SyncTable Name="dbo.ServiceTickets" GlobalName="ServiceTickets" IncludeAllColumns="true" />
        </SyncTables>
      </SyncScope>
    </SyncScopes>
    <Databases>
      <TargetDatabase Name="FabrikamFIber" DbServer=".\SQL2012" DbName="FabrikamFIber" UseIntegratedAuth="true" />
    </Databases>
  </SyncConfiguration>
</configuration>
Syncsvcutil.exe is located in the folder : \Sync Framework 4.0 Toolkit\Tools

Here is the command line I have used:
syncsvcutil.exe /mode:provision /scopeconfig:fabrikam.xml

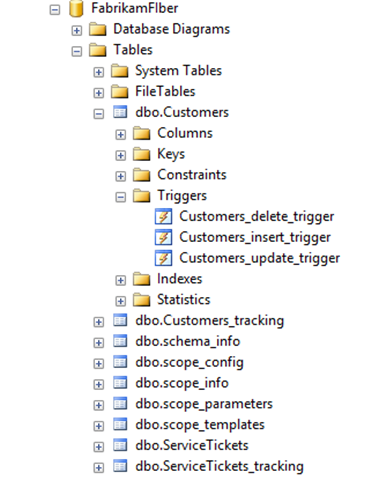
Your database is ready ! Note that 5 more tables will be added to your database schema, and 1 more table per synchronization table.
For each table in the synchronization schema, 3 triggers will be added to track changes:
On the server side, you have to create a web site to provide an handler for your WinRT application.
The SyncSvcUtil.exe will generate two classes (depending on your scope name) :
DefaultscopeEntities.cs and
DefaultscopeSyncService.svc.
DefaultscopeEntities will contains all entities mandatories for synchronization.
Here is the command line I used for Fabrikam sample :
Syncsvcutil.exe /scopeconfig:fabrikam.xml /mode:codegen /target:server /directory:server

Add the generated code in your web site project like you can see here :
DefaultscopeSyncService.svc is the Service Handler generated for you that will provide all the methods mandatories to sync from the client.
You have to configure this file for working with your sync – enabled – database.
Here is the “by design” version of the DefaultScopeSyncService.svc:
 #region SyncService: Configuration and setup
public class DefaultScopeSyncService : Microsoft.Synchronization.Services.SyncService<DefaultScopeOfflineEntities> {

    public static void InitializeService(Microsoft.Synchronization.Services.ISyncServiceConfiguration config) {
        // TODO: MUST set these values
        // config.ServerConnectionString = "connection string here";
        // config.SetEnableScope("scope name goes here");
        //
        //
        // TODO: Optional.
        // config.SetDefaultSyncSerializationFormat(Microsoft.Synchronization.Services.SyncSerializationFormat.ODataJson);
        // config.SetConflictResolutionPolicy(Microsoft.Synchronization.Services.ConflictResolutionPolicy.ServerWins);
    }
}
#endregion
And here is the file completed with the connection string and the format I want to use (JSON)
 public class DefaultScopeSyncService : Microsoft.Synchronization.Services.SyncService<DefaultScopeOfflineEntities> {

    public static void InitializeService(Microsoft.Synchronization.Services.ISyncServiceConfiguration config) {
         config.ServerConnectionString = ConfigurationManager.ConnectionStrings["Fabrikam"].ConnectionString;
         config.SetEnableScope("DefaultScope");
         config.SetDefaultSyncSerializationFormat(SyncSerializationFormat.ODataJson);
         config.SetConflictResolutionPolicy(ConflictResolutionPolicy.ServerWins);
    }
}
If you look at the .svc in your browser, you will see an OData Stream :
![image124[2] image124[2]](https://msdntnarchive.blob.core.windows.net/media/MSDNBlogsFS/prod.evol.blogs.msdn.com/CommunityServer.Blogs.Components.WeblogFiles/00/00/01/58/09/metablogapi/3122.image1242_6AE0D74D.png)
Your server is ready.
WinRT application
Next step, as we have already done for the server side, we need to generate the Client files.
Here is the command line I used to generate the client files:
syncsvcutil.exe /mode:codegen /scopeconfig:fabrikam.xml /directory:client /target:sqliteclient
![image61[1] image61[1]](https://msdntnarchive.blob.core.windows.net/media/MSDNBlogsFS/prod.evol.blogs.msdn.com/CommunityServer.Blogs.Components.WeblogFiles/00/00/01/58/09/metablogapi/7840.image611_17899127.png)
The files generated : DefaultScopeEntities.cs and DefaultScopeOfflineContext.cs
DefaultScopeEntities contains all your entities, that inherit from a new class in the toolkit : SQLiteOfflineEntity.
![image12[1] image12[1]](https://msdntnarchive.blob.core.windows.net/media/MSDNBlogsFS/prod.evol.blogs.msdn.com/CommunityServer.Blogs.Components.WeblogFiles/00/00/01/58/09/metablogapi/2806.image121_483C98D2.png)
Note : You will probably used SQLite-net to be able to query your datas. So you need to modify the DefaultScopeEntities class to mark all properties with SQLite-net attributes (you can see a example in th Fabrikam sample)
You can now launch a synchronization:
In the MainPage.xaml, add a simple Button, and copy paste this code :
 Uri serviceUri = new Uri("https://localhost/Sample.WebServer/DefaultScopeSyncService.svc/");
DefaultScope.DefaultScopeOfflineContext ctx = new DefaultScopeOfflineContext("fabrikam.db", serviceUri);

var stats = await ctx.SynchronizeAsync();

if (stats.Error != null)
{
    Debug.WriteLine(stats.Error.Message);
    return;
}

Debug.WriteLine(stats.TotalDownloads);
Here is the result, during a debug session :
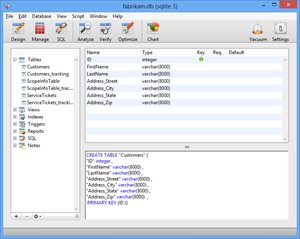
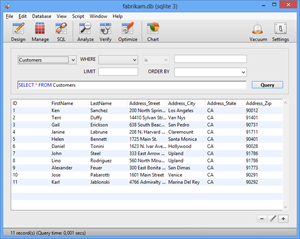
After the first Synchronization, you can check your WinRT database with some SQLite Tools, like SQLiteManager :
![image11[1] image11[1]](https://msdntnarchive.blob.core.windows.net/media/MSDNBlogsFS/prod.evol.blogs.msdn.com/CommunityServer.Blogs.Components.WeblogFiles/00/00/01/58/09/metablogapi/5852.image111_2BDF30E5.png)
In my sample, my database is generated in this folder :
AppData\Local\Packages\46f9d90d-893a-4319-8a18-a3c4a40513c7_frjbj8e8b44ec\LocalState
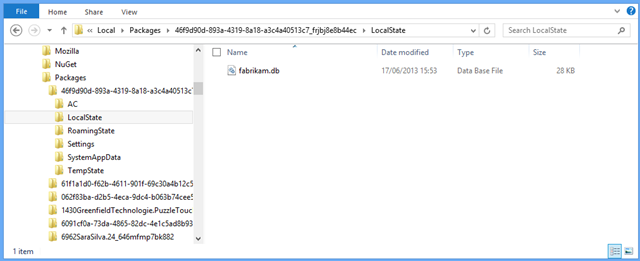
And here is the database structure. As you can see, all the datas are locally persisted :
Windows Phone 8 application
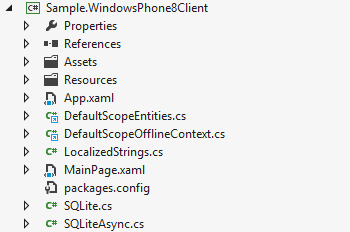
Once again, as WinRT, database and web server, you need to generate the Windows Phone 8 client files. Note that the generated code for WP8 is the same as WinRT.
So, I will just add the generated files with the “Add as Link” option :
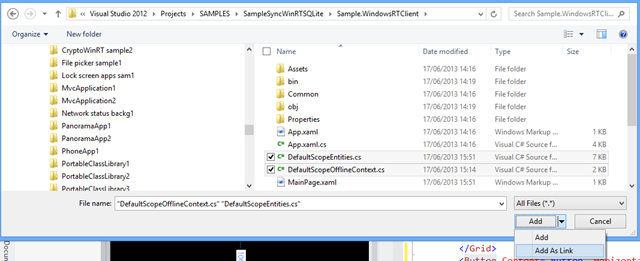
Here is my Windows Phone 8 project structure:
And now, before starting ….
Check your emulator connetivity !
Before develop, test and deploy your WP8 application, you need to be sure that your emulator (or device) can reach your web server.
In this sample, you have to check this url (Note that I use my local machine IP instead of “localhost”) https://192.168.0.17/Sample.WebServer/DefaultScopeSyncService.svc/$syncscopes)
Note : Here is the steps I follow every time I need to check connectivity on my emulator or device :
- Launch Internet Explorer.
- Make a web search (Amazon for example).
- Try to get the $syncscope url from your web server.
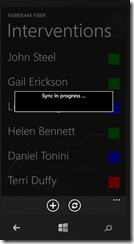
Now that you are sure you can send requests to your web server with your emulator or your device, you can try a simple synchronization. Here is a screenshot in debugging mode:
![image[50] image[50]](https://msdntnarchive.blob.core.windows.net/media/MSDNBlogsFS/prod.evol.blogs.msdn.com/CommunityServer.Blogs.Components.WeblogFiles/00/00/01/58/09/metablogapi/6114.image50_30254045.png)
If you have any questions, you can use the Issue Tracker or Discussions sections.

![image_thumb[18] image_thumb[18]](https://msdntnarchive.blob.core.windows.net/media/MSDNBlogsFS/prod.evol.blogs.msdn.com/CommunityServer.Blogs.Components.WeblogFiles/00/00/01/58/09/metablogapi/7585.image_thumb18_thumb_5F1B6A4E.png)
![image_thumb[11] image_thumb[11]](https://msdntnarchive.blob.core.windows.net/media/MSDNBlogsFS/prod.evol.blogs.msdn.com/CommunityServer.Blogs.Components.WeblogFiles/00/00/01/58/09/metablogapi/3441.image_thumb11_thumb_005AC451.png)
![image_thumb[12] image_thumb[12]](https://msdntnarchive.blob.core.windows.net/media/MSDNBlogsFS/prod.evol.blogs.msdn.com/CommunityServer.Blogs.Components.WeblogFiles/00/00/01/58/09/metablogapi/0741.image_thumb12_thumb_778ABC04.png)
![image_thumb[13] image_thumb[13]](https://msdntnarchive.blob.core.windows.net/media/MSDNBlogsFS/prod.evol.blogs.msdn.com/CommunityServer.Blogs.Components.WeblogFiles/00/00/01/58/09/metablogapi/5430.image_thumb13_thumb_672F444B.png)
![image_thumb[14] image_thumb[14]](https://msdntnarchive.blob.core.windows.net/media/MSDNBlogsFS/prod.evol.blogs.msdn.com/CommunityServer.Blogs.Components.WeblogFiles/00/00/01/58/09/metablogapi/1184.image_thumb14_thumb_39CDAE7B.png)
![image_thumb[15] image_thumb[15]](https://msdntnarchive.blob.core.windows.net/media/MSDNBlogsFS/prod.evol.blogs.msdn.com/CommunityServer.Blogs.Components.WeblogFiles/00/00/01/58/09/metablogapi/7801.image_thumb15_thumb_57CBBC6F.png)