So You Want to Build a Vista Sidebar Gadget?
I've spent a bit of time building a SideBar gadget recently and had a lot of fun doing it. I thought it might be worth sharing some of the stuff I learned along the way by building out a gadget that does something. Maybe not something useful but something more than print my machine name or the like. Ahem.
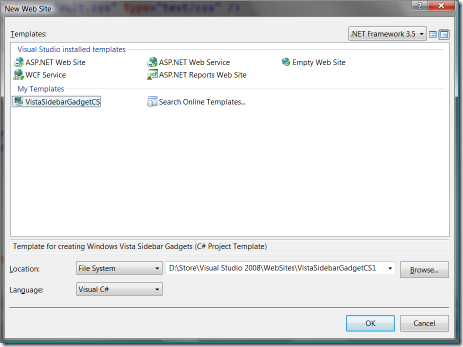
I suggest you start by downloading the Vista Sidebar Gadget project template for Visual Studio that Tim Heuer created. Once you've got that installed you'll get a new template under File -> New Web Site (I'm running Visual Studio 2008 Beta 2 so the dialogue below may not be identical to yours):
Create a new Vista Sidebar Gadget project and you'll get a solution that looks like the below:
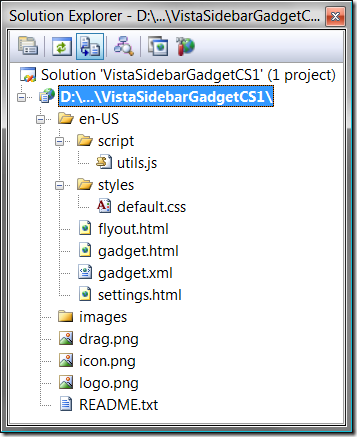
Have a look in the README.txt file, it contains a lot of useful information to get started. Of note to us:
- gadget.xml - this is the manifest file and must be named gadget.xml. It has pointers to the various resources that comprise the gadget, principally the html file that describes the default UI for your gadget (gadget.html by default in the template but you can rename this as long as you update gadget.xml to point to the new html file in the src attribute in the base element)

- The other html files (flyout & settings) are intended to be used for the UI for the gadget flyout pane / settings pane respectively. Typically, when you build a gadget, you will also define a "flyout" (see the radio gadget example below) and a "settings" pane.
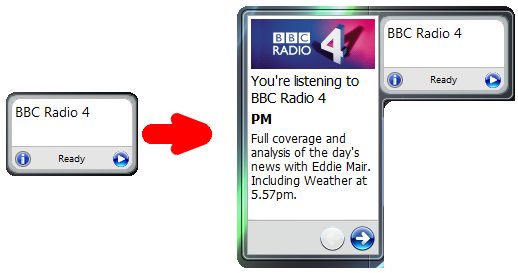
- You define what event triggers the flyout (eg in the radio gadget below I click the "i" icon and the flyout appears with programme information). If a settings pane is defined, it is shown when the user clicks the settings icon (little spanner shown when you hover over the gadget).
- utils.js contains some skeleton JavaScript functions you'll find useful when building your gadget. eg it defines a flyout function to display the flyout, handles docking and undocking the gadget etc
- drag.png, icon.png and logo.png are images used by the Sidebar (for example when displaying your gadget in the "Add Gadgets" dialogue, when dragging your gadget onto the Sidebar etc. These can be renamed in the gadget.xml file.
Now you've created the skeleton of a gadget, save it somewhere.
- Rename the folder containing your gadget to have a .gadget extension
- eg I rename folder VistaSidebarGadgetCS1 to VistaSidebarGadgetCS1.gadget
- Copy the folder to
- C:\Users\[username]\AppData\Local\Microsoft\Windows Sidebar\Gadgets
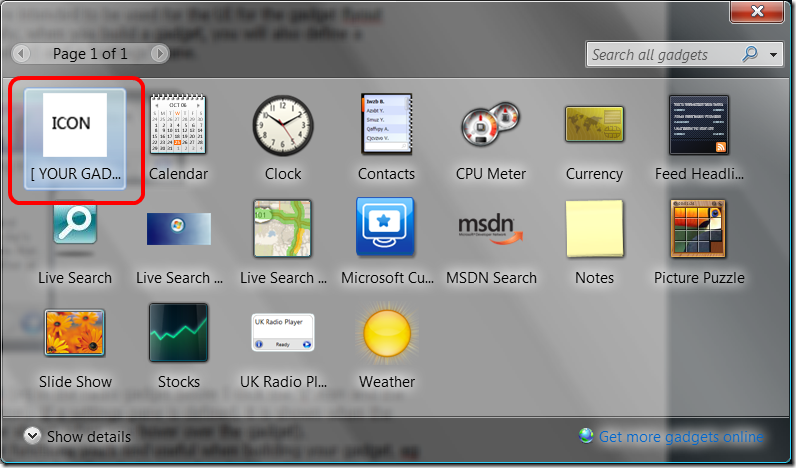
- Right-click on the Sidebar and select "Add Gadgets..."
- You should see your gadget in the add gadgets dialogue as below
- Double click and the gadget will be added to your Sidebar
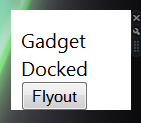
It wont be pretty but you should have a functional gadget on your Sidebar. Click the Flyout button and a flyout will appear. Drag it from the Sidebar and it will undock. Drag it back and it will dock. Click the settings icon (hover over the gadget) and you'll see a settings pane appear.
Clearly we've got a bit of work to do but it's not a bad start. Next up we need to add some HTML and CSS to pretty things up and then add some code to make it do something useful.
There is a useful walkthrough on the MSDN site entitled "Gadget Development Overview"