FHIR Server with Azure API Management
Fast Healthcare Interoperability Resources (FHIR) is a draft standard describing data formats and elements (known as “resources”) and an application programming interface (API) for exchanging electronic health records. I have discussed how to run Firely FHIR Servers in Azure PaaS and how to run a HAPI FHIR Server in Azure PaaS. There are other servers that will run in Azure PaaS services as well, but more on that later. In this blog post, I want to show how to use Azure API Management with a FHIR server.
FHIR servers are accessed through a REST API, but they don't all provide the governance and structure required to publish and consume APIs, it would make sense to use something like Azure API Management (APIM) for that. The addition of APIM would enable user management, key management, analytics, etc.
In order to demonstrate this scenario, I have created a APIM instance and a HAPI FHIR Server in Azure. I have used Azure Government for this demonstration, but it will work the same in Azure Commercial. In order to get an API specification for the FHIR server, I have used the fhir-swagger tool by Bobby Brennan. It reads the conformance profile (the /metadata endpoint) from your FHIR and generates a swagger.json file based on it. To use it:
[shell]
npm install -g fhir-swagger
fhir-swagger --fhir_url "https://YOUR-FHIR-SERVER/baseDstu3" \
--conformance_path="/metadata?_format=application/json" \
--dstu3 --output swagger.json
[/shell]
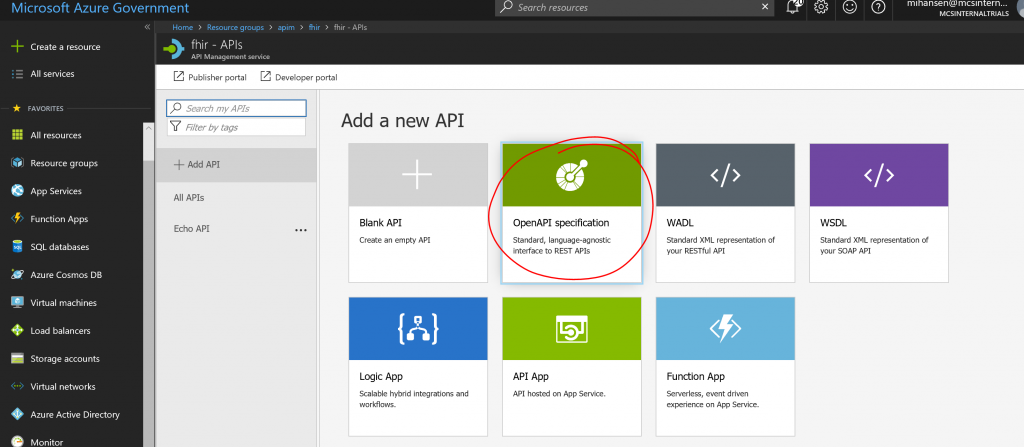
Once you have generated the swagger.json file, you can import it into APIM. First add a new OpenAPI (new name for Swagger):
In the pop-up box, select the definition from a file:
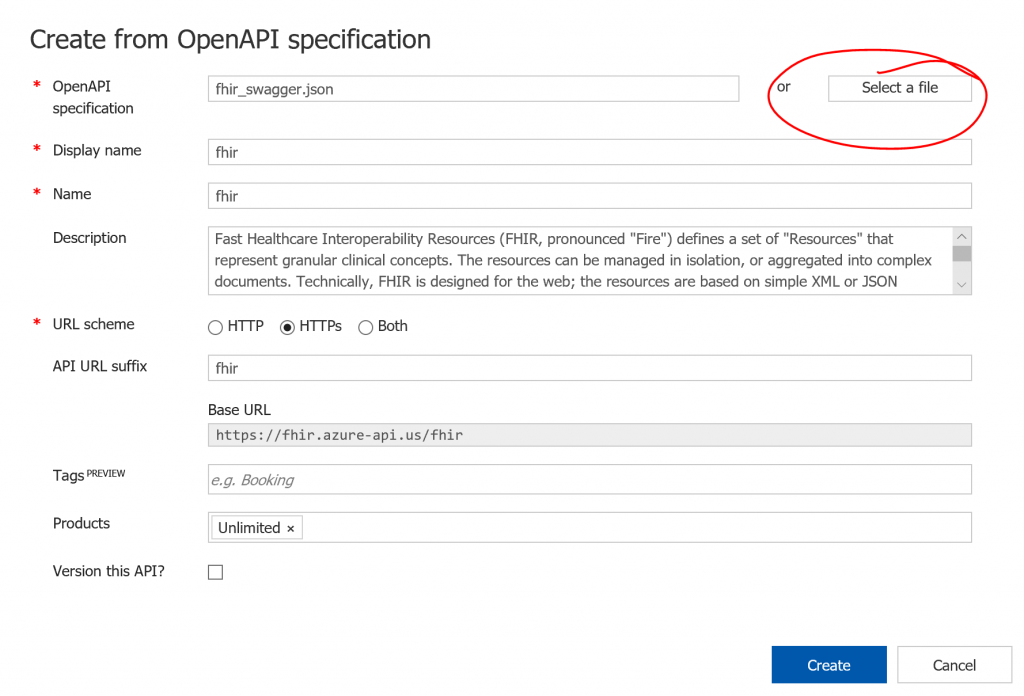
Most of the fields will prepopulate with the information from the Swagger definition, but you can add things such as display name, URL suffix, etc. In the example here, I have added it to the "Unlimited" product, which is one that is automatically provisioned with the APIM instance. In a real world scenario, you would add this to a more specific product.
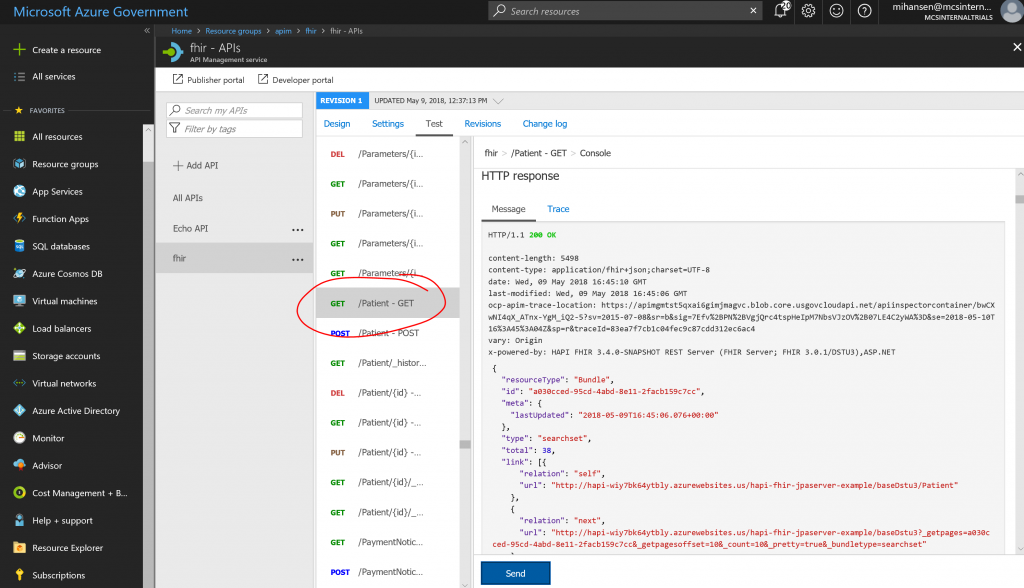
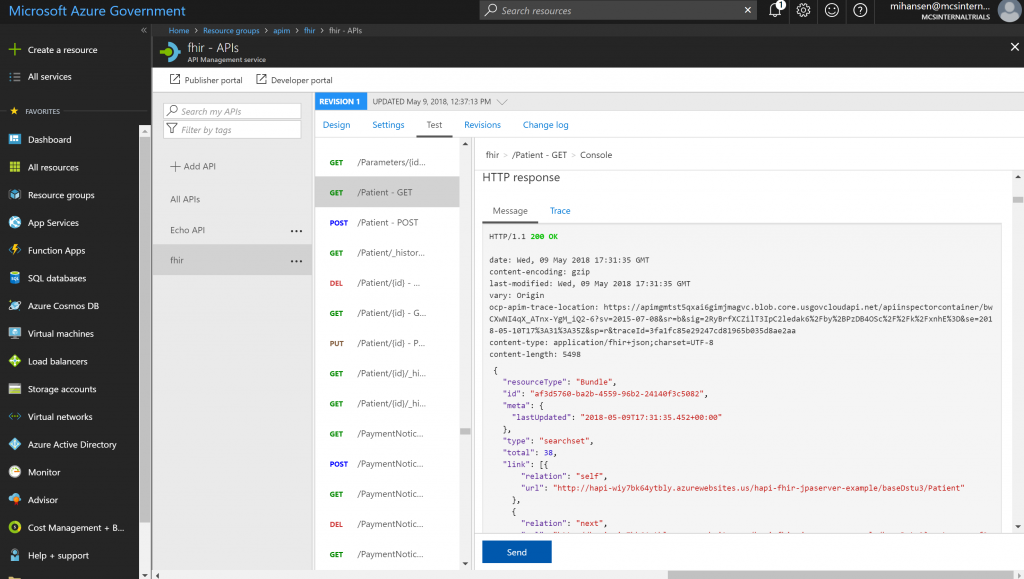
Once the API has been imported, you can test it in the portal. Here is an example of using the /Patient endpoint:
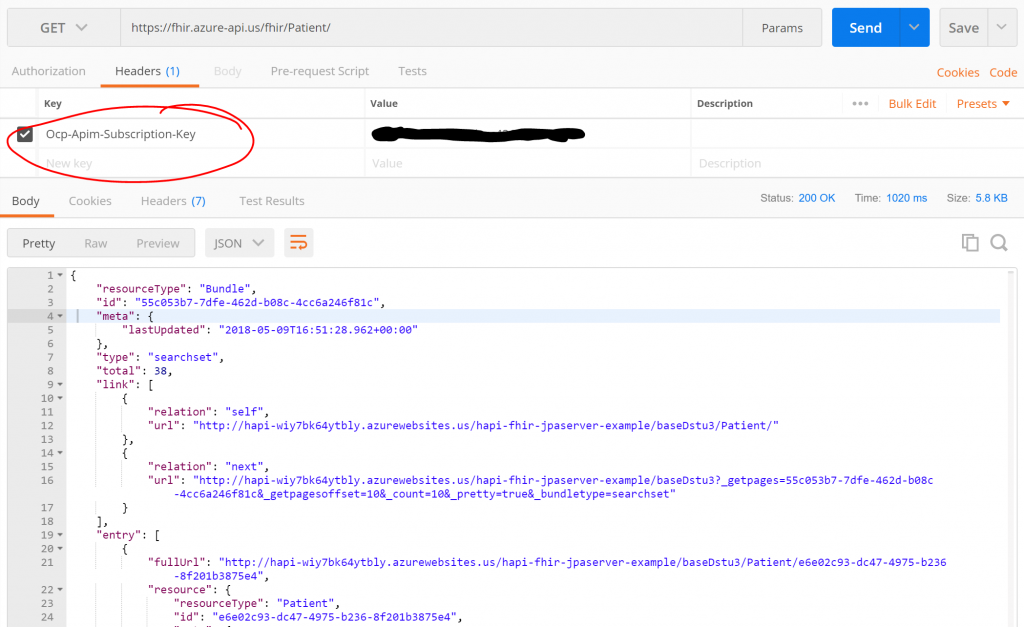
Users will be able to sign up to consume the API in the developer portal, e.g. in this case https://APIM-INSTANCE.portal.azure-api.us/ (.us because I am using Azure Government). Once subscribed to the product containing the API, the subscription key can be used in the HTTP header to get access. Here is an example of using Postman to access the FHIR API:
Now that we have the API in APIM, we can start leveraging some of the features. As an example, let's look at modifying the HTTP headers returned by the API. In the example above, we see that the x-powered-by is set, indicating that we are running a HAPI FHIR server on the backend. You may wish to change that. This can be done by changing the outbound policy:
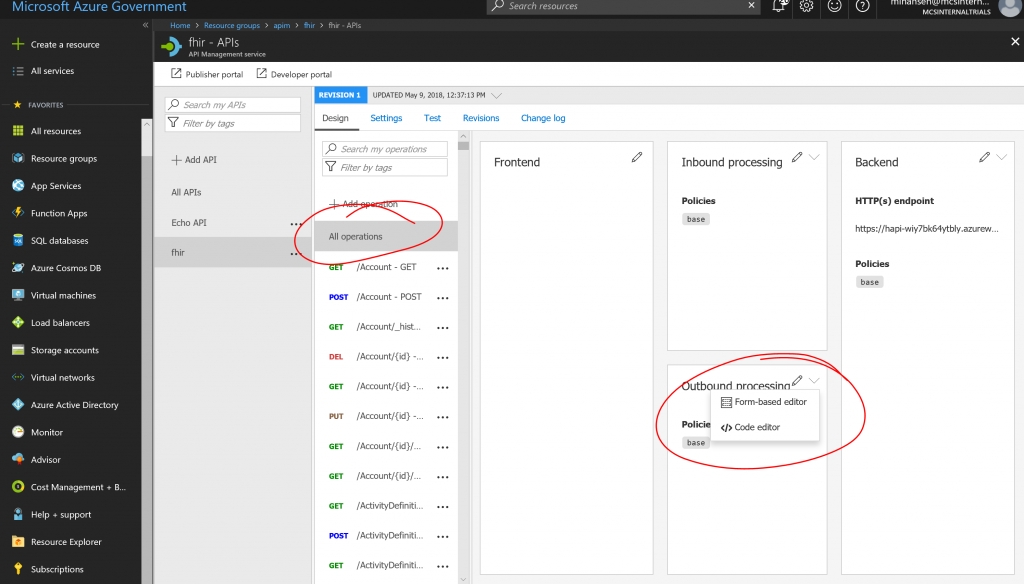
Use the "Code editor" and add a set-header transformation:
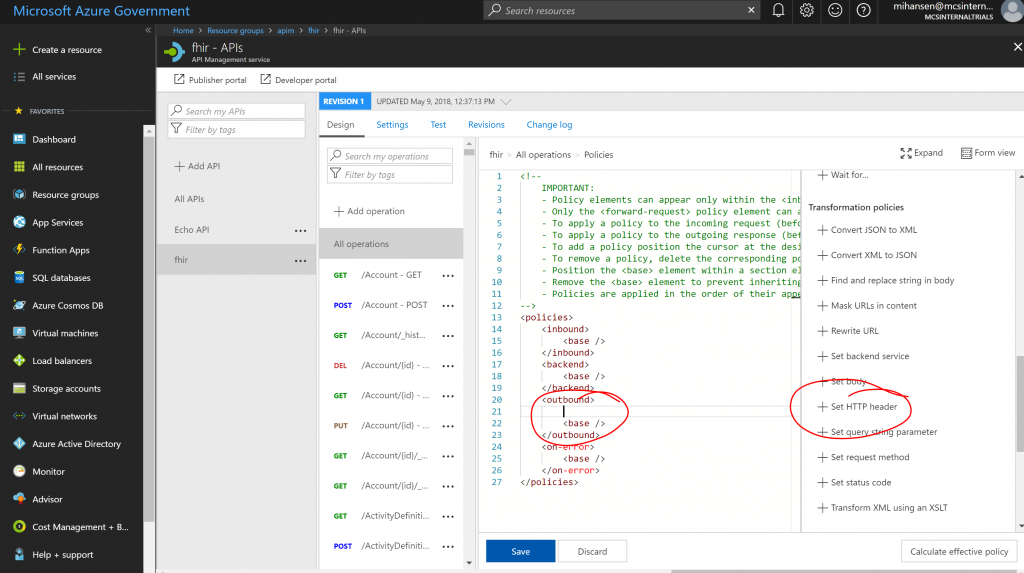
In this case, we will want the transformation to be:
[xml]
<set-header name="X-Powered-By" exists-action="delete" />
[/xml]
After saving the transformation, you can check the result in the portal (or Postman):
Another thing that you may need to do is replace URLs and other references on requests going to and from your FHIR server. Here is a simplified example of setting the policy to replace URLs going in and out:
[xml]
<policies>
<inbound>
<find-and-replace from="fhir.azure-api.us/fhir" to="FHIR-SERVER-APP-NAME.azurewebsites.us/hapi-fhir-jpaserver-example/baseDstu3" />
<base />
</inbound>
<backend>
<base />
</backend>
<outbound>
<set-header name="X-Powered-By" exists-action="delete" />
<find-and-replace from="FHIR-SERVER-APP-NAME.azurewebsites.us/hapi-fhir-jpaserver-example/baseDstu3" to="fhir.azure-api.us/fhir" />
<base />
</outbound>
<on-error>
<base />
</on-error>
</policies>
[/xml]
And that is it. You now have a FHIR server with API management on the front-end for your user management and policy needs. Let me know if you have questions/comments/suggestions.