Reverse Proxy with Basic Authentication in Azure Web App
I have previously discussed using a Web App in App Service Environment (ASE) as a reverse proxy with user authentication. In that scenario I used Azure Active Directory (AAD) App Service authentication (a.k.a. Easy Auth). In some cases, the AAD authentication may not be what you would like to use. Specifically, if the client is unable obtain a token from AAD.
In this blog post, I will describe configuring an Azure Web App to use Basic Authentication instead. This is really a 5 step process: 1) create a new web app, 2) Add an applicationHost.xtd file to enable the ARR functionality in the web app, 3) deploy a web app, which includes a module for basic authentication, 4) Set username and password, 5) create/modify rewrite rules in the web.config file for the web app. I have collected all the code, etc. needed in this GitHub repository: https://github.com/hansenms/BasicAuthReverseProxy.
There are a few different Basic Auth modules out there:
- https://github.com/hexasoftuk/Hexasoft.BasicAuthentication
- https://github.com/devbridge/AzurePowerTools/tree/master/Devbridge.BasicAuthentication
- https://github.com/1and1/WebApi.BasicAuth
- Etc.
The first one being inspired by the second one. In this example, I am using the first one from Hexasoft purely because I happened to find it first and it is available on NuGet. You can probably search on NuGet and find other modules. This is just an example.
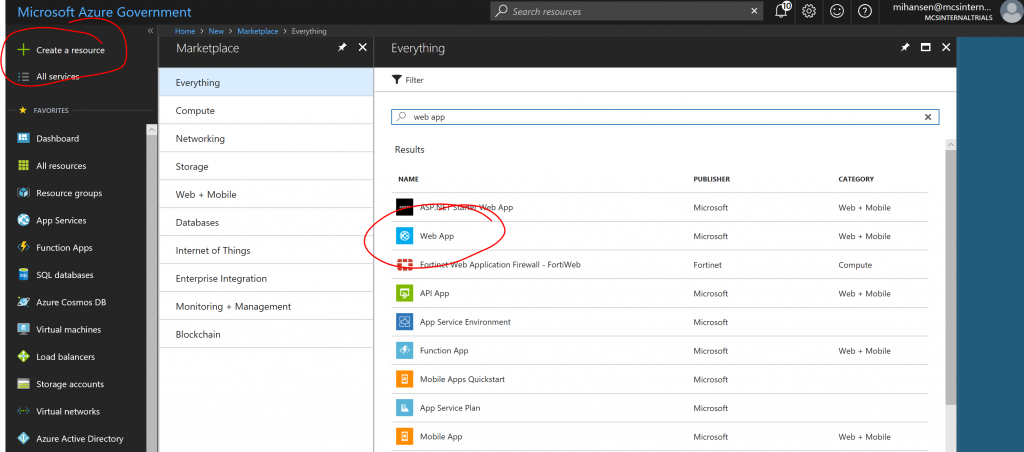
Step 1: Create a new Azure Web App
Use the Azure Portal to create a new Web App. Here I am using Azure Government, but Azure Commercial will work too. You can also use either a regular web app or a web app in an App Service Environment.
Step 2: Add applicationHost.xdt file
Open the Kudu console and add a filed called applicationHost.xdt in the D:\Home\site folder:
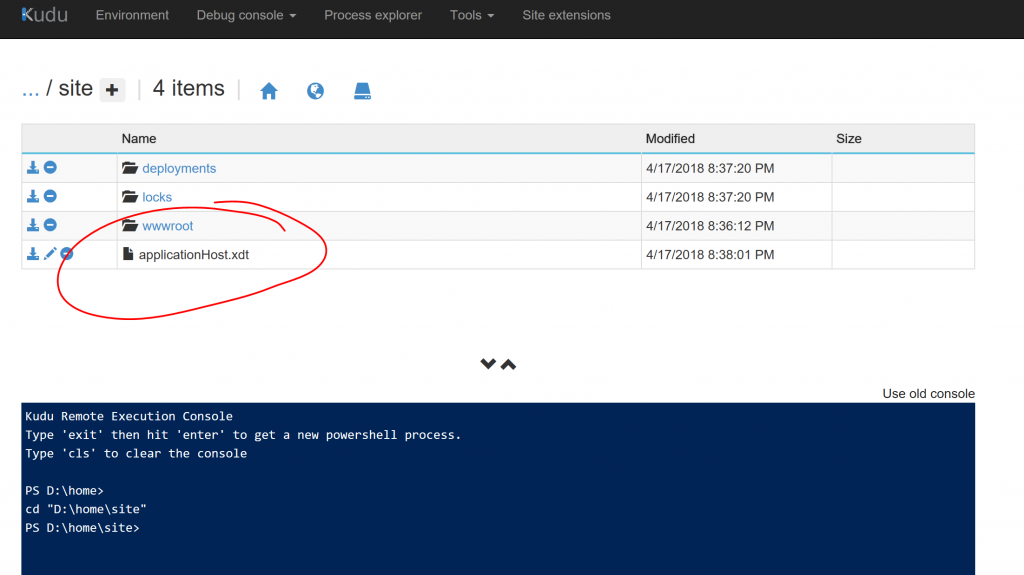
Edit the file and set the contents to:
[xml]
<?xml version="1.0"?>
<configuration xmlns:xdt="https://schemas.microsoft.com/XML-Document-Transform">
<system.webServer>
<proxy xdt:Transform="InsertIfMissing" enabled="true" preserveHostHeader="false" reverseRewriteHostInResponseHeaders="false" />
</system.webServer>
</configuration>
[/xml]
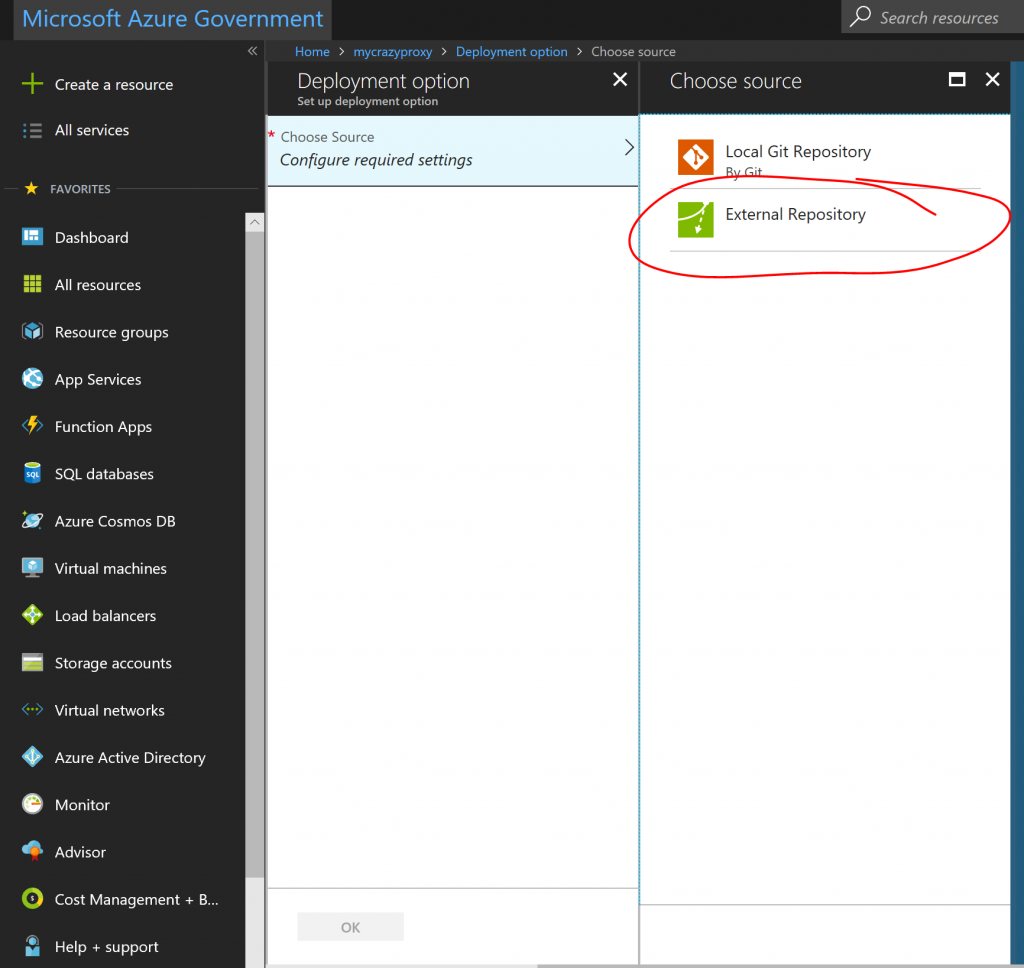
Step 3: Deploy web app with basic auth module
There are several ways to do this, but an easy way is to just add the git repository https://github.com/hansenms/BasicAuthReverseProxy as an external repository in the deployment options:
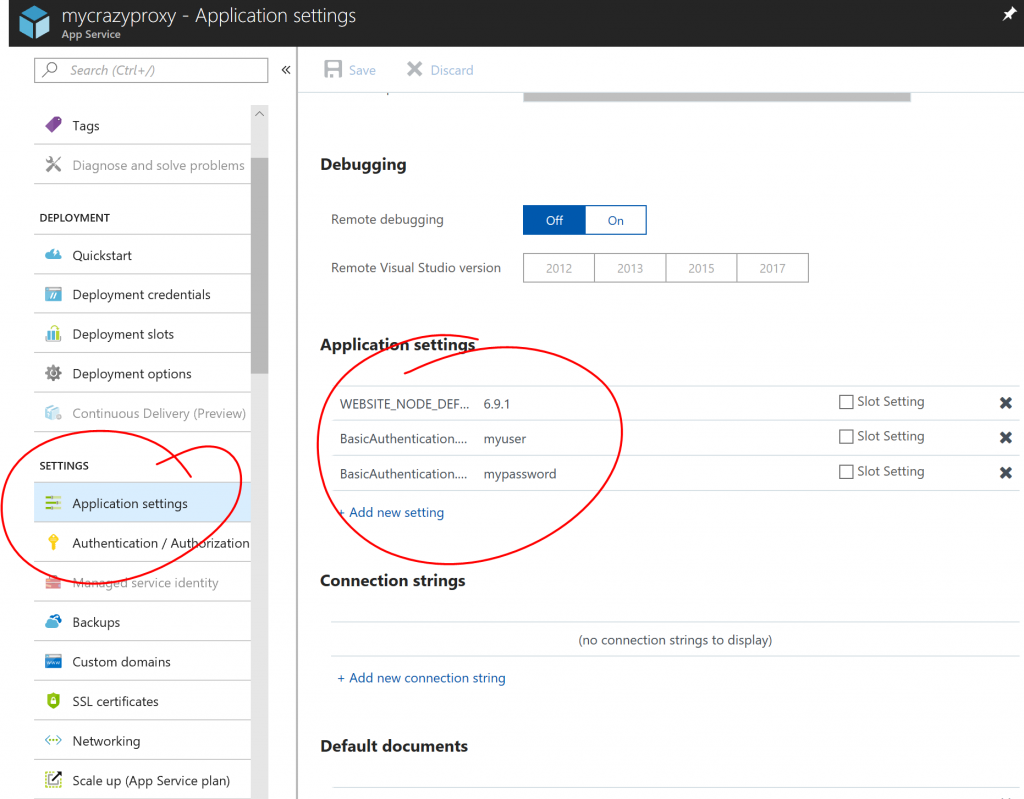
Step 4: Set username and password
Next use app settings to set BasicAuthentication.Username and BasicAuthentication.Password:
Step 5: Update/Modify/Create rewrite rules
The default deployment proxies YOUR-SITE.azurewebsite.us/msdn/* to blogs.msdn.microsoft.com and the same for technet/. But you can modify and add rules in the web.config file.
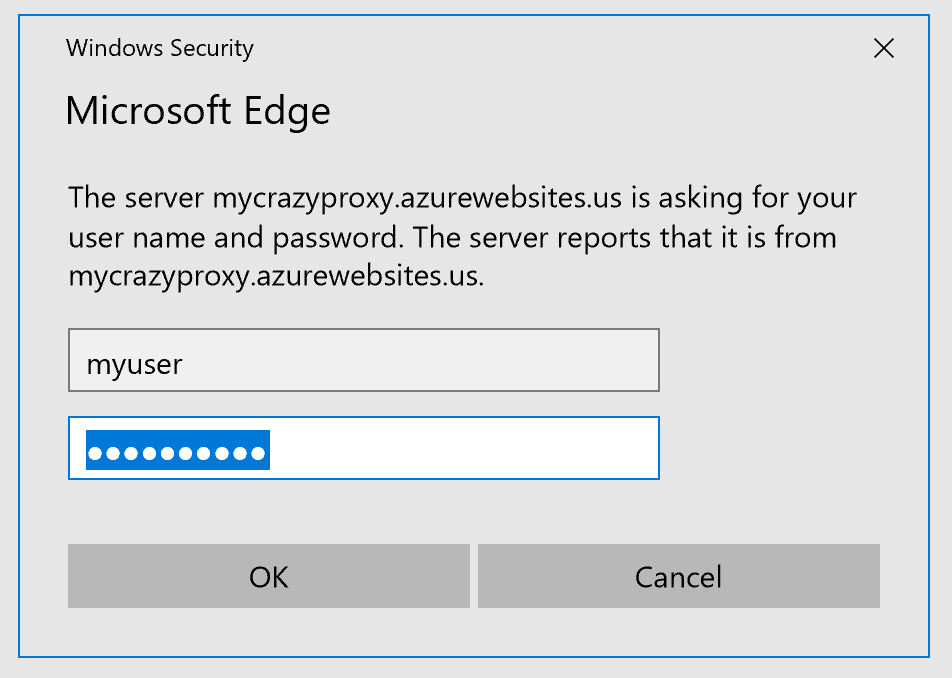
After deployment and setting passwords, you can try the proxy, you should be asked for credentials:
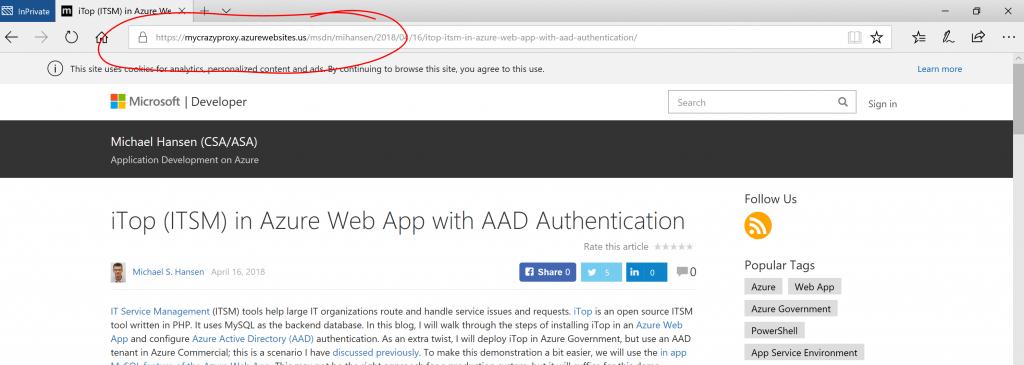
And then the request will be forwarded. Here is an example of proxying to one of my blog posts:
And that's it. You have now created a web app reverse proxy with basic authentication. Let me know if you have questions/comments/suggestions.