Azure Government Web App Authentication using Azure Commercial AAD - PowerShell Configuration
Azure Web Apps offer a generic mechanism for authentication and authorization. It is also know as "Easy Auth" because it is easy to enable and configure. It is available through the "Authentication/Authorization" pane in the Azure portal. Easy Auth offers authentication using a number of different identity providers such as Azure Active Directory (AAD), Facebook, Twitter, etc. Furthermore, it works without code modifications and for any type of application that can be deployed in a Web App (.NET, NodeJS, Java, PHP, etc.). In Azure Commercial, it is possible to use express configuration to setup AAD authentication for a Web App using the AAD tenant associated with the Web App subscription. Express mode will create the AAD Application Registration for you and configure the Web App.
For Azure Government users, it is common to have two AAD tenants, one in Azure Government and one in Azure Commercial (used for Office 365). Customers with Web Apps deployed in Azure Government often want to use the Azure Commercial tenant for authentication, since the organizational users are registered there. In such a scenario, some manual configuration is needed.
While it is perfectly fine to click through this configuration using the portal (https://portal.azure.us and https://portal.azure.com), there are scenarios where it would be desirable to automate the configuration, e.g. using PowerShell. Specifically, a user may have a large number of web sites to move and set up. In other cases, an automation with a script provides a good method for documenting the setup process and making it repeatable.
In this blog post, I will describe how to automate the process of setting up Easy Auth for an Azure Government Web App using an Azure Commercial AAD tenant. I will also provide some convenience scripts for the key steps.
The process is the same as one would follow for configuration through the portal:
- Create a Web App in Azure Government.
- Create and configure and AAD Application Registration in Azure Commercial.
- Add the AAD Application Registration details to the Web App.
Creating an Azure Government Web App using PowerShell
There would be many sources of documentation for this, but I will repeat it here for completeness. Creating a Web App consists of three steps (after logging into the Azure Subscription): 1) Creating a Resource Group to hold the Web App, 2) Creating an App Service Plan, 3) Creating the Web App.
First log into Azure Government:
[ps]
Login-AzureRmAccount -Environment AzureUsGovernment
[/ps]
Create a Resource Group for holding the Web App and App Service Plan:
[ps]
New-AzureRmResourceGroup -Name AADAppAuthDemo -Location usgovvirginia
[/ps]
Create and App Service Plan and a Web App:
[ps]
$appServicePlan = New-AzureRmAppServicePlan -Name AADAppAuthDemoAsp -ResourceGroupName AADAppAuthDemo -Tier Basic -Location usgovvirginia
$webApp = New-AzureRmWebApp -ResourceGroupName AADAppAuthDemo -AppServicePlan $appServicePlan.Id -Name AADAppAuthDemoSite -Location usgovvirginia
[/ps]
You can capture the home page URL of the Web App and browse to it with something like:
[ps]
$webAppUrl = "https://" + $webApp.HostNames[0]
Start-Process -FilePath $webAppUrl
[/ps]
Creating an Azure Commercial AAD Application Registration using PowerShell
Creating the AAD App Registration is not as trivial as one might imagine. Let's look at why. The Azure PowerShell Module has a command New-AzureRmADApplication, which can be used to create a new App Registration in AAD. However, it does it in a way that is different from you when you create a new App Registration using the portal. If you create the App Registration using the portal, the default behavior is to include "Windows Azure Active Directory" API access in the "Required Permissions" section:
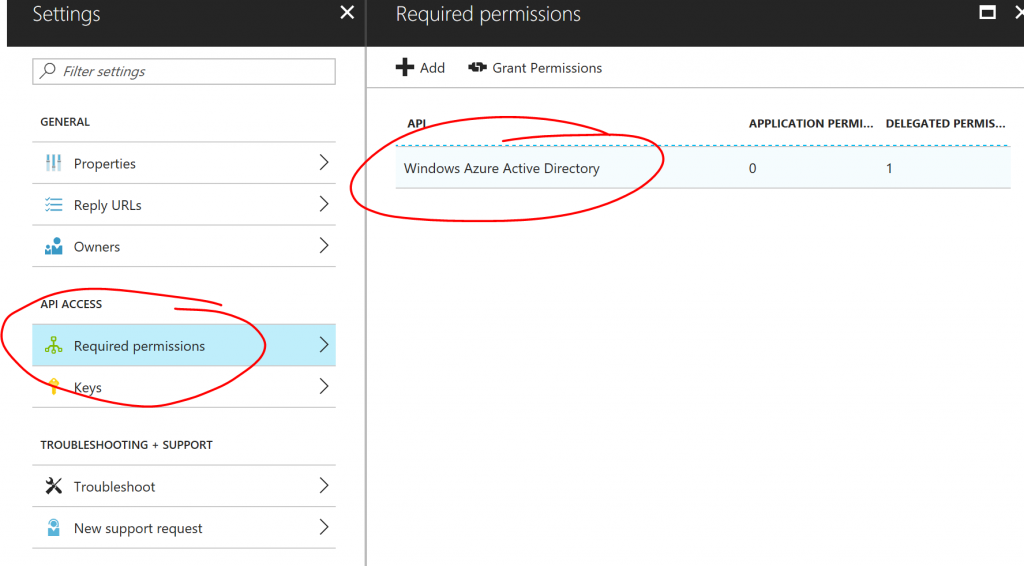
The scope of the delegated permissions is "user.read", which is sufficient to sign in as the user and read the basic profile of the user, which is what an application would need in order to authenticate against the AAD. If instead you use the New-AzureRmADApplication command to create the App Registration, no "Required Permissions" are added. That command does not offer any interface that would allow us to specify which permissions to add. One could of course go and add those in the portal later, but since we are aiming to automate this whole process, we need to find a way to do this in PowerShell.
To get the required scripting interface to what we would like to do, we need to install the AzureAD PowerShell module. If you have not installed this, you can open a PowerShell as Administrator and type:
[ps]
Install-Module AzureAD
[/ps]
This module offers the command New-AzureADApplication, which accepts an argument called "RequiredResourceAccess" and using this argument, we can specify which resources this App Registration will have access too. We quickly get into the weeds when we look at the data types for this argument, but for the purposes of scripting this, we just need to know that RequiredResourceAccess will take a list of objects, where each object represents one of the APIs that the registration needs access too. Each of these objects contains a list of scopes that will be needed in that API. I have written a script that will create the App Registration and add AAD access. In the script on GitHub.com, I have included some comments on how to find GUIDs for different resources and scopes. The end result is a script that looks like this:
[ps]
# Full script listing with information on how to locate GUIDs:
# https://github.com/hansenms/psscripts/blob/master/CreateAppRegForAADAuth.ps1
param
(
[Parameter(Mandatory=$true,Position=1)]
[System.Uri]$SiteUri,
[Parameter(Mandatory=$false,Position=2)]
[ValidateSet("AzureCloud","AzureUsGovernment","AzureGermanCloud","AzureChinaCloud")]
[String]$Environment = "AzureCloud",
[Parameter(Mandatory=$false,Position=3)]
[String]$Password
)
$aadConnection = Connect-AzureAD -AzureEnvironmentName $Environment
if ([string]::IsNullOrEmpty($Password))
{
$Password = [System.Convert]::ToBase64String($([guid]::NewGuid()).ToByteArray())
}
$Guid = New-Guid
$startDate = Get-Date
$PasswordCredential = New-Object -TypeName Microsoft.Open.AzureAD.Model.PasswordCredential
$PasswordCredential.StartDate = $startDate
$PasswordCredential.EndDate = $startDate.AddYears(1)
$PasswordCredential.Value = $Password
$displayName = $SiteUri.Host
[string[]]$replyUrl = $SiteUri.AbsoluteUri + ".auth/login/aad/callback"
$reqAAD = New-Object -TypeName "Microsoft.Open.AzureAD.Model.RequiredResourceAccess"
$reqAAD.ResourceAppId = "00000002-0000-0000-c000-000000000000"
$delPermission1 = New-Object -TypeName "Microsoft.Open.AzureAD.Model.ResourceAccess" -ArgumentList "311a71cc-e848-46a1-bdf8-97ff7156d8e6","Scope" #Sign you in and read your profile
$reqAAD.ResourceAccess = $delPermission1
$appReg = New-AzureADApplication -DisplayName $displayName -IdentifierUris $SiteUri -Homepage $SiteUri -ReplyUrls $replyUrl -PasswordCredential $PasswordCredential -RequiredResourceAccess $reqAAD
$loginBaseUrl = $(Get-AzureRmEnvironment -Name $Environment).ActiveDirectoryAuthority
#Small inconsistency for US gov in current AzureRm module
if ($loginBaseUrl -eq "https://login-us.microsoftonline.com/") {
$loginBaseUrl = "https://login.microsoftonline.us/"
}
$issuerUrl = $loginBaseUrl + $aadConnection.Tenant.Id.Guid + "/"
return @{ 'IssuerUrl' = $issuerUrl
'ClientId' = $appReg.AppId
'ClientSecret' = $Password
}
[/ps]
Using this script, you can create the App Registration in Azure Commercial with something like:
[ps]
$appReg = .\CreateAppRegForAADAuth.ps1 -Environment AzureCloud -SiteUri $webAppUrl
[/ps]
You will be prompted for your credentials. You can inspect the $appReg variable and see the details of the app registration. It would look like this (secret details masked with Xs):
[ps]
$appReg
Name Value
---- -----
IssuerUrl https://login.microsoftonline.com/xxxxxxx-xxxx-xxxx-xxxx-xxxxxxxx/
ClientId fb399eaf-xxxx-xxxx-xxxx-xxxxxxx
ClientSecret XXXXXXXXXXXXXXXXXXXXXX=
[/ps]
Adding AAD App Registration details to Web App using PowerShell
Final step is to add the App Registration details created in Azure Commercial to the Web App in Azure Government. There is also no dedicated command for this operation in the AzureRm module, but we can combine a few generic resource manipulation commands to achieve the results that we want. I have written a convenience script to do this, which you can also find on GitHub. The script is repeated here for completeness:
[ps]
param(
# Parameter help description
[Parameter(Mandatory=$true,Position=1)]
[string]$ResourceGroupName,
[Parameter(Mandatory=$true,Position=2)]
[string]$WebAppName,
[Parameter(Mandatory=$true,Position=3)]
[string]$ClientId,
[Parameter(Mandatory=$true,Position=4)]
[string]$ClientSecret,
[Parameter(Mandatory=$true,Position=4)]
[string]$IssuerUrl,
[Parameter(Mandatory=$false,Position=5)]
[ValidateSet("AzureCloud","AzureUsGovernment","AzureGermanCloud","AzureChinaCloud")]
[String]$Environment = "AzureCloud"
)
$azcontext = Get-AzureRmContext
if ([string]::IsNullOrEmpty($azcontext.Account) -or
!($azcontext.Environment.Name -eq $Environment))
{
Login-AzureRmAccount -Environment $Environment
}
$azcontext = Get-AzureRmContext
$authResourceName = $WebAppName + "/authsettings"
$auth = Invoke-AzureRmResourceAction -ResourceGroupName $ResourceGroupName -ResourceType Microsoft.Web/sites/config -ResourceName $authResourceName -Action list -ApiVersion 2016-08-01 -Force
$auth.properties.enabled = "True"
$auth.properties.unauthenticatedClientAction = "RedirectToLoginPage"
$auth.properties.tokenStoreEnabled = "True"
$auth.properties.defaultProvider = "AzureActiveDirectory"
$auth.properties.isAadAutoProvisioned = "False"
$auth.properties.clientId = $ClientId
$auth.properties.clientSecret = $ClientSecret
$auth.properties.issuer = $IssuerUrl
New-AzureRmResource -PropertyObject $auth.properties -ResourceGroupName $ResourceGroupName -ResourceType Microsoft.Web/sites/config -ResourceName $authResourceName -ApiVersion 2016-08-01 -Force
[/ps]
Using the App Registration from above, you can set Web App authentication with a command like this:
[ps]
.\SetAADAuthWebApp.ps1 -Environment AzureUsGovernment -ResourceGroupName AADAppAuthDemo -WebAppName AADAppAuthDemoSite -ClientId $appReg.ClientId -ClientSecret $appReg.ClientSecret -IssuerUrl $appReg.IssuerUrl
[/ps]
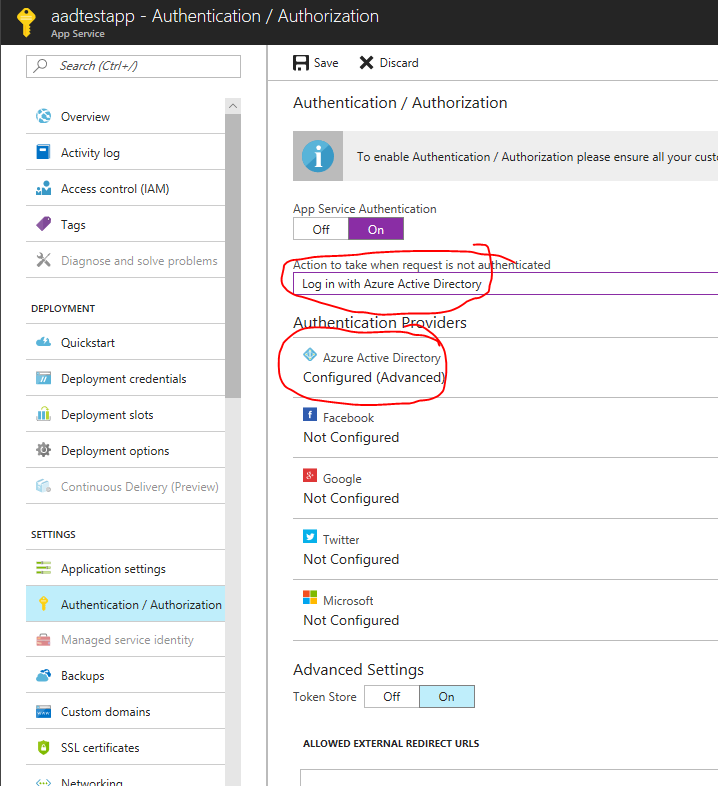
Optionally, you can go in the portal and check that the web app now has authentication configured.
Finally, you can navigate to the Azure Government Web App:
[ps]
Start-Process -FilePath $webAppUrl
[/ps]
You should be prompted for credentials (if you are not already signed in) and you will then be asked if it is OK for the application to sign in on your behalf and read your profiles:
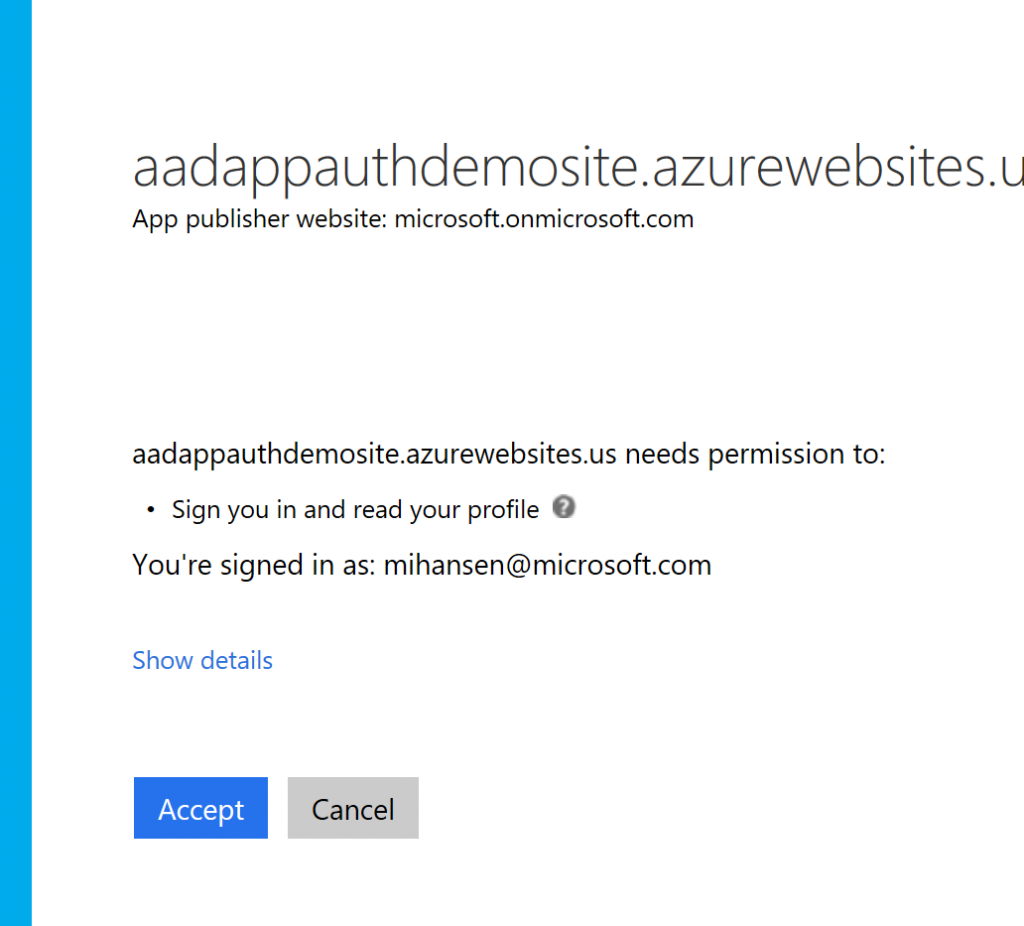
Once you accept, you will be logged in and can access the website.
And that's it. That is how you can use PowerShell to create a Web App in Azure Government and configure AAD authentication using a tenant in Azure Commercial.
Let me know if you have comments or questions.