Running ColdFusion in Azure WebApp
This tutorial will show you how to deploy Adobe ColdFusion in an Azure Web App. We will walk through setting up a development environment on a local machine and how to deploy developed ColdFusion site to a Web App. The basic steps are:
- Install Apache Tomcat Server
- Install ColdFusion JEE Configuration
- Deploy ColdFusion
*.warfile directly to local Tomcat server. - Create a suitable Azure Web App and App Service Plan for hosting ColdFusion server.
- Deploy ColdFusion
*.warfile to Azure Web App. - Develop a local ColdFusion site and use ColdFusion packaging utility to create custom
*.warfile. - Deploy custom ColdFusion
*.warfile to Azure Web App.
Some or all of these steps may be useful or relevant for your development scenario. This tutorial uses a Windows machine as installation and development host, but the instructions should be generic enough that they are easily adapted to Linux or Mac hosts.
Installing Apache Tomcat
It is not technically necessary to have an on-premises deployment of Tomcat for running ColdFusion, but in this tutorial I am including one to show that you can have an on-premises development environment and deploy to a similar environment in the cloud. This is a workflow that many are familiar with so I wanted to make sure that is included. To get a Tomcat server up and running quickly:
- Download the Windows Service Installer from https://tomcat.apache.org/download-80.cgi (or try a different version if you prefer).
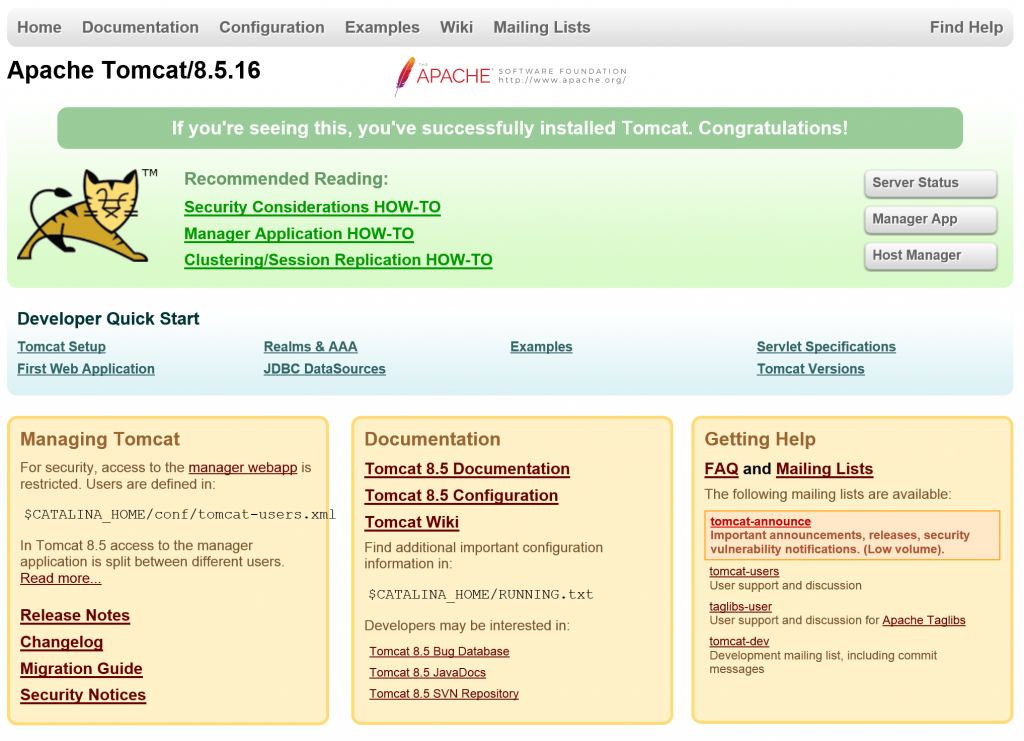
- Run the installer and verify that server is running by pointing your browser to https://localhost:8080/
After the installation, you should be able to find the tomcat webapps folder in C:\Program Files (x86)\Apache Software Foundation\Tomcat 8.5\webapps if you have installed in the standard location.
Installing ColdFusion JEE Configuration
The installation for installing the JEE configuration of ColdFusion can be found at https://helpx.adobe.com/coldfusion/installing/installing-the-jee-configuration.html. This tutorial installs a 30-day trial version of ColdFusion, which can be obtained from here. In a production scenario, you will need appropriate license keys as indicated in the installation instructions.
- Run the installer
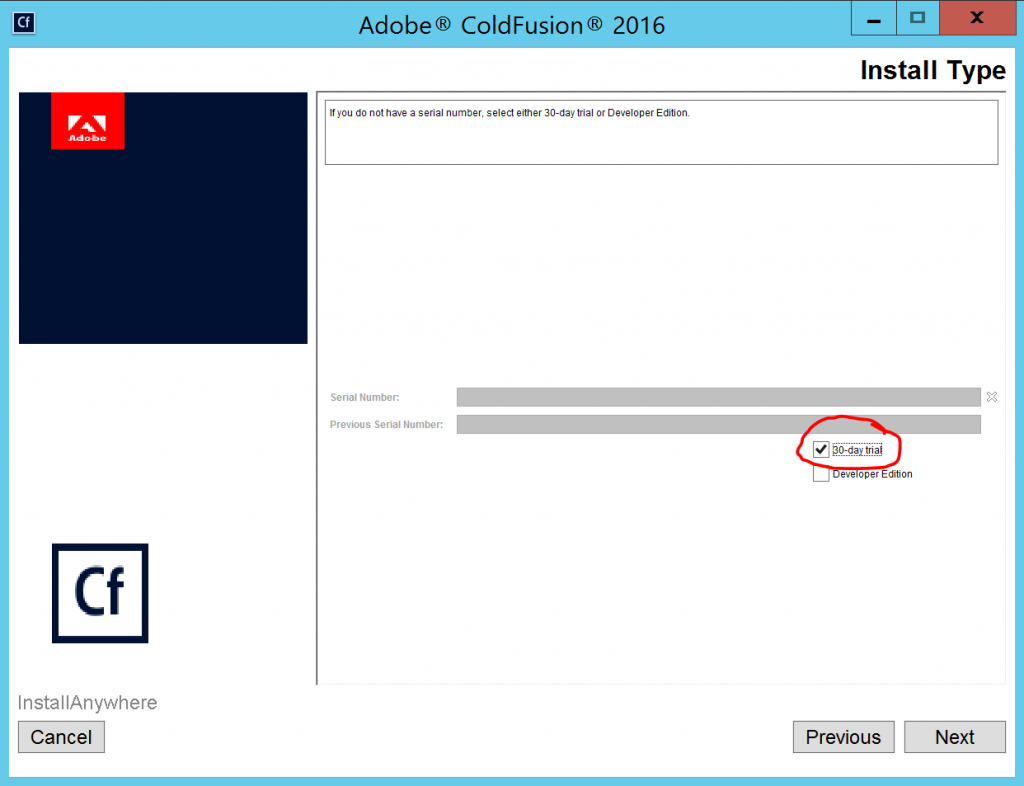
ColdFusion_2016_WWEJ_win64.exe. Select the following settings:- Select the 30-day trial option (unless you have a serial number):
- Select the JEE configuration with the
*.warfile: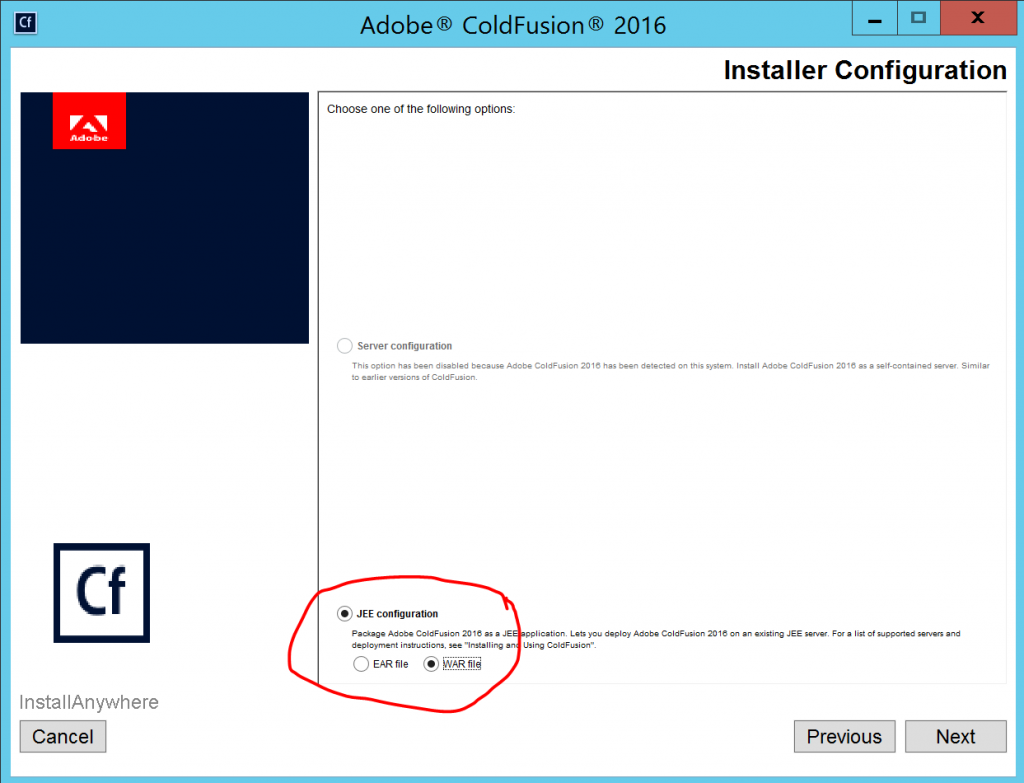
- Select Production profile:
- Select install location (make a note of where you install):
- For other options, you can just select default values. Create an administrator password and make a note of it.
- Select the 30-day trial option (unless you have a serial number):
- After installation locate the
cfusion.warfile. If you picked the default installation location, it should be atC:\ColdFusion2016\cfusion.war. Copy this file toC:\Program Files (x86)\Apache Software Foundation\Tomcat 8.5\webapps\and you should see that the Tomcat server expands the*.warfile and creates acfusionfolder.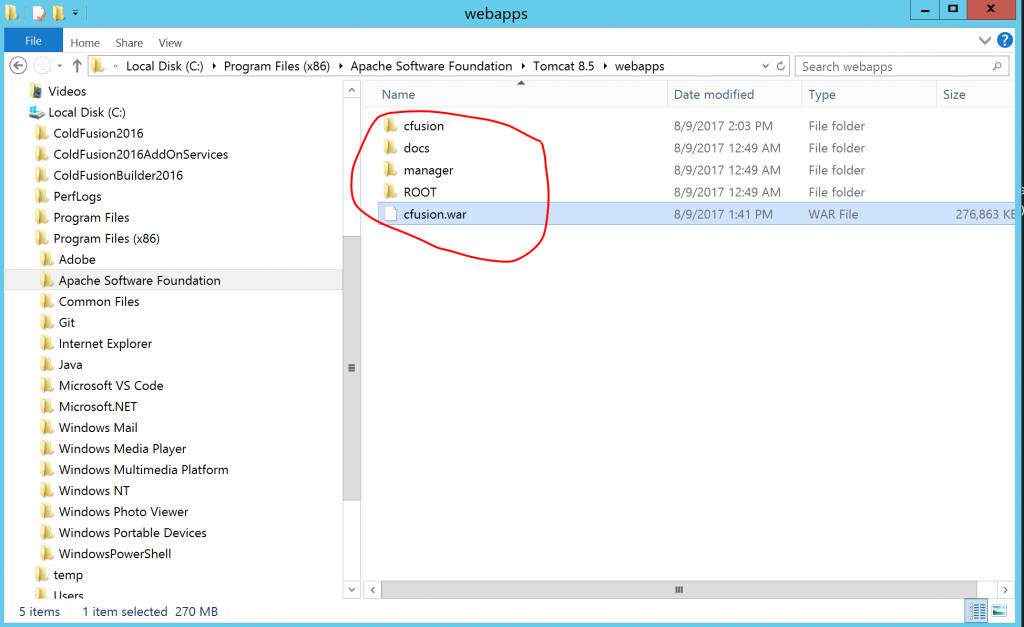
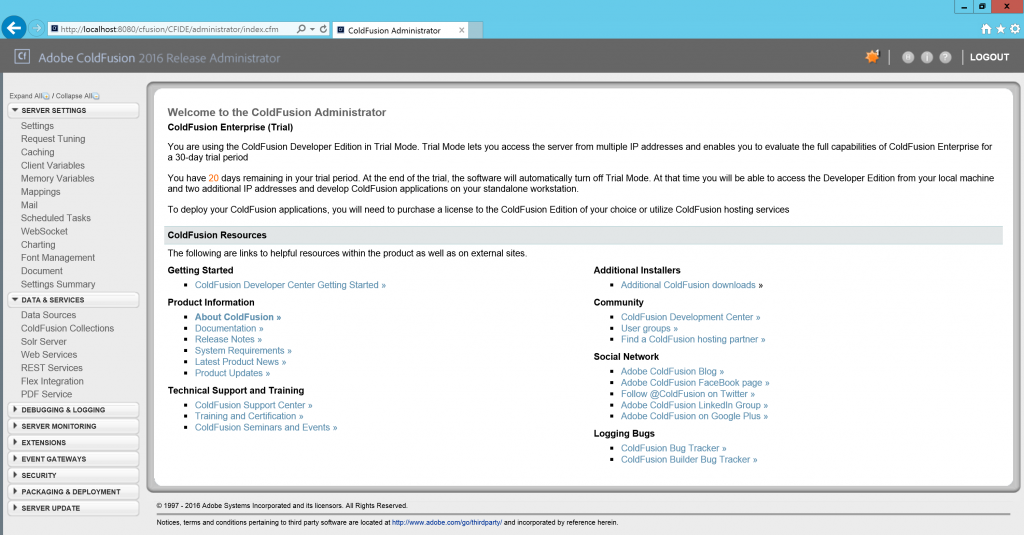
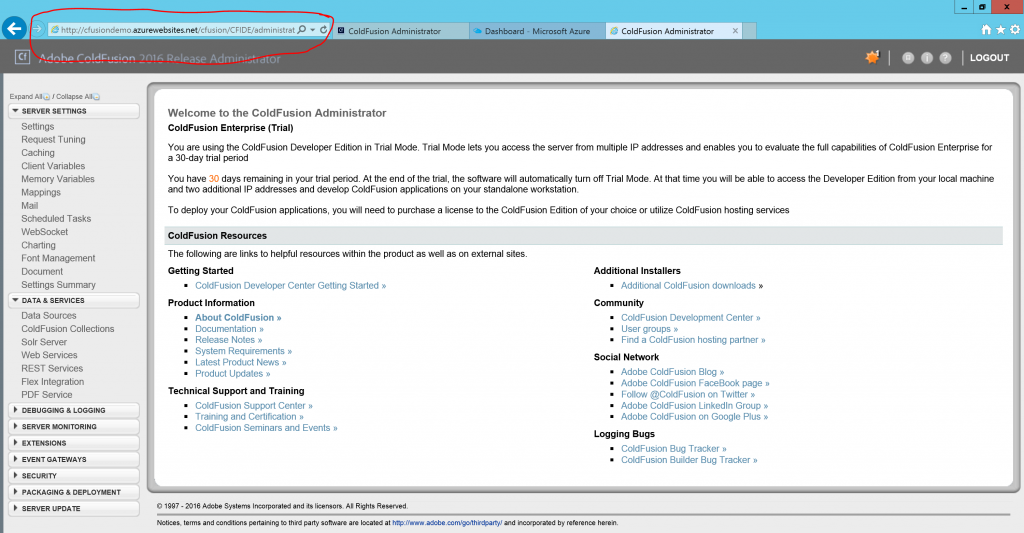
- Point your browser to https://localhost:8080/cfusion/CFIDE/administrator/index.cfm and log in with the admin account that you created during installation. After logging in, the server will finish setup and should redirect you to the administrators interface. You may have to log in again. It should look something like:
Deploying the JEE ColdFusion Configuration in Azure
Please note that when deploying ColdFusion in Azure (or any other platform for that matter) you should make sure that your license covers the deployment strategy that you choose. Azure App Services can automatically scale (up and out) and adding more app service instances may well require you to get more licenses and thus increase costs. In this tutorial we are just using a trial license.
To set up a Web App appropriate for running ColdFusion:
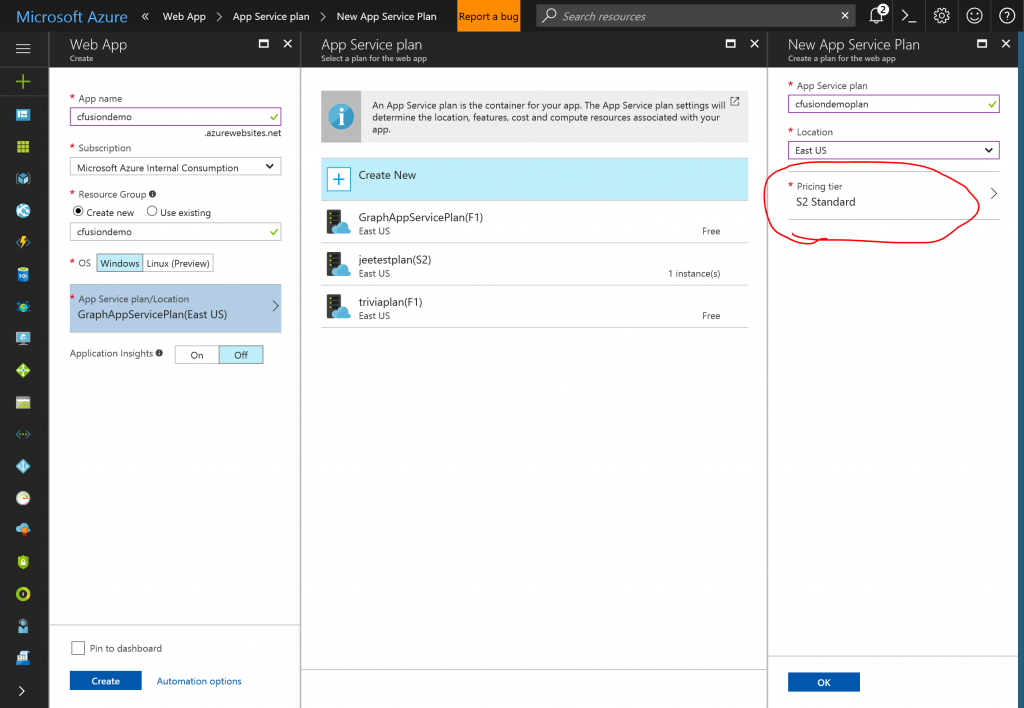
- Create a new Azure Web App with a service plan large enough to support an application like ColdFusion. In my experience, you need at least an S2 plan, but you can experiment depending on the demands of your application:
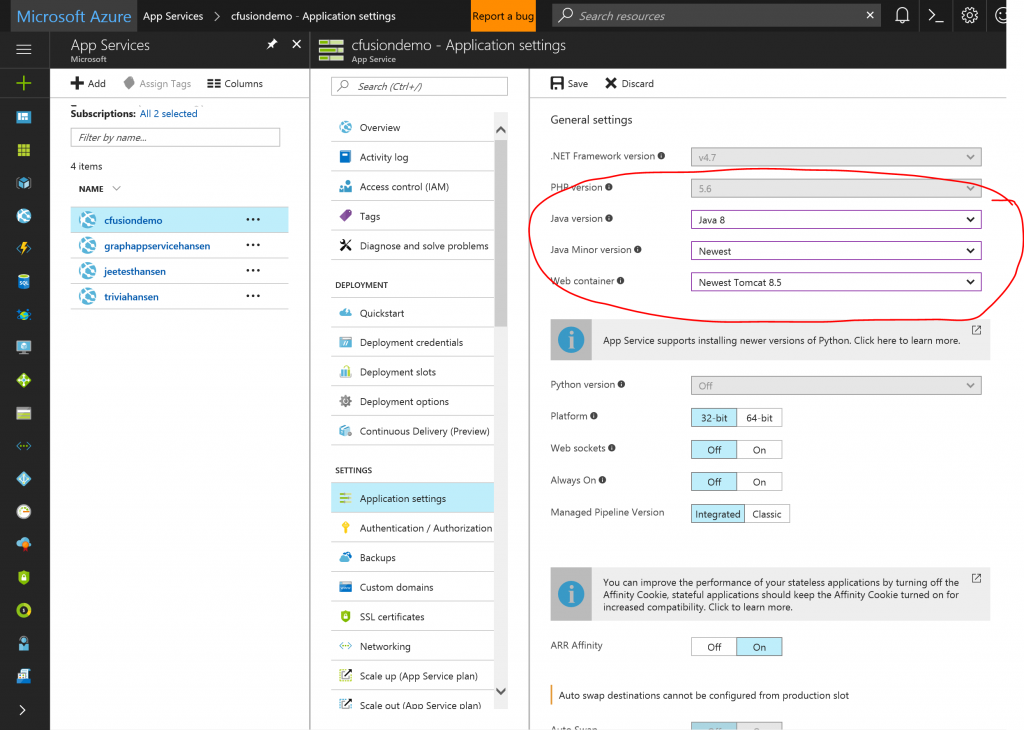
- After the Web App has deployed successfully, go to the settings pane and change it to a Java application with Tomcat:
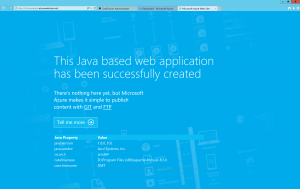
- Validate that the Java webapp is running. You should see something like:
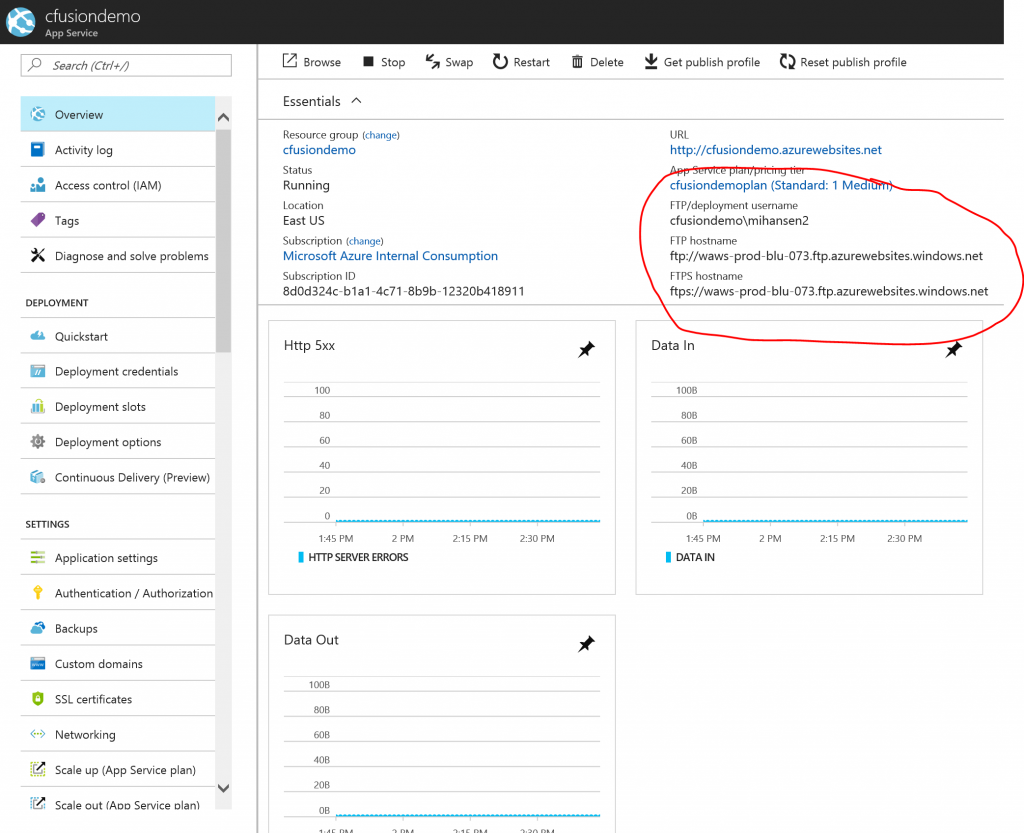
- Locate the FTP login details on the overview pane for the webapp:
- Use the FTP login details to connect to the webapp (with your favorite FTP client) and upload the
cfusion.warfile to/site/wwwroot/webappson the Web App. The process of expanding the*.warfile should be similar to the local installation of Tomcat described above. - Give the process a bit of time. (How much time will depend on the performance of the App Service Plan you selected). Then point your browser to the ColdFusion admin interface on the Web App similar to what you did on the local Tomcat server. You should now see the ColdFusion administrators interface in your Web App:
Develop a local ColdFusion Site and Deploy to Azure Web App
On your local Tomcat server create a file
C:\Program Files (x86)\Apache Software Foundation\Tomcat 8.5\webapps\cfusion\index.cfmwith the following content:<html>
<body>
<cfset message = "World" />
<cfoutput>Hello <b>#message#</b>!</cfoutput>
</body>
</html>
Point your browser to https://localhost:8080/cfusion/index.cfm and you should see your ColdFusion page is working:

You could just FTP this page to your Web App, but we will use the ColdFusion server packaging tool to package your page and the ColdFusion server itself in a single
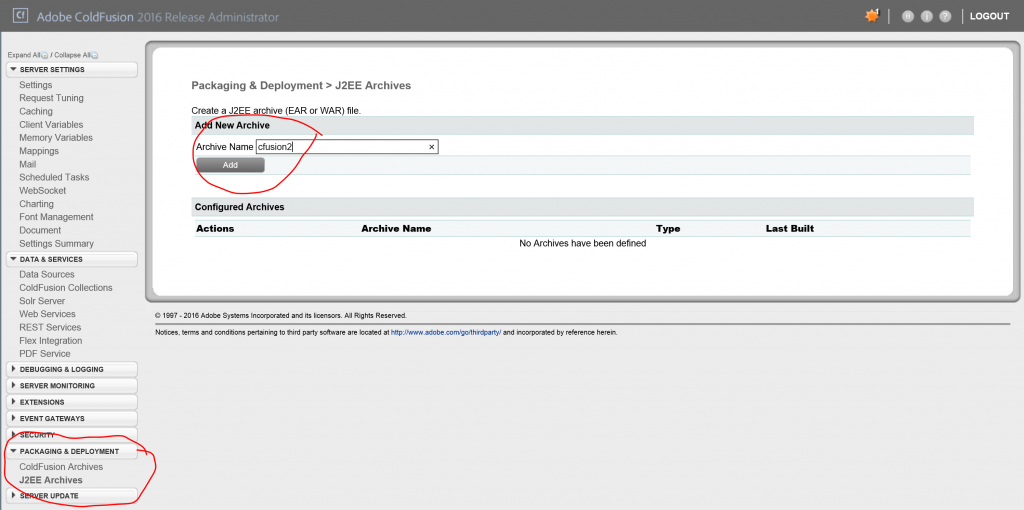
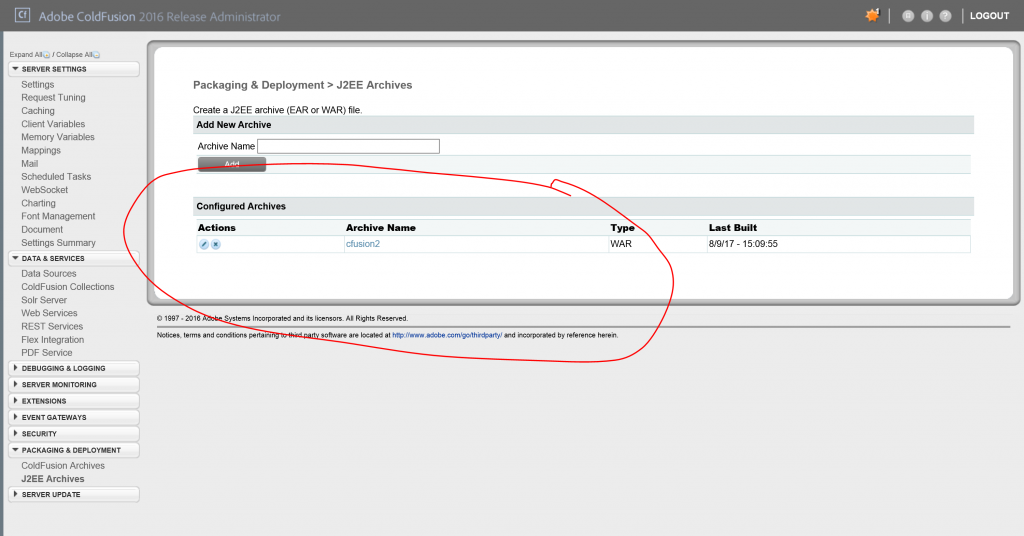
*.warfile that you can deploy in a Web App. Follow these steps:- Go to the ColdFusion administrators page and add a new package:
- Choose an application director to include in the package. In this case, the directory is
C:/Program Files (x86)/Apache Software Foundation/Tomcat 8.5/webapps/cfusion/. You can also decide whether to include data sources and whether the administrative interface should be available: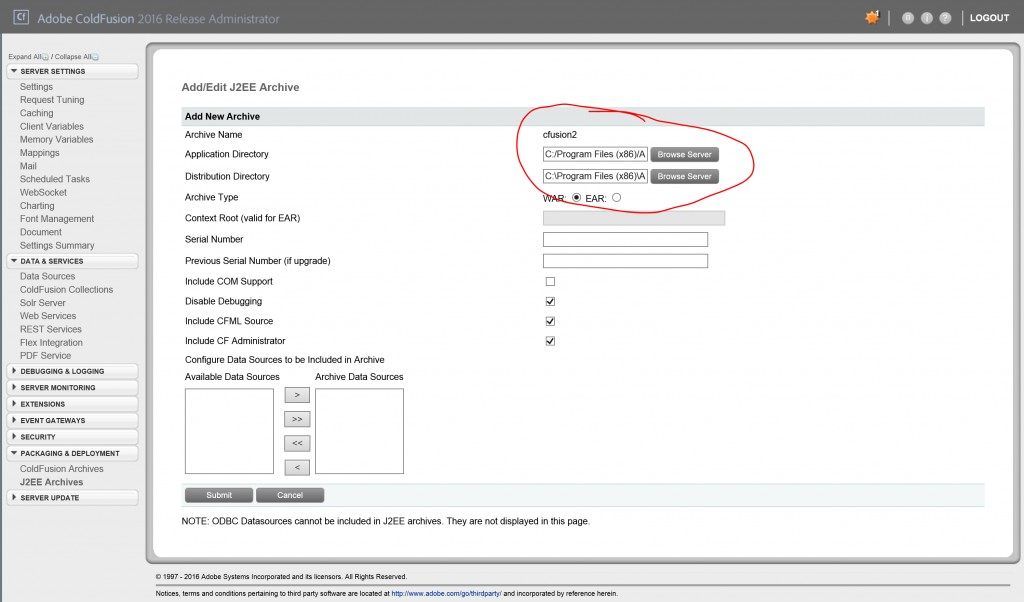
- When the package is done, it should show up in the list of packages:
- Go to the ColdFusion administrators page and add a new package:
Upload the generated package to the Azure Web App. You can find it at
C:\Program Files (x86)\Apache Software Foundation\Tomcat 8.5\webapps\cfusion\WEB-INF\cfusion\packages\cfusion2\cfusion2.war.After the wait for the unpacking of the
*.warfile, you should be able to point your browser to your Web Apps new ColdFusion site: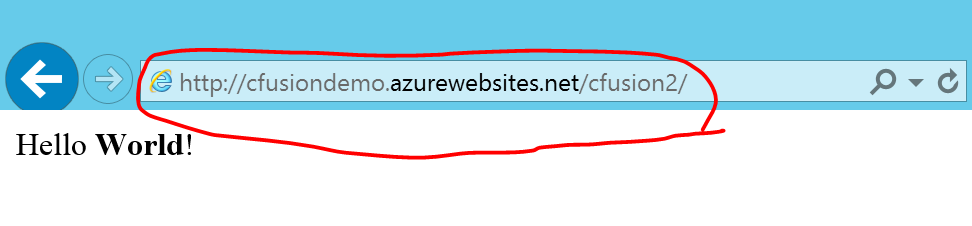
That is it, you have deployed ColdFusion on an Azure Web App. Let me know if this is useful to you or if you have comments.