From the MVPs: Windows Intune 101
Here’s the 9th post in our series of guest posts by Microsoft Most Valued Professionals (MVPs). Since the early 1990s, Microsoft has recognized technology champions around the world with the MVP Award . MVPs freely share their deep knowledge, real-world experience, and impartial and objective feedback to help people enhance the way they use technology . Of more than 100 million users who participate in technology communities, around 4,000 are recognized as Microsoft MVPs.
This post is by Akfash Ahamed Abdul Latibu , who is a Windows Expert IT Pro MVP in Brunei. Thanks, Akfash!
Windows Intune is a cloud-based PC management solution for small- and medium-sized businesses. As an administrator, whether you’re in an office, a branch office, or at home, you can always manage your client computers from anywhere, anytime. Windows Intune provides a web-based management interface to administrators that can be accessed by any web browser that supports Microsoft Silverlight.
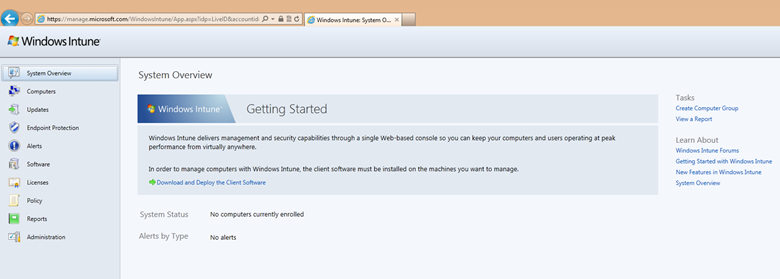
To access the administrator console, you will have to visit https://manage.microsoft.com/WindowsIntune/App.aspx and sign in using the administrative live id.
The Windows Intune client software that needs to be installed on client computers in order to manage them can be deployed either manually (machine by machine) or automatically by using a software deployment method such as SCCM, group Policy, etc.
To install the client software package:
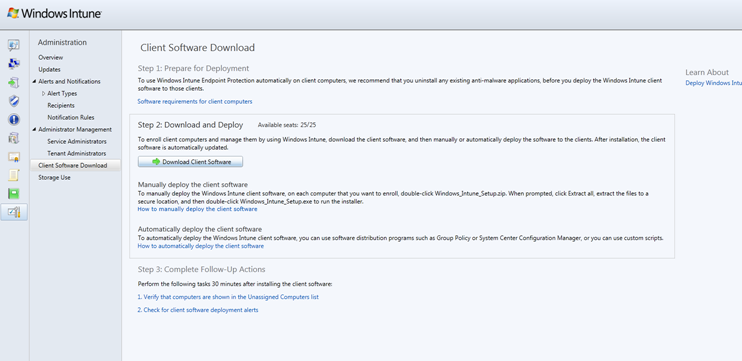
1. Click the Download And Deploy The Client Software link, which will take you to a page in the Administration workspace:
2. Click the Download Client Software button, and the download will start (a .zip file, around 16MB in size).
3. Extract the files, and run the Windows Intune Setup file.
4. Click Next.
5. Click Finish, and the Client Software deployment is done.
Once the client software is deployed, you’ll be able to see the client inside the Computers workspace under the Unassigned Computers group, which is the default group.
6. Once you’ve installed the client software on all your client computers that are to be managed, those computers will be shown under the Unassigned Computers group. You can then create different groups to meet your requirements and move the computers accordingly, for easy management.
a. You can create additional groups by right-clicking All Computers.
b. Then choose Create Computer Group.
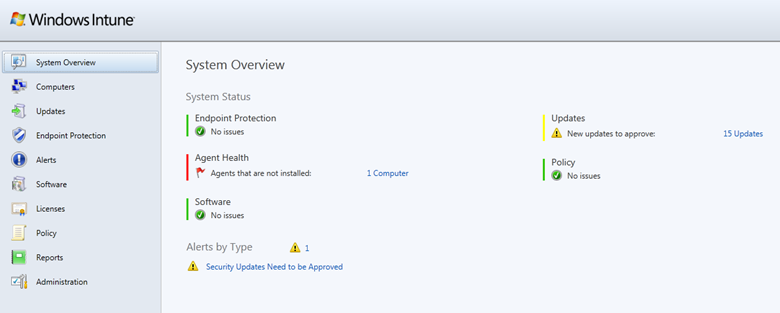
Windows Intune includes several workspaces, which let you manage different aspects of your client computers. For example, the System Overview workspace gives you a holistic view of the system status of all your clients.
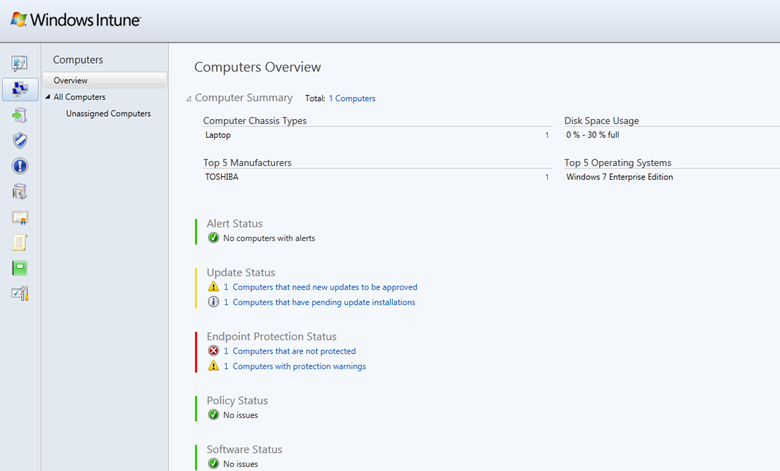
The Computers workspace provides details and insights about your client computers:
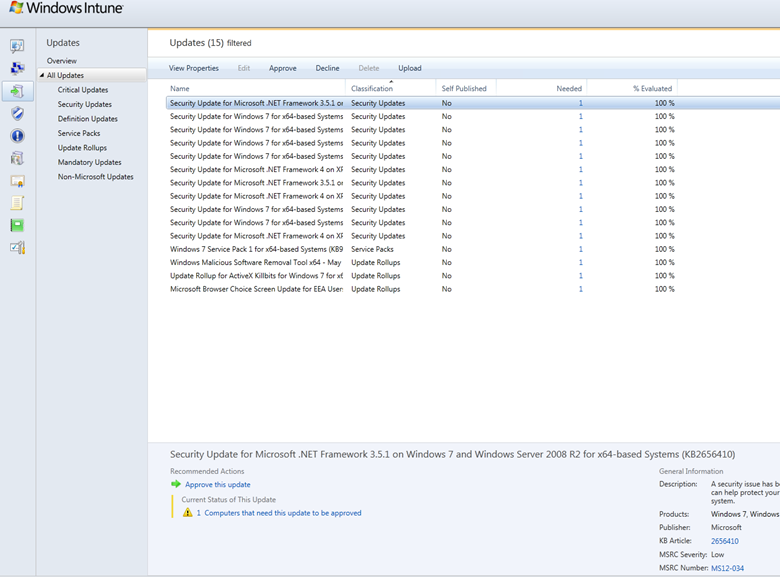
The Updates workspace provides the details of the updates that are available for your client computers:
Likewise, other workspaces enable certain key elements of computer management: the Endpoint Protection workspace, which helps protect all your client computers from malware; the Alerts, Software workspace, which lets you manage and deploy software packages to clients; and the Licenses, Policies, Reports and Administration workspace, via which you can modify your administrative settings, such as adding multiple administrator Live IDs, downloading the client software, and so on.
One of the most interesting features of Windows Intune is the ability for any user to request remote assistance from the administrator at any time. Whether you are in a domain environment or a standalone environment, if your client PC is managed by Windows Intune, you can simply start a Remote Assistance request from your client end, which will trigger an alert to the administrator through which he or she can connect and help you.
To try Windows Intune, visit https://www.microsoft.com/en-us/windows/windowsintune/pc-management.aspx and sign up for a free 30-day trial. Trust me: you will LOVE it.
