William Stanek: The Dreaded Printer, Scanner, Fax Installation: Yes or No—The Adventure Concludes
William here. Concluding what I’d like to call “Adventures in Printer, Scanner, Fax Installation.” If you’ve been following along you’ve learned about the steps needed to install a wireless Printer, Scanner Fax machine and also quite a bit about what to do if things go wrong. It wasn’t meant to be a cautionary tale, but the discussion does dig into most of the typical problems you may encounter.
This particular All-in-One is from HP. After installation, there computer has an HP folder with all the software goodies (if you’ve installed the complete software and not the drivers only). This includes:
- HP Document Manager, which is similar to Windows Fax And Scan
- HP Solutions Center, which provides access to the device for management
- Reconfigure Network Settings, which allows you to reconfigure networking by connecting the device via USB.
You use HP Document Manager to:
- Start and manage scans.
- View faxed or scanned documents
- Convert faxed or scanned documents to editable text
- Send selected documents as email attachments
- Fax or print selected documents
As I said, it’s very much like Windows Fax And Scan. HP Solutions Center was what I wanted to work with next, however. HP Solutions Center is the dashboard for the All-in-Ones.
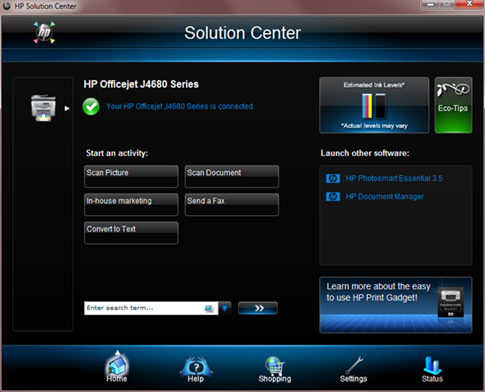
The Home page, shown below, provides the current status of the device and the graphical display of ink levels. It also provides quick access to scan, fax and conversion features.
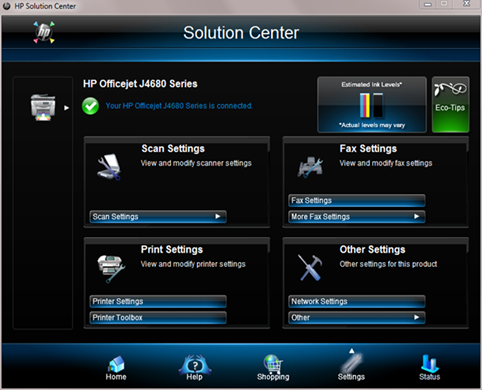
The Settings page, shown below, gives you good control over the device settings:
Scan Settings allow you to control what the front panel Scan button does as well as what the Solution Center scan button does.
Printer Settings allow you to configure printer settings. The available Printer Shortcuts provide collections of saved print settings that you can select whenever you print.
Printer Toolbox allows you to access test, diagnostic and alignment tools.
Fax Settings allow you to configure personal information, fax forwarding, digital fax and ring settings.
More Fax Settings allow you to configure speed dialing, re-run fax setup, access the fax log and more.
Network Settings opens the web management interface for the device, which includes a Networking tab. On the Networking tab, you can configure automatic or manual IP and DNS settings and also modify the wireless networking details.
Other provides access to auto prompt settings, HP update and usage data settings.
Lots to optimize as you might imagine. For starters, I went through the fax configuration. Some fax and other settings, however, can only be configured using the front panel display on the device itself, including the fax dial speed, which I knew I wanted to modify from Medium to Fast.
Thanks for reading! Hope these posts help you work better and smarter with All-in-Ones.
William R. Stanek
williamstanek at aol dot com

